(Continued from page 1)
Disclosure: WoodAndShop.com is supported by its audience. When you purchase through certain links on our site, we may earn a small affiliate commission, at no cost to you. Learn more.
4 Wood Turning Chisels to Buy for Spindle Turning
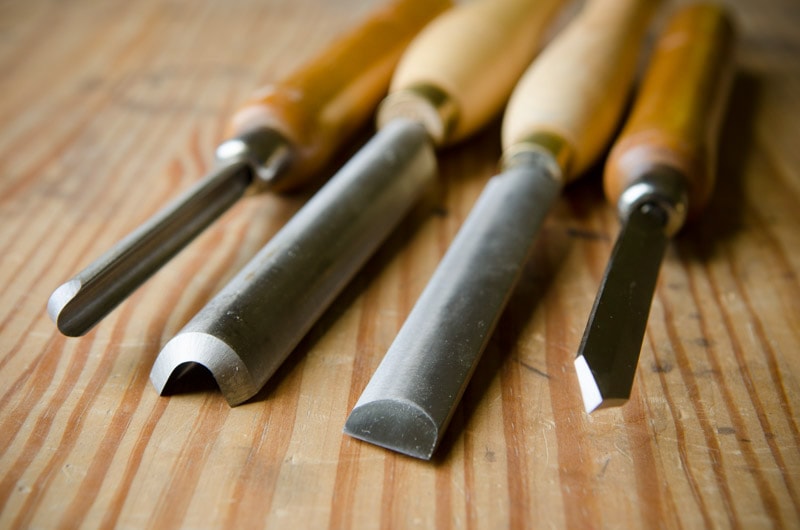
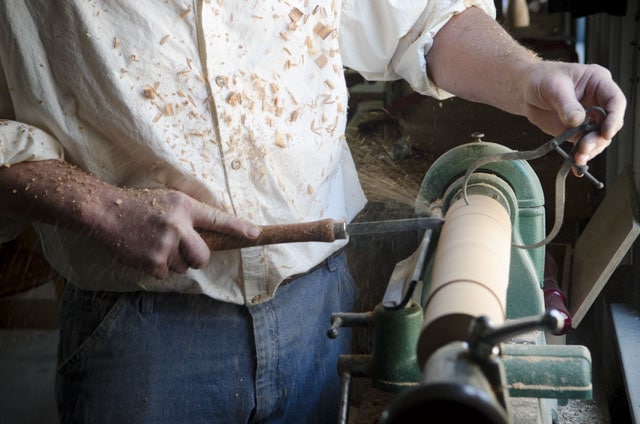
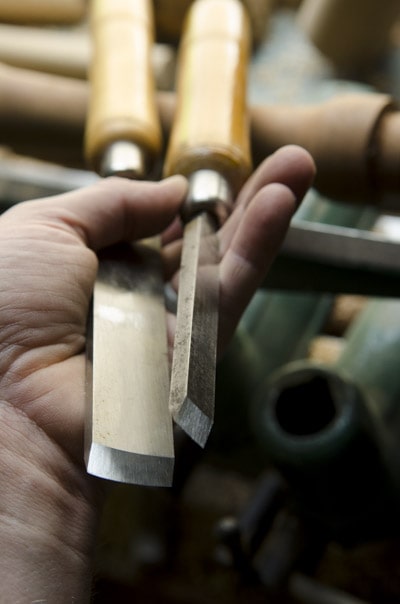
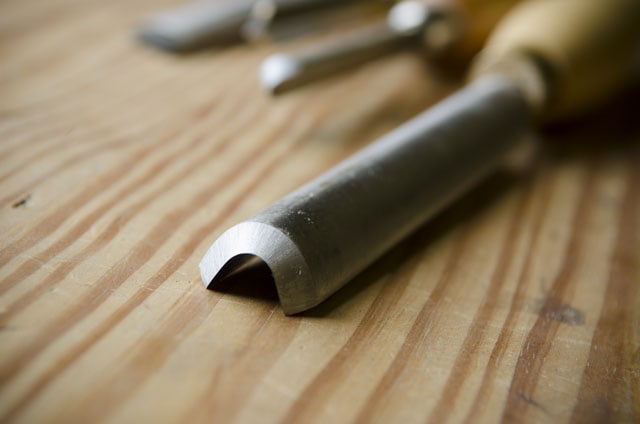
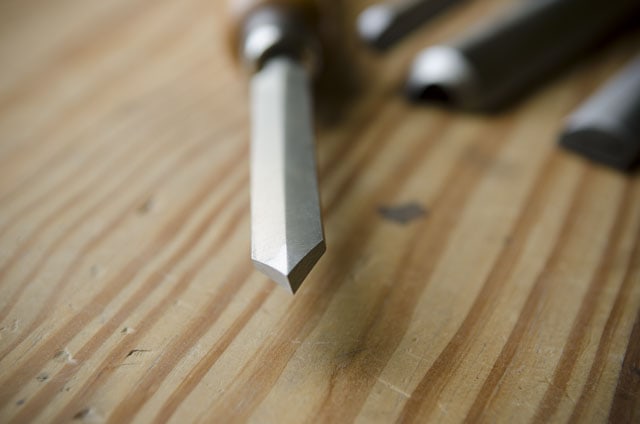
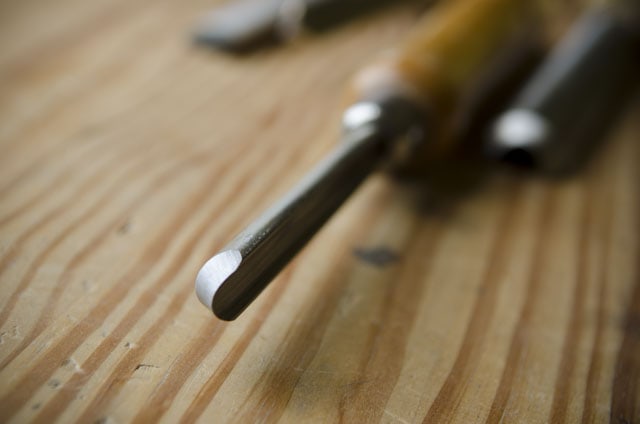
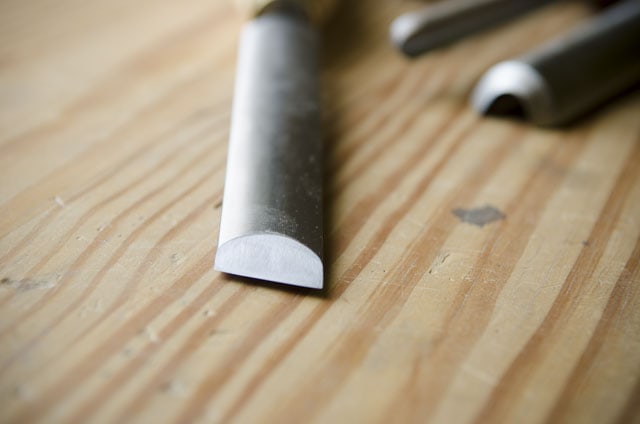
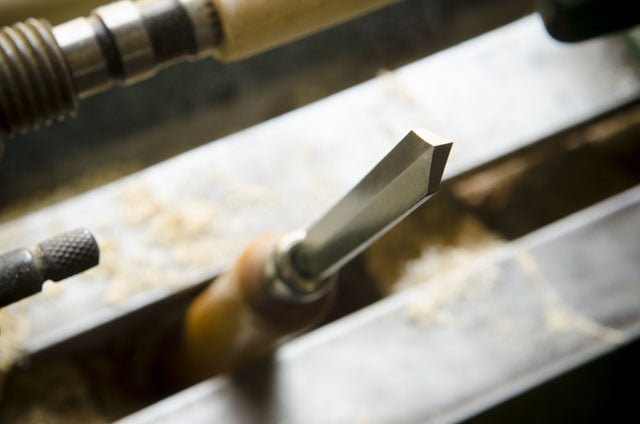
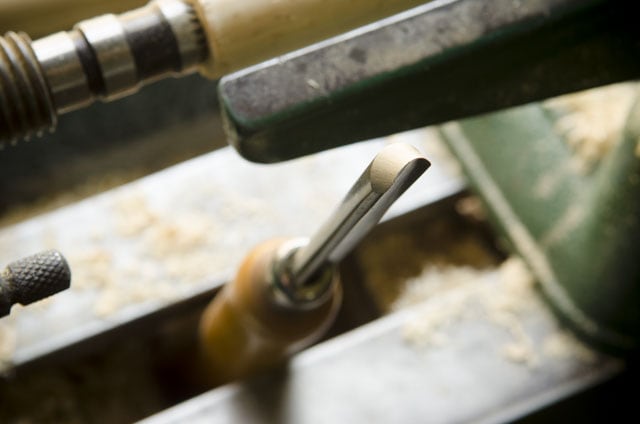
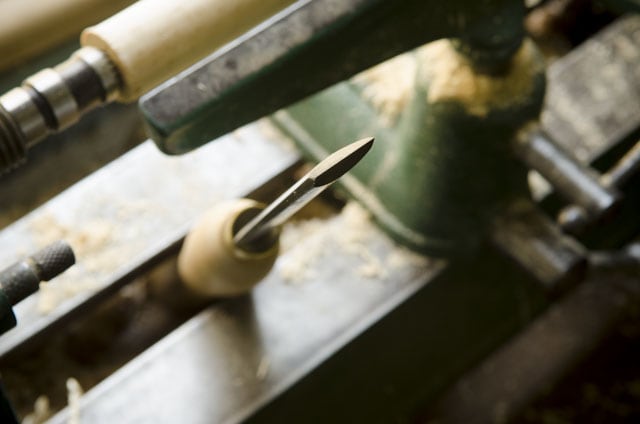
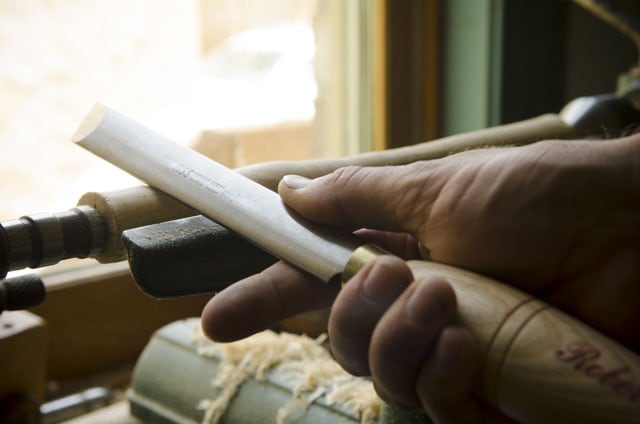
The four wood turning chisels that I use for spindle turning are: a Roughing Gouge, a Diamond Parting Tool, a Detail Spindle Gouge, and a Skew Chisel. These four tools will be discussed in detail, further below. I have other wood turning chisel shapes that came to me over the years, but I rarely use anything beyond these four wood turning tools. You can click on each of the four below thumbnail images to see a close-up of each chisel profile.
Detail Spindle Gouge
A detail spindle gouge is a wood turning chisel that is used for creating finer curved details in the coves and beads (especially the coves) when turning a spindle. It’s also great at refining other transitions where the skew chisel can’t safely go. With a fingernail grind (pictured above) I find that a detail spindle gouge can satisfactorily start coves in place of a skew chisel.
Skew Chisel
A skew chisel is a wood turning chisel that is used first for making V-cuts for beads & coves and also for cutting spindle pommels (the transition between square and round sections on a spindle). It is then used for fine finish cuts and cleanup, which will allow you to skip sanding on many parts of a spindle.
1. Roughing Gouge
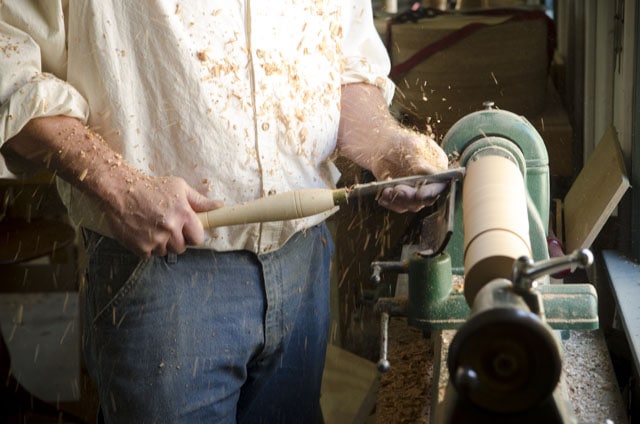
As mentioned above, a roughing gouge is the workhorse of woodturning tools. It needs to be strong and should hold an edge for an extended period of time.
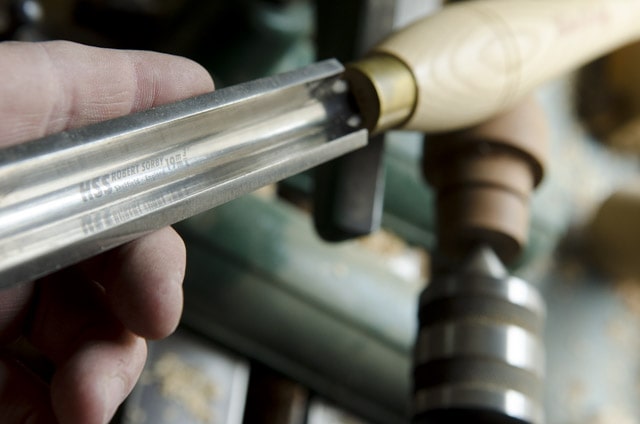
When I was looking to upgrade to a modern roughing gouge, a friend who is a professional woodturner recommended that I purchase this HSS 3/4-inch roughing gouge made by Robert Sorby.
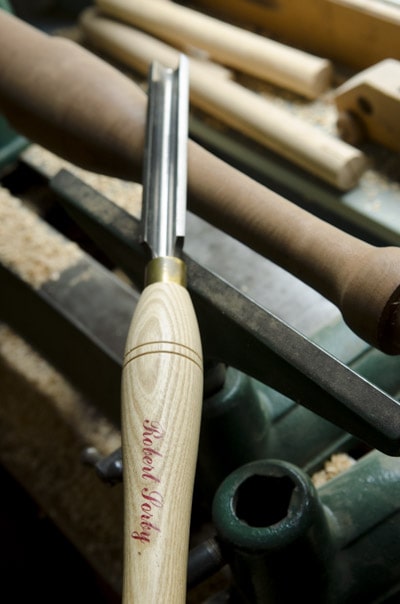
Larger roughing gouges can be helpful when turning spindles from large pieces of split wood, but a 3/4-inch roughing gouge is a good size for most spindle turning work. This roughing gouge is made of M2 High Speed Steel, so it will get a nice edge, that lasts a good while between sharpening.
2. Diamond Parting Tool
My vintage diamond parting tool is 1/8-inch thick, which I prefer for removing as little wood as possible, when I’m doing detail work. Modern diamond parting tools usually come in a 3/16-inch thickness, which isn’t too bad, but I find 1/8-inch diamond parting tools vibrate less than 3/16-inch diamond parting tools. And you will find parting tools that aren’t diamond shaped (flat on the sides), will bind easier in the cut than the diamond shaped tool.
Unfortunately it’s a little difficult to find new 1/8-inch diamond parting tools made by reputable companies. Crown (in Sheffield, England) has been known to make good wood turning tools in the past, and they make a new 1/8-inch diamond shaped parting tool. However, the reviews of their 1/8-inch diamond parting tool (see here) makes me think that Crown may have dropped the ball on the quality control of this tool, and maybe other wood turning tools. So I’d recommend that you either go with a new 3/16-inch diamond parting tool (made by Robert Sorby or Henry Taylor) or find a vintage 1/8-inch diamond parting tool. Below I’ll also list a new 1/8-inch parting tool that looks good, though I haven’t heard of the brand before (Stone Mountain).
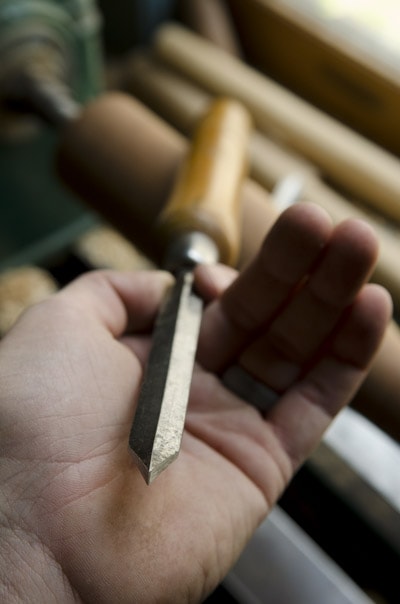
Because a parting tool doesn’t do as much work for me as a gouge or skew chisel, I’ve found that I haven’t needed to upgrade to HSS from my old carbon steel diamond parting tools. I have also even seen some woodworkers use 1/8-inch mortise chisels in place of a parting tool to set the depths of their spindle transitions. Again, this may not be ideal, due to the possibility of binding, but it shows that sometimes you can improvise. Here are some options for diamond parting tools:
- See new Robert Sorby diamond parting tools
- See new Henry Taylor Diamond parting tools
- HSS 1/8″ Diamond Parting Tool By Stone Mountain Turning Tools
- See Diamond Parting Tools on Ebay
- See Diamond Parting Tools on Amazon
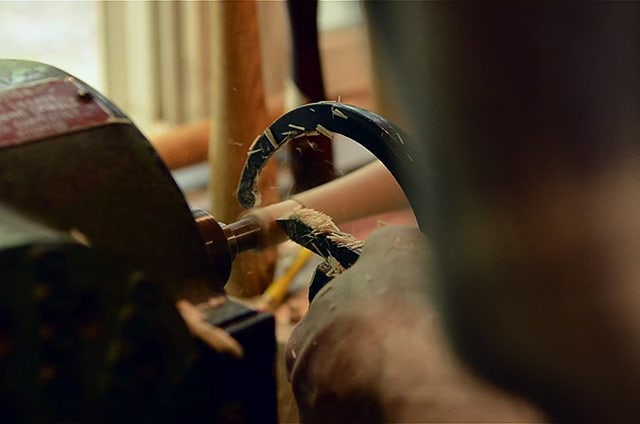
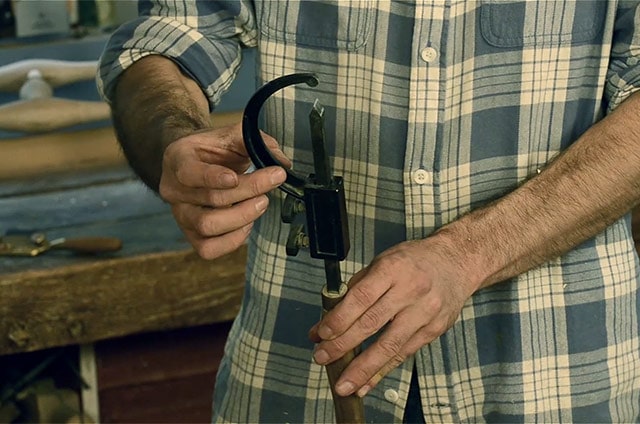
If you decide to get into Windsor chair making or other furniture making that requires turning tenons on your spindles, then a “Bedan” style parting tool (found here) can be added to your tool kit, along with with an attachable sizing gauge (found here), sometimes called a “Turner’s Gate” which will help you cut very accurate tenons. I’m not a Windsor chair maker, so I haven’t added a Bedan tool to my kit yet. These tools are pictured above and below.
3. Detail Spindle Gouge
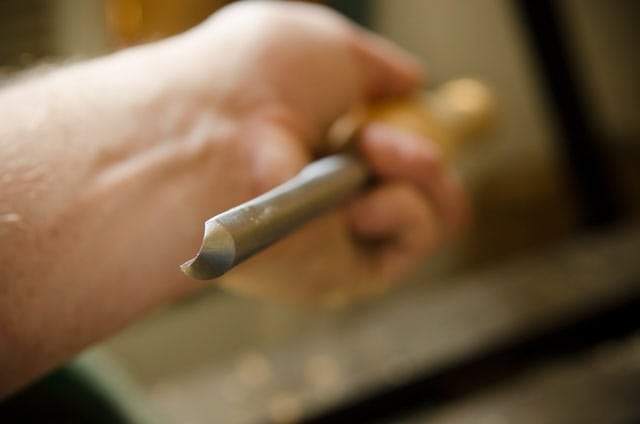
A detail spindle gouge is really quite a versatile wood turning chisel, and a lot of spindle work can be done with this woodturning tool. I have several different sizes of detail spindle gouges (5/16-inch, 1/2-inch, and 3/4-inch), but I find that I mostly use my 1/2-inch detail spindle gouge.
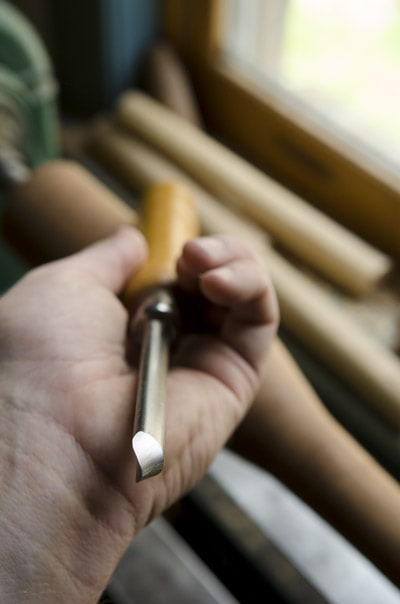
As mentioned above, I add a thumbnail grind to my detail spindle gouges so that I can tilt my tool and get better cuts with the side of the tool, which makes starting coves easier, if you don’t feel so comfortable using a skew chisel.
You can buy a detail spindle gouge with a thumbnail grind already on it, but you can also add the thumbnail grind with a grinder and a jig. I find it hard to create a thumbnail grind without a jig. Some people can do it, but it’s tough for me. Down a little further on this page I share the grinding system that I now use (the Wolverine Grinding System with the VARI-GRIND jig) for wood turning tools, which I adopted a couple years ago after talking with woodturners who are much more experienced than myself. Once setup, this sharpening system makes a thumbnail grind very quick. Here is a YouTube video that shows how to sharpen a spindle gouge with the Wolverine grinding system. Here are some detail spindle gouges that would be good to buy:
- Robert Sorby 1/2-inch spindle gouge with fingernail grind
- Robert Sorby 1/2-inch spindle gouge
- Robert Sorby 3/8-inch spindle gouge
- Robert Sorby 1/4-inch spindle gouge
- Crown Tools 1/2-inch spindle gouge
- Used & new 1/2-inch spindle gouges on Ebay
- Various top brands of 1/2-inch spindle gouges on Craft Supplies USA
4. Skew Chisel
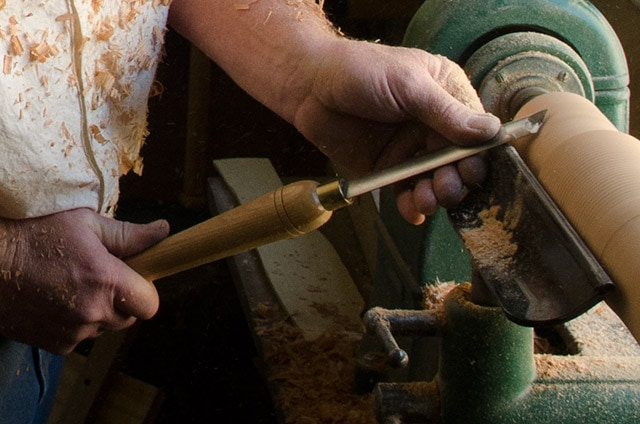
I have both square shaped skew chisels and a newer oval shaped skew chisel. They both work fine, but the oval shaped skew is a bit more comfortable in my hands when doing detail work.
I have skew chisels from 1/2-inch to 1-inch, but prefer using a 3/4-inch skew chisel. Some professional wood turners prefer the 1/2-inch skew chisel, but I sometimes find it hard to see what I’m doing. And I find the 1-inch skew chisel to be a little big for some detail work. The 1/2-inch skew chisel is also known to catch easier if you aren’t as experienced. And catching a wood turning tool on a wood lathe can be scary.
The 3/4-inch skew chisel size is a perfect compromise for me. This picture above shows my Robert Sorby 3/4-inch HSS oval shaped skew chisel (see below for places where you can buy it). I know a couple professional woodturners who use this skew chisel. I sharpen my skew chisels with a slight radius so that I can take less aggressive cuts when entering the wood, so when the Sorby skew chisel didn’t arrive perfectly sharpened, this was a non-issue for me, because I planned on sharpening it anyway. That’s how I am with any wood turning tools or chisels. I don’t let the manufacture decide on the sharpening for me! So ignore any online reviews from shoppers who were disappointed that their tool didn’t arrive with a perfectly sharpened edge. You can see this convex bevel below on my vintage skew chisels:
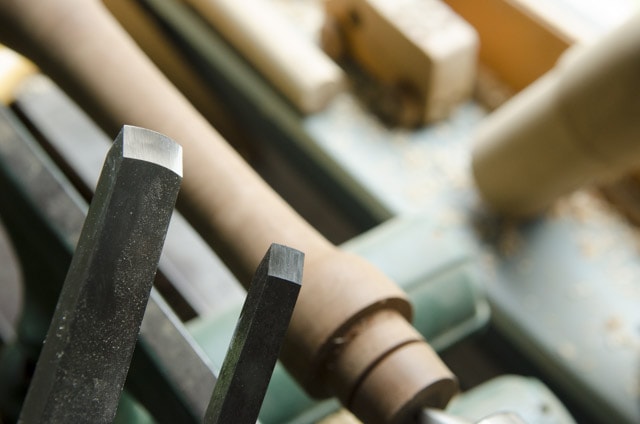
This convex bevel looks like the camber that I put on my jack plane irons, and it’s created in just about the same way on the grinder, rotating it back and forth, but at 15 degrees on each side, for a 30 degree combined angle.
My favorite skew chisel is very popular, so it’s often out of stock, so I’ve included three places where you can look for it:
Wood Turning and Wood Lathe Accessories to Buy
Below are a few woodturning accessories that you will need when getting started in woodturning, along with some optional accessories that you may decide to buy down the road (or not at all).
Spring Calipers
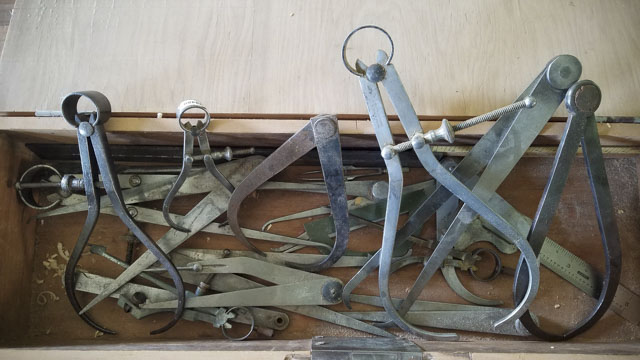
Spring calipers are small gauges used to let you know when you have reached the correct diameter of a section of your spindle turning when using your parting tool. Having a few calipers is convenient when turning spindles so you don’t have to continually change the diameter for different sections of your spindle, especially if you are turning four table legs and want to keep the same sizes for each of the legs. You can certainly get by with just one caliper to start with, and buy another one or two when you notice an inconvenience. Somewhere between 6-inches and 8-inches is the most common size, which can handle most spindle turning needs.
If you look at different woodturning caliper sets, you’ll see they usually come with three types of spring calipers: outside calipers, inside calipers, and spring dividers. For spindle turning I only use outside calipers. So I’d recommend that you don’t buy one of those sets.
I have found a lot of good vintage calipers, usually under $10 a piece, and often for a couple dollars at tool swaps or flea markets. Sometimes they’ll even be thrown in when buying a used wood turning lathe. You can find a lot of vintage outside spring calipers on Ebay (see link below). Because I have so many vintage calipers, I haven’t had to buy any new calipers. But most inexpensive outside spring calipers should do the job just fine. Here are a few affordable options that you can compare:
- See a bunch of affordable spring calipers at Taylor Toolworks
- Powertec 6-inch outside spring caliper at Amazon
- Big Horn 8-inch outside spring caliper at Amazon
- 8-inch outside spring caliper at Highland Woodworking
- Vintage outside spring calipers at Ebay
- Variety of outside spring calipers at Amazon
- Variety of outside calipers at WoodCraft
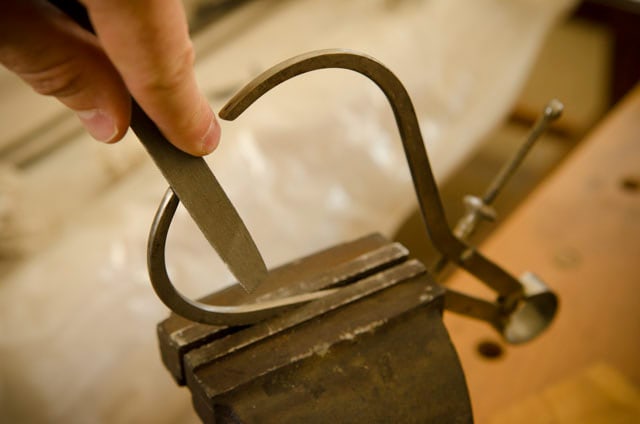
Some cheaper woodturning calipers come with sharpened tips. To prevent catches, you should blunt and round the sharp tips with your grinder or with a metal file.
If you don’t want to buy calipers just yet, you can also make a “Go No-go” gauge out of scrap wood. This is helpful if you are turning tenons or other repeated diameters. However, I find it a bit time consuming to make a gauge for every diameter of a spindle. Another option is Peter Galbert’s cool “Galbert Caliper” (found here). I haven’t used it, but it does look like it would improve speed and safety. The one drawback I see is that you have to rely on your eyes to reach the right diameter of the scale, as opposed to using spring calipers which just drop over the spindle when the correct diameter is reached. Also, spring calipers can take measurements directly from another spindle, whereas with the Galbert Caliper you need to know the measurement.
Wolverine Grinding System with VARI-GRIND jig
Sharpening woodturning tools is a very regular task when making furniture, and unlike most other woodworking tools, most of the work is done at the grinder, and very little sharpening is done on honing stones. Also, for me (and many other people) it’s a little difficult to achieve acceptable results with freehand grinding my wood turning tools.
For these reasons, I invested in a jig system that works with the same grinder that I use for sharpening my hand plane irons & wood chisels. Several different woodturners recommended the “Wolverine Grinding System with VARI-GRIND jig” to me. Here are some places that you can buy it:
- Buy the Wolverine Grinding System with VARI-GRIND jig at Amazon
- Buy the Wolverine Grinding System at WoodCraft
- Buy the Wolverine VARI-GRIND jig at WoodCraft
- Buy the Wolverine Grinding System at Rockler
- Buy the Wolverine VARI-GRIND jig at Rockler
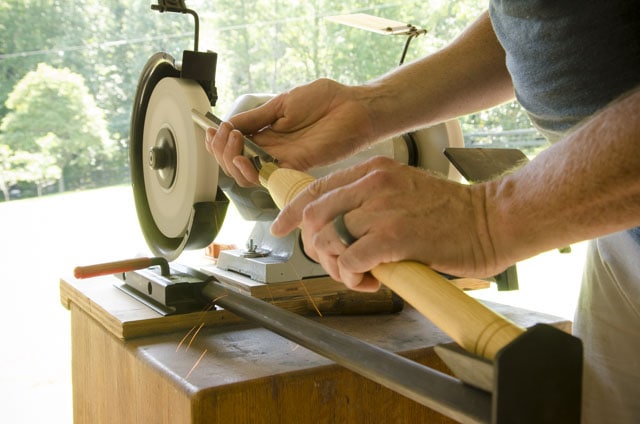
This system, when accurately mounted under each grinding wheel allows much more simple grinding of detail spindle gouges and roughing gouges. In the picture above, you can see how easy it is to set the angle for my roughing gouge, simply by extending the Vee-arm out.
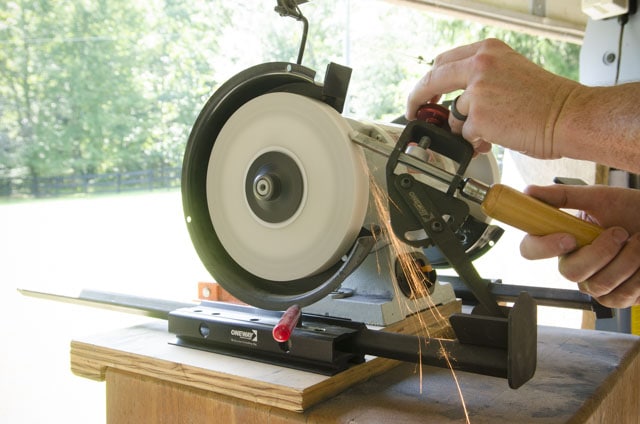
Then for fingernail grinds (as mentioned above in the section on detail spindle gouges) I just attach the VARI-GRIND jig to my spindle gouge, and rotate it back and forth in the extended vee-arm’s pocket. This is pictured in the above photo.
And finally, I can slide the normal tool rest in the base and sharpen my skew chisel at any angle. I now use this tool rest for grinding all my edge tools, including my bench chisels and handplane irons.
You can read my sharpening buyer’s guide (here) for details on buying grinders and other sharpening systems.
Diamond Hones
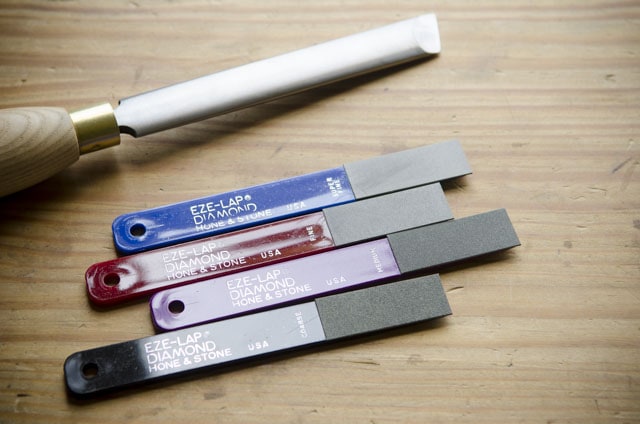
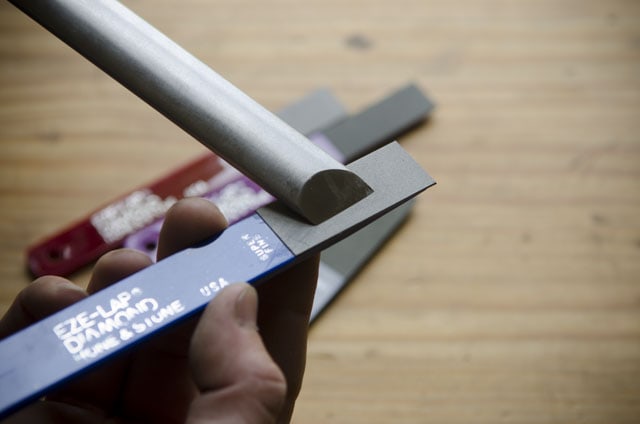
After grinding the bevels on wood turning tools it is important to hone the bevel a bit to remove the burr (the microscopic metal that turned over). I’ve found that the most convenient tool to accomplish this is a set of diamond hones. This EZE-LAP diamond hone set is what I use to hone not only the bevels of my wood turning tools, but also bevels on my wooden spokeshaves, molding planes, and other complex-shaped tools. I also use them to “stone” the freshly set teeth on my handsaws (see my article on sharpening a hand saw). You can find this diamond hone set here on Amazon for about $25.
And a diamond honing cone (like this one) is probably the best tool I’ve found for removing the burr that forms when sharpening the rounded woodturning tools, like the detail spindle gouge and roughing gouge.
Face Shield for Wood turning

Some woodturners feel comfortable enough just wearing safety glasses, but in our woodworking school we use a face shield, to protect students from large wood chips that can fly at their face. It’s not 100% comfortable having a plastic face shield in front of your face, but it’s worth protecting your whole face. Some bowl turners use large, enclosed face shields with airflow systems to keep the mask from fogging up. These high-tech (and expensive) masks are probably overkill for humble spindle turners. At my school we just use this inexpensive polycarbonate face shield and it has worked great.
Wood Lathe Chucks
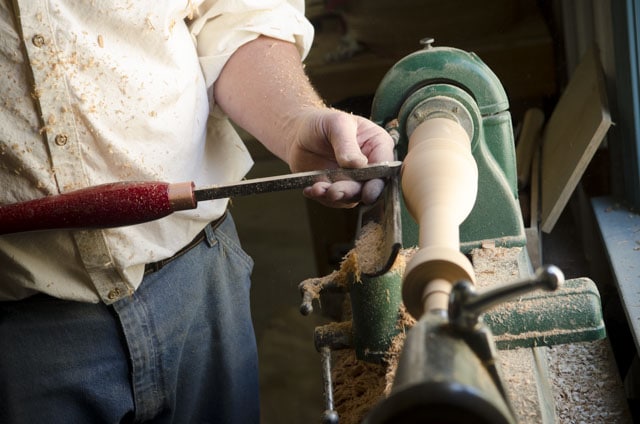
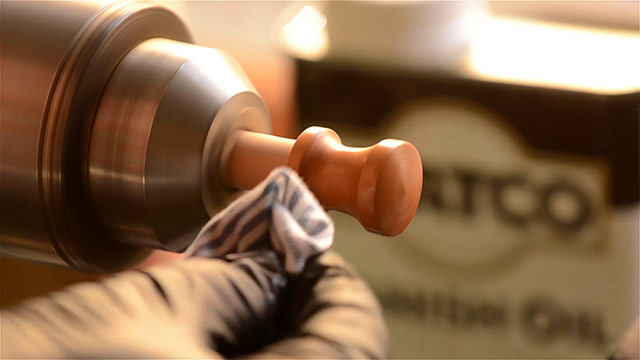
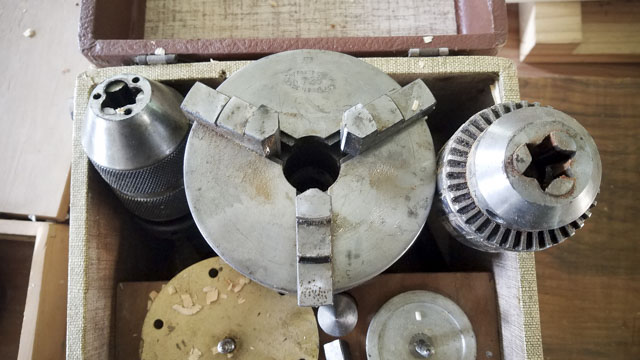
Chucks for a wood lathe are typically used for bowl turning, but I find one useful when I need to do sanding or finishing details on things like knobs (as seen above). The jaws of the chuck work like jaws on a drill press or hand power drill, clamping the workpiece tightly on one end, rather than between two sharp points. In this buyer’s guide I’m not going to dive into lathe chucks, partly because my vintage chucks came with my lathes (and I haven’t had to buy one) and also because buying a chuck can be a bit complex due to the fact that chucks aren’t universal to all lathes. The threaded insert of a wood lathe chuck is sized specific to each lathe model, so you’ll need to figure out the thread pitch and diameter of your lathe’s spindle. But often you can search by your lathe’s make and model to find a chuck that will fit. Also, some manufactures sell step-up or step-down inserts to adapt a larger or smaller chuck thread to your lathe’s spindle.
Larger four-jaw chucks are the more modern and popular choice for bowl turning. I have an old 3 jaw chuck, which I sometimes use, but I tend to use a drill chuck or dowel chuck when finishing knobs. Here are a couple resources to help you do some research if you want to add a chuck to your wood lathe:
- “Getting a Grip on Four-Jaw Lathe Chucks” (Wood Magazine)
- “The Lathe Accessory Everyone Needs: A 4-jaw chuck will change the way you turn“ by Ralph Tursini (Fine Woodworking Magazine issue #212)
- “Buying Your First Chuck for Your Wood Lathe“ (Video)
- See wood lathe chucks for sale at WoodCraft
- See wood lathe chucks for sale at Rockler
What about Carbide Woodturning Tools?
You may have noticed that I didn’t recommend the modern carbide-tipped woodturning tools. Carbide turning tools are marketed as wood turning tools that never need to be sharpened. You just rotate the blade when it gets dull, and then throw the carbide tip away when all four sides are dull. Maybe it’s because I learned woodturning with traditional style wood turning tools, but when I tried the carbide wood turning tools, I just didn’t prefer them. I know some people like them, and one of our instructors brings some carbide tools for beginners, because they supposedly make turning easier. But I just found them a bit awkward and limiting. Kind of like trying to draw a detailed picture with crayons. Maybe I didn’t give them a fair try, but I just personally don’t prefer them. Do you like them? If so, tell me why in the comment box below.
Conclusion + Cool Wood Turning Videos
Well, that wraps up this buyer’s guide for the best wood turning tools to buy for beginners. Below are a couple woodturning videos that I’ve filmed that should get you excited about wood turning:
Page: 1 | 2
Continue to the Power Tool Buying Guide for Traditional Woodworkers…
TOOL GUIDE SHORTCUTS:

HAND TOOL BUYER’S GUIDES
- Intro to Buying Woodworking Hand Tools
- Workbench & Tool Storage
- Layout, Marking, & Measuring Tools
- Handplanes
- Handsaws
- Chisels
- Sharpening & Honing Supplies
- Mallets & Hammers
- Hand Drills, Braces, & Bits
- Tools for Curved Work
- Tools for Green Woodworking
- Woodworking Clamps, Gluing & Fasteners
- Tools for Wood Carving
- Products for Wood Finishing, Sanding & Scraping
- Wood Turning Tools & Lathes




I will have to say this has to be the best article on wood turning tools I have seen. Pretty informative, inline, good examples that is easily seen. Now, as for the PPE. The face shied at minimum I do agree on. But should also use a fresh air respirator too. As you should be for all sawdust creating work.
The reason is you breathe that in. Over time it adds up. COPD/ emphysema is nothing you want. No cure.