Woodworking videos and articles that share woodworking projects for woodworkers of all skill levels, including furniture making projects, DIY workbench projects, hand tool projects, and more.

How to Make a Wooden Pizza Peel

Ad Banner

How to Make a Wooden Pizza Peel

Make a wooden pizza peel using hand tools and power tools

Joshua Farnsworth Portrait  By Joshua Farnsworth  |  Published 13 February, 2024
Share This Article:

How to Make a Wooden Pizza Peel

Share This Article:

Joshua Farnsworth Portrait  By Joshua Farnsworth  | Published 13 February, 2024
Disclosure: WoodAndShop.com is supported by its audience. When you purchase through certain links on our site, we may earn a small affiliate commission, at no cost to you. Learn more.

Introduction

In the above video I show how to make a wooden pizza peel / bread peel using woodworking hand tools and power tools. Click here to get the free PDF plans in case you want to make a pizza peel too! And remember, you can adjust the measurements to accommodate your oven size and your preferences.

Wooden Pizza Peel With French Bread

In the below 8 steps I’ll summarize how I made this wooden pizza peel:

  1. Measure your oven
  2. Cut the lumber to dimension
  3. Layout the three boards
  4. Refine the handle
  5. Glue up the pizza peel
  6. Add an arc to the pizza peel
  7. Add a bevel to the pizza peel
  8. Sand & finish the pizza peel

Portable Moravian Workbench Plans Used To Make This Collection Of The Best Collapsible Workbench

Wood & Shop Traditional Woodworking School

Come take a hand tool woodworking class at our school in Earlysville, Virginia!

1. Measure your oven

I drew my free pizza peel plans based off of the size of my oven, and also the uses my pizza peel would have. I actually make more bread than pizza, and needed a wooden pizza peel that would hold longer French baguettes. “Pain À L’Ancienne” is my favorite French bread, which you can find a recipe for here or in my favorite bread baking book. So I designed my pizza peel to be as wide as possible for my standard-sized oven, without being too tight for maneuvering. 

Using A Wooden Pizza Peel To Bake Loaves Of Pain À L’ancienne French Bread

So even though my plans are for a standard oven size, I would recommend measuring the width and depth of your oven to make sure my dimensions will fit. If mine is too big, then simply adjust the measurements for your wooden pizza peel.

Portable Moravian Workbench Plans Pdf

Build Your Dream Workbench

Buy our 57 page premium Moravian Workbench Plans for only $19.99!

2. Cut the lumber to dimension

My wooden pizza peel is 1/2-inch at the thickest. A 3/4-inch pizza peel would be too thick, in my opinion, so standard, pre-dimensioned 3/4-inch lumber would probably not work.

Square A Board With A Felder Planer Jointer

So you may need to mill your own lumber to get it to 1/2-inch thick. If you are new to woodworking, here are some of our tutorials on squaring your lumber using both hand tools and power tools:

Woodworking Projects Woodworking ProjectsWoodworking Projects

In this project I just mill up three pieces: two side boards and one long center board. I used my woodworking machines to mill the lumber (see my power tool buyer’s guides here). Once I got to the table saw, I just ripped the side boards to width, and squared up one end on each board. I’ll cut them to length length after I do some measuring. I did cut the center handle board to the final length on the table saw.

Cutting A Wooden Pizza Peel On A Sawstop Table Saw

After I squared up my three boards (according to my drawings) I was ready to lay out the boards. I made a mark on the center handle board where I wanted the paddle of the pizza peel to start. I lined up the two side boards flush with that line, making sure to put the cut ends of the side boards against the pencil line:

Measuring Wood For A Wooden Pizza Peel

Then I marked the other ends of the two side boards where the center handle board ended, which gave me the final length of the side boards:

Measuring Wood For A Wooden Pizza Peel

I went back to the table saw and cut the two side boards at that pencil mark, to give me the final length of the two side boards:

Cutting A Wooden Pizza Peel On A Sawstop Table Saw

Then I placed the side boards in place next to the center handle board. You can see that this essentially now looks like a pizza peel:

Measuring Wood For A Wooden Pizza Peel

But you don’t want to stop with a pizza peel that looks like this, do you? We need to do some more layout and shaping, which we’ll continue in step three below.

3. Layout the three pizza peel boards

The vast majority of the shaping of the pizza peel is on the center handle board. First I found the center of the handle board, by marking from both edges with a combination square, and then finding the midway point between those two marks:

Using A Pencil To Layout A Wooden Pizza Peel Or Diy Pizza Peel

Then to get the rounded top of the handle, I used a compass with a pencil. I just moved the point down the pencil line until it would reach the top and both sides. Then I drew the arc, like this:

Using A Compass To Layout A Wooden Pizza Peel Or Diy Pizza Peel

Next I came in from the two edges and drew pencil lines, with the help of a combination square, to establish the final width of the handle:

Using A Combination Square And Pencil To Layout A Wooden Pizza Peel

Of course, make sure you don’t change the setting on the combination square when you switch sides.

Using A Combination Square And Pencil To Layout A Wooden Pizza Peel

Then I marked down a bit, where I wanted the flared edges to start:

Using A Combination Square And Pencil To Layout A Wooden Pizza Peel

Next I free-hand drew the flared part of the handle. This doesn’t have to be perfect, because you’ll go back and cut the profile out and use a rasp to even the two flares out:

Using A Pencil To Draw Handle Curves On A Wooden Pizza Peel

Then I went down and created some flares down where the side pieces will meet the center handle board:

Using A Pencil To Draw Handle Curves On A Wooden Pizza Peel

That’s all the layout I did. Next, in step 4 we’ll move onto cutting and shaping the wooden pizza peel.

Moravian Workbench Dvd Cover

Build Your Dream Workbench

Buy our 7+ hour Workbench Build Video on DVD or Download!

4. Cut and refine the pizza peel handle

After laying out and cutting out the center handle board, the next step is to refine the handle to remove the rough saw marks, and make the pizza peel handle smooth, comfortable to hold, and nice to look at. After marking the center point of the handle hanging hole (see the plans), I used a drill press to bore out the hole:

Using A Drill Press To Bore A Hole In A Wooden Pizza Peel Handle

I used a Fortner bit so I could get a nice, clean hole. You can use a brace and bit if you want to make the pizza peel in a traditional manner.

Using A Drill Press To Bore A Hole In A Wooden Pizza Peel Handle

Next I moved to the bandsaw to start cutting out the handle profile. I started with the top of the handle:

Using A Bandsaw To Cut Out A Handle For A Wooden Pizza Peel

Then I moved to cutting near the two side lines, to give me the final width. When using a bandsaw or a bow saw, I like to make relief cuts so that I don’t get stuck in the cut:

Using A Bandsaw To Cut Out A Handle For A Wooden Pizza Peel

And you can see here how I cut the curves. The wood looks terrible, but it’ll look much nicer after we refine the curves:

Using A Bandsaw To Cut Out A Handle For A Wooden Pizza Peel

Here’s what the handle looks like after being cut out, but before being refined:

Using A Lie-Nielsen Spokeshave To Refine A Wooden Pizza Peel Handle

Next I used a hand -stitched rasp to fare the curves of the handle, and remove the bandsaw blade marks:

Using A Rasp To Refine A Wooden Pizza Peel Handle

I used a spokeshave to remove the bandsaw blades from the sides of the handle, and also to add a bevel to the edges of the handle, so it will be comfortable in the hand:

Using A Lie-Nielsen Spokeshave To Refine A Wooden Pizza Peel Handle

I switched back and forth between using the rasp and the spokeshave. You can see more about the specifics of these tools that I recommend in my curved-work tool buyer’s guide here. This is a fine-toothed rasp.

Using A Rasp To Refine A Wooden Pizza Peel Handle

I used the rasp to add bevels to the parts of the curve where the spokeshave had a hard time making a bevel. Using a fine-toothed hand-stitched rasp gives you a much finer finish than some of the raps that you’d find in the hardware store.

Using A Rasp To Refine A Wooden Pizza Peel Handle

Using A Lie-Nielsen Spokeshave To Refine A Wooden Pizza Peel Handle

Using A Rasp To Refine A Wooden Pizza Peel Handle

Here is that the handle looked like after refining it with a rasp and spokeshave, but before I used sandpaper to do the final smoothing:

Wooden Pizza Peel Handle On A Moravian Workbench With Rasps

And as you can see here, the center handle board is all shaped, and the three boards are all ready to be glued up in step 5.

Wooden Pizza Peel Handle On A Moravian Workbench With Rasps

Hand Tool Woodworking T Shirts

Woodworking T-Shirts and Apparel

Browse our traditional woodworking clothes to show off your cool hobby!

5. Glue up the pizza peel

Now that the center board is more-or-less complete, it’s time to glue the two outer boards on either side of the center handle board. I like to use parallel clamps like these, because the pizza peel can sit flat on the clamp bar. But you can use other types of clamps too. See my woodworking clamp & glue guide to learn more.

Gluing Up A Wooden Pizza Peel Using Titebond 3 Wood Glue

I like to use Titebond III wood glue (which I buy here) because it works on wood that is going to get wet or be in humidity. And you’ll most definitely be washing your wooden pizza peel. Though I wouldn’t recommend that you submerge it in water.

I try to not use too much glue, and I spread it out on the edges, and put the two edges together. I like to rub the edges back and forth to get the best possible adhesion between the board edges.

Gluing Up A Wooden Pizza Peel

Then I clamp up the three boards together and wait a few hours before taking them out of the clamps. If you do get some glue squeeze out (which is likely with thinner lumber like this), then it’ll be easier to remove it before the glue gets too hard. Come back and scrape the glue off with an old chisel about 20-30 minutes after the clamping. If you wait too long, the glue may tear wood fibers out. If you try to wipe the glue off with a wet cloth, the glue may spread throughout the wood pores, making it difficult to apply a finish.

Using A Wood Chisel To Scrape Wood Glue Off A Glue Joint

Even though the glue is technically set after a few hours, I would recommend waiting around 24 hours before you move onto the next steps, which can be pretty rough on the glue joints.

Using A Card Scraper On A Wooden Pizza Peel

You can also use a card scraper to clean up the glue joint line, after the glue has dried.

6. Add an arc to the pizza peel paddle

This step is optional, but I like to add a traditional arc to my wooden pizza peel. I find the center of the handle by measuring from both sides with a square or ruler.

Using A Combination Square To Find The Center On A Wooden Pizza Peel

After I make the center mark, I use a combination square to scribe the pencil line a ways up the handle:

Using A Combination Square To Find The Center On A Wooden Pizza Peel

Then I use trammel points (buy some here) with a long stretcher to create a nice-looking arc. I place the pointed end of the trammel points on the handle center line, and then I put the pencil end on the edge of the peel paddle:

Using Trammel Points To Layout An Arc On A Wooden Pizza Peel

You can experiment with different arc sizes. The farther back the pointed end of the trammel point is, the less extreme the arc’s curve radius will be. Once I decided on the radius size, I scribed the curve onto the wood with the pencil end:

Using Trammel Points To Layout An Arc On A Wooden Pizza Peel

After I drew the arc, I cut along the line, or rather just outside the line. In this tutorial I used a bandsaw, but you could easily use a bow saw or a coping saw (like this coping saw that we use in our school).

Using A To Cut Out The Paddle On A Wooden Pizza Peel

I also used this time to cut the back angle, where the pizza peel handle starts:

Using A To Cut Out The Paddle On A Wooden Pizza Peel

Then I used a very sharp spokeshave to smooth the curve. This spokeshave needs to be very sharp, and have a fine mouth, because it is all end-grain, which is harder to shave than edge grain:

Using A Lie-Nielsen Spokeshave To Refine An Arc On A Wooden Pizza Peel

I also used a sharp spokeshave to trim the end grain on the back end of the pizza paddle:

Using A Stanley Spokeshave To Refine A Wooden Pizza Peel

I used my fine rasp to fare the curve where I couldn’t get my spokeshave:

Using A Rasp To Refine The Paddle On A Wooden Pizza Peel

Woodworking Projects

Woodworking DVDS and Digital Videos

Browse our traditional woodworking video classes available in HD Streaming / Download and on DVD.

7. Add a bevel to the pizza peel

After adding an arc to the wooden pizza peel, I used a marking gauge (I use this one) to layout the bevel. The bevel makes it possible for you to slide the pizza peel under the pizza or bread loaves. I came back about 1-1/2″ for the top bevel:

Using A Marking Gauge To Mark A Bevel On A Wooden Pizza Peel

And I like a 1/8″ to 1/4″ bevel for the edge. This is measured from the bottom of the wooden pizza peel:

Using A Marking Gauge To Mark A Bevel On A Wooden Pizza Peel

Then I used a jack plane to remove the initial wood quickly, first going across the grain on the front of the pizza peel.  This is rough work, so don’t be alarmed if the wood looks bad during this stage:

Using A Wooden Jack Plane To Make A Bevel On A Wooden Pizza Peel

Before I got too close to the layout lines I stopped, and moved to handplaning the sides, until I got close to the layout lines:

Using A Wooden Jack Plane To Make A Bevel On A Wooden Pizza Peel

Then I switched to a smoothing plane to gradually come down to the layout lines for a fine finish:

Using A Stanley Bedrock 604 Smoothing Plane To Make A Bevel On A Wooden Pizza Peel

I first planed with the grain, on the sides, until smooth.

Using A Stanley Bedrock 604 Smoothing Plane To Make A Bevel On A Wooden Pizza Peel

And then I finished by smoothing the front bevel with the smoothing plane:

Using A Stanley Bedrock 604 Smoothing Plane To Make A Bevel On A Wooden Pizza Peel

This was a #604 Stanley Bedrock smoothing plane, but you can use most any sharp smoothing plane. You can learn more about the different types of handplanes in my article, here.

Ye Olde Beeswax Cutting Board &Amp; Wood Spoon Finish

Ye Olde Beeswax Cutting Board & Wood Spoon Finish

Protect your wooden spoons, bowls, and cutting boards with our historic beeswax wood finish!

8. Sand & finish the pizza peel

Finally, I sanded the entire surface of the pizza peel. This can all be done by hand, but if you have a power hand sander, it can speed things up a bit for the face grain and bevels of the pizza peel.

Using A Dewalt Palm Sander To Sand The Paddle Of A Wooden Pizza Peel

I used this hand sander in the video. And be sure to take care with sawdust. Either wear a mask with a respirator or use a bench sanding dust collector, like this one that I use.

Using Sandpaper To Sand The Handle Of A Wooden Pizza Peel

Move through your preferred order of sandpaper grits. Here’s a helpful article from Wood Magazine on order of grits.

Using Sandpaper To Sand The Handle Of A Wooden Pizza Peel

When you hand-sand the handle, take care to not remove the nice edge facets created with your spokeshave and rasp. Before my last sanding grit, I wiped the wood down with a damp cloth to raise the grain. Then I lightly sanded the raised-grain down with 220 grit sandpaper.

Ye Olde Beeswax Cutting Board Finish Spoon Finish

Adding a food-safe wood finish is a great idea to protect your pizza peel. I actually formulated my own food-safe beeswax wood finish, which I make here at our school. You can buy it here in our store. I like to warm the wax near a window before I use it, so that it’s soft and easier to apply:

Using Ye Olde Beeswax Wooden Spoon Finish On A Wooden Pizza Peel

I used a cutoff from an old T-shirt, and wiped the beeswax finish onto all parts of the finely-sanded wood:

Using Ye Olde Beeswax Wooden Spoon Finish On A Wooden Pizza Peel

I made sure to get the wax finish onto all surfaces, including the bottom and inside the wall-hanging hole:

Using Ye Olde Beeswax Wooden Spoon Finish On A Wooden Pizza Peel

This is what the final wooden pizza peel / bread peel looks like:

Wooden Pizza Peel Sitting On A Moravian Workbench

I used tulip poplar wood for this pizza peel, which I milled from trees from the forest behind my woodworking school. Over time the green will turn into a nice light brown. But you can use pretty much any food-safe wood (see here for a discussion on some species of wood that aren’t safe for food contact).

Woodworking Projects

Woodworking DVDS and Digital Videos

Browse our traditional woodworking video classes available in HD Streaming / Download and on DVD.

Conclusion: The Best Part of the Project

Now for the best part of the project…making pizza or bread! It’s time to make pizza or bread using your best pizza peel! If the pizza or bread doesn’t slide off as easily as you would prefer, consider using your handplane to make the front bevel longer and thinner.

Using A Wooden Pizza Peel To Cook A Pizza In An Oven

Also make sure you use corn meal and flour to ensure that the sticky dough will slide easier. You can also use cooking parchment paper and just slide it onto your hot pizza stones in your oven. And after you pull the pizza out of the oven with your new, DIY pizza peel, you get to eat the pizza! My favorite pizza is a traditional Italian-style Margarita pizza, with a thin crust, fresh mozzarella cheese, a fresh tomato sauce, and basil. Share your favorite pizza flavor below in the comment section!

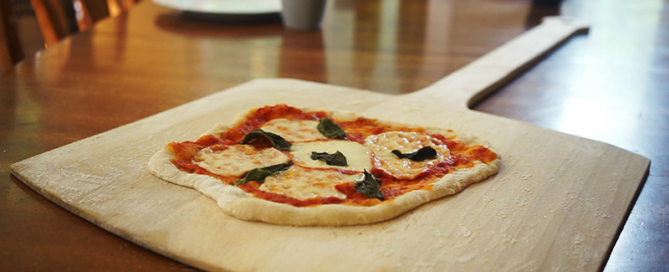
Margherita Pizza On A Wooden Pizza Peel

And of course, my absolute favorite food, French bread, uses my wooden pizza peel to bake:

Using A Wooden Pizza Peel To Bake Loaves Of Pain À L’ancienne French Bread

I hope you enjoyed learning how to make this DIY pizza peel / bread peel!

Pain À L’ancienne French Bread On A Wooden Pizza Peel

How to Make a Wooden Pizza Peel2024-02-14T23:44:14-05:00

Amazing Moravian Workbench Tour

Ad Banner

Amazing Moravian Workbench Tour

See the features of this unique and historical portable workbench

Joshua Farnsworth Portrait  By Joshua Farnsworth  |  Published 05 September, 2023

Share This Article:

Amazing Moravian Workbench Tour

Share This Article:

Joshua Farnsworth Portrait  By Joshua Farnsworth  | Published 05 September, 2023

In the above video, Will Myers shows the unique features of the amazing unique Moravian Workbench.

This Wooden Workbench Is An Antique Portable Workbench Called The Moravian Workbench At Old Salem

This Moravian workbench design is based on an 18th century workbench found at the Old Salem Museum, which is a Moravian settlement in Winston-Salem, North Carolina.

Dvd Cover For “Building The Portable Moravian Workbench With Will Myers”

You can buy our detailed 7 hour Moravian Workbench build video here and also buy the premium 57 page Moravian Workbench plans here.

Moravian Workbench Plans For Sale

Here are some photos of the unique features of this portable Moravian Workbench:

Portable Moravian Workbench Slab Top Made Out Of Ambrosia Maple

A Wooden Bench Dog On A Portable Moravian Workbench

Portable Moravian Workbench Parallel Guide Leg Vise

Portable Moravian Workbench Holding A Board With A Holdfast On The Flush Legs

Curly Maple Leg Vise On A Portable Moravian Workbench

Portable Moravian Workbench Tail Wagon Vise

Portable Moravian Workbench Dovetailed Tool Tray

Portable Moravian Workbench Wedged Tenon Stretchers And Legs

Portable Moravian Workbench Through Mortise Joint And Holdfast Holes On The Leg

Amazing Moravian Workbench Tour2023-09-05T15:13:40-04:00

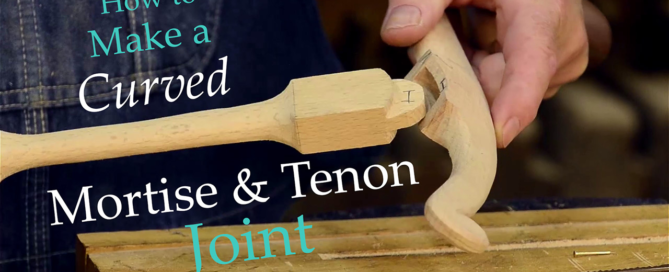
How to Make a Curved Mortise and Tenon Joint

Ad Banner

How to Make a Curved Mortise and Tenon Joint

Add some attractive curves to your mortise and tenon joint

Joshua Farnsworth Portrait  By Joshua Farnsworth  |  Published 03 July, 2023

Share This Article:

How to Make a Curved Mortise and Tenon Joint

Joshua Farnsworth Portrait  By Joshua Farnsworth  | Published 03 July, 2023

Share This Article:

Intro: How to Make a Curved Mortise and Tenon Joint

Curved Mortise And Tenon Joint With A Chisel On A Howarth Bow Saw

In traditional woodworking, the mortise and tenon joint is a widely used technique for joining two pieces of wood. However, in some cases, a curved mortise and tenon joint may be required to create unique and visually appealing designs.

Howarth Bow Saw Collection On A Wooden Workbench

In this article (and the above video) Bill Anderson and I share a tutorial on how to make a curved mortise and tenon joint. This tutorial is based on the historical Howarth bow saw, which features this type of curved mortise and tenon joint. Bill and I filmed a video class called “Building the Historic Howarth Bow Saw with Bill Anderson”, which you can purchase here.

Howarth Bow Saw Cover

By following these steps, traditional hand tool woodworkers can learn how to create curved mortise and tenon joints and incorporate them into their woodworking projects. The above video will give you in-depth instruction, and this article will summarize the steps of making a curved mortise and tenon joint.

Moravian Workbench Dvd Cover

Build Your Dream Workbench

Buy our 7+ hour Workbench Build Video on DVD or Download!

Step 1: Layout of the Mortise

To begin, the mortise needs to be laid out on the workpiece. In this tutorial, a 5/16-inch mortising chisel is used, along with a mortise gauge. But you’ll obviously need to use the size mortise chisel that works best for your project. You can refer to our woodworking hand tool guide for more information on these hand tools.

Setting The Mortise Gauge Pins To The Mortise Chisel Width

The mortise gauge’s pins are set to match the width of the chisel (see above). By referencing the reference face, the two shoulders of the mortise are scribed.

Laying Out A Mortise With A Mortise Gauge

Once marked, the mortise can be penciled-in for better visibility, as seen below:

Using A Pencil To Darken The Mortise Gauge Lines

Portable Moravian Workbench Plans Pdf

Build Your Dream Workbench

Buy our 57 page premium Moravian Workbench Plans for only $19.99!

Step 2: Chop the Mortise

To ensure stability, clamp the work down so that it is positioned directly over the bench. Begin chiseling the mortise with a mortise chisel, following the same principles as with a standard, straight-walled mortise mortise. You can read my article here for a tutorial on making a traditional mortise and tenon joint.

Chopping A Mortise And Tenon Joint

Work back and forth chopping the mortise, until a the desired depth is reached. Using a combination square set to your desired depth (in this case, three-quarters of an inch), the chopping continues with the mortise chisel until the final depth of the mortise is achieved.

Using A Combination Square And Mortising Chisel To Chop A Mortise And Tenon Joint

Note that at this stage, the focus is on creating the rough shape of the mortise, and the curved shoulder is not considered.

Bill Anderson Chopping A Mortise And Tenon Joint

Woodworking Projects

Woodworking DVDS and Digital Videos

Browse our traditional woodworking video classes available in HD Streaming / Download and on DVD.

Step 3: Tenon Layout

Next, the tenon needs to be laid out. The mortise gauge setting used for the mortise is used on the tenons, to ensure consistency. The face side rule is also applied to make the tenons flush with the surface.

Woodworking Projects

The tenon is marked by scribing from shoulder line to shoulder line, on the end of the board:

Woodworking Projects

Once marked, the tenons can be sawn out using a rip cut technique. Care must be taken not to saw past the layout lines. The waste material is then knocked out, and the shoulders are cut off to form a starting point for shaping the curved shoulder.

Hand Tool Woodworking T Shirts

Woodworking T-Shirts and Apparel

Browse our traditional woodworking clothes to show off your cool hobby!

Step 4: Sawing the Curved Tenon

To make the sawing of the tenon easier, use a chisel to make little notches, with the flat face of the chisel against the waste side, that will be removed with the dovetail saw:

Woodworking Projects

Then saw the cheeks of the tenon, being careful to keep your dovetail saw just outside the line, into the waste area:

Woodworking Projects

Be careful to cut down to the straight layout line, but not to the curved layout line:

Woodworking Projects

After cutting down to the straight line, tilt your tenon board, and saw carefully at an angle, using the curved line as a guide:

Woodworking Projects

Then using a crosscut backsaw, cut on the upper layout line, which is above the curved layout line:

Woodworking Projects

Once the cheeks are removed, use a chisel to carefully pare down to the curved layout line:

Woodworking Projects

Then use pencil to draw a curve on your tenon face, and use a bench chisel to carefully pare down to that line to get your curved tenon:

Woodworking Projects

Do a visual check to ensure that your shoulders are at the same height. To ensure a proper fit, it is essential that the shoulder heights of both tenons match. This ensures the strength and stability of the mortise and tenon joint.

Woodworking Projects

By holding the pieces up to the eye and inspecting the curve, adjustments can be made using a chisel and/or a rasp, to bring the shoulder heights to the same level.

Ye Olde Beeswax Wood Finish On Mahogany With Hand Plane

Ye Olde Beeswax Wood Finish for Furniture

Make your furniture silky smooth with our historic beeswax wood finish!

Step 5: Shaping the Curved Mortise Shoulder

Now that the tenon shoulder is cut, it is time to shape the mortise shoulder’s curve. As you can see below, the curve is drawn on the board, but not yet shaped:

Woodworking Projects

Layout lines are drawn based on the end walls of the mortise, and the shoulders are carefully rasped to achieve the desired curve. Different rasps can be used to refine the shape gradually. The curve should match the tenon’s curved shoulder, ensuring a proper fit. Using a cabinet maker’s rasp, shape the curve until the rasp comes just down to the penciled layout lines (but don’t remove the pencil lines):

Woodworking Projects

The mortise shoulder should be matched to the tenon shoulder. The final fitting is done using the actual tenon to ensure a precise match. Once the shaping is complete, the curved mortise and tenon joint can be assembled.

Woodworking Projects

The joint should look like this when finished:

Woodworking Projects

Conclusion

Creating a curved mortise and tenon joint adds a unique touch to special woodworking projects; especially to woodworking hand tools like this lovely Howarth Bow Saw!

Curved Mortise And Tenon Joint

More about Bill Anderson

Bill Anderson With A Full Set Of 36 Hollows And Rounds Planes At Roy Underhill Woodwright'S School

Bill Anderson is a craftsman who is skilled in the art of traditional joinery and hand too making. In addition to being a teacher at the Wood and Shop Traditional Woodworking School, Roy Underhill’s “The Woodwright’s School” and the  “John C. Campbell Folk School” Bill has written numerous articles for magazines like Popular Woodworking Magazine and has three DVD’s on making, refurbishing, and using traditional hand tools (purchase here).

Bill is an active member and published contributor of the Society of American Period Furniture Makers and the Mid-West Tool Collectors Association. Bill has become a well-known expert on traditional hand planes and making hand planes. He is currently working on a book about restoring handplanes, which will be published by Lost Art Press in the near future.

Bill is a retired environmental scientist for the EPA and a lover of wilderness. In addition to his backpacking trips with his wife Dee Dee to wild places like Norway, he enjoys the quiet solitude of his mountain workshop in Chapel Hill, North Carolina. See the Wood and Shop tour of Bill’s workshop here. You can also visit Bill’s website here.

How to Make a Curved Mortise and Tenon Joint2023-07-12T13:01:01-04:00

Anatomy of an End Table and Drawer

Ad Banner

Anatomy of an End Table and Drawer

Learn How Tables and Dovetail Drawers Fit Together, so you can Build Your Own Furniture with Drawers

Joshua Farnsworth Portrait  By Joshua Farnsworth  | Updated Mar 11, 2022

Share This Article:

Introduction: Anatomy of a DIY End Table and Drawer

Quartersawn White Oak Diy End Table Night Stand With Half Blind Dovetail Drawers

Are you planning on building a DIY end table or do you want to make a table of any other type? Then this article and video will uncover the mystery behind how tables fit together, especially tables with drawers or any other furniture with drawers!

Joshua Farnsworth Showing How To Make A Table Or A Diy End Table

Tables with drawers are really enjoyable to build, but how everything fits together can be confusing for beginner woodworkers. So I’m going to show you how my quartersawn white oak nightstands fit together. And in case you like my table design, here are the plans that I designed, in case you want to buy them for only $4.99.

I did some research and discovered a major lack of written specifics on the anatomy of tables, especially how the inside drawer-holding parts fit together. I flipped through new and old books, and checked a bunch of DVDs, and virtually all of them just skip over the details.

Parts Of A Diy End Table Interior Drawer

So a new woodworker would have to search extremely hard, or inspect well-built antique furniture to uncover the mystery. You certainly won’t find it by looking at most modern furniture. I just think most beginners would have trouble trying to figure it all out on their own. So I’m going to walk you through how a simple table and drawer fits together over the process of a build. This information will be invaluable when you make a table.

How To Make A Table And Build Dovetail Drawers With A Dovetail Saw For A Diy End Table

In case you’re curious, this particular set of end tables is made out of the lovely quartersawn white oak lumber that I milled up with my friend Todd Horne from a fallen tree, as featured in this video. Before I talk about how all the joinery and parts fit together, lets first look at the names of all the parts of this DIY end table with a drawer.

Build A Trestle Table Video With Will Myers

Learn to Build Your Own Table!

5+ Hour Dining Table Build Video on DVD or Download!

Parts of a DIY End Table

How To Make A Table And Build Dovetail Drawers For A Diy End Table With Mortise And Tenon Joints

The below photo diagrams show the different parts of a DIY end table with drawers. For more details, certainly watch the video at the top of this article. I’ve divided the table anatomy into (A) visible exterior parts, (B) hidden interior parts, and (C) drawer parts:

A. Visible exterior parts of an end table with a drawer

Parts Of A Table Diagram On How To Make A Table

“Table Top”: The table top is the horizontal flat part that protects the interior contents of the table, and offers a surface for setting items on. These particular table tops were made by gluing up several smaller pieces of quartersawn white oak because I wanted less seasonal moisture movement, but mostly because I wanted wood figure on the entire top. It’s really hard to find figured wood that’s 18″ wide.

“Apron”: The aprons (sometimes called “skirts”) are the sides and back that enclose three sides of the table. The aprons have tenons that fit into mortises cut into the legs. The rear tenons are beveled with a 45 degree angle to allow the side and rear tenons to meet in the rear legs without getting in the way of the other.

“Tapered Leg”: Table Legs are thin vertical pieces that hold the table up. Legs can be tapered (as pictured above), straight, turned on a lathe (with circular elements), carved, or a mixture of any of these. I prefer the delicate and simple appearance of tapered table legs, which is representative of the Shaker style of furniture. But you may like straight legs from Arts & Crafts furniture or more fancy turned or carved legs from classical furniture styles.

“Drawer Pull”: A drawer pull is a handle or knob that is attached to a drawer front to enable the opening of the drawer. Drawer pulls can be attached with screws or, in the case above, a wedged tenon.

“Drawer Rails”: Drawer rails connect the two front legs, and create a frame for insertion of the drawer.

How To Make A Table Diagram Of Table Parts Showing A Double Mortise And Tenon Joint

The lower drawer rail has a double tenon that fits into two small mortises in the front legs, and the upper drawer rail has dovetailed ends that are lapped into the tops of the front legs.

Parts Of A Table Diagram Showing A Lapped Dovetail Joint On An Upper Drawer Rail

Moravian Workbench Plans

B. Hidden Interior parts of an end table

How To Make A Table Tutorial Inside Parts Of A Table Diagram

“Spacers”: Spacers (or “doublers”) fill in the space between the table legs and apron to offer a lateral limit to the drawer, to prevent the drawer from moving side to side.

Dovetail Drawer Spacers Or Doublers To Build A Table

Historically these spacers were made from a secondary wood, like Tulip Poplar or some species of Pine. The spacers in the above photo are made from poplar. They are glued to the side rails. Glue is sufficiently strong to hold the spacers in place.

“Drawer Runners”: Drawer runners give the drawers a surface to slide on, and prevent the drawer from dropping out of the bottom opening of the table.

Dovetail Drawer Runners To Build A Table

Drawer runners are simply glued onto the drawer spacers. The runners are level with the lower drawer rails.

“Kickers”: Drawer kickers are like runners, as they restrain the movement of the drawer.

Dovetail Drawer Kickers To Build A Table

But they sit level with the upper drawer rail and help keep the drawer pushed snugly against the drawer runner.

“Drawer Rails”: As mentioned above, drawer rails connect the two front legs, and create a frame for insertion of the drawer.

Dovetail Drawer Rails To Build A Table

Moravian Workbench Dvd Cover

Build Your Dream Workbench

Buy our 7+ hour Workbench Build Video on DVD or Download!

C. Parts of a Drawer

Make A Table Parts Of A Dovetail Drawer Diagram

“Drawer Front”: The drawer front is the only visible part of a closed drawer (aside from the pull) and is made from primary wood (like quartersawn white oak, in this case). Drawer fronts usually feature the most visually pleasing wood on the table, as it is the most visible of all table parts. A groove is plowed into the inner side of the drawer front to accept the drawer bottom.

Make A Dovetail Drawer To Make A Table

“Drawer Sides”: The left and right drawer sides are connected to the drawer front with half-blind dovetails. Drawer sides are usually made from a secondary wood, like Tulip Poplar or some species of Pine. This saves the furniture maker money, and lightens the drawer. The drawer sides also have grooves plowed into the inner sides to accept the drawer bottom.

Make A Dovetail Drawer To Make A Table Half Blind Dovetails

“Drawer Back”: Like the drawer sides, the drawer back is also made of a secondary wood, and is connected to the drawer sides via through-dovetail joints. The drawer bottom is shorter than the drawer sides and front, to allow the drawer bottom to escape underneath it when seasonal changes in humidity cause expansion and contraction of the drawer bottom.

Make A Dovetail Drawer To Make A Table

“Drawer Pull”: A drawer pull is a handle or knob that is attached to a drawer front to enable the opening of the drawer. Drawer pulls can be attached with screws or, in the case above, a wedged tenon. I made these pulls with chisels, rasps, and sandpaper.

Dovetail Drawer With A Drawer Pull And Quarter Sawn White Oak

“Drawer Bottom”: The drawer bottom holds all the contents of the drawer, and prevents them from falling out. Drawer bottoms can be made of plywood (because it doesn’t expand and contract much), but a superior custom drawer is made out of solid wood, like poplar or pine (secondary woods).

Drawer Bottom Of A Dovetail Drawer To Make A Diy End Table

Solid drawer bottoms allow a thicker bottom, with edges that are beveled with a handplane to fit into the grooves in the sides and front. Antique drawers usually have the handplane marks on the bottom. I used a bandsaw to resaw a poplar board for my bottom, milled up the two halves, and glued them together to form a solid bottom.

Drawer Bottom Of A Dovetail Drawer To Make A Diy End Table

As mentioned above, the drawer is built to manage the seasonal movement of the drawer bottom. Wood doesn’t expand and contract lengthwise, but it does expand & contract widthwise. So furniture makers arrange the drawer bottom in a way to allow the expansion to occur out the back of the drawer.

Diagram Showing Parts Of A Table Drawer Bottom

As the above photos show, the drawer bottom sits in the grooves that were plowed into the drawer sides and drawer front, and then sits on the drawer back. The drawer bottom is screwed into the drawer back with one or two screws (only one screw for a small drawer like this). The pilot hole in the drawer bottom is drilled wider than the screw to prevent the drawer from splitting with seasonal movement. It’s like wearing stretchy pants during the holiday season.

Furniture Making Dvds Woodworking

Learn to Make Tables & Chairs

Browse our traditional woodworking video classes available in Digital Download and DVD.

How an End Table & Drawer are Assembled

Two Night Stand End Tables In A Plastic Ammonia Fuming Tent

Now I’ll talk about how all the parts fit together when you make a table, including (a) Constructing the Table Frame (visible exterior parts), (b) Constructing the Spacers & Runners (Hidden Interior parts), (c) Drawer Construction and Drawer Fitting, and (d) How to Attach a Table Top. I’ll also include a section on finishing the tables. 

Portable Moravian Workbench Plans Used To Make This Collection Of The Best Collapsible Workbench

Traditional Woodworking Store

Check out our Tools, Videos, Plans, Apparel, and More!

A. Constructing the Table Frame (visible exterior parts)

Assembling A Diy End Table With Mortise And Tenon Legs

This DIY end table fits together with tenons on the aprons, inserted into mortises that are cut into the four legs. The rear tenons are beveled to allow them to clear each other inside the mortise. The rear legs, of course, each have a mortise on each side to accept the aprons.

Joshua Farnsworth Showing How To Make A Table Assembling The Legs Mortise And Tenon Joint

The front two legs are different. Like the rear legs, they have mortises that accept the apron tenons, but on the interior faces are mortises that are cut to provide an opening for the drawer.

Joshua Farnsworth Showing How To Make A Table Assembling The Legs Mortise And Tenon Joint

These mortises hold the drawer rails. The lower drawer rail uses a double tenon and double mortise to prevent the rail from twisting over time:

Lower Drawer Rail Being Inserted Into A Table Leg With A Double Mortise And Tenon Joint

The upper drawer rail uses a dovetail lapped into the top of the leg (pictured below). The dovetailed rail sits proud of the top of the leg so it can be hand planed down later when fitting the table top. Don’t worry if your rail dovetails look ugly. They’ll be covered with the table top later.

Lapped Dovetail Joint Drawer Rail Inserted Into A Table Leg

For aesthetic purposes I set my drawer rails back about 1/16 of an inch from the front of the table legs to create a “reveal”, as pictured above and below:

Drawer Rails Attached To A Table Leg With Lap Dovetail Joint And Double Mortise And Tenon Joint

The reveal adds visual interest to the rails and the tapered leg. The tapers on the table legs usually start a few inches down from the drawer rails:

Tapered Table Leg For Building A Diy End Table

Woodworking Videos And Woodworking Dvds

Woodworking DVDS and Digital Videos

Browse our traditional woodworking video classes available in HD Streaming / Download and on DVD.

B. Constructing the Spacers, Runners, & Kickers (Hidden Interior parts)

Dovetail Drawer Rails, Spacers, Runners, And Kickers Used To Build A Diy End Table

After the table frame is glued up, it’s time to make custom spacers, runners, and kickers. These parts are made out of a secondary wood, like Poplar or pine, and can be permanently attached to the table frame with wood glue. The glue is certainly strong enough to keep them attached, without using nails or screws. I like to use this liquid hide glue for this step.

Dovetail Drawer Runners, Kickers, And Spacers Or Doublers To Build A Table

I first glue on the top and bottom spacers (or doublers). I use plenty of wood clamps to ensure that the spacers will stay snugly against the table aprons:

Using Wood Clamps To Glue Drawer Spacers To Build A Table

The spacers are made to be flush with the four legs (pictured above). Leave the clamps on for a couple of hours.

Next, the drawer runners and kickers are glued to the spacers. The drawer runners give a platform for the drawer to run along, and the kickers are added up top to keep the drawer tight against the runners.

Dovetail Drawer Kickers To Build A Table

So essentially the drawer rails, drawer runners, drawer kickers, and drawer spacers create the boundaries to ensure your drawer will fit nice and snug. The more precise you are with building these interior parts, the better your drawer will fit in the table.

Parts Of A Table Interior Drawer Runners, Kickers, And Spacers

Woodworking T-Shirts And Apparel

Woodworking T-Shirts and Apparel

Browse our traditional woodworking clothes to show off your cool hobby!

C. How to Attach a Table Top

There are a variety of methods for attaching table tops, which I’ll mention here:

Wooden Buttons

One traditional method to attach table tops is making wooden buttons. To do this you cut shallow mortises into the rear apron, side kickers, and front rail, and make wooden “buttons” that hold the table top tight, while allowing seasonal wood movement.

Attaching A Table Top With Buttons

The button mortises should be cut before gluing up the table. I chisel out the button mortises with a ¼” chisel. Buttons are made out of scrap wood, and historical slotted screws are driven into pre-drilled pilot holes.

Table Aprons Inserted Into A Table Leg. Also Table Top Button Mortises.

Metal Button Fasteners

You can also buy inexpensive metal versions of the button style of fastener (see below). This is much easier than making your own wooden buttons.

Table Top Fasteners On A Diy Table

You can find this style of table top fastener here for not very much money. Table top buttons do, however, take a long time to install, because you either have to chop mortises or cut them with a plunge router.

Figure 8 Table Top Fasteners

Even more than table top buttons, I’m particularly fond of the figure eight table top fasteners. They are also called Desk Top Fasteners. These are my favorite style of table top fasteners, and in my opinion, the easiest to install:

Table Top Fasteners Figure 8

With this style of table top fastener you just bore shallow half circles into the top of your table aprons (same depth as the thickness of the fastener) and screw the other side into the table top. I clamp a sacrificial board to the inside of each apron so I can bore these holes.

Table Top Fasteners Figure 8

You can find the lowest prices on good figure 8 table top fasteners here. 

Pocket Screw Holes

Another method for attaching a table top is using pocket holes. I don’t mean using a Kreg jig (unless you want to). I mean using a carving gouge and a wood screw. You can see this method here:

Attach A Table Top With A Pocket Hole Screw

This is a very historical method for attaching table tops.

This is currently the most economical place to purchase table top fasteners. All of these table top fasteners allow for seasonal wood movement, if installed correctly.

I prefer to use an undercut bevel for the tops of my end tables, to give it the aesthetics of a thinner top, but the strength of thicker top. And the slope gives it a nice look. I use a hand plane to make these undercut bevels. Beveling with a handplane is faster than making undercut bevel table saw jigs. But if you plan on making a lot of these tables, using the table saw is the way to go. An undercut beveled top is one sign of quality in an end table like this.

D. Drawer Construction and Drawer Fitting

Make A Dovetail Drawer To Make A Table

When building a drawer for a table I make sure that I build the drawer a tad wider than the drawer opening in the table. Why? Because I want the drawer to fit perfectly snug, and I want to make a custom fit. If you build the drawer box to the exact dimensions of your opening, then there’s a good chance that the drawer will be too lose in the opening. I try to make the drawer about 1/16th of an inch wider than the opening. If you build the drawer any wider, then you’ll be doing a whole lot of handplaning in the drawer fitting stage.

Assembling the Dovetail Drawer Box

Now it’s time to assemble the drawer parts. The sides of the drawers are attached to the drawer front using half-blind dovetail joints, and the sides are attached to the back using through-dovetail joints.

Assembling A Half Blind Dovetail Joint On A Drawer To Make A Table

I first attach one drawer side to the drawer front, with the half-blind dovetail joint (pictured above. I then attach the drawer back to that first drawer side.

Assembling A Half Blind Dovetail Joint On A Drawer To Make A Table

I finish assembling the drawer frame by attaching the second side to the drawer front and drawer back:

Assembling A Dovetail Drawer To Make A Table

Next I glue up the dovetail drawer box, taking extra care to ensure that the drawer box is square before the glue dries. But I don’t add the drawer bottom yet, since I’ll be sliding in a solid drawer bottom after I ammonia fume and finish the drawer front and drawer box.

Fitting the drawer to the table

Make A Table Diy End Table

After the glue on the drawer box is dried (I wait overnight, just to be careful), I fit the drawer box to the opening of the table.

Using A Smoothing Plane To Fit A Drawer To Make A Table

As I mentioned earlier, I make the drawer box about 1/16-inch wider than the opening, so I can custom fit the drawer with a hand plane. The drawer shouldn’t fit in the opening at first. I use a smoothing plane (see my handplane guide here) to take fine shavings from both sides of the drawer box until the drawer box slides in perfectly.

How To Fit A Dovetail Drawer When You Make A Table

The drawer fitting process also includes handplaning a tad off the top and bottom of the drawer front, to create a very slight space above and below the drawer front, called a “reveal”. The top and bottom reveal prevents the drawer from hanging up, and also helps aesthetically balance the reveal that was created when handplaning the drawer sides.

How To Fit A Dovetail Drawer When You Make A Table

To me, a perfect fit means that the drawer requires a little pressure to get the drawer box to go inside the table, but not so much that it requires too much effort. And a loose drawer would be wobbling around. Watch my video at the top of this page to see how my drawer slides in.

How To Fit A Dovetail Drawer When You Make A Table

I know this was just a quick explanation on fitting a drawer, but the topic of fitting a drawer could require a whole article on it’s own, depending on how deep you want to delve. You can either just go ahead and experiment with what I just mentioned, or if you want a really good lesson on drawer fitting, here is a great DVD on making fine custom-fit drawers:

Building A Classic Drawer With Alan Turner Dvd

Finishing the drawer box

After my drawers are glued up and snugly fit to the table, I use a block plane to bevel the tops of the drawer sides to prevent dings from showing up. You can also see how nice the half-blind dovetails look after the drawer sides have been hand planed for fitting.

How To Fit A Dovetail Drawer When You Make A Table

The marking gauge line remains visible, which is historically accurate, so don’t try to sand them out! I also finish the secondary wood parts of the drawer (sides, back, and bottom) with a few coats of thinned down dewaxed shellac (scuffing between coats with steel wool). And later, after finishing the drawer front and table, I add a beeswax wood finish / beeswax polish for a little extra protection and sheen.

Applying Ye Olde Beeswax Wood Finish To A Drawer

The shellac and beeswax wood finish gives the drawer box a slight amount of moister protection. Thinned shellac only takes a few minutes to dry, and applying a wax only take s a minute or two, so this process is very quick.

You can buy my “Ye Olde Beeswax Wood Finish For Furniture” here. 

Applying Ye Olde Beeswax Wood Finish To A Drawer

You don’t have to do any finishing on the interior drawer parts if you don’t want to. I just find that it makes the drawer interior look nicer for a longer period of time. And it offers protection from dirt and grime, and also moisture (when I wipe clean the drawer with a damp cloth).

I did an ammonia fuming on these tables and drawers, so the Shellac prevented the drawer box from any darkening.

Unfinished Quartersawn White Oak Diy End Table Night Stand With Half Blind Dovetail Drawers

Drawer stops are added to stop the drawer from going too far into the table. They stop the drawer front even with the drawer rails. I simply glue little blocks on the lower front drawer rail.

Quarter Sawn White Oak Table With Drawer Stops

On these particular night stands I used a historical finishing method called “fuming” with ammonium hydroxide, or Ammonia as it’s known to most people. In a confined space, the ammonia will react with the tannin in the white oak, darkening it. You can check out my article and video tutorial on fuming these tables here.

Two Night Stand End Tables In A Plastic Ammonia Fuming Tent

After a couple days of fuming in my plastic tent, the end tables look dark and lovely. But not as lovely as when adding a finish. The grain just pops when adding a finish like this. A recipe and instructions for this great penetrating, yet protective, wipe on finish can also be found below.

Quartersawn White Oak End Table Night Stand With Half Blind Dovetail Drawers

I then add a drawer bottom. As mentioned earlier, the drawer bottom’s grain runs side to side, which means the wood will move front to back. This is why the drawer back is kept out of the way.

Attaching A Drawer Bottom Into A Drawer Frame On A Nightstand Table With A Screw And Screwdriver

The drawer bottom is beveled with a hand plane, slid into the drawer bow, and then attached to the drawer bottom with a screw. The screw hole in the drawer bottom is slightly larger than the screw, so that seasonal wood movement won’t destroy the drawer. I make the hole oval shaped. I like to use historical-style slotted screws for this purpose. You can check out my video blog post on making affordable historical slotted screws here.

Bonus: Wiping Varnish Finish Recipe for Tables

Applying A Wiping Varnish Finish To A White Oak Night Stand

This is an easy, lovely, and protective wood finish recipe that is based on a recipe that my friend Will Myers shared with me. I like it because it brings out the figure and gives depth with some oil, but offers protection that a table needs, without getting a plastic look.

  • Mix Natural Danish Oil and Satin Polyurethane in a 50/50 mixture. I like to use a small jam-sized canning jar (8 oz – 12 oz. size).
  • Use a lint-free cloth, or old t-shirt scraps to wipe on a first coat. Wait 10-15 minutes, and then wipe off the excess with a clean cloth. Let the first coat dry for three days.
  • Lightly sand or scuff between coats with 0000 steel wool, an ultra fine Scotch-Brite pad, or very fine sandpaper. This finish really doesn’t build enough film to need wet sanding, so just lightly dry scuff between coats.
  • Repeat the above steps two more times.
  • After the last (third) coat has dried for three days, lightly scuff the surface again, and buff with a nice furniture wax and a cotton cloth (an old T-shirt). You can buy my “Ye Olde Beeswax Wood Finish For Furniture” here. Waiting a week before applying a wax finish is even better so that the oil finish gets a nice long time to harden. Don’t leave the wax on longer than 10 minutes before buffing it with a soft cotton cloth.
  • Tip: This finish will thicken up in the jar and be unusable after a few weeks, so if you have leftovers, I spray a bit of Bloxygen to preserve it and then close the lid. I also spray this into my danish oil can and polyurethane can (and all my varnishes). Bloxygen is argon gas that displaces the oxygen, which preserves your wood finishes. It has saved me a lot of money in wasted wood finish. It’s especially good to spray in Waterlox, which tends to coagulate more quickly than other finishes I’ve used.

Conclusion

And here are the finished end tables! Hopefully this has educated you on the anatomy and process of making tables with drawers.

Two Quartersawn White Oak Night Stands Sitting On A Roubo Workbench Slab

The construction process gets a bit more complex when introducing more than one drawer, but that will be a lot easier for you to understand now. I get educated more and more each time I build something, so now go and build a table of your own!

(This article was originally published Dec 01, 2017)

Anatomy of an End Table and Drawer2022-06-17T08:50:55-04:00

Building the Isaac Youngs Shaker Wall Clock with Will Myers

Ad Banner

By Joshua Farnsworth

I’m excited to announce the release of our newest video class, “Building the Isaac Youngs Shaker Wall Clock with Will Myers“. This 7.5 hour woodworking video class is a great way to learn many valuable hand tool woodworking skills while creating a charming historical clock to hang on your wall.

Building The Isaac Youngs Shaker Wall Clock With Will Myers

You can buy the digital streaming / download version here. Will Myers and I visited the Hancock Shaker Village a few years ago to measure and photograph some historical Shaker Furniture.

Hancock Shaker Village

One of the gems that Will measured was an 1840’s wall clock made by Isaac Newton Youngs.

Antique Isaac Youngs Shaker Wall Clock At The Hancock Shaker Village

The special thing about the clocks made by Isaac Youngs was that his name is inscribed inside the clocks, which was a rare practice among Shakers. And Isaac Young’s mechanical skills and furniture making skills were beyond belief.

Antique Isaac Youngs Shaker Wall Clock At The Hancock Shaker Village

The Hancock Shaker Village (in Pittsfield, Massachusetts) should be a pilgrimage for anyone interested in woodworking, farming, or even just simple country living.

Joshua Farnsworth, Will Myers, And Other Woodworkers At Hancock Shaker Village

It’s also a place to go to experience an unusual amount of peace. You can watch some of my videos where I shared tours of different workshops at the Hancock Shaker Village.

Hancock Shaker Village In Autumn With A Yellow House

Will carefully measured, studied, and built several of these clocks to figure out how Isaac Youngs did it. And once he figured out the process, we filmed a video class in my traditional woodworking school.

Will Myers And Joshua Farnsworth Filming The Isaac Youngs Shaker Wall Clock Video Class

Will used power tools to square up the lumber, but he used only woodworking hand tools to build his clocks, including the clock seen in the video.

Will Myers Using A Molding Plane While Making The Isaac Youngs Shaker Wall Clock

In the video class, Will starts out making the mortise and tenon doors for the clock (which is a useful skill for many other projects) and then he makes the case of the clock to fit the doors.

Will Myers Using A Back Saw While Making The Isaac Youngs Shaker Wall Clock

In this woodworking class Will teaches many valuable hand tool woodworking skills, including:

  • How to cut dovetails with hand tools
  • How to make mortise and tenon joints
  • How to make frame and panel doors
  • How to cut and glaze glass
  • How to make a dado joint with a router plane
  • How to use hand planes
  • How to cut a rabbet joint with a moving fillister plane
  • How to turn a simple door knob on a lathe
  • How to install door hinges
  • How to use a spokeshave
  • How to finish with Shellac
  • How to paint with milk paint
  • And much more!

Will Myers Making The Isaac Youngs Shaker Wall Clock With Woodworking Hand Tools

The video purchase includes PDF plans, cut list, and a printable clock face.

Will Myers Applying Shellac With A Brush While Making The Isaac Youngs Shaker Wall Clock

Here are a few photos of the lovely finished clocks:

Hinges On The Isaac Youngs Shaker Wall Clock

Knob On The Isaac Youngs Shaker Wall Clock

Teardrop Hole On The Isaac Youngs Shaker Wall Clock

Will Myers Making The Isaac Youngs Shaker Wall Clock With Woodworking Hand Tools

Isaac Youngs Shaker Wall Clocks

Isaac Youngs Shaker Wall Clock

Isaac Youngs Shaker Wall Clock Face 1840

Building the Isaac Youngs Shaker Wall Clock with Will Myers2021-10-12T17:54:14-04:00

Making a Collapsible Viking Camp Chair

Ad Banner

Disclosure: WoodAndShop.com is supported by its audience. When you purchase through certain links on our site, we may earn a small affiliate commission, at no cost to you. Learn more.

By Joshua Farnsworth

This past fall I was camping with my friends, Ervin & Willie Ellis (“The Ellis Bros Builders”…see them here) at their new beautiful property in Southwest Virginia.  Ervin let me sit in a surprisingly comfortable wooden camp chair, and he told me that it is called a Viking Camp Chair (I’m almost certain it isn’t of Viking origin).

Campfire With A Viking Camp Chair In The Foreground

We immediately took measurements, because I wanted to make one too. The chair only requires one 2×12 board from the hardware store, it doesn’t require squaring the board up, it only has one mortise & tenon joint, it’s collapsible & easy to take anywhere, and it doesn’t require too much precision.

Woodworking Projects

For all these reasons I thought it would  also make a perfect project for all my viewers. Above you can watch the video tutorial, and below you can find the plans and a list of tools used in the video:

Viking Camp Chair Plans & Tools Used:

Collapsible Viking Camp Chair Pdf Woodworking Plans

Enter your name & email address in the box below, and we’ll email the download links to you. You’ll also be subscribed to our free newsletter, so you’ll occasionally be notified when we’ve released new woodworking articles and videos! Remember, you’ll need to confirm your subscription in the first email before we’re allowed to send the email with the download links.

Woodworking Projects

By subscribing you agree to receive our promotional marketing materials and agree with our Privacy Policy. You may unsubscribe at any time.

Here are links to the Tools used in this tutorial:

(DISCLAIMER: Some of the links below can help me receive a small commission, if you make any purchase on that company’s website. This really helps me out, and costs you nothing extra!)

* Plans for the Viking Camp Chair: 

* Hitachi 12-inch sliding compound miter saw: https://amzn.to/3armeVf

* Grizzly 17-inch bandsaw: https://amzn.to/2MRjbwW

* Wood Slicer 1/2-inch Bandsaw Blade: http://bit.ly/38eSGYR

* Vintage Disston No. 16 Cross Cut Panel Saw: https://ebay.to/2NFKXdU

* Folding Rule: https://amzn.to/38pji9C

* 6-Inch Pocket Combination Square: https://amzn.to/2WBzvnr

* JET® 16-1/2″ Floor Drill Press: https://amzn.to/2MTYC2X

* Starrett Professional Framing Square: https://amzn.to/3bG5Y27

* Irwin Marples 1-1/4″ Forstner Bit: https://amzn.to/3bDkl7C

* BeaverCraft LS1P1 Leather Paddle Strop: https://amzn.to/2vYAMMu

* Auriou French-cut Cabinet Rasp: http://bit.ly/38sCQtE

* 1-inch Chisel: https://woodandshop.com/woodworking-hand-tool-buying-guide-chisels/

* Wooden Joiner’s Mallet: shop made

* Forged Holdfast: custom made

Woodworking Projects

Alright, let’s get started building the Viking Camp Chair!

Woodworking Projects

I start by measuring out where I want to cut the two parts out of my 8-foot board. I’m using 2×12 pressure treated lumber, so the chair will last longer outdoors. But you can an untreated board if you plan on keeping this out of the rain.

Woodworking Projects

If you use treated lumber, make sure to wipe your tools down with oil afterward to prevent rust. I’m laying these two pieces out in a way that I can leave out the major knots. But it’s not a big deal if you have knots. Because this isn’t nicely squared up lumber, I can get by with using a framing square to lay most everything out.

Woodworking Projects

You can use a crosscut hand saw, but I had my sliding miter saw out, so I used it to make these cuts. Again, these cuts don’t need to be perfect, so just get your cut pretty close to square across the board.

Woodworking Projects

And make sure you let your blade come to a full stop before you move anything around. I recently saw someone on Instagram who had badly cut her hand because she was being rushed in this situation.

Woodworking Projects

Now that my two pieces are cut, I’ll lay out the tenon board. You can use whichever measurements you want for a custom reclining angle, but I’ve included all the measurements in my free plans, so I won’t mention them here.  I measure down for the seat length. You may want a different size seat depending on the length of your legs.

Woodworking Projects

Then I draw a square line across the board, and then measure in for the tenon from each side. This isn’t a critical measurement, as long as you come in the same amount from both sides.

Woodworking Projects

Then I set a combination square at the mark that I set. I then run the square and pencil along the board to extend the layout lines for the tenon. This is an important step if you’ll be using a handsaw to rip down the line. If you’re using a bandsaw, then you only really need to make the marks at the end of the board.

Woodworking Projects

And I always keep a habit of marking my waste, even though it would be pretty hard to mess this cut up. I’ve darkened my lines with a marker so you can see how the seat is supposed to look:

Woodworking Projects

If you’ve got a band saw, this ripping step only takes a few seconds. If you’ll be using a rip saw, then you’ll get much better exercise than me! Once the first cut is made, all I have to do is flip the board over, and the fence will give me the exact same measurement in from the edge.

Woodworking Projects

For the crosscuts on the seat, I find it faster to use a cross cut handsaw rather than trying to use power tools.

Woodworking Projects

Woodworking Projects

Now I layout the mortise on the seat back. I make a small tick mark where I want the mortise to start.

Woodworking Projects

Then I lay the tenon on the board to get the width of the mortise. I make another tick mark.

Woodworking Projects

Then I square the framing square up against the edge of the board, and carry both of these lines across the face of the board.

Woodworking Projects

Woodworking Projects

Now I take the combination square measurement that I used for marking the tenon, and I use it to mark the ends of the mortise.

Woodworking Projects

I set the tenon over the mortise and draw the lines. Now I’ve got my mortise laid out.

Woodworking Projects

I use a square to continue the mortise layout lines over the edges of the board.

Woodworking Projects

And then I extend them on the other face of the board.

Woodworking Projects

Woodworking Projects

I then use a straight edge to connect the layout lines.

Woodworking Projects

If your board is relatively square, then the layout lines should meet. But like I said before, this joint doesn’t need to fit really tightly, so don’t stress out if the lines don’t line up perfectly.

Woodworking Projects

And I again use the combination square to mark the edges of the mortise.

Woodworking Projects

Woodworking Projects

Now it’s time to establish cut lines around the mortise. First I use a holdfast to hold the board down to my workbench. Then I use a large chisel to outline the mortise. I’m not hitting the chisel hard yet, because I’m just trying to keep a clean mortise. And notice that I’m putting the bevel-edge of the chisel toward the waste?

Woodworking Projects

This ensures that the walls of my mortise will be straight & clean because of the flat face of the chisel. I always chop across the grain first, and extend a hair past the edge of the mortise. This helps to prevent splitting when I establish the edges of the mortise, which run with the grain. I flip the board over and repeat. Here’s a closeup view:

Woodworking Projects

To remove the majority of the mortise waste, you can either use an auger bit and brace, or a drill press with a Forstner bit.

Woodworking Projects

Forstner bits on a drill press are my favorite way to clean out large mortises, especially when I’m building workbenches that have a ton of these mortises. I use as large a bit as I can, without getting too close to my layout lines. The chisel marks that I made on the layout lines help to prevent the wood from chipping out.

Woodworking Projects

I try to get the holes to overlap a bit, to make waste removal easier. And notice how I drew a center line to aid in getting the bit centered in the mortise.

Woodworking Projects

I strop my chisel before going back to chop the mortise. I try to strop every couple minutes of use so I don’t have to go back to my honing stones. This is a great time saver, and it keeps me working with a razor sharp chisel!

Woodworking Projects

Then I remove waste from the mortise. But I don’t get too close to the line yet, and I don’t chop all the way to the bottom. I don’t want to risk blowing out beyond the mortise lines on the other side.

Woodworking Projects

And I usually have to work the chisel at an angle to get the waste out of the corners:

Woodworking Projects

Once I’ve gotten really close to all the layout lines, then I can finally drop my chisel in the knife lines.

Woodworking Projects

This method will ensure that my mortise walls stay crisp, and don’t get pushed backward. Once the first side is complete, I flip the board over and repeat the process again, meeting in the center of the board. Without using my joiner’s mallet, I use my chisel to pare away any remaining gunk.

Woodworking Projects

I like to use a cabinet-maker’s rasp to bevel the edges of the tenon. This will help the tenon slide into the mortise easier, and will also keep it from splitting when it’s set on the ground.

Woodworking Projects

Now I check the fit of the tenon in the mortise. It appears to fit, but more snugly than I want for this chair.

Woodworking Projects

If yours fits too tight, you can either use the rasp to expand the mortise a bit, or widen the mortise a little more with a chisel.

Woodworking Projects

This is a nice, fairly loose fit that I’m going for:

Woodworking Projects

And this is what the chair will look like when you’re finished:

Woodworking Projects

As a final optional step, I like to use the rasp to ease the edges anywhere it might be uncomfortable when sitting:

Woodworking Projects

That’s it! Wasn’t that pretty simple? This is a super easy project to work on while you’re quarantined during this coronavirus pandemic. And hopefully it’ll help you get outside, and enjoy the sun…away from people.

Woodworking Projects

My sweet wife was kind enough to offer a demonstration of how easy this Viking Camp Chair is to setup.

Woodworking Projects

Of course, you should watch the video to see the whole setup.

Woodworking Projects

Pointing Finger Vertical

Check out some of our woodworking classes here:

Making a Collapsible Viking Camp Chair2024-02-07T16:25:01-05:00

How to Make Milk Paint from Scratch

Ad Banner

By Joshua Farnsworth

In the above video I share a tutorial on how to make historical milk paint from scratch! The article below shares the same information (in case you’re reading this at work…).

Painting Red Milk Paint On A Shaker Bench

In a previous video (here) I showed how to build this shaker bench from just three pine stair treads, and I asked my viewers to let me know if they wanted a video on making milk paint from scratch. Well, I got a positive response, so here’s the tutorial:

Shaker Bench With Black Milk Paint With Red Undercoat In Home Made Milk Paint Tutorial

What is Milk Paint & Why Do I Use It?

Mixing Red Paint Pigment Into Home Made Milk Paint

Milk paint is a historical paint that has been used for thousands of years. I love it because it’s durable, it’s non-toxic, I can easily mix my own custom colors, and it’ll accept most top coat finishes. And lastly, it was a common furniture finish on my two favorite styles of furniture: Shaker and Colonial. I really love making provincial country-style furniture.

Hancock Shaker Village Bedroom With Milk Painted Furniture

In modern times milk paint has become popular again, even on contemporary furniture, but most people can only buy it in powder form. Powdered milk paint can be expensive, and it’s only available online and at some specialty hardware stores. And no, the canned stuff isn’t real milk paint. But if you consider your time and the convenience of being able to mix up small batches, then the commercial powdered milk paint is still the way to go.

Mixing Powder Milk Paint

But, I do love trying to replicate historical processes from scratch, so homemade milk paint is fun. And it isn’t very expensive. In fact, most of the items you need are probably in your fridge and garden shed. You may only need to buy color pigment powder. I happen to use pigment to make my own colors with powdered commercial milk paint, so I always have some sitting in my shop.

Mixing Yellow Paint Pigment Into Powdered Milk Paint In A Plastic Container

I use natural earth pigments in my paint, and years ago I got this recipe from the company that makes my color pigments, so you can see a link to their pigments below, along with a list of all the ingredients, and where you can find them.

Joshua Farnsworth Standing In His Woodworking Workshop Over A Shaker Bench

Alright, let’s get started!

Ingredients & Supplies for Making Milk Paint from Scratch

Joshua Farnsworth Painting A Shaker Bench With Homemade Milk Paint From Scratch

Here are the ingredients & supplies to make your own milk paint from scratch (some links may be affiliate links, but won’t cost you anything):

* 1 Gallon Skim Milk (Room temperature) 

* 2 Cups  Distilled White Vinegar (Room temperature) 

* Cheese cloth: https://amzn.to/2vd81vm

* 3/4 Cup Hydrated Lime: https://amzn.to/3962HZ3

* 3/4 Cup Water

* Paint Filters: https://amzn.to/2vm1MoV

* My 1.5″ Paint Brush: https://amzn.to/2wOo8zG

* Paint pigments on Amazon: https://amzn.to/2wfbEAI

* Paint pigments at The Earth Pigments Company: https://www.earthpigments.com/

* Plans for the Shaker bench: https://store.woodandshop.com/product…

Making Milk Paint from Scratch

Adding Black Color Pigment To Home Made Milk Paint From Scratch

Alright, so I need to make a confession: I have milk in my fridge, but I only buy fat free skim milk when I’m making milk paint, because it’s super gross. If you’re going to drink milk, drink the good stuff! Anyway, I start off by pouring the whole gallon of skim milk into a large pot. Make sure it’s at room temperature.

Woodworking Projects

Then I add 2 cups of distilled white vinegar, and stir it up.

Woodworking Projects

Then I let the mixture sit in a warm room, and I don’t touch it again for at least a few hours. Overnight is better. The vinegar will curdle the milk, just like when you’re making cheese.

Woodworking Projects

You’ll know it’s ready when the milk has separated into curds and whey. The curds, or “quark”, has  a lot of concentrated milk protein, which gives the paint its durability.

Mixing Milk Paint From Scratch Using Skim Milk, Vinegar, And Hydrated Lime Powder

Then I put a pasta strainer in the sink, and I lay a couple layers of cheese cloth inside. I pour the curds and weigh into the strainer, and give it some time to drain the whey.

Mixing Milk Paint From Scratch Using Skim Milk, Vinegar, And Hydrated Lime Powder

Next I rinse the vinegar and whey off of the quark a couple times.

Mixing Milk Paint From Scratch Using Skim Milk, Vinegar, And Hydrated Lime Powder

I gather the quark up in the cheese cloth, and further squeeze out more of the water. But I don’t get it too dry, or I’d end up with cheese! Yes, at this point I think you can still back out and have some nice farm cheese…although it probably won’t taste great because there’s no fat in it.

Mixing Milk Paint From Scratch Using Skim Milk, Vinegar, And Hydrated Lime Powder

This next step is where the quark becomes inedible. First I add ¾ cups of Hydrated Lime into a glass container.  Make absolute sure you don’t use quick lime. I bought hydrated lime at a nearby farm supply store. $5 for a 50 pound bag, or $8 for a smaller bag. But the small bag is more than you’ll need. You can also order small bags of it online (see above in the ingredient section).

Mixing Milk Paint From Scratch Using Skim Milk, Vinegar, And Hydrated Lime Powder

Then I add the same amount of water onto the lime, and mix them together.

Mixing Milk Paint From Scratch Using Skim Milk, Vinegar, And Hydrated Lime Powder

Eventually the mixture will become smooth, with no clumps.

Mixing Milk Paint From Scratch Using Skim Milk, Vinegar, And Hydrated Lime Powder

Then I dump the quark onto the lime, and do my best to scrape as much of the quark off the cheesecloth as possible. I mix this mess up for a couple minutes until it’s as smooth as possible, then I let it sit for about 15 minutes to let the lime further break it up.

Mixing Milk Paint From Scratch Using Skim Milk, Vinegar, And Hydrated Lime Powder

Then I come back and do my best to break up remaining  clumps.

Mixing Milk Paint From Scratch Using Skim Milk, Vinegar, And Hydrated Lime Powder

I put the kitchen strainer over another clean bowl, and strain the mixture again through some clean cheese cloth.

Mixing Milk Paint From Scratch Using Skim Milk, Vinegar, And Hydrated Lime Powder

Paint filtering funnels like this work well too, though it takes longer to filter this thicker mixture.

Mixing Milk Paint From Scratch Using Skim Milk, Vinegar, And Hydrated Lime Powder

If you’re doing a base color and a top color like me, then you can divide the mixture up into two containers. I’m using some old disposable plastic containers.

Woodworking Projects

Mixing Paint Pigment into the Milk Paint

Mixing Red Paint Pigment Into Home Made Milk Paint From Scratch

Now I get some of my color pigment from the container. I start off with a small amount so I can see how the color will turn out.

Red Paint Pigment In A Tablespoon For Use In Home Made Milk Paint From Scratch

I put it into a small cup, and mix some water in with it. I use about twice as much water as pigment, and thoroughly mix it up.

Mixing Red Paint Pigment With Water For Home Made Milk Paint From Scratch

Then I pour the pigment into the milk paint base. I like to use a disposable plastic spoon to thoroughly mix it up. If you want you can use a little bit of water to get the last bit of pigment out of the cup.

Mixing Red Paint Pigment Into Home Made Milk Paint From Scratch

Now you need to decide if this is a dark enough color. It’s plenty dark for my under coats.

Mixing Red Paint Pigment Into Home Made Milk Paint From Scratch

I’m doing a black coat on top of the red coat, so I add black pigment to the other container of milk paint.

Mixing Black Paint Pigment Into Home Made Milk Paint From Scratch

This mixture didn’t look dark enough to me, so I added more pigment.

Mixing Black Paint Pigment Into Home Made Milk Paint From Scratch

Now I like to strain each of the paint colors through a fine automotive paint strainer. My wife tells me these are the same strainers they have at the hospital for patients to pee into to catch gall stones. Hmmm…Who knew?

Home Made Milk Paint From Scratch Being Poured Into Paint Strainer And Into A Canning Jar

Anyway, I like to strain the paint into glass canning jars, because I can seal the lids and shake the jars to mix up the paint before using it each time.

Canning Jar Used For Making Home Made Milk Paint From Scratch

You could also recycle pasta sauce jars or something similar. Just make sure they’re clean.

Home Made Milk Paint From Scratch In Canning Jars

Testing the Milk Paint Before Using It

Testing Homemade Milk Paint From Scratch By Painting It On A Scrap Board Of Pine With Jar Of Red Milk Paint

Before I use the paint on my furniture, I like to make sure it’s thin enough. I mix it up, remove excess foam, and paint some strokes on a scrap board to make sure the paint spreads out at least a foot in length. This looks pretty good to me.

How to Paint with Milk Paint

Joshua Farnsworth Painting A Shaker Bench With Homemade Milk Paint From Scratch

Now it’s time to paint the shaker bench! Every time I shake up the jars, it tends to create foam. I try to spoon out as much foam as possible before I paint, but it honestly is nearly impossible to do. Foam forms every time I shake the jar. You can see the initial foaminess in this photo:

Joshua Farnsworth Painting A Shaker Bench With Homemade Milk Paint From Scratch

Just make sure that you go back repeatedly over any painted surface to make sure the foamy paint gets spread out. It’ll eventually get smooth.

Joshua Farnsworth Painting A Shaker Bench With Homemade Milk Paint From Scratch

I paint carefully in every nook and cranny, and go back over any spots that look like they need better coverage. But the first coat will not look amazing, so don’t worry if the coverage isn’t great at this point.

Joshua Farnsworth Painting A Shaker Bench With Homemade Milk Paint From Scratch

And between coats make sure you store the milk paint in the fridge. Some people say to use all of the milk paint in the same day, but this is impractical. I’ve found that you can use it for up to two weeks…or until it starts to smell bad.

Joshua Farnsworth Using Sandpaper To Smooth Between Milk Paint Coats On A Shaker Bench With Homemade Milk Paint From Scratch

After the first base coat has dried for a couple hours, I can lightly sand over it with a fine grit sandpaper. I’m using 220 grit here. I just sand enough to make the rough surface feel smooth to the touch, but I try to not sand through to bare wood. I feel every part of the bench to make sure I didn’t miss a spot.

After using my air compressor to spray off the paint dust (outside the shop), it’s time for a second coat of red. Again, you’ll see some foaminess in the paint. This seems to be more unique to homemade milk paint. But if you keep coming back and spread the paint with the brush, the foaminess will eventually disappear. And you’ll find that the second coat looks much better than the first coat did.

Joshua Farnsworth Using Sandpaper To Smooth Between Milk Paint Coats On A Shaker Bench With Homemade Milk Paint From Scratch

After letting the second coat dry for another couple hours, or overnight, I again do a light scuff sanding as before.

Joshua Farnsworth Painting A Shaker Bench With Homemade Milk Paint From Scratch

Now it’s time for the first black coat to go on. For some strange reason I find that the black pigments that I bought don’t bond to the homemade milk paint quite as well as other colors do, so I have to be more diligent in going back over the paint with the brush if I see some separation.

Joshua Farnsworth Painting A Shaker Bench With Homemade Milk Paint From Scratch

But the black coats of paint sure look nice. I find that at least two coats of black are required to make the finish look nice.

Joshua Farnsworth Painting A Shaker Bench With Homemade Milk Paint From Scratch

After letting the final coat of milk paint dry for at least a day, I use 4-aught (0000) steel wool to buff the surface until I see a sheen. The sheen may not be noticeable unless you look at it with the right angle of window light, or with a lamp.

Joshua Farnsworth Using Steel Wool To Rub Down A Shaker Bench With Homemade Milk Paint From Scratch

I can also do a little extra buffing in areas where I may want some of the red paint to show through, like on the edges & corners. This gives the furniture an aged look, which I like a lot. I just try to not overdo it.

Joshua Farnsworth Using Steel Wool To Rub Down A Shaker Bench With Homemade Milk Paint From Scratch

Adding a Top Coat Over the Milk Paint Finish

Joshua Farnsworth Adding A Coat Of Wiping Varnish That Was Applied Over 4 Coats Of Homemade Milk Paint On A Shaker Bench

Finally, after using my air compressor again to remove the paint dust, I add a top coat. You can use pretty much any top coat you like, but I’m using a wiping varnish, because I like how the oil in the varnish penetrates the paint, and imparts some depth to the finish, and also some protection for all the rear-ends that’ll be sitting on it.

Joshua Farnsworth Adding A Coat Of Wiping Varnish That Was Applied Over 4 Coats Of Homemade Milk Paint On A Shaker Bench

I also like using a wiping varnish, because it wipes on quickly and wipes off quickly, and doesn’t require too much time to build up a finish. After spending so much time with the paint job, I’m not in the mood for a long, drawn out process of applying a complex top coat! Shellac is also a great option, if you like working with Shellac.

Joshua Farnsworth Using A Rag To Rub Off A Wiping Varnish That Was Applied Over 4 Coats Of Homemade Milk Paint On A Shaker Bench

Conclusion

Joshua Farnsworth Standing In His Woodworking Workshop Over A Shaker Bench

Now wasn’t that fun? I had fun, and I hope you had watching! Here are a few photos of the completed Shaker Bench:

Shaker Bench With Black Milk Paint With Red Undercoat In Home Made Milk Paint Tutorial

Shaker Bench With Black Milk Paint With Red Undercoat In Home Made Milk Paint Tutorial

Lap Dovetail On A Shaker Bench With Black Milk Paint In Home Made Milk Paint Tutorial

Shaker Bench With Black Milk Paint With Red Undercoat In Home Made Milk Paint Tutorial

So have I switched to only using homemade milk paint? No. As I already mentioned, there can sometimes be a couple inconvenient drawbacks from making milk paint from scratch, and commercial milk paint sure is more convenient when you’ve got a small project to paint.

Joshua Farnsworth Painting On Yellow Milk Paint Over Dovetails On A Small Wooden Poplar Tool Chest

But it sure is fun using a finishing method that’s been around since caveman times. If you’re interested in trying out historical methods like I am, or you just don’t want to go hunting for powdered milk paint, then I hope you give this a try.

If you’ve found this article to be helpful, consider buying the $5 plans for the Shaker Bench (see below), and I hope you’ll leave a comment at the bottom of this page, and consider subscribing to my free articles (here) and to my YouTube channel (here). Thanks for joining me!

Pointing Finger Vertical

How to Make Milk Paint from Scratch2021-06-16T18:25:08-04:00

Make a Shaker Bench from 3 Stair Treads!

Ad Banner

Disclosure: WoodAndShop.com is supported by its audience. When you purchase through certain links on our site, we may earn a small affiliate commission, at no cost to you. Learn more.

By Joshua Farnsworth

In this video I give a detailed tutorial on how to build a Shaker bench. I chose this design because I absolutely love the look of the lapped dovetail braces, and I felt that the lap dovetail joints and the through-mortise & tenon joints would give beginner woodworkers a challenge without overwhelming them. And the project is really fun for experienced woodworkers as well. The most exciting thing about this bench is that I built it using only three yellow pine stair treads from the hardware store! Below I talk a little about the details of the build, and share the project plans and list of tools that I used.

Shaker Bench Sitting On A Workbench For Woodworking Plans

Why did I use Yellow Pine Stair Treads?

  • These stair treads are usually made from very clear pine, with very few (if any) knots.
  • Stair treads are a little over 11-inches wide, so I wouldn’t have to glue up boards to make the bench wide enough to sit on.
  • Yellow pine stair treads only cost around $10 each, so this project is very affordable to build (under $35).
  • Yellow pine is easy to use with hand tools and power tools.

Joshua Farnsworth Woodworker Using A Block Plane While Building A Shaker Bench From Woodworking Plans

In this video I used a mix of power tools and hand tools, but if you want to make the bench using just hand tools, you can check out my article & video: “How to Square, Flatten, and Dimension Rough Boards with Hand Tools“.

Project Plans for the Shaker Bench

Shaker Bench Woodworking Plans Exploded View

You can certainly build this bench without my plans, but I created these for those who’d like to save the time of figuring out dimensions. I designed these plans based off of many antique Shaker benches that I’ve seen over the years. But I added some of my own details, and made my dimensions simple to work with, and so they can be used with stair treads. You can click the button below to see more details about my $5 woodworking plans:

Woodworking Plans For A Shaker Dovetail Lap Braced Bench

Tools & Supplies used in the Project:

Shaker Bench Sitting On A Workbench With A Stanley Block Plane For Woodworking Plans

This is a list of tools that I used in this video. Because I have a school full of woodworking tools I am able to use a large variety of tools, but you certainly don’t have to have every one of these tools to make this bench. Some of these links are affiliate links, but don’t cost you anything.

Shaker Bench Sitting On A Workbench For Woodworking Plans

And here’s the video that I shared last week on making a ton of wedges quickly on a bandsaw, for use in wedging the tenons on this bench:

I hope you enjoyed the video! I’ll be using this bench in an upcoming video on making milk paint from scratch, so subscribe below if you want to be notified when it’s released. Also, please share your comments below and check out our upcoming woodworking classes:

Pointing Finger Vertical

Make a Shaker Bench from 3 Stair Treads!2024-02-07T16:33:01-05:00

Amazing Tree of Life Chests made by William Brown

Ad Banner

In this video expert furniture maker, William Brown, shares his “Tree of Life” chests and summarizes the woodworking techniques and a bunch of tricks he uses to make these stunning inlaid wooden chests.

Tree Of Life Wooden Dovetail Chest Made By William Brown

Please leave a comment below if you’re interested in buying a chest from William, taking a class on building these chests, or seeing a paid video class on building these chests. And if you missed William’s workshop tour or furniture tour, you can see them here. And make sure you check out our upcoming woodworking classes below:

2020 WOODWORKING CLASSES:

Pointing Finger Vertical

2020 CLASS CALENDAR:

We’ll be adding more classes, so please check back! Or get on our free mailing list (click here) if you want to be one of the first to know when new classes are added.

Mar 12-14: “Introduction to Hand Tool Woodworking with Joshua Farnsworth”

Apr 10: “Hand Cut Moldings with Bill Anderson”

Apr 11: “Hand Plane Skills with Bill Anderson”

Apr 16-18: “Timber Framing with Ervin & Willie Ellis”

Apr 22-23: “Make a Handsaw Till with Tom Calisto”

Apr 24-25: “Make a Dovetail Saw & Tenon Saw with Tom Calisto”

May 1-2: “Restoring Wooden Handplanes with Bill Anderson”

May 11-12: “18th Century Wood Carving with Kaare Loftheim”

May 15-16: “Make a Colonial Ratcheting Table with David Ray Pine”

May 18-20: “Introduction to Hand Tool Woodworking with Joshua Farnsworth”

Jun 5-6: “Build a German Shave Horse with Ervin & Willie Ellis”

Jun 8-9: “Introduction to Wood Veneering and Inlay with Dave Heller”

Jun 11-13: “Bowl Carving & Spoon Carving with Mike Cundall”

Jun 27: “Wood Joinery by Hand with Joshua Farnsworth”

Jul 11: “Make a Moravian Dovetailed Footstool with David Ray Pine”

Jul 16-18: “Introduction to Hand Tool Woodworking with Joshua Farnsworth”

Jul 31-Aug 1: “Carving Wooden Fans & Shells with David Ray Pine”

Aug 29: “Wood Joinery by Hand with Joshua Farnsworth”

Sep 14-16: “Introduction to Hand Tool Woodworking with Joshua Farnsworth”

Sep 18-19: “Sharpening Woodworking Hand Tools with Bill Anderson”

Sep 21-26: “Intro to Chair Making with David Ray Pine”

Sep 29-30: “Make Workbench Fixtures with Bill Anderson”

Oct 9-10: “Make a Wooden Spokeshave with Tom Calisto”

Oct 19-20: “Make a Moravian Dovetailed Candlebox with David Ray Pine”

Amazing Tree of Life Chests made by William Brown2021-09-27T14:32:45-04:00

Anatomy of a Shaker Wall Cupboard

Ad Banner

By Joshua Farnsworth

In the above video I show how a hanging Shaker wall cupboard, or wall cabinet fits together. This isn’t a full build tutorial, but a 5 stage anatomy lesson to help woodworkers understand how a wall cupboard like this comes together. But you can buy the detailed plans here for $5.

Cherry Hanging Shaker Wall Cupboard With Door Closed Built By Joshua Farnsworth

I designed this Cherry hanging Shaker wall cupboard based off several different antique Shaker cupboards that I’ve seen over the years, and documented various steps of the construction process to help you better understand how a wall cabinet like this fits together. Last year I shared a similar video & article, called “Anatomy of an End Table and Drawer“. You can watch & read it here.

How To Build A Table Tutorial Two Oak Night Stands Sitting On A Woodworking Workbench Parts Of A Table Diagram

Below are my 5 stages of building a charming wall cupboard for your home!

Woodworking Plans For A Shaker Hanging Wall Cupboard Cabinet

Pointing Finger Vertical

1. ASSEMBLE THE CUPBOARD CARCASS & SHELVES

The carcass, or case of this cupboard is joined together with through dovetail joints. Notice how I made the dovetails so that they would not only be visible, but so that the hanging cupboard would benefit from the strength of the joint. The tails are hanging tightly between the pins. If the orientation were reversed, the sides could technically drop out of the top over time.

Dovetails Top Of Shaker Wall Cupboard Cherry Wood

Quite a few historic style cupboards have the tails on top, which doesn’t offer good strength to the carcass:

Dovetailed Top Of Walnut Spiced Cupboard Wood And Shop

However, in most cases it’s not a factor since those cupboards are generally small, and aren’t being hung from the top, as mine is. The larger size of my cupboard, and the fact that there is more pressure being exerted on the dovetail joint, necessitated tails on the sides, and pins on top.

Shaker Peg Hole On A Cherry Hanging Shaker Wall Cupboard Built By Joshua Farnsworth

Next, I made two other types of wood joints on the inside of the carcass: dado joints (for the shelves) and a groove (for the back to slide into). Here are all the parts of the carcass (or case):

Diagram Of Parts And Wood Joints Of Wall Cupboard

I then glued up the dovetail joints, and after the case dried, I used a smoothing plane, card scraper, and sandpaper to smooth the carcass sides, carcass interior, and shelves:

Coffin Smoother Smoothing Plane Planing Shavings On A Cherry Board

Just make sure you don’t waste time planing or sanding the top & bottom of the carcass (aside from planing the dovetail pins flush). The top & bottom of the carcass will be covered with the the cupboard top & bottom boards. I then inserted the hand planed shelves into the dado joints:

Shelves Inserted Into Dado Joints Of A Hanging Shaker Wall Cupboard

A little glue can be applied inside the dado joints before sliding the shelves in, but not a lot is required since the face frames and back will hold the shelves in place. You technically could add the shelves after the case has been glued up, and the face frames added, but I find that the shelves add rigidity to help square up the case during glue-up.

2. ATTACH THE FACE FRAME

Shaker Cherry Wall Cupboard Gluing Face Frames

The next step is to glue the face frame boards onto the carcass. You can reinforce the face frame pieces with nails if you want to, but I’ve found that the wood glue is plenty strong (especially Titebond 3, which is permanent glue). I make sure to use enough wood clamps to apply even pressure. If you use too much glue, you’ll have a squeeze out problem. Squeeze out stinks (especially with PVA glue, like this) because it can show up later through your finish, if you don’t sand well enough. It’s best to just minimize squeeze out in the first place. If you’re just a sloppy glue-er-upper, then you may want to stick with hide glue, since it doesn’t seem to be as problematic if you didn’t sand a glue spot well enough before applying finish.

Shaker Cherry Wall Cupboard Gluing Face Frames And Clamping With Woodworking Clamps

After the face frame boards were glued on, I went ahead and did final hand planing, scraping & sanding of all the assembled parts (including the bottom piece and top piece, that will be shown in the following step).

3. ATTACH THE BOTTOM, BACK, AND TOP

Shaker Cherry Wall Cupboard Spreading Glue On Bottom

After the glue on the face frame boards dried, I glued the bottom piece onto the carcass. In fact, you could just as easily glue the bottom piece on before the face frame boards. In the photo above you can see that I used liquid hide glue (this Titebond hide glue). Mostly because it was closer to my workbench. Just be careful to check the expiration date on your liquid hide glue, because it really does expire, and won’t hold like it should. You could alternatively heat up your own fresh hide glue crystals if you can find a hide glue pot.

I clamped the bottom piece on, but didn’t reinforce it with nails, because there will be no stress on the bottom. It just needs to hang in there!

Shaker Cherry Wall Cupboard Gluing Bottom And Clamping With Woodworking Clamps

After the bottom piece was glued on, I applied several coats of Danish Oil, a nice penetrating wiping varnish. I didn’t need a super protective finish, because this cupboard will be hanging on the wall, and won’t be exposed to all the spills and abuse that a table or chair is. I also applied finish to the slide-in-back piece, and let all the pieces dry. A wipe-on varnish is an easy and fast finish, but if you’re in a real hurry, try a dewaxed (and properly thinned) Shellac finish. You could do all the finishing in a couple of hours.

Applying Oil Finish To Dovetail Carcass Of Shaker Cherry Hanging Wall Cupboard

After all the parts dried (over several days of applying the coats), I slid the back into the grooves.

Sliding Back Into A Shaker Cherry Hanging Wall Cupboard

I made sure that the width of the slide-in-back was about 1/4-inch narrower than the distance between the walls of the grooves. That gives me 1/8-inch of a gap on each of the sides, because my grooves were plowed to about 1/4-inch deep. When humidity levels change, wood expands & contracts in width, so you don’t want the back to expand to be too wide, or it could break the back or the carcass.

Peg Hole Of A Shaker Cherry Hanging Wall Cupboard

I drilled pilot holes in the top piece, then spread glue on the top of the carcass, and slid the top board in place. Notice how the top board has a notch cut out in it to make room for the protruding back piece:

Shaker Cherry Wall Cupboard Attaching Top

I made sure the top was aligned properly, and then used traditional cut nails to fasten the top piece. I aimed to have them enter the carcass in the middle of the vertical sides and face frame boards. Make sure you align the long edge of the rectangular nail with the grain. If you do it backward, there’s more of a chance that the nail will split your wood (think splitting firewood). The nails go in a lot easier with some soft wax:

A Hand Holding A Cut Nail To Attach A Top With A Hammer On A Shaker Wall Cupboard

Sometimes I dip my nails in my beeswax finish (see the recipe here), and sometimes in a wax introduced to me by my friend David Ray Pine, who teaches several classes here (see his classes here and his workshop tour here). He mixes 3-in-1 multi-purpose oil with melted wax (beeswax or paraffin wax). This makes the nail go in easier. It also works great for screws.

Why did I use nails on the top piece, but not on the bottom piece? You’ll notice that when you hang the knob hole on a shaker knob, all the weight will be pushing up against the top piece. So nails work with the glue to keep the top piece from flying off. You can also hammer some small finish nails into the back piece, to add greater strength.

An alternate (and more common) type of cupboard back, is setting ship lapped boards into rabbets in the carcass, and nailing them into the back:

Ship Lap Back In Rabbet Back Of Walnut Spice Cupboard

The rabbet joints would be used in place of the grooves that I plowed in the Shaker cupboard. And the ship lap joint is just two rabbet joints facing each other, so they can expand & contract with changes in humidity.

4. MAKE & HANG A FRAME & PANEL DOOR

Diagram Frame And Panel Door Parts Construction

The above graphic shows how a frame and panel door fits together. The “Rails” run horizontally (think of a hand rail) and the stiles run vertically. The rails and stiles fit together with mortise and tenon joints. Both the stiles and rails have grooves cut into them for the floating panel to sit in. The rails have tenons, which fit into the mortises of the stiles. The tenons and mortises are cut after the grooves are plowed (with a plow plane, table saw, or router table). Notice how the rail tenons have little “haunches” left on them to plug up the groove in the stiles:

Mortise Tenon Stile Rail Haunch Joint Door

Most cupboards just have a single panel, so don’t let this double panel confuse you. The addition of a second panel requires a center rail. Look at most any door in your house (even the fake doors), and you’ll see multiple panels, rails, and stiles. If you used a solid piece of wood for a door, the wood would move too much, so a frame and panel door allows the floating panel to expand & contract in width during changes in humidity. Glue isn’t added to the panel, otherwise it wouldn’t be allowed to expand & contract without causing damage to the door. Glue is just added to the mortise & tenon joints.

Frame And Panel Door For A Cherry Shaker Wall Cupboard

You’ll notice that I added a coat of finish to the panels before gluing the frame together. Why? Because if you waited to finish the panel with the rest of the door, the oil may not reach the hidden edges of the panel. When the humidity drops in the winter, the panel will shrink, and an unfinished part of the panel may become visible. I know some very experienced furniture makers who don’t worry about this step, because they take extra care to get their oil finish into the grooves, so don’t get too concerned if you forget to add a coat of finish to the panel before gluing up the door frame.

Frame And Panel Door Being Glued Up With Woodworking Clamps For A Cherry Shaker Wall Cupboard

Again, try to tame the squeeze-out by not adding too much glue to the mortise and tenon joints. Back in 2010 Fine Woodworking magazine published a great article by Hendrik Varju, called  “How to Tame Squeeze-out” (Issue #213, pp. 36-41). It’s a very helpful read, if you get a chance.

Frame And Panel Door Hung On A Cherry Shaker Wall Cupboard

Before adding Danish Oil to the whole door, I fit it with a handplane, cut hinge mortises with a chisel & small router plane, and hung it with some nice butt hinges from Horton Brasses.

Cutting A Cupboard Door Hinge Mortise With A Chisel And Small Router Plane

The subject of hanging a door in a cupboard is more in-depth than this already-too-long article will cover, but you can find a lot of articles & videos on the subject (try Christian Beckvoort‘s article in Fine Woodworking Issue #218, pp. 54-57, called “Frame-and-Panel Doors Made Easier“). I removed the properly-fitted door, bored a hole for the shaker knob, and added several coats of Danish Oil and wax to the door (the same as with the rest of the cupboard).

5. TURN AND INSTALL A SHAKER KNOB

Turning A Cherry Shaker Knob On The Lathe With A Skew Chisel

After adding several coats of finish to the door, and re-hanging it, the last step was to turn a simple Shaker knob out of some scrap cherry wood, and add it to the door. On the lathe I made sure to use calipers to size the tenon to match the hole that I bored in the door. I actually made it a hare too big so I could hand sand it down to the perfect fit, which is just tight enough to not wiggle, but loose enough to twist. I put the Shaker knob in a chuck on the lathe, and added Danish Oil while it was spinning:

Adding Danish Oil Finish To A Shaker Knob On The Lathe

Disclaimer: Wood turning is dangerous, and you should not just experiment with a lathe. Take a good class first. I’m quite a basic woodturner, so don’t use this as a guide on woodturning!

And for the very last step (aside from letting the cupboard sit next to a South-facing window to darken & even out the blotchiness), I made a small wooden latch from some scrap cherry, and bored a hole in it with the same drill bit that I used for the door:

Shaker Knob With Door Latch

Notice how I also drilled a tiny hole in the latch, and through the door knob tenon. I chose a drill bit that would perfectly fit a finish wire nail that I had sitting around. I used pliers to cut the nail to the right length, then used a ball peen hammer to drive it into the latch hole. I made sure that I left an ever so slight gap between the latch and the door, so that the latch would turn freely when twisting the knob.

Shaker Knob With Door Latch And Hammering A Pin

After the small nail pin was inserted, the knob was able to be twisted, which caused the latch to move up and down:

Hand Twisting A Cherry Shaker Knob On A Frame And Panel Door Of A Cupboard

Just push the door closed, twist the knob, and the door stays shut!

Cherry Shaker Knob On A Frame And Panel Door Of A Cupboard

Here are a few more images of the finished Shaker Hanging Wall Cupboard:

Cherry Hanging Shaker Wall Cupboard With Door Closed Built By Joshua Farnsworth

Door Panel Of A Cherry Hanging Shaker Wall Cupboard Built By Joshua Farnsworth

Cherry Hanging Shaker Wall Cupboard With Door Open Showing Shelves Built By Joshua Farnsworth

Shaker Door Knob On A Cherry Hanging Shaker Wall Cupboard Built By Joshua Farnsworth

Please share comments and questions in the comment box, which is at the bottom of this page!

Woodworking Projects

Anatomy of a Shaker Wall Cupboard2021-09-27T15:14:14-04:00
Go to Top