Anatomy of an End Table and Drawer
Learn How Tables and Dovetail Drawers Fit Together, so you can Build Your Own Furniture with Drawers
![]() By Joshua Farnsworth | Updated Mar 11, 2022
By Joshua Farnsworth | Updated Mar 11, 2022
Introduction: Anatomy of a DIY End Table and Drawer
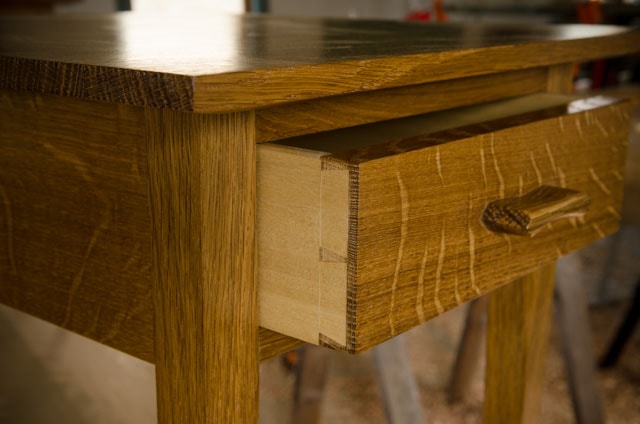
Are you planning on building a DIY end table or do you want to make a table of any other type? Then this article and video will uncover the mystery behind how tables fit together, especially tables with drawers or any other furniture with drawers!
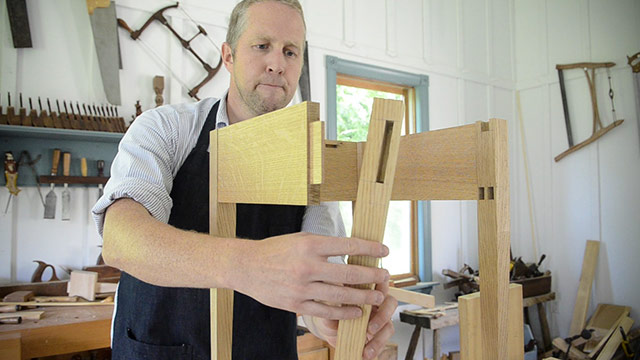
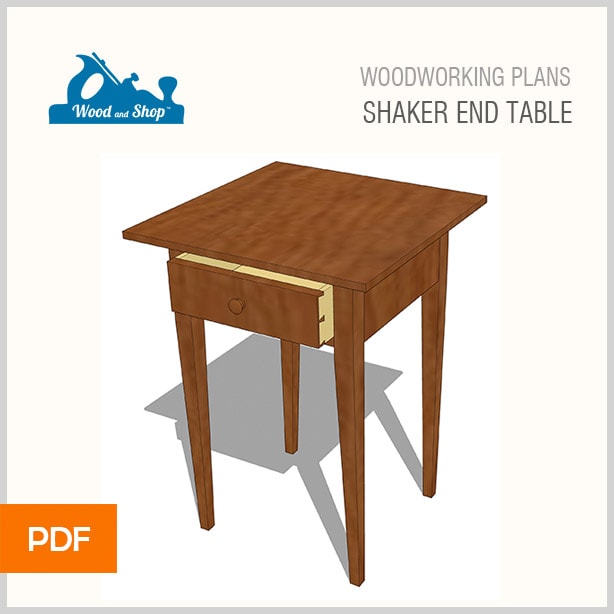
Tables with drawers are really enjoyable to build, but how everything fits together can be confusing for beginner woodworkers. So I’m going to show you how my quartersawn white oak nightstands fit together. And in case you like my table design, here are the plans that I designed, in case you want to buy them for only $4.99.
I did some research and discovered a major lack of written specifics on the anatomy of tables, especially how the inside drawer-holding parts fit together. I flipped through new and old books, and checked a bunch of DVDs, and virtually all of them just skip over the details.
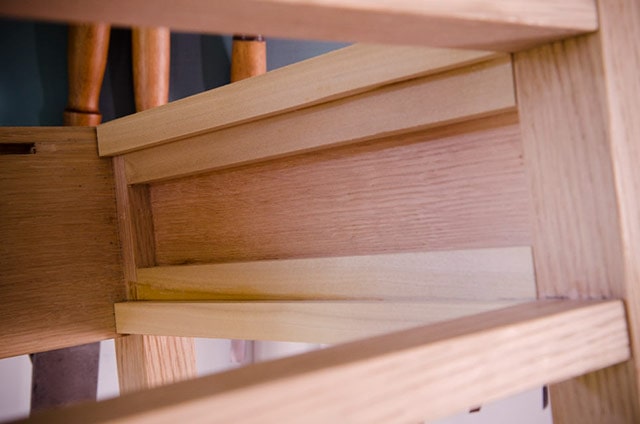
So a new woodworker would have to search extremely hard, or inspect well-built antique furniture to uncover the mystery. You certainly won’t find it by looking at most modern furniture. I just think most beginners would have trouble trying to figure it all out on their own. So I’m going to walk you through how a simple table and drawer fits together over the process of a build. This information will be invaluable when you make a table.
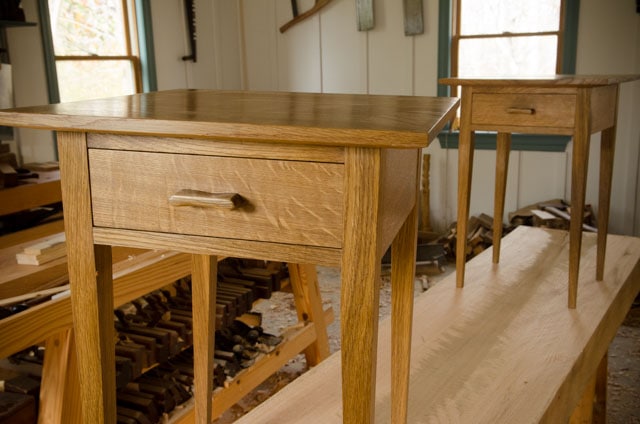
In case you’re curious, this particular set of end tables is made out of the lovely quartersawn white oak lumber that I milled up with my friend Todd Horne from a fallen tree, as featured in this video. Before I talk about how all the joinery and parts fit together, lets first look at the names of all the parts of this DIY end table with a drawer.
Parts of a DIY End Table
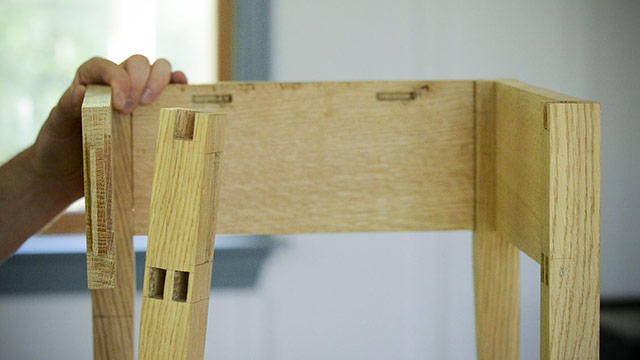
The below photo diagrams show the different parts of a DIY end table with drawers. For more details, certainly watch the video at the top of this article. I’ve divided the table anatomy into (A) visible exterior parts, (B) hidden interior parts, and (C) drawer parts:
A. Visible exterior parts of an end table with a drawer
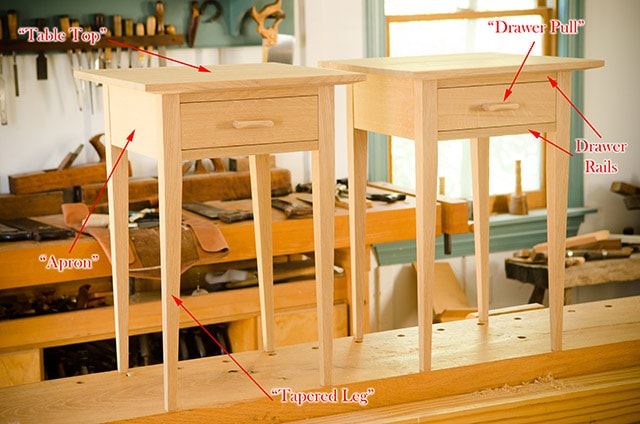
“Table Top”: The table top is the horizontal flat part that protects the interior contents of the table, and offers a surface for setting items on. These particular table tops were made by gluing up several smaller pieces of quartersawn white oak because I wanted less seasonal moisture movement, but mostly because I wanted wood figure on the entire top. It’s really hard to find figured wood that’s 18″ wide.
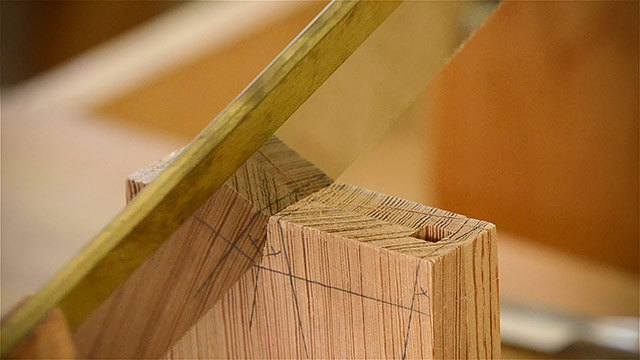
“Apron”: The aprons (sometimes called “skirts”) are the sides and back that enclose three sides of the table. The aprons have tenons that fit into mortises cut into the legs. The rear tenons are beveled with a 45 degree angle to allow the side and rear tenons to meet in the rear legs without getting in the way of the other.
“Tapered Leg”: Table Legs are thin vertical pieces that hold the table up. Legs can be tapered (as pictured above), straight, turned on a lathe (with circular elements), carved, or a mixture of any of these. I prefer the delicate and simple appearance of tapered table legs, which is representative of the Shaker style of furniture. But you may like straight legs from Arts & Crafts furniture or more fancy turned or carved legs from classical furniture styles.
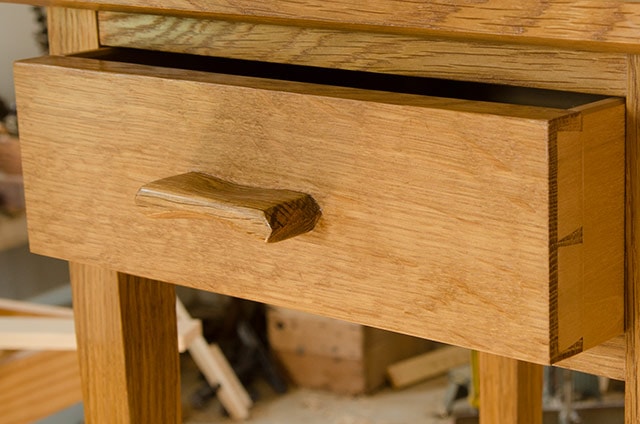
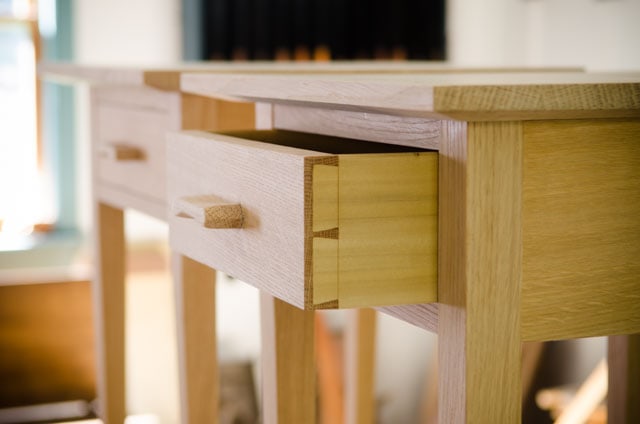
“Drawer Pull”: A drawer pull is a handle or knob that is attached to a drawer front to enable the opening of the drawer. Drawer pulls can be attached with screws or, in the case above, a wedged tenon.
“Drawer Rails”: Drawer rails connect the two front legs, and create a frame for insertion of the drawer.
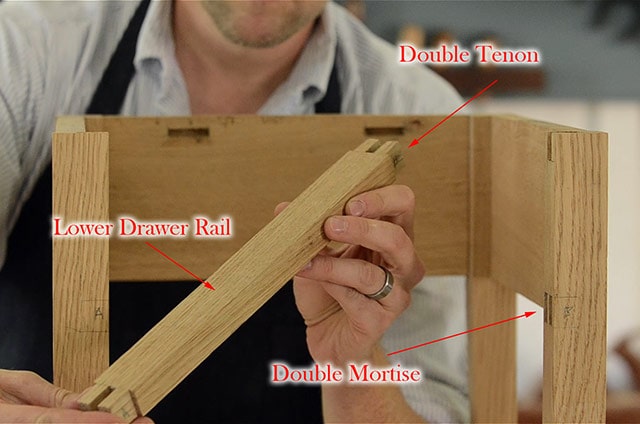
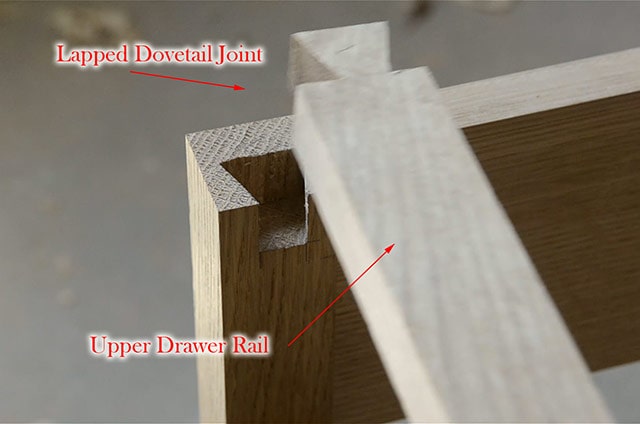
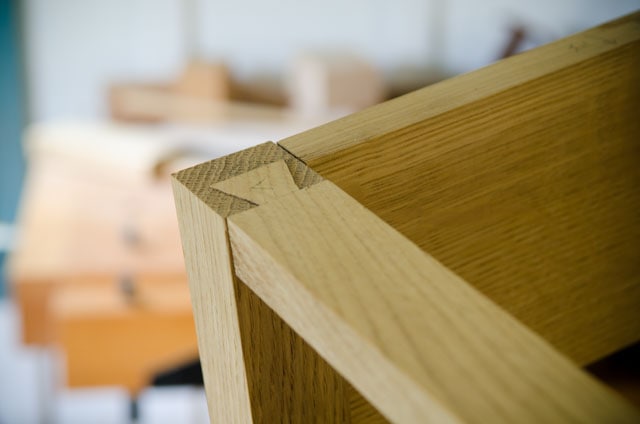
The lower drawer rail has a double tenon that fits into two small mortises in the front legs, and the upper drawer rail has dovetailed ends that are lapped into the tops of the front legs.
C. Parts of a Drawer
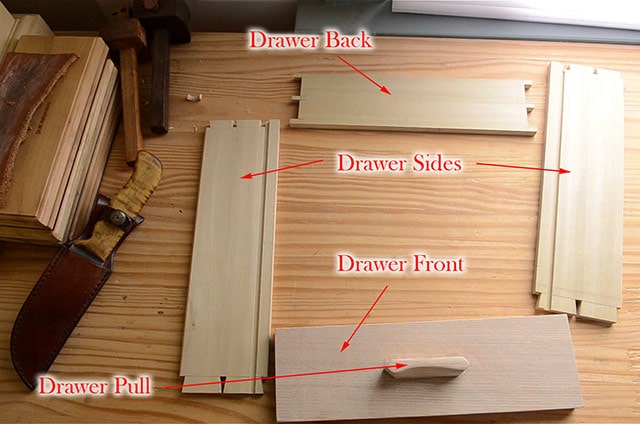
“Drawer Front”: The drawer front is the only visible part of a closed drawer (aside from the pull) and is made from primary wood (like quartersawn white oak, in this case). Drawer fronts usually feature the most visually pleasing wood on the table, as it is the most visible of all table parts. A groove is plowed into the inner side of the drawer front to accept the drawer bottom.
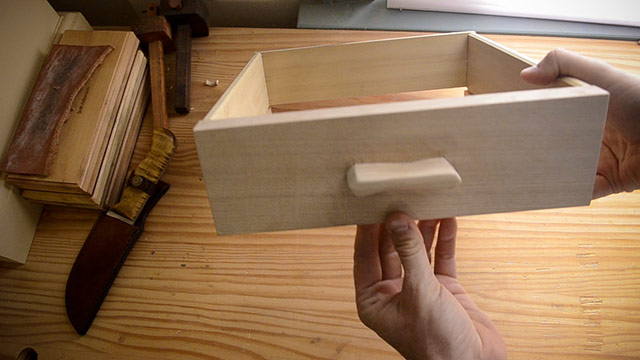
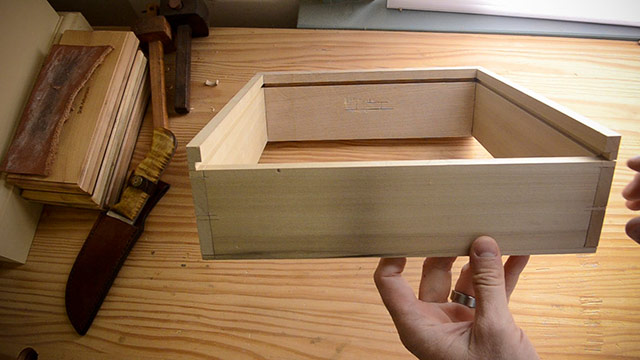
“Drawer Sides”: The left and right drawer sides are connected to the drawer front with half-blind dovetails. Drawer sides are usually made from a secondary wood, like Tulip Poplar or some species of Pine. This saves the furniture maker money, and lightens the drawer. The drawer sides also have grooves plowed into the inner sides to accept the drawer bottom.
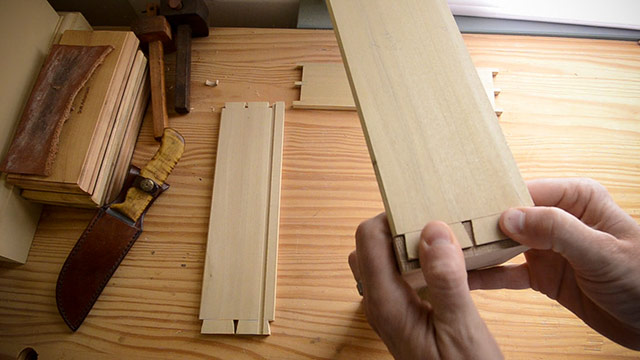
“Drawer Back”: Like the drawer sides, the drawer back is also made of a secondary wood, and is connected to the drawer sides via through-dovetail joints. The drawer bottom is shorter than the drawer sides and front, to allow the drawer bottom to escape underneath it when seasonal changes in humidity cause expansion and contraction of the drawer bottom.
“Drawer Pull”: A drawer pull is a handle or knob that is attached to a drawer front to enable the opening of the drawer. Drawer pulls can be attached with screws or, in the case above, a wedged tenon. I made these pulls with chisels, rasps, and sandpaper.
“Drawer Bottom”: The drawer bottom holds all the contents of the drawer, and prevents them from falling out. Drawer bottoms can be made of plywood (because it doesn’t expand and contract much), but a superior custom drawer is made out of solid wood, like poplar or pine (secondary woods).
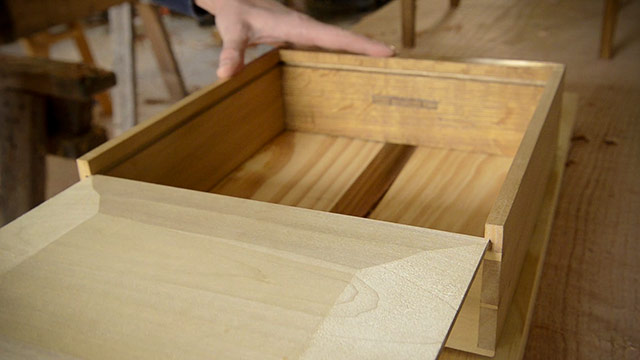
Solid drawer bottoms allow a thicker bottom, with edges that are beveled with a handplane to fit into the grooves in the sides and front. Antique drawers usually have the handplane marks on the bottom. I used a bandsaw to resaw a poplar board for my bottom, milled up the two halves, and glued them together to form a solid bottom.
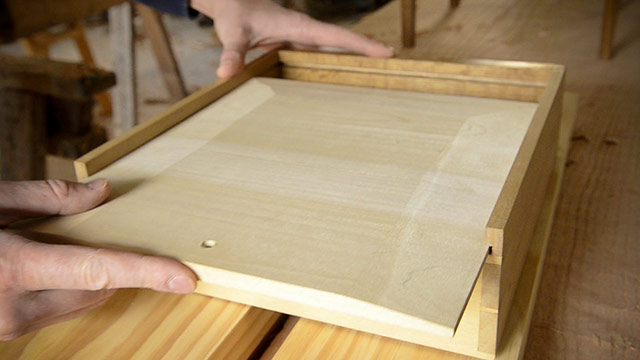
As mentioned above, the drawer is built to manage the seasonal movement of the drawer bottom. Wood doesn’t expand and contract lengthwise, but it does expand & contract widthwise. So furniture makers arrange the drawer bottom in a way to allow the expansion to occur out the back of the drawer.
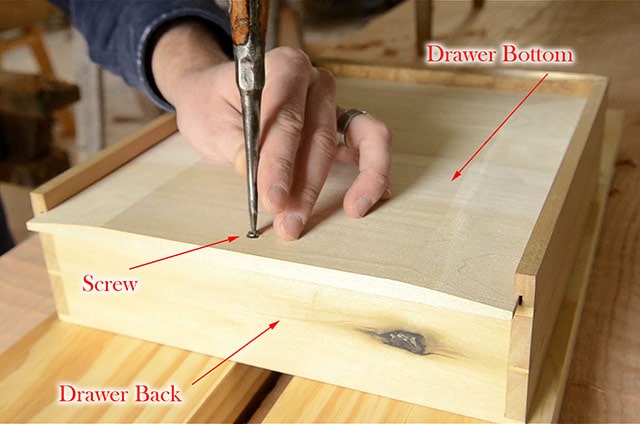
As the above photos show, the drawer bottom sits in the grooves that were plowed into the drawer sides and drawer front, and then sits on the drawer back. The drawer bottom is screwed into the drawer back with one or two screws (only one screw for a small drawer like this). The pilot hole in the drawer bottom is drilled wider than the screw to prevent the drawer from splitting with seasonal movement. It’s like wearing stretchy pants during the holiday season.
How an End Table & Drawer are Assembled
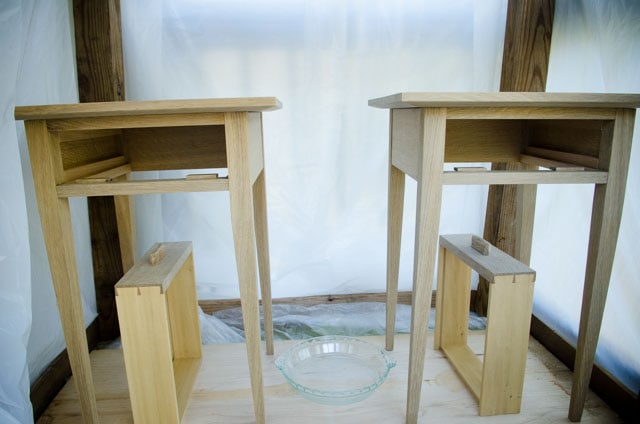
Now I’ll talk about how all the parts fit together when you make a table, including (a) Constructing the Table Frame (visible exterior parts), (b) Constructing the Spacers & Runners (Hidden Interior parts), (c) Drawer Construction and Drawer Fitting, and (d) How to Attach a Table Top. I’ll also include a section on finishing the tables.
A. Constructing the Table Frame (visible exterior parts)
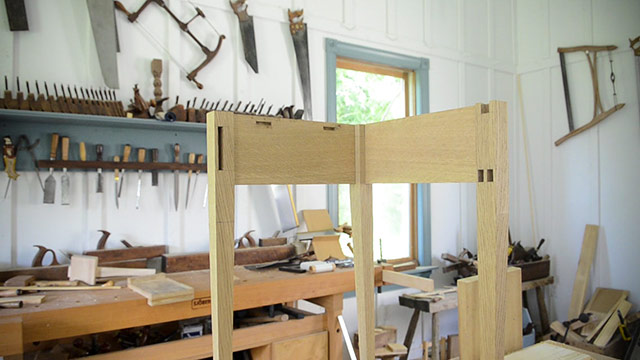
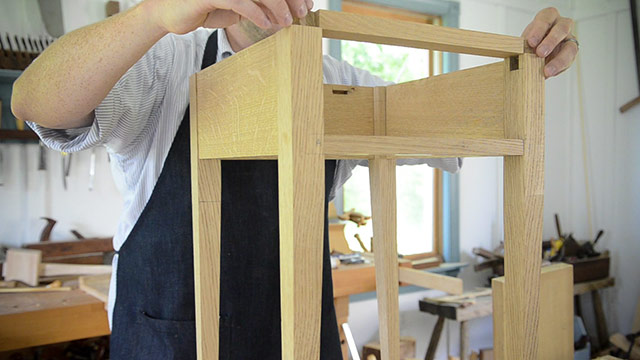
This DIY end table fits together with tenons on the aprons, inserted into mortises that are cut into the four legs. The rear tenons are beveled to allow them to clear each other inside the mortise. The rear legs, of course, each have a mortise on each side to accept the aprons.
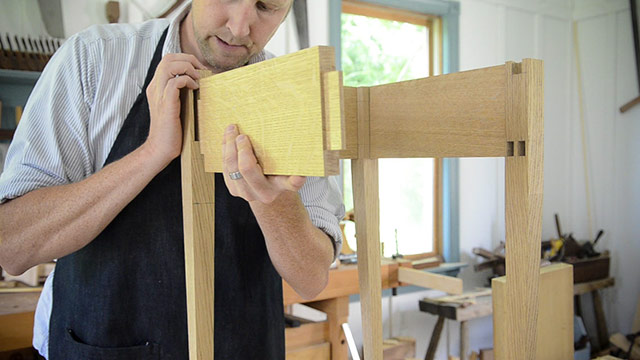
The front two legs are different. Like the rear legs, they have mortises that accept the apron tenons, but on the interior faces are mortises that are cut to provide an opening for the drawer.
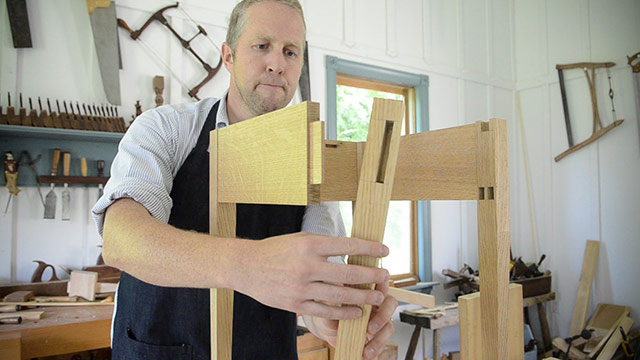
These mortises hold the drawer rails. The lower drawer rail uses a double tenon and double mortise to prevent the rail from twisting over time:
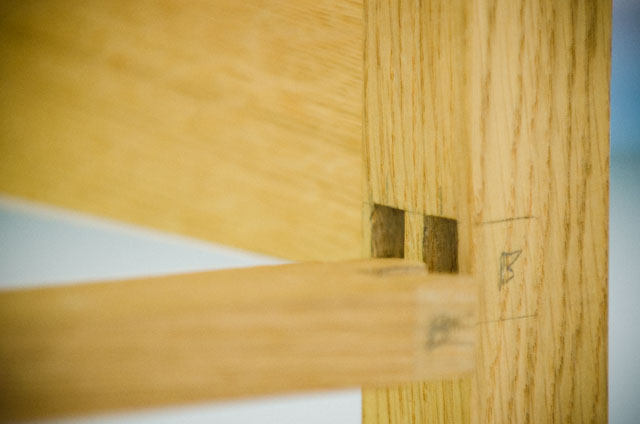
The upper drawer rail uses a dovetail lapped into the top of the leg (pictured below). The dovetailed rail sits proud of the top of the leg so it can be hand planed down later when fitting the table top. Don’t worry if your rail dovetails look ugly. They’ll be covered with the table top later.
For aesthetic purposes I set my drawer rails back about 1/16 of an inch from the front of the table legs to create a “reveal”, as pictured above and below:
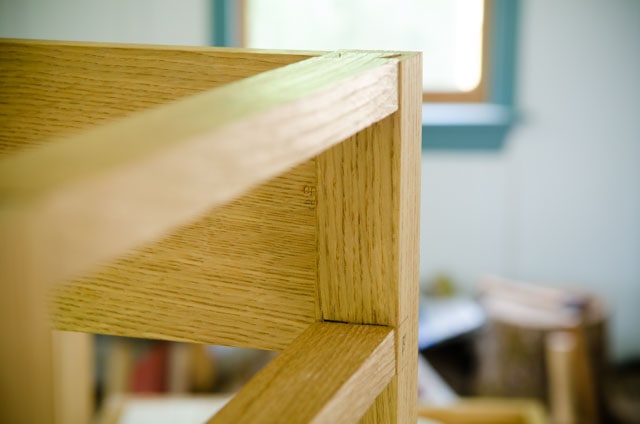
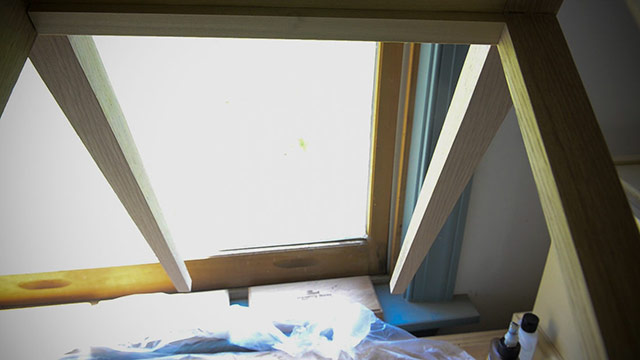
The reveal adds visual interest to the rails and the tapered leg. The tapers on the table legs usually start a few inches down from the drawer rails:
B. Constructing the Spacers, Runners, & Kickers (Hidden Interior parts)
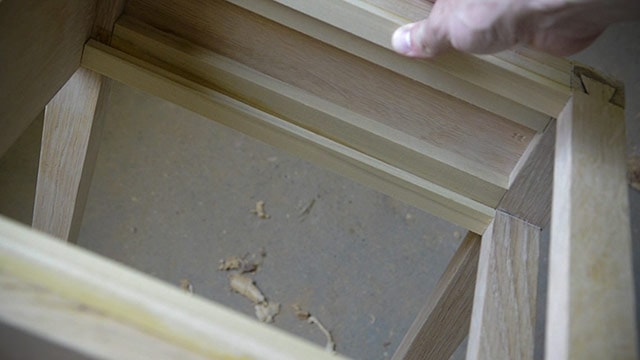
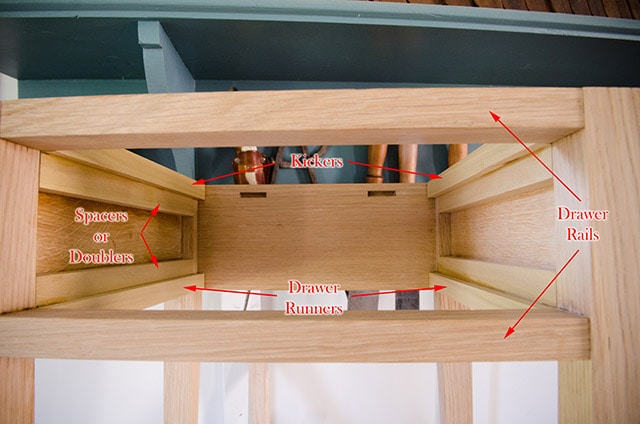
After the table frame is glued up, it’s time to make custom spacers, runners, and kickers. These parts are made out of a secondary wood, like Poplar or pine, and can be permanently attached to the table frame with wood glue. The glue is certainly strong enough to keep them attached, without using nails or screws. I like to use this liquid hide glue for this step.
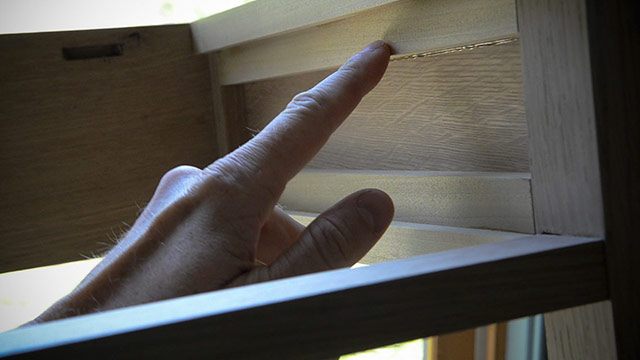
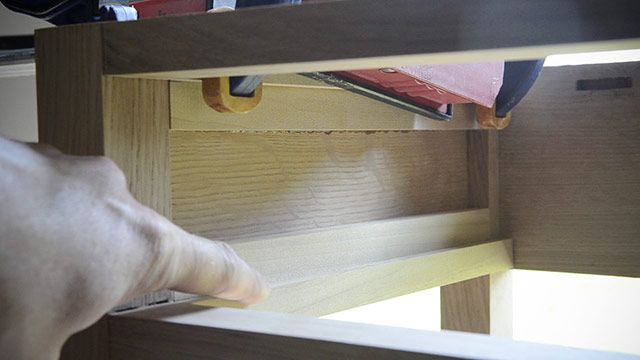
I first glue on the top and bottom spacers (or doublers). I use plenty of wood clamps to ensure that the spacers will stay snugly against the table aprons:
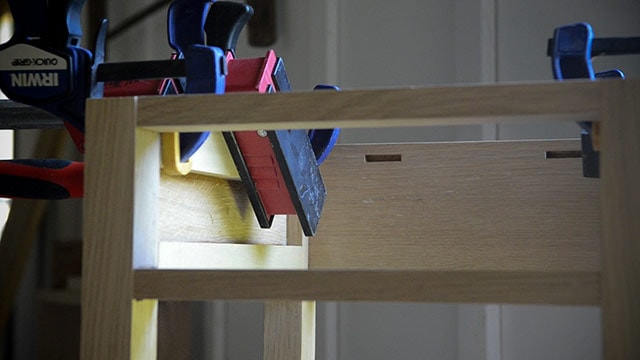
The spacers are made to be flush with the four legs (pictured above). Leave the clamps on for a couple of hours.
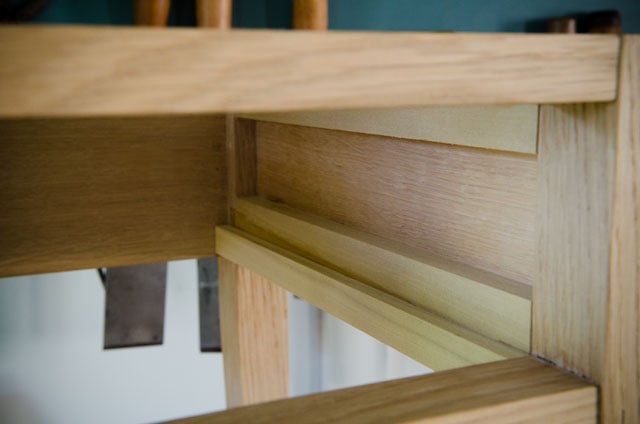
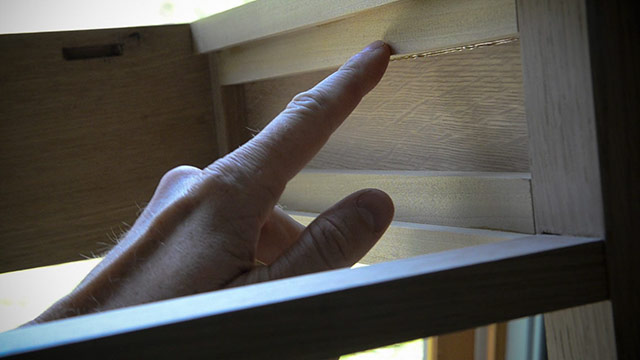
Next, the drawer runners and kickers are glued to the spacers. The drawer runners give a platform for the drawer to run along, and the kickers are added up top to keep the drawer tight against the runners.
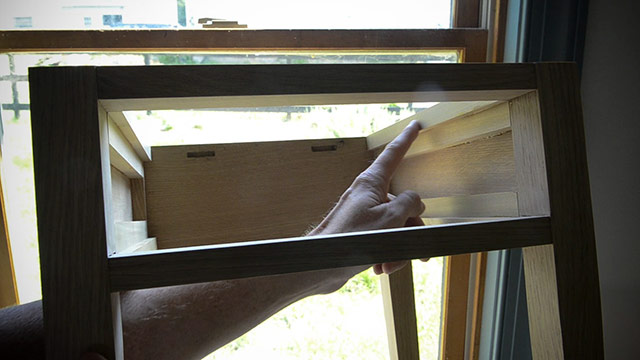
So essentially the drawer rails, drawer runners, drawer kickers, and drawer spacers create the boundaries to ensure your drawer will fit nice and snug. The more precise you are with building these interior parts, the better your drawer will fit in the table.
C. How to Attach a Table Top
There are a variety of methods for attaching table tops, which I’ll mention here:
Wooden Buttons
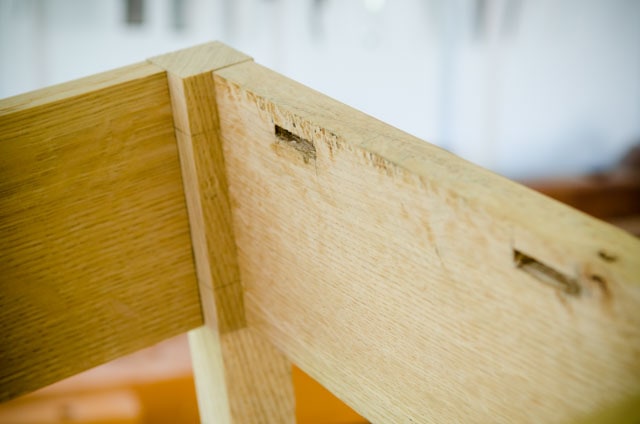
One traditional method to attach table tops is making wooden buttons. To do this you cut shallow mortises into the rear apron, side kickers, and front rail, and make wooden “buttons” that hold the table top tight, while allowing seasonal wood movement.
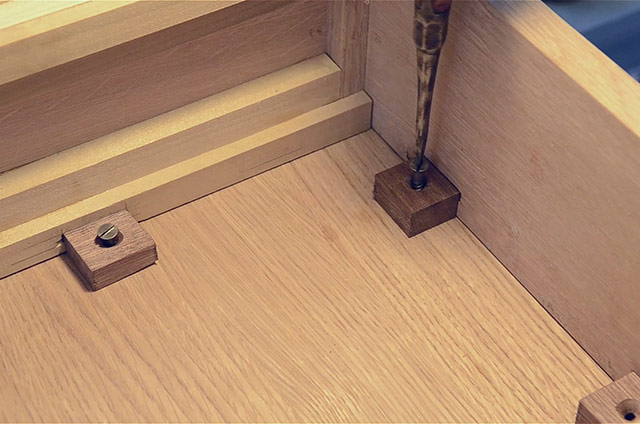
The button mortises should be cut before gluing up the table. I chisel out the button mortises with a ¼” chisel. Buttons are made out of scrap wood, and historical slotted screws are driven into pre-drilled pilot holes.
Metal Button Fasteners
You can also buy inexpensive metal versions of the button style of fastener (see below). This is much easier than making your own wooden buttons.
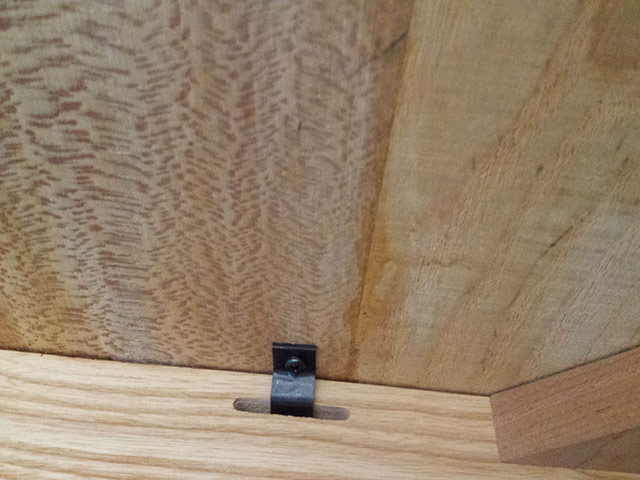
You can find this style of table top fastener here for not very much money. Table top buttons do, however, take a long time to install, because you either have to chop mortises or cut them with a plunge router.
Figure 8 Table Top Fasteners
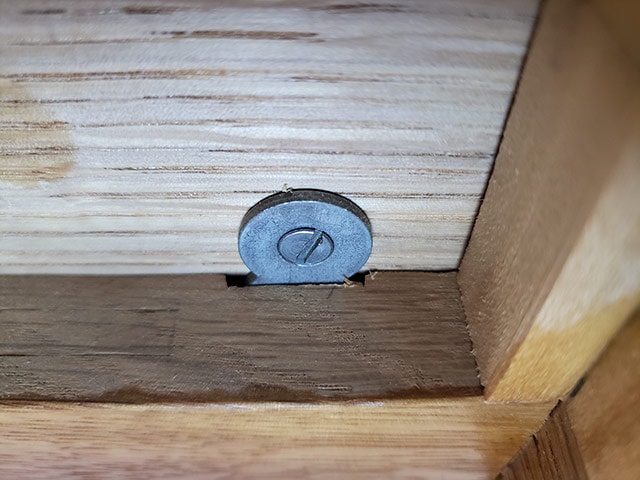
Even more than table top buttons, I’m particularly fond of the figure eight table top fasteners. They are also called Desk Top Fasteners. These are my favorite style of table top fasteners, and in my opinion, the easiest to install:
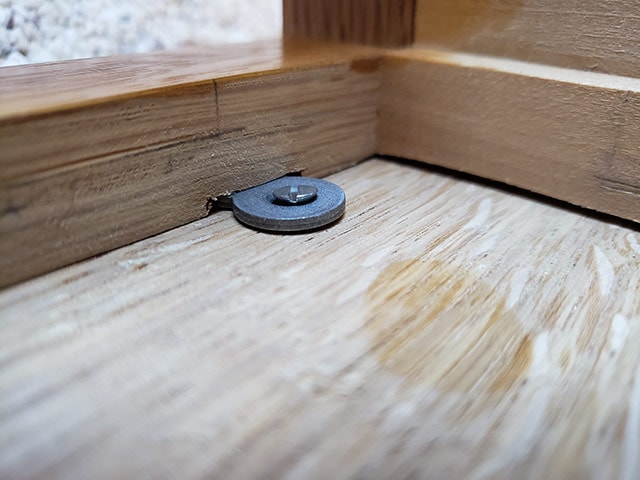
With this style of table top fastener you just bore shallow half circles into the top of your table aprons (same depth as the thickness of the fastener) and screw the other side into the table top. I clamp a sacrificial board to the inside of each apron so I can bore these holes.
You can find the lowest prices on good figure 8 table top fasteners here.
Pocket Screw Holes
Another method for attaching a table top is using pocket holes. I don’t mean using a Kreg jig (unless you want to). I mean using a carving gouge and a wood screw. You can see this method here:
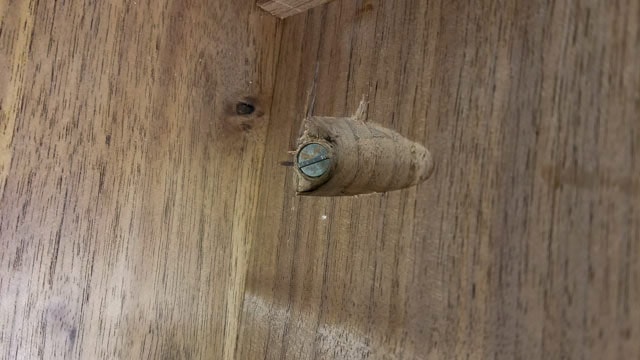
This is a very historical method for attaching table tops.
This is currently the most economical place to purchase table top fasteners. All of these table top fasteners allow for seasonal wood movement, if installed correctly.
I prefer to use an undercut bevel for the tops of my end tables, to give it the aesthetics of a thinner top, but the strength of thicker top. And the slope gives it a nice look. I use a hand plane to make these undercut bevels. Beveling with a handplane is faster than making undercut bevel table saw jigs. But if you plan on making a lot of these tables, using the table saw is the way to go. An undercut beveled top is one sign of quality in an end table like this.
D. Drawer Construction and Drawer Fitting

When building a drawer for a table I make sure that I build the drawer a tad wider than the drawer opening in the table. Why? Because I want the drawer to fit perfectly snug, and I want to make a custom fit. If you build the drawer box to the exact dimensions of your opening, then there’s a good chance that the drawer will be too lose in the opening. I try to make the drawer about 1/16th of an inch wider than the opening. If you build the drawer any wider, then you’ll be doing a whole lot of handplaning in the drawer fitting stage.
Assembling the Dovetail Drawer Box
Now it’s time to assemble the drawer parts. The sides of the drawers are attached to the drawer front using half-blind dovetail joints, and the sides are attached to the back using through-dovetail joints.
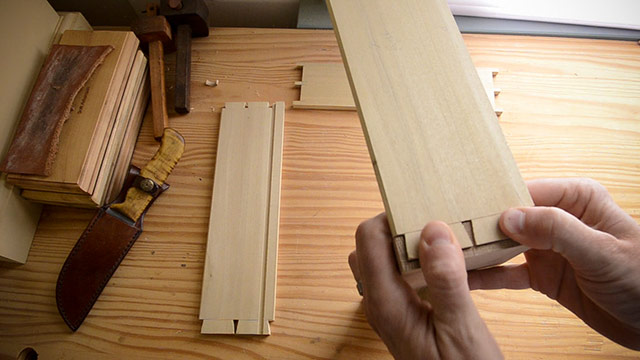
I first attach one drawer side to the drawer front, with the half-blind dovetail joint (pictured above. I then attach the drawer back to that first drawer side.
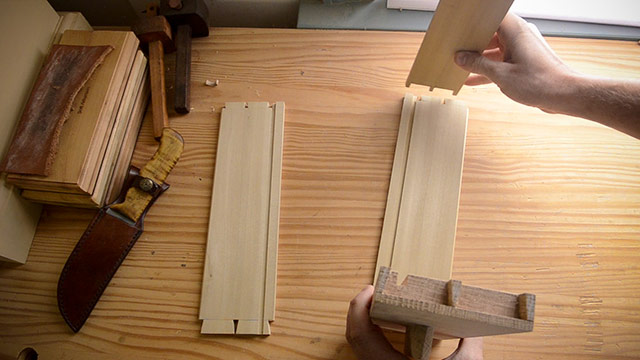
I finish assembling the drawer frame by attaching the second side to the drawer front and drawer back:
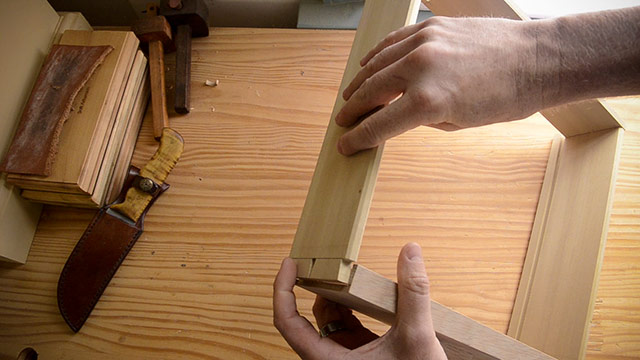
Next I glue up the dovetail drawer box, taking extra care to ensure that the drawer box is square before the glue dries. But I don’t add the drawer bottom yet, since I’ll be sliding in a solid drawer bottom after I ammonia fume and finish the drawer front and drawer box.
Fitting the drawer to the table
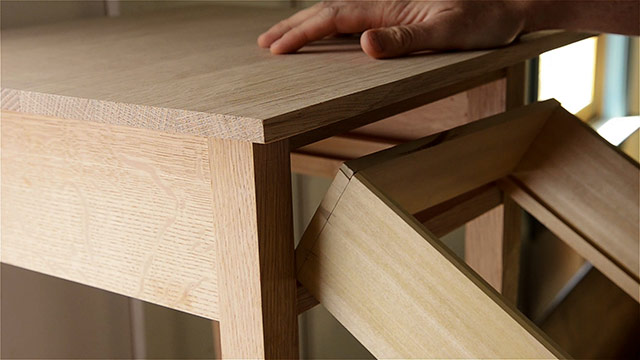
After the glue on the drawer box is dried (I wait overnight, just to be careful), I fit the drawer box to the opening of the table.
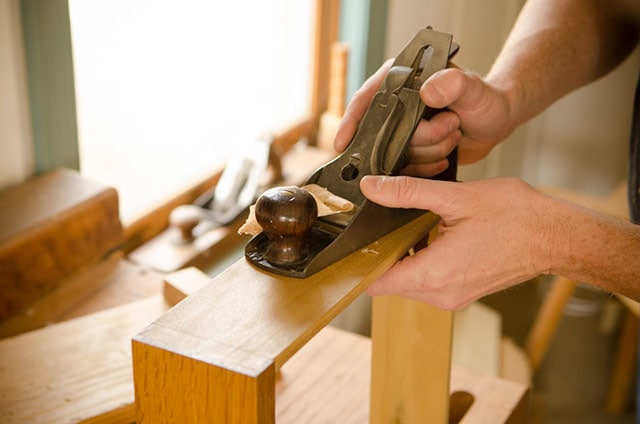
As I mentioned earlier, I make the drawer box about 1/16-inch wider than the opening, so I can custom fit the drawer with a hand plane. The drawer shouldn’t fit in the opening at first. I use a smoothing plane (see my handplane guide here) to take fine shavings from both sides of the drawer box until the drawer box slides in perfectly.
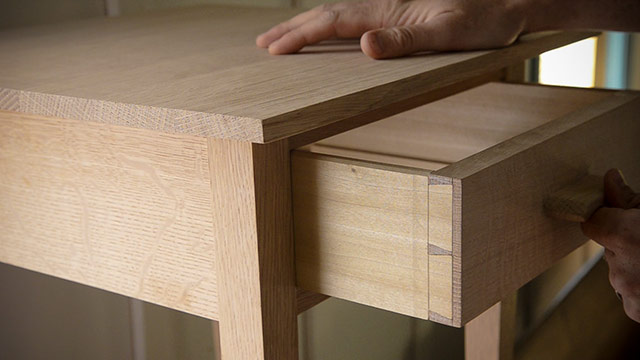
The drawer fitting process also includes handplaning a tad off the top and bottom of the drawer front, to create a very slight space above and below the drawer front, called a “reveal”. The top and bottom reveal prevents the drawer from hanging up, and also helps aesthetically balance the reveal that was created when handplaning the drawer sides.
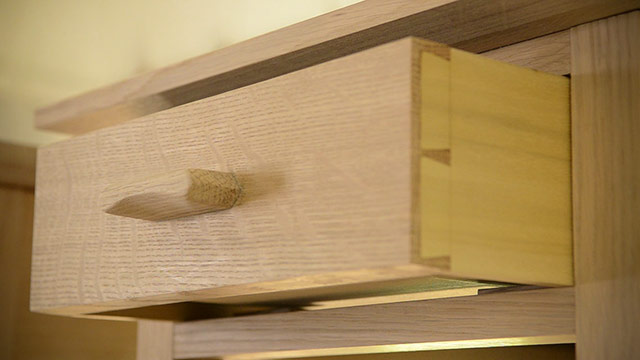
To me, a perfect fit means that the drawer requires a little pressure to get the drawer box to go inside the table, but not so much that it requires too much effort. And a loose drawer would be wobbling around. Watch my video at the top of this page to see how my drawer slides in.
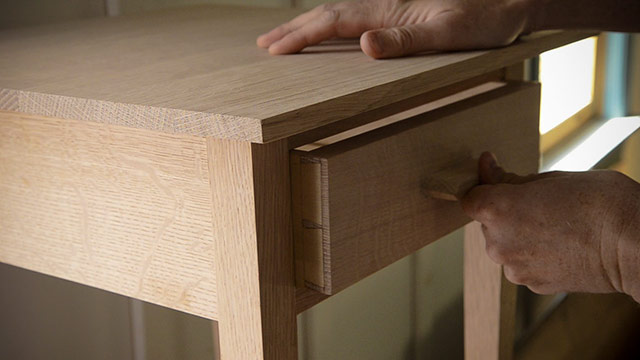
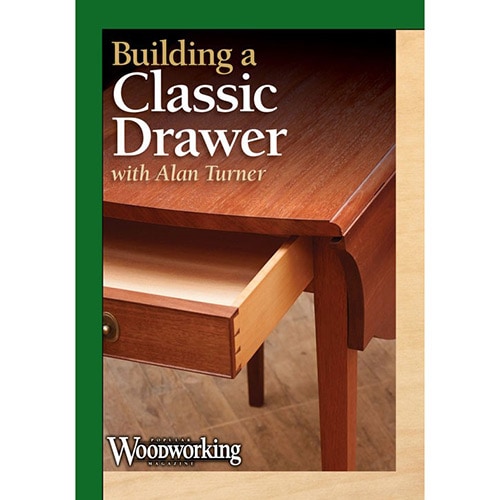
I know this was just a quick explanation on fitting a drawer, but the topic of fitting a drawer could require a whole article on it’s own, depending on how deep you want to delve. You can either just go ahead and experiment with what I just mentioned, or if you want a really good lesson on drawer fitting, here is a great DVD on making fine custom-fit drawers:
Finishing the drawer box
After my drawers are glued up and snugly fit to the table, I use a block plane to bevel the tops of the drawer sides to prevent dings from showing up. You can also see how nice the half-blind dovetails look after the drawer sides have been hand planed for fitting.
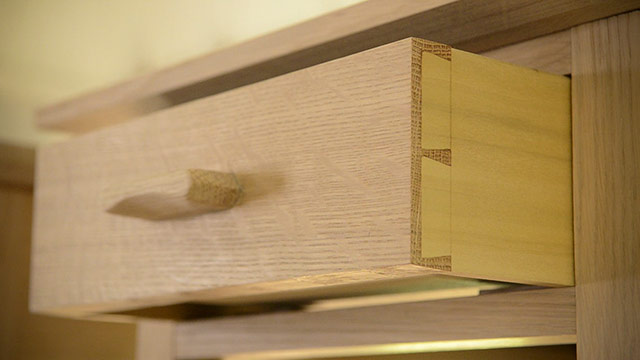
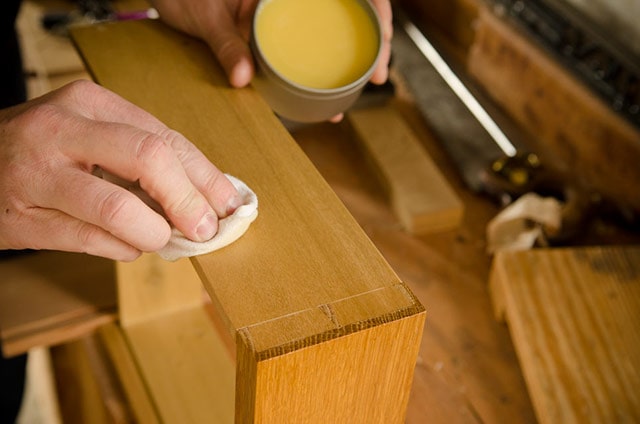
The marking gauge line remains visible, which is historically accurate, so don’t try to sand them out! I also finish the secondary wood parts of the drawer (sides, back, and bottom) with a few coats of thinned down dewaxed shellac (scuffing between coats with steel wool). And later, after finishing the drawer front and table, I add a beeswax wood finish / beeswax polish for a little extra protection and sheen.
The shellac and beeswax wood finish gives the drawer box a slight amount of moister protection. Thinned shellac only takes a few minutes to dry, and applying a wax only take s a minute or two, so this process is very quick.
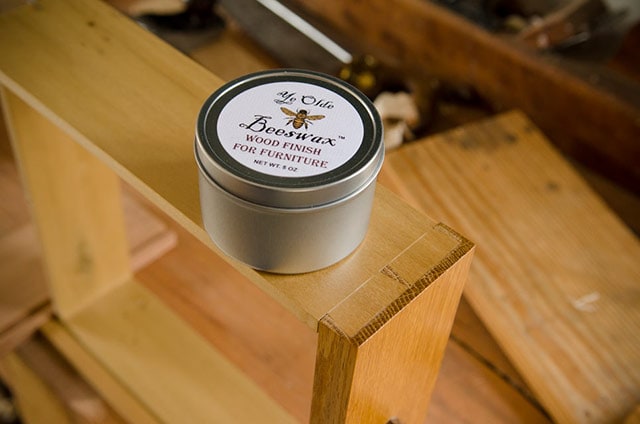
You can buy my “Ye Olde Beeswax Wood Finish For Furniture” here.
You don’t have to do any finishing on the interior drawer parts if you don’t want to. I just find that it makes the drawer interior look nicer for a longer period of time. And it offers protection from dirt and grime, and also moisture (when I wipe clean the drawer with a damp cloth).
I did an ammonia fuming on these tables and drawers, so the Shellac prevented the drawer box from any darkening.
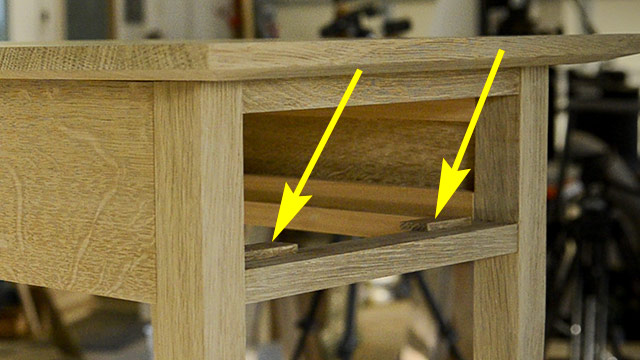
Drawer stops are added to stop the drawer from going too far into the table. They stop the drawer front even with the drawer rails. I simply glue little blocks on the lower front drawer rail.
On these particular night stands I used a historical finishing method called “fuming” with ammonium hydroxide, or Ammonia as it’s known to most people. In a confined space, the ammonia will react with the tannin in the white oak, darkening it. You can check out my article and video tutorial on fuming these tables here.

After a couple days of fuming in my plastic tent, the end tables look dark and lovely. But not as lovely as when adding a finish. The grain just pops when adding a finish like this. A recipe and instructions for this great penetrating, yet protective, wipe on finish can also be found below.

I then add a drawer bottom. As mentioned earlier, the drawer bottom’s grain runs side to side, which means the wood will move front to back. This is why the drawer back is kept out of the way.
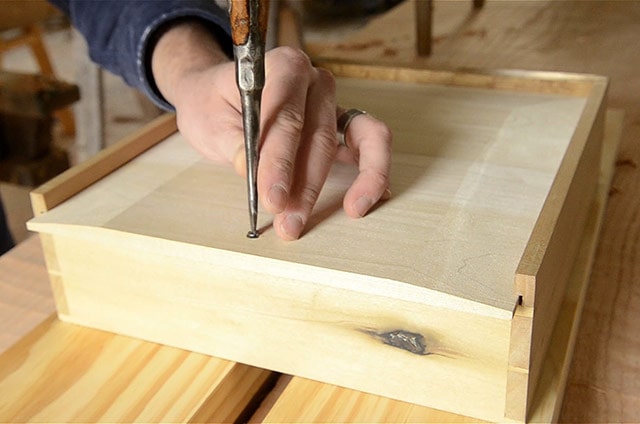
The drawer bottom is beveled with a hand plane, slid into the drawer bow, and then attached to the drawer bottom with a screw. The screw hole in the drawer bottom is slightly larger than the screw, so that seasonal wood movement won’t destroy the drawer. I make the hole oval shaped. I like to use historical-style slotted screws for this purpose. You can check out my video blog post on making affordable historical slotted screws here.
Bonus: Wiping Varnish Finish Recipe for Tables
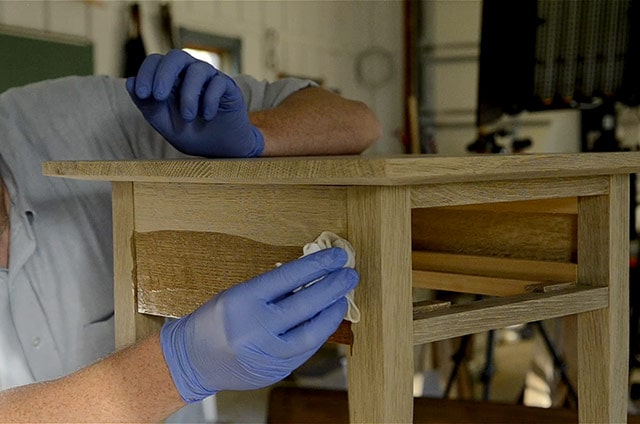
This is an easy, lovely, and protective wood finish recipe that is based on a recipe that my friend Will Myers shared with me. I like it because it brings out the figure and gives depth with some oil, but offers protection that a table needs, without getting a plastic look.
- Mix Natural Danish Oil and Satin Polyurethane in a 50/50 mixture. I like to use a small jam-sized canning jar (8 oz – 12 oz. size).
- Use a lint-free cloth, or old t-shirt scraps to wipe on a first coat. Wait 10-15 minutes, and then wipe off the excess with a clean cloth. Let the first coat dry for three days.
- Lightly sand or scuff between coats with 0000 steel wool, an ultra fine Scotch-Brite pad, or very fine sandpaper. This finish really doesn’t build enough film to need wet sanding, so just lightly dry scuff between coats.
- Repeat the above steps two more times.
- After the last (third) coat has dried for three days, lightly scuff the surface again, and buff with a nice furniture wax and a cotton cloth (an old T-shirt). You can buy my “Ye Olde Beeswax Wood Finish For Furniture” here. Waiting a week before applying a wax finish is even better so that the oil finish gets a nice long time to harden. Don’t leave the wax on longer than 10 minutes before buffing it with a soft cotton cloth.
- Tip: This finish will thicken up in the jar and be unusable after a few weeks, so if you have leftovers, I spray a bit of Bloxygen to preserve it and then close the lid. I also spray this into my danish oil can and polyurethane can (and all my varnishes). Bloxygen is argon gas that displaces the oxygen, which preserves your wood finishes. It has saved me a lot of money in wasted wood finish. It’s especially good to spray in Waterlox, which tends to coagulate more quickly than other finishes I’ve used.
Conclusion
And here are the finished end tables! Hopefully this has educated you on the anatomy and process of making tables with drawers.
The construction process gets a bit more complex when introducing more than one drawer, but that will be a lot easier for you to understand now. I get educated more and more each time I build something, so now go and build a table of your own!
(This article was originally published Dec 01, 2017)



Thanks for the lesson and everything made sense until the the mixing of the finish. Everyone has a take on this subject and every label claims that their product is the best, but that’s another topic for another day. What I’m curious about is why bother mixing danish oil with poly. Why not instead just add a little more poly into Tung oil or BLO. Essentially that’s all you’re doing with the method you’ve described. I guess for the sake… Read more »
I’m no finishing chemist, but I have mixed poly and BLO plenty of times. I’ll have to do the two finishes side-by-side to see the difference. Thanks for the comment!
That was very helpful. I think a review of the “anatomy” without the making is a useful exercise. Thank you, Joshua
Glad it was helpful Al!
Thank you for sharing this video. I have an end table project coming up (first time) and I learned much from you.
You’re most welcome! Make sure to document and post your project here: https://woodandshop.com/submit-your-woodworking-project-workshop/
This is the most thorough description of the parts of a table with drawer I have ever come across. Excellent tutorial.
Glad it was helpful Jeff! What else do you feel would be helpful for me to teach?
Josh, This is the ONLY drawer explanation I have e ver found in ANY literary plan . You have definitely produced a clear and excellent tutorial with this one. Also appreciated the formula for the “Will Myers Finish” which I intend to use on the Morvaian Workbench he taught me to build at Sir Roys.
Hey Warren, great to hear from you! I’m really happy that this helped. It’s true that there’s a major lack of instruction on this topic, other than some older Fine Woodworking Magazines. I’m going to work on a similar tutorial for wall cabinets with frame & panel doors, since there seems to be a similar lack of published information on those too. Do you think that would be helpful?
Yes Josh, My knowledge of panel doors came from the class you and I attended at “Sir Roys”. Think fame and panel doors will make agreat tutorial.
Sounds awesome Joshua. Thanks for all the hard work. This is a great beginner wood working project. My high school students are going to love working along with this project.
Fantastic! Where’s the school? It would be great for you to share photos of the students building their nightstands!
I’m up in Milwaukee at Messmer High School. I’m trying to get kids to use the math they learn in school to make amazing things. Intro to Craftsmanship is what I call it. The carpenters union is quite interested. They are garunteeing jobs to those students I find that show up on time, work hard, and have decent math skills. We’re building our traditional workbenches right now, so it will be a bit for the end tables, but I will… Read more »
I thoroughly enjoyed this presentation of the functional aspects of table/drawer design! Your explanations have expanded and reinforced my understanding of the “why” of the design – I think this will help to make it easier to make my own. Thank you! A natural companion presentation, and something I would really love, would be follow-on video that covers the same aspects of dresser anatomy!
Glad it helped! When you build your own, make sure you share photos and a little write up here: https://woodandshop.com/submit-your-woodworking-project-workshop/
Oh, and I’ll keep the anatomy of a dresser build in mind…thanks for the feedback!
Joshua,would you mind giving out the dimensions of the end table?
Sure Joe. If you can email me I’ll try to measure it for you: https://woodandshop.com/contact/
Hello Celine,
I’m sometimes available for visits. The school will also be open in May: https://woodandshop.com/wood-and-shop-traditional-woodworking-school/
I guess, May would be the ideal time to visit and to plan ahead. Thanks.
Are you living in Australia?
Thanks Josh! Lovely work as always
Thanks Tassos!
Thanks, Joshua. Your work and the resources you provide online are terrific. Regarding the finishing of the tables, is there any other way to get a traditional looking finish that reveals the beauty of the quarter-sawn oak without having to use ammonia? I am trying to keep as many toxins out of my shop – and away from my family – as possible. Thanks, again. I will be grateful for your reply.
Hi George,
You can try a finish with pigment stains and dyes. Fine Woodworking Magazine had an article in issue #157, pages 42-45 called “Safe and Simple Arts and Crafts Finish”. Hope this helps!
Thanks, Joshua! You are clearly as generous as you are highly skilled. If I didn’t live way out here in the Pacific Northwest I would be taking your classes. Let me know if you ever come out here to our Port Townsend School of Woodworking.
You’re most welcome! And thanks for the kind words. What do you mean by generous?
Classes? You teach classes too? Hmm, I’m in Shenandoah county, your just over the mountain. I run a small woodshop out here, also focused mostly on hand tools.
Hello Anthony, yes, we’ve got our school here: https://woodandshop.com/school
That’s great to hear about your shop and classes! Do you have a website I can check out? You should drop by sometime.
Joshua
Whoops… I guess I missed your follow up question. By generous I am referring to the earnest and honest effort you make to provide a thoughtful array of resources on your website, and through your videos. You are not the only site offering tips for new or aspirant woodworking hand tool woodworkers, but your approach suggests you are making the journey yourself, and retain the humility to remember that although you have achieved a masterful level of skill, this sort… Read more »
Hey, thanks for the kind words George. Yes, I do make some money on this venture, but not much profit…if any! When I recommend tools (and I only recommend what I believe in) people use affiliate links (Amazon, ebay, etc.) and I make a small percentage of their sale as a referral fee. It costs viewers nothing, it helps sellers, and it helps a little out here…so win-win-win! But that’s not my main purpose with the site…just a way to… Read more »
G’day. What a great article. You are correct in saying there aren’t many articles about ‘where the drawer goes’ and details of the internal components. Really cleared it up for me – I ‘kinda’ knew but was it always a bit grey – until now.
Thanks again & cheers from Down Under ??
Glad it helped out mate!
Hi. This is a really nice article and video. I’m curious why you chose a double tenon on the lower rail, rather than a single tenon. Is there a an advantage to using two tenons, rather than one larger one?
Thank you!
Thanks Brett! This is a traditional design, and I personally think that the double tenon can better help the board from twisting if it were to move because of moisture change. It also provides more glue surface than a single tenon, which makes for a stronger joint.
This is an older post, but would you be willing to post a picture or diagram of the rear apron with the tenons that are beveled at 45 degrees? You wrote: “The rear tenons are beveled with a 45 degree angle to allow the side and rear tenons to meet in the rear legs without getting in the way of the other.”
Hi Daniel, this article has a photo to illustrate: https://woodandshop.com/how-to-fit-mortise-tenon-part-9-of-build-a-dovetail-desk-with-hand-tools/
I have built several tables and have used M&T for the legs and sides ….the buttons I have used fit into a continuous groove on the inside of the rails ….but your method makes solid sense to me …mostly I have learned from doing ….but although i have used drawers i added Kickers on my own thoughts of what will keep the drawer stable ….this is the first time I have ever watched such a good video explaining the things… Read more »
I’m glad you found my video to be so helpful David!
Interested in these designs, I have build two almost identical tables for daughter and daughter-in-law in Brisbane using Tasmanian Blackwood, with grain matched Camphor Laurel drawer. Anyone wants a photo simply advise an email address
Nice John! Please feel free to share the photo here, or on our forum!