Disclosure: WoodAndShop.com is supported by its audience. When you purchase through certain links on our site, we may earn a small affiliate commission, at no cost to you. Learn more.
Introduction to Buying Woodworking Gauges
By Joshua Farnsworth
In this article I’ll discuss which woodworking gauges, layout, marking & measuring tools you need for woodworking, and which ones you don’t. Precision is key to getting tight fitting joints, whether you’re using hand tools or power tools, so it’s important to use the right marking tools to ensure precision.
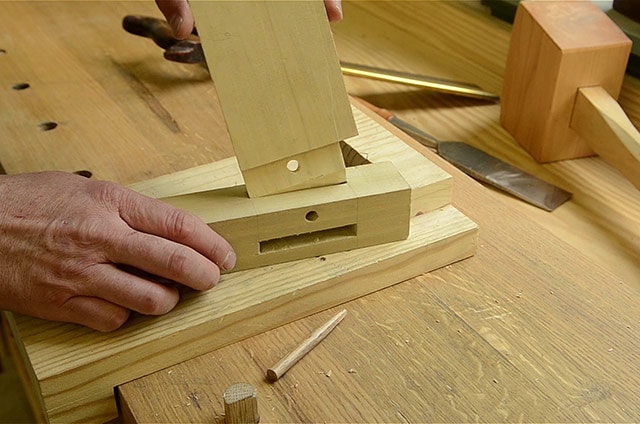
And woodworking gauges like these squares, dividers, and marking gauges help you ensure accuracy. For example, it’s difficult to cut a tight fitting mortise & tenon table leg like this without accurate layout lines to guide you.
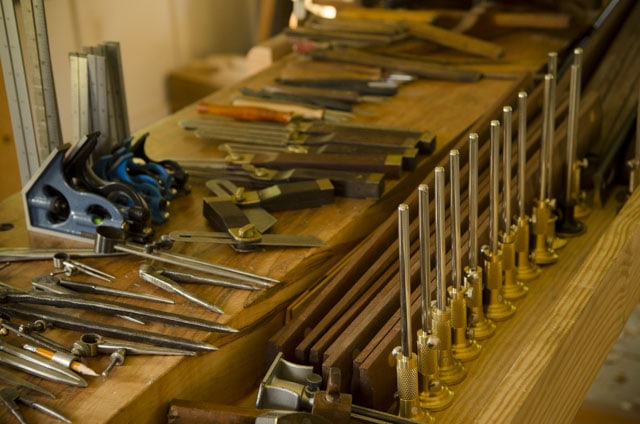
Here in my woodworking school, I have dozens of these tools, so I’ve had a lot of experience in seeing which tools I like best. But more importantly I’ve seen which tools my students like best. And I’ve found some really affordable options that actually work great, which is helpful for students who are on a tight budget. But it can be a bit overwhelming to understand all the different woodworking gauges required for layout, marking, & measuring, so hopefully I can make it a little less confusing for you. At the top of this page is a video I shared that goes along with this article. And below is part two of the video:
Alright, let’s jump into talking about which layout, marking, and measuring tools you need for hand tool woodworking:

RELATED
Which 20 Woodworking Hand Tools Should You Buy First?
Why Traditional Hand Tool Woodworking?
10 Jaw-Dropping Woodworking Shop Tours
57 Page Moravian Workbench Plans Now for Sale
How to Make a Mortise and Tenon Joint with Woodworking Hand Tools
8 Steps to Cutting Dovetails with Woodworking Hand Tools
Buying Squares for Woodworking
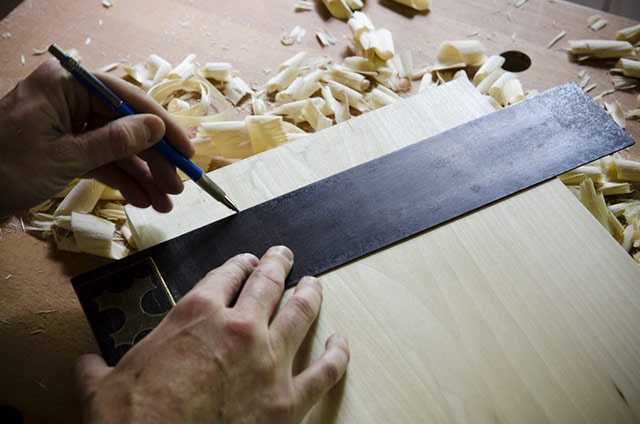
Squares have been around for thousands of years, and are an essential tool for determining if your board’s edge is perfectly 90 degrees to it’s face. That’s important because you want your joints to fit together. Squares are also used for making 90 degree marks on your boards. Squares come in many different sizes and styles, so I won’t mention every type here; just the types that I use here in my workshop.
Buying Combination Squares & Double Squares
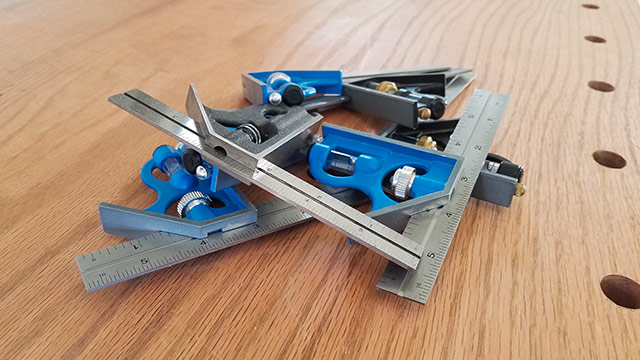
Combination Squares are a more modern style of metal square, and I find them very useful in my workshop, for many tasks. The bar of the square slides back and forth to give you different lengths for measuring and marking your boards. The bearing surface of the square allows you to scribe both a 90 degree line and a 45 degree line.
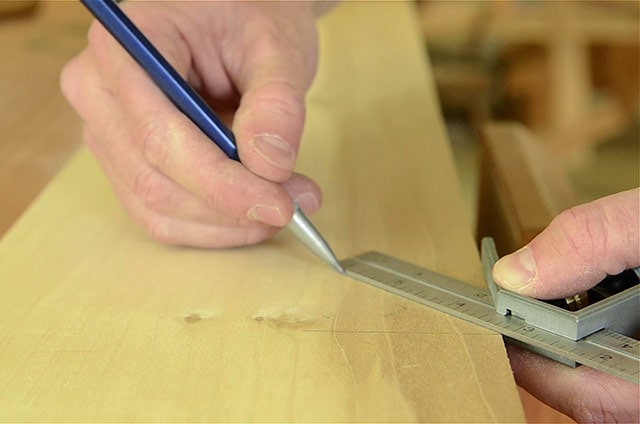
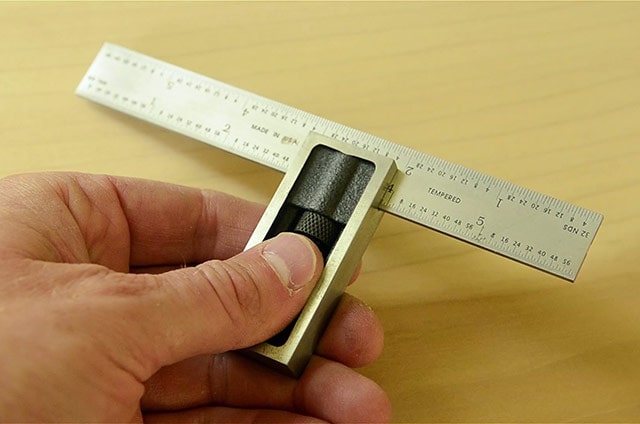
Double squares are like combination squares, but without the 45 degree bearing surface. The below pictured double square is of excellent quality, and you can find it here.
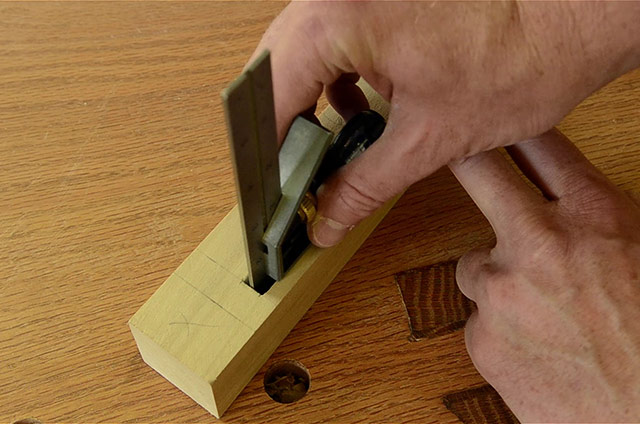
A combination square also works great as a depth gauge, for example, when you’re chopping a mortise.
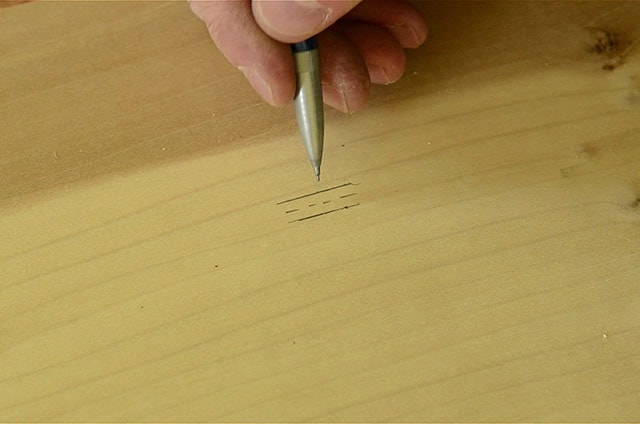
It’s also useful for finding the center of boards. Just as a little side tip, to find a board’s center, I adjust the combination square close to what appears to be the center, and then I mark from both sides, and make marks with a pencil or a marking knife.
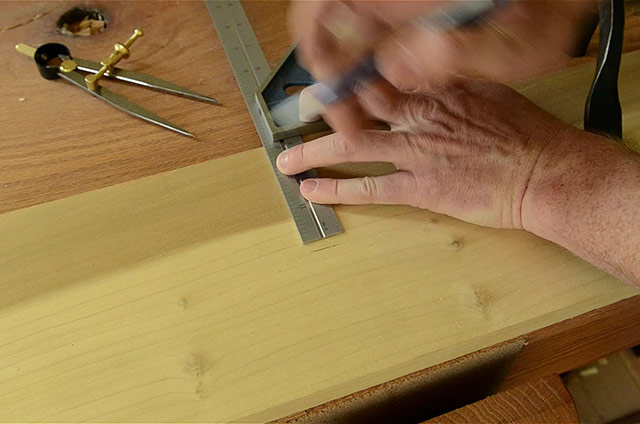
Right in-between those two marks is the center of the board.
Combination squares are also convenient because they’re usually purchased new, and are usually accurate if you buy them from a reputable maker. Vintage squares often need some work to get them back into square. I’ll talk about how to test a square for accuracy in just a minute. But I recommend that my students buy both a 6-inch combination square and a 12-inch combination square. I’ve found that those sizes cover most of the tasks that I encounter when building furniture.
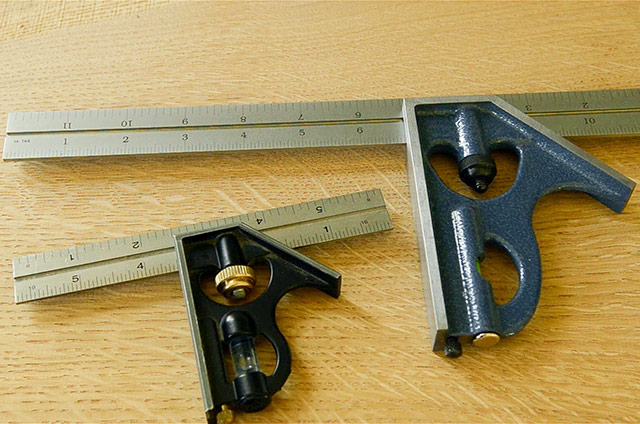
My Favorite Combination Squares (Budget-Friendly)
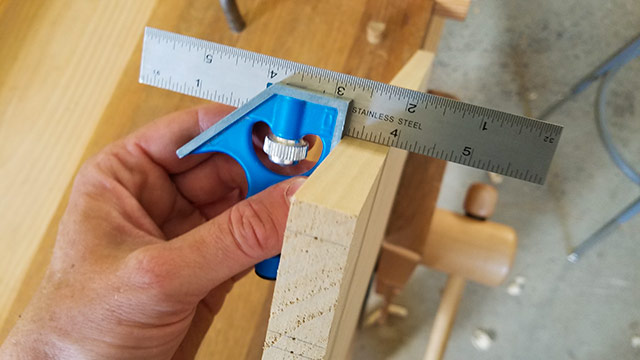
I’m always on the lookout for affordable tools that are also accurate, and I’ve found a couple combination squares that meet those criteria. I’ve bought a bunch of these for my school, and I have yet to find one that’s “out of square”. This particular brand runs about $15 for the 6-inch combination square and about $17 for the 12-inch combination square. You can find the 6-inch combination square here on Amazon for about $14 (including shipping) and you can find the 12-inch combination square here on Amazon for about $17 (including shipping) . They don’t adjust as smoothly as the more expensive combination squares that I’ll mention below, but for the price, I can overlook the smooth adjustments. I have bought about 7 of them for my woodworking school, and they were all square.
My Favorite Combination Squares (If You’ve Got Extra Money to Spend)
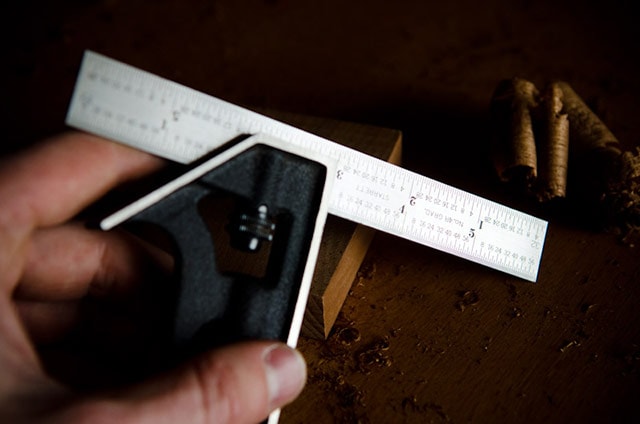
If you’re not on a very tight budget I’d recommend buying a new Starrett 6-inch combination square (I like the version with the 4R markings). I found the best prices here on Amazon (under $75) and here on Highland Woodworking. And here is the 12-inch Starrett combination square.
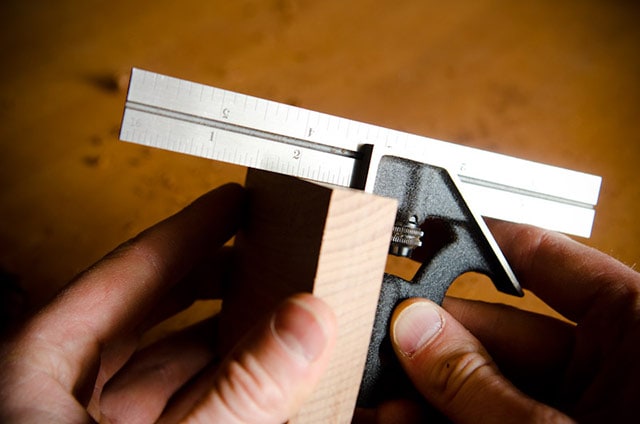
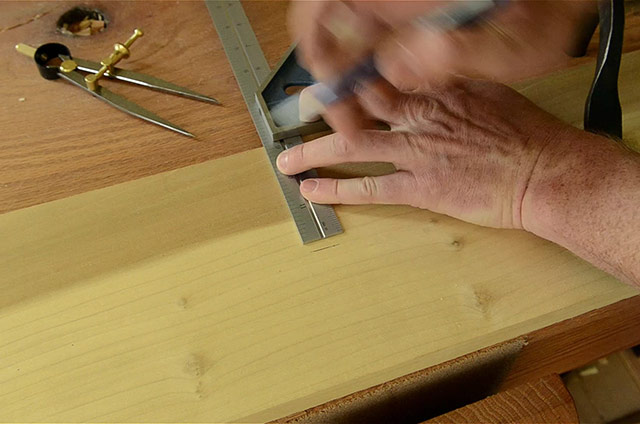
If you can find a used Starrett combination square, in person, and can test it for accuracy (see above) then go for it! If you want to buy a used Starrett combination square on eBay, ask the eBay seller to show you pictures of them testing the square: test the squareness by lining the square along the edge of a board and scribing a line along the inner side of the blade. Flip the square over and try to draw a line over the same line, again with the inner side and outer side of the blade. If the lines line up, then it’s good! If not, then move on or negotiate a lower price.
UPDATE: I have recently gotten two other new 12-inch combination squares from Taylor Toolworks that I really like, this PEC 12-inch 4R Combination Square and also this LaSquare 12-inch 4R Combination Square. They are both quite well-made, beefy, and at about $75 each, they are more affordable than the Starrett 12-inch combination square. You can see Taylor Toolwork’s full line of combination squares here and their double squares here.
Quick Links to All of My Recommended Combination Squares
Here are quick links to the combination squares that I’ve recommended above, so you can quickly compare prices.
- Empire 6″ combination square on Amazon
- Empire 12-inch combination square on Amazon
- PEC 12-inch 4R Combination Square at Taylor Toolworks
- LaSquare 12-inch 4R Combination Square at Taylor Toolworks
- Starrett 6″ Combination square on Amazon
- Starrett 12-inch combination square on Amazon
- Starrett 6″ Combination squares on Highland Woodworking
- Used Starrett combination squares on ebay
Buying or Making Try Squares
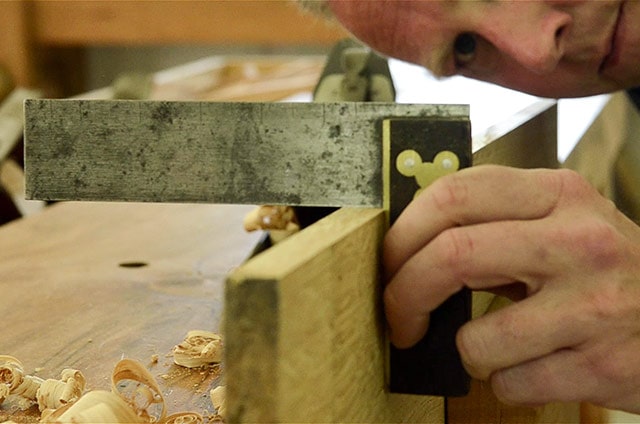
If you’re looking to go more traditional, then a Try Square may be a great option for you. Metal try squares are quite common on the antique market, but often require a good deal of filing to get them back into square.
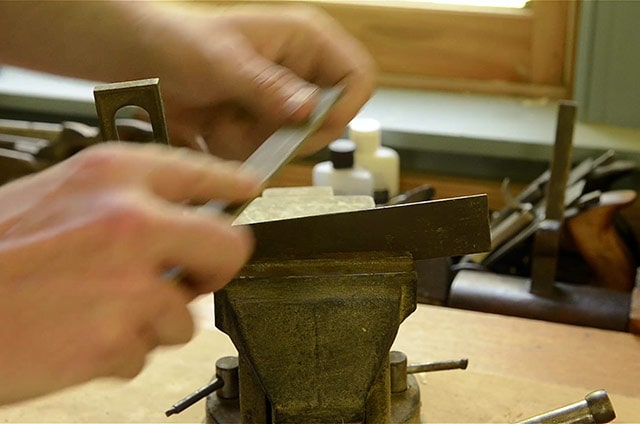
Shop-made wooden try squares are much easier to get back in square, but do require a good deal of time to make them. It’s a tradeoff.
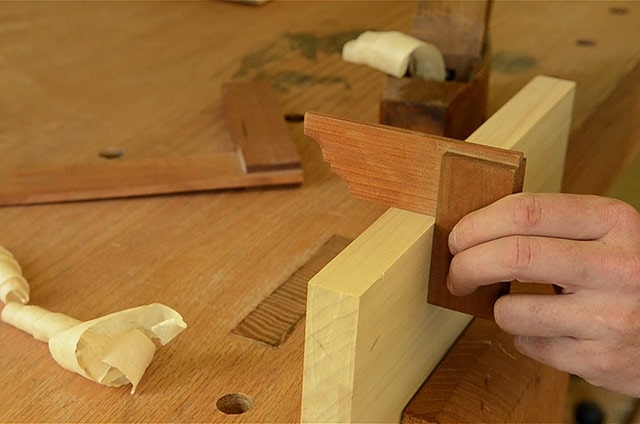
How to Square up an “Out-of-Square” Square
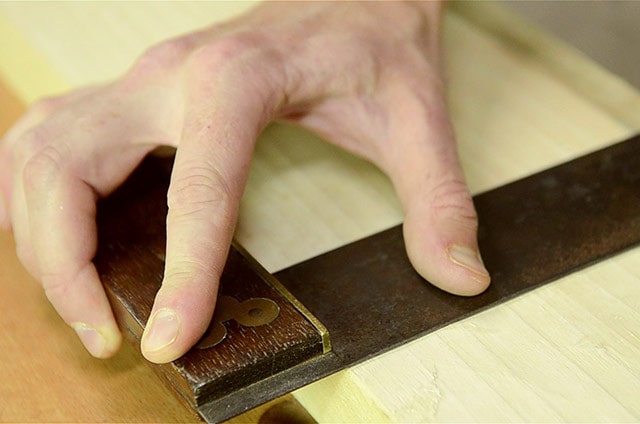
Many of the antique metal try squares that I’ve purchased are out of square when I’ve bought them, but they can be brought back into square with a file. When buying a vintage try square, it’s a good idea to test it for squareness so you make sure it will be accurate. Here’s how I do it:
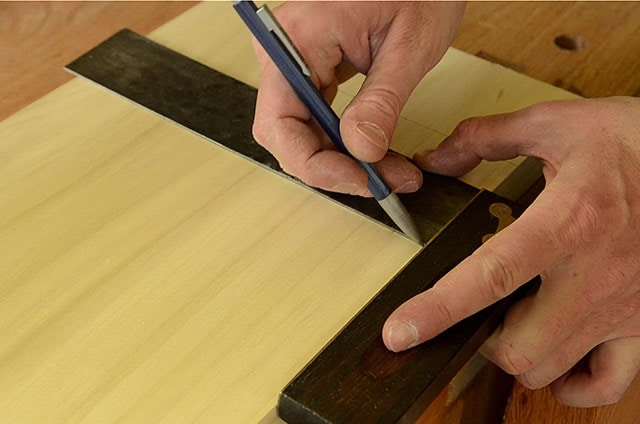
First I line the square up along the edge of a straight board and draw a fine line along the inner side of the blade. I flip the square over and try to draw a line over the same line, again with the inner side of the blade. If the lines line up, then it’s square! I also like to test the outer-side of the blade. If the try square isn’t square, then either move on, or negotiate a lower price. Because it really does take a good deal of filing to get them back into square.
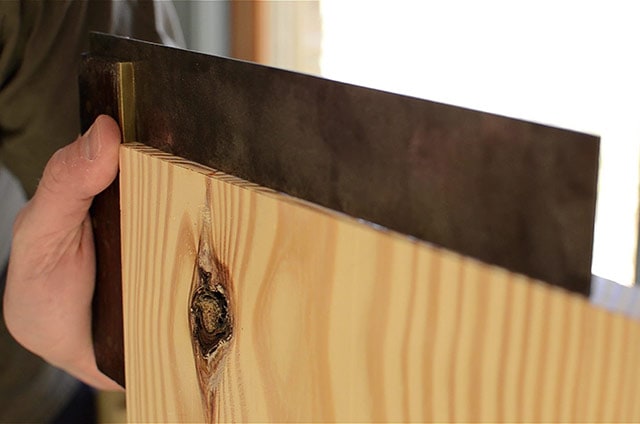
What about new Try squares?
What about new Try squares? I’ve found that many new Try squares are actually out-of-square, and usually too expensive for what you get. That’s why I recommend to either buy combination squares or look for antique Try squares. If you’re going to spend time squaring a try square up, you might as well get a superior antique Try square. But if you like the look of try squares, and don’t want to take the time to find an antique try square, then go ahead and buy a new try square. Here are some new metal try squares on Highland Woodworking. But just make sure you can return the square if it’s “out of square”, or be willing to do some filing to get it in-square.
Where to Buy Antique Try Squares?
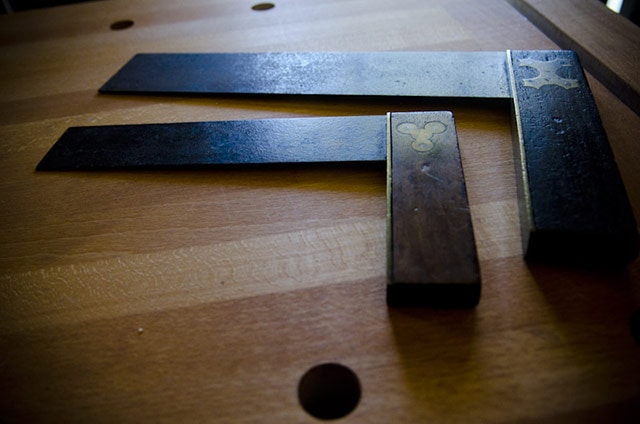
I have bought my large collection of antique try squares at many different places, including tool-collector swaps, from farmers, flea markets, antique stores (usually way overpriced), and on Ebay. You can view vintage metal try squares here on eBay.
Make Your Own Wooden Try Square
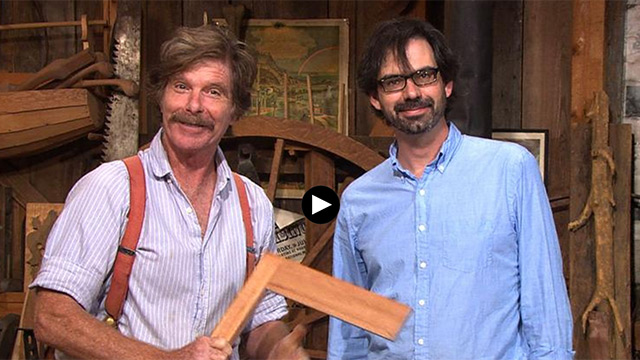
Would you like to learn to build your own accurate wooden try square? It costs next to nothing, is beautiful, and the work will prime you for learning traditional woodworking! In this free video Roy Underhill & Christopher Schwarz talk all about wooden try squares and also show how to make one:
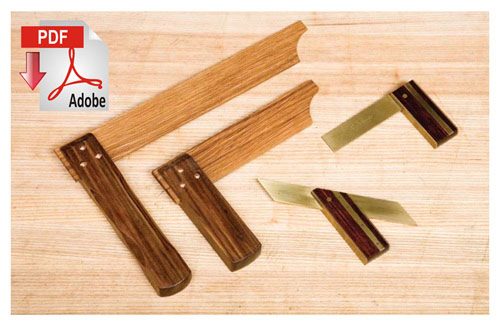
Chris’ book “The Anarchist’s Tool Chest” gives more precise measurements for the square in the above video. If you’d like to learn how to build another accurate try square, then download this free PDF tutorial from Jim Tolpin’s book “The New Traditional Woodworker“:
This book is an excellent introduction to traditional woodworking and can be purchased: here at Highland Woodworking or here at Amazon.
Buying a Framing Square
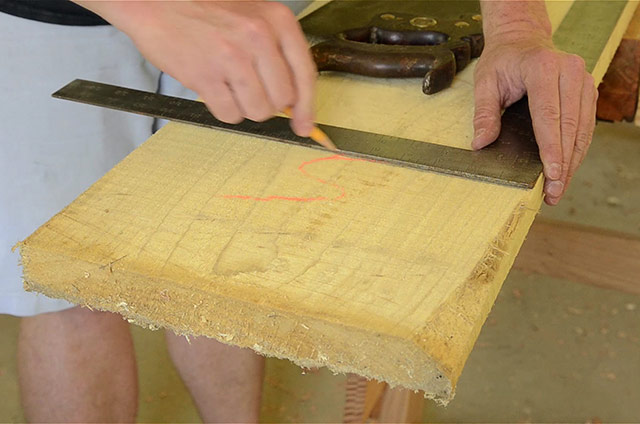
I use framing squares in situations when I don’t need quite as much accuracy, like when I’m crosscutting rough lumber or when I’m doing rough carpentry. It’s not because a framing square can’t be accurate, but because it’s harder for me to register a framing square against a reference surface than with a try square, for example.
Just recently I used my framing squares a lot when I laid out a bunch of stringers for the new front stairs I built for my house (if you’ve attended a class here, and eaten on the front porch, you’ll be glad to see these new stairs!).
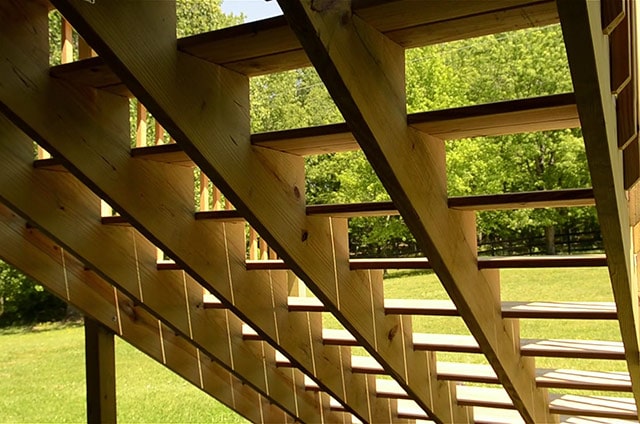
You may have also seen me use a framing square in my recent video on building a Viking camp chair. Framing squares are also very useful in timber framing.

Students in our timber framing class have learned just how useful a framing square can be for laying out timerber frame joints.
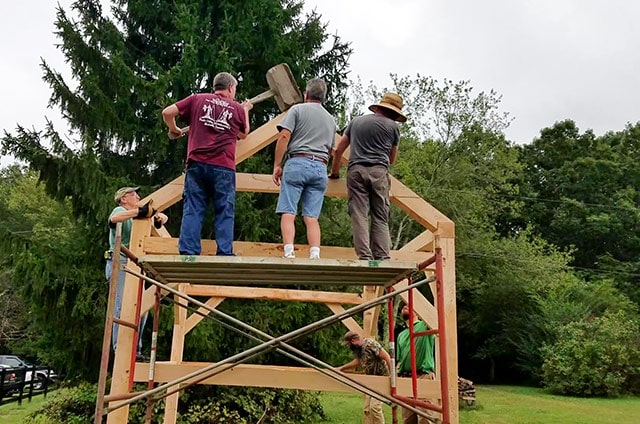
While I don’t use it for really accurate furniture joints, it’s still important to have your framing square be in-square. I’ve had great luck with this accurate new framing square:
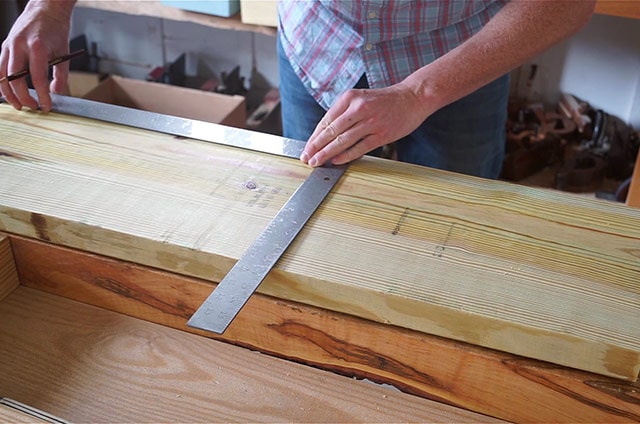
It’s made by Starrett, and is actually quite affordable at around $30-$35. You can find it here. I’ve also had great luck with my other beautiful framing square, a vintage Stanley Sweetheart No. 3, which you can find here on Ebay.
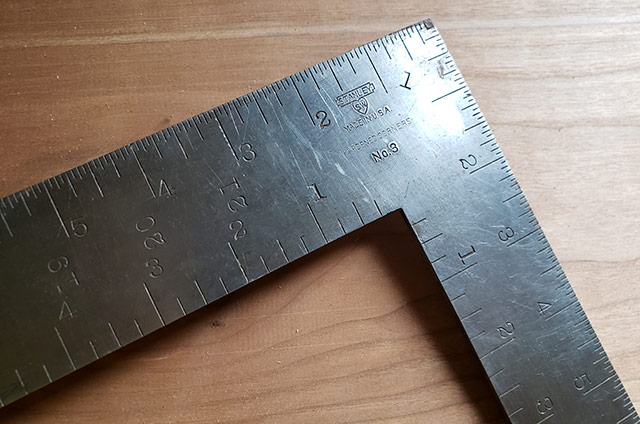
Due to the outdoor environment where framing squares are mostly used, they can easily get dropped or bumped, and can go out-of-square.
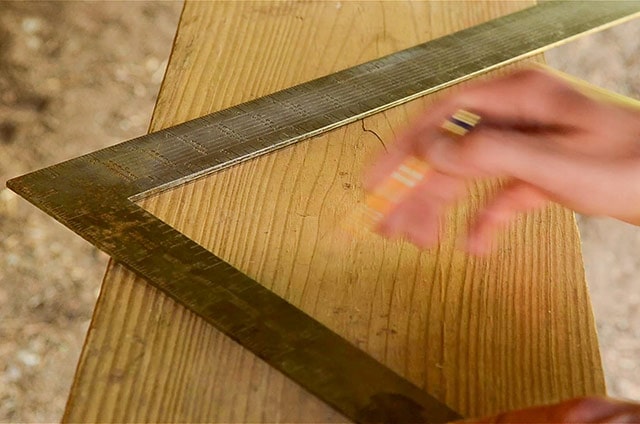
If it’s out of square less than 1/16th of an inch, it can be brought back into square with a simple trick using a metal punch.
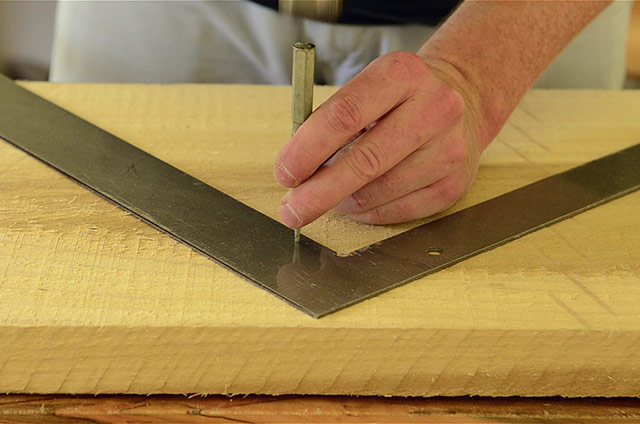
Here’s a good video tutorial that shows how to bring a framing square back “into square”:
Buying Sliding T-Bevel Squares
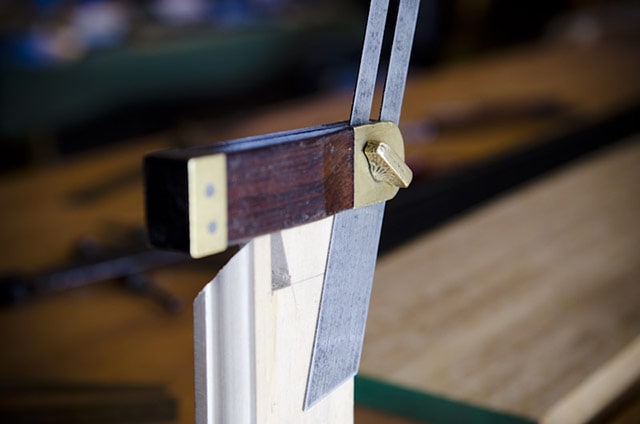
Sliding T-bevel squares, or “sliding bevels”, or “bevel squares” are very useful for holding & transferring an angle. I prefer to use these in laying out dovetail joints, rather than using a dovetail marker. You probably only need one sliding bevel square. My antique rosewood & brass sliding bevel sqaures don’t have any brand names on them, but I really love them. They’re gorgeous and they don’t loosen up until you want them to. The blade shouldn’t move after you lock it down. Otherwise the angle will be changed. I like this type of face locking mechanism (pictured above).
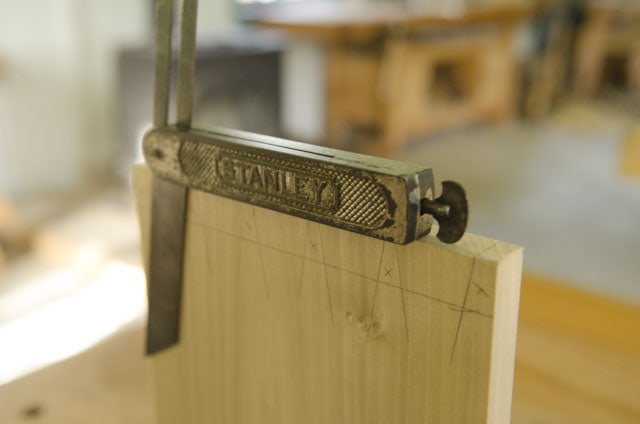
And I also really like this style of the butt-locking mechanism (pictured above). As far as antique bevel squares go, the butt-locking bevel squares are usually in higher demand, and hence more expensive, so if you’re on a tight budget either go for the face locking style, or buy an affordable new but-locking bevel gauge, like this one:
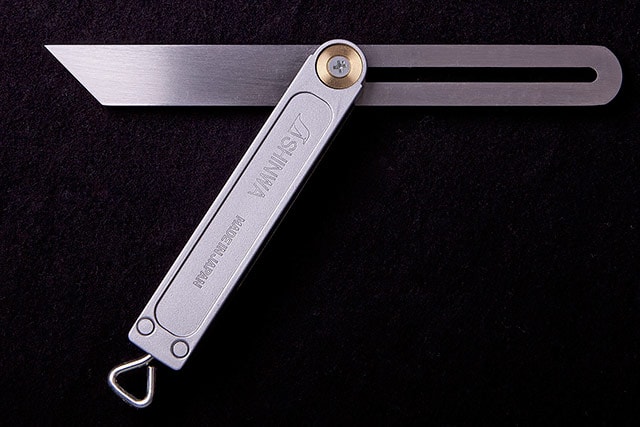
A student let me try out this Japanese-made butt-locking bevel gauge (pictured above) and I liked it. It held really tightly, and it runs about $25, which is a good value. You can buy it here at Taylor Tools or here at Amazon.
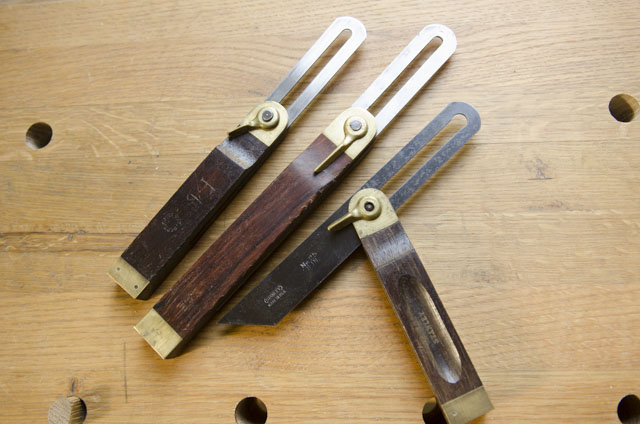
I own several nice rosewood & brass bevel gauges that have a face lever mechanism (pictured above). While they do hold tight, I don’t like them quite as much because the lever can get in the way, and you have to fidget with the back nut to get the lever to point out of the way. But if you find one like this for under $10, go ahead and buy it.
Which Bevel Squares Shouldn’t You Buy?
Now for a warning of what not to buy. Steer clear of new bevel squares that look like this (see it here), with a knurled brass nut:
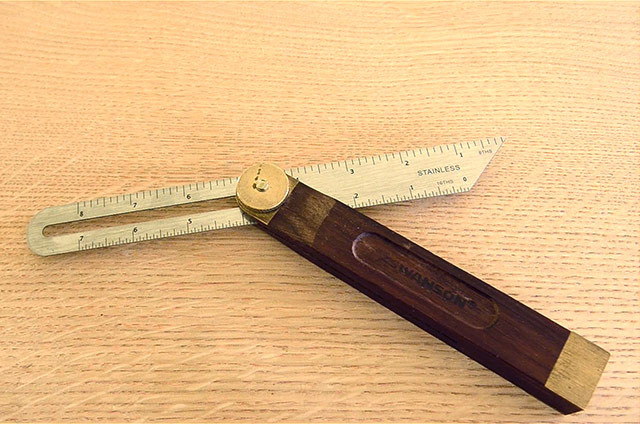
Because of the knurled brass nut (which doesn’t offer leverage) it won’t tighten well at all. I’ve heard some people suggest that you can spend some time modifying this type of bevel square. But if you can get a beautiful antique bevel square for the same price, why spend time messing with a bad one like this?
And what about the really, really expensive sliding bevel squares? I’ve seen some over $150. And while they’re gorgeous, and I’d certainly accept one as a gift, I just couldn’t rationalize spending that much money on something that a $10-$25 tool handles perfectly. But to be fair, I’ve never tried a super expensive bevel square, so maybe I could be convinced.
Sliding bevel gauges are fairly common at tool swaps, antique stores & flea markets, but you can also search for them here:
Buying Dividers (Compasses)
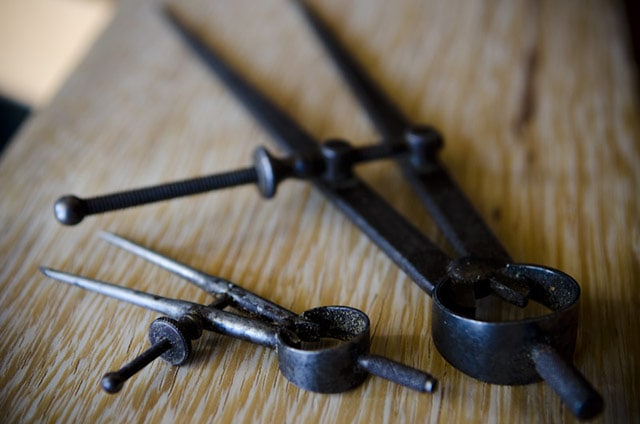
Dividers (or compasses) are used for taking and laying out precise measurements without ever having to look at a number. You can also use them for circumscribing circles or arcs, like when laying out a profile on a custom molding. I also use them a lot for stepping off a bunch of dovetails, as you may have seen in my recent video on laying out dovetails with just a few affordable tools:
In my opinion, I feel like it’s good to have at least one pair of dividers. If you only want to start out buying one pair of dividers, start out with a six inch size. If you can afford it, then also look for large 9 to 12-inch dividers and smaller 3 to 4-inch dividers.
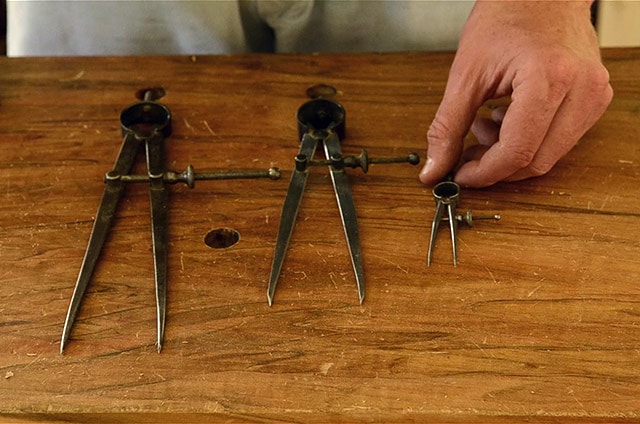
Custom, hand forged dividers (pictured below) like this are usually the most expensive, whether you buy them new or used. Antique forged dividers are often collectible, which leads to the higher prices.
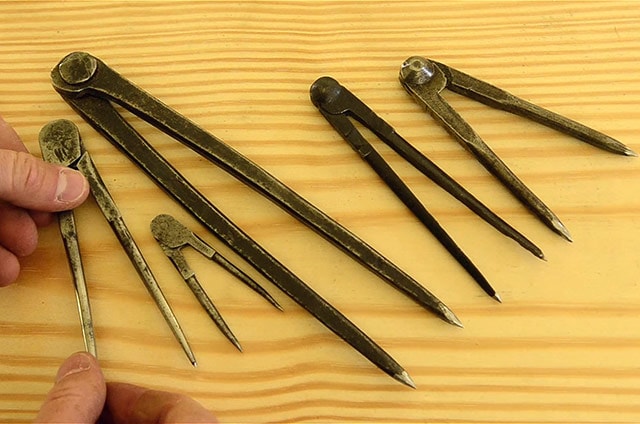
And I’ve even seen some new forged (or similar) dividers for a staggering $200! Again, I don’t feel like this is the best place to spend your tool budget. A higher price doesn’t always mean that a tool will work better.
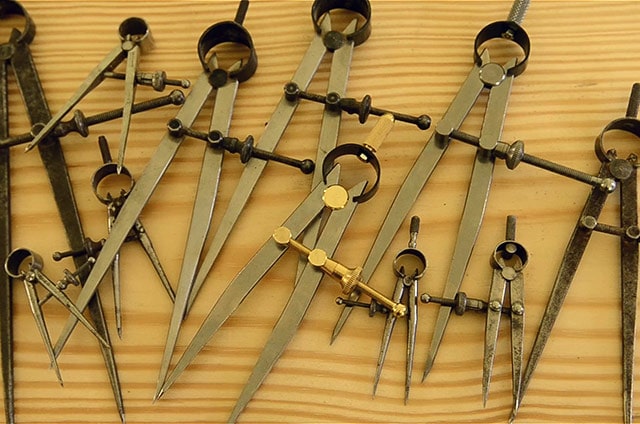
In fact, my favorite type of dividers can be purchased new or vintage at a very reasonable price. I prefer this spring style of dividers with a micro adjust wheel.
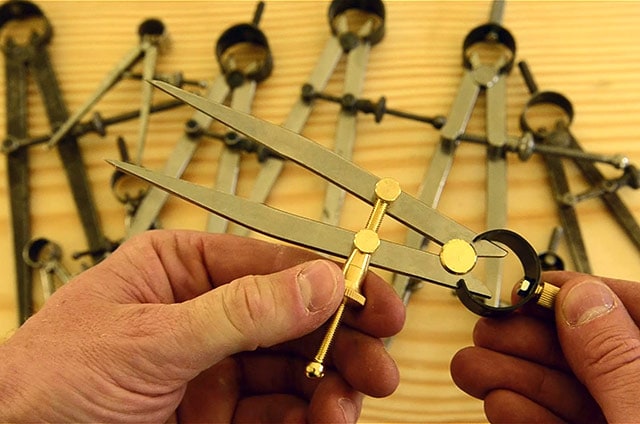
Why? Because if they get bumped, they bounce right back to the measurement that you set them at. The forged dividers, and screw-style of dividers (like the one pictured below) don’t have this feature. And I find those styles a bit tough to get accurate.
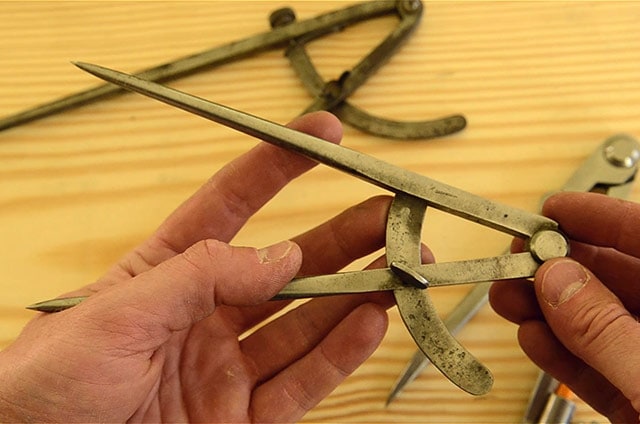
I have purchased a number of antique spring dividers for around $10 to $20. You can find antique spring dividers with this search here on Ebay.
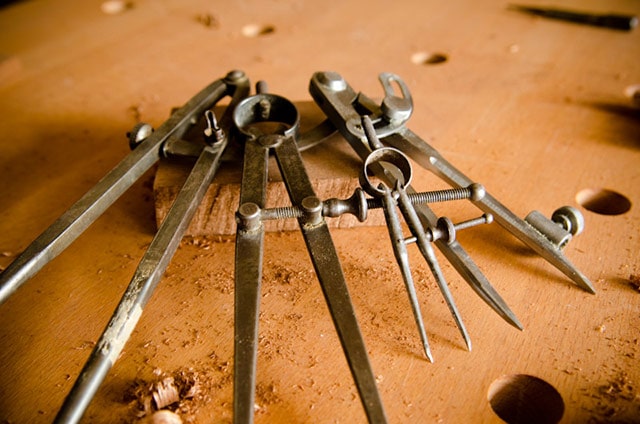
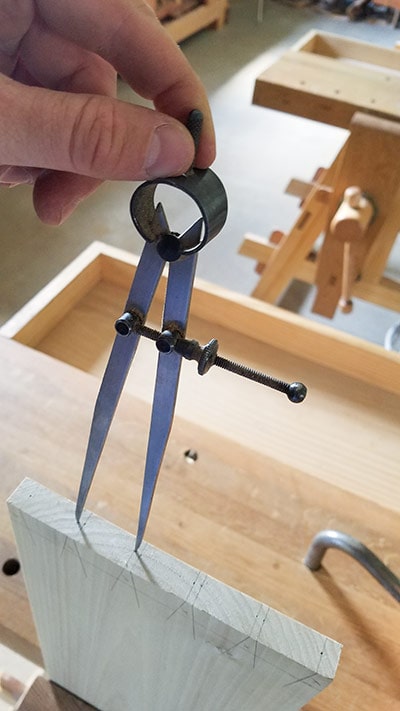
And in searching for affordable dividers for my woodworking school, I discovered a few pair of really great dividers, which are quite similar to my antique version. I used to recommend this pair of 6-inch dividers, which I paid an unbelievably low price of $8 for (I bought 4 or 5 of them), but they are now unavailable as of the writing of this article (see them here):
My students also liked those dividers. And recently I have gotten a couple other affordable dividers (both under $15) that I like even more than the previous one. This pair of Yankee dividers has become my favorite new pair:
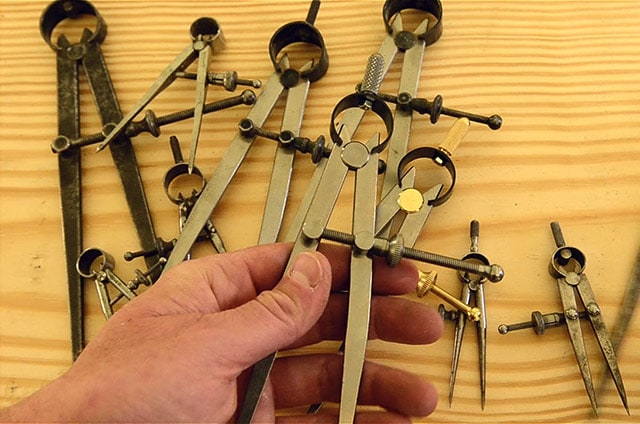
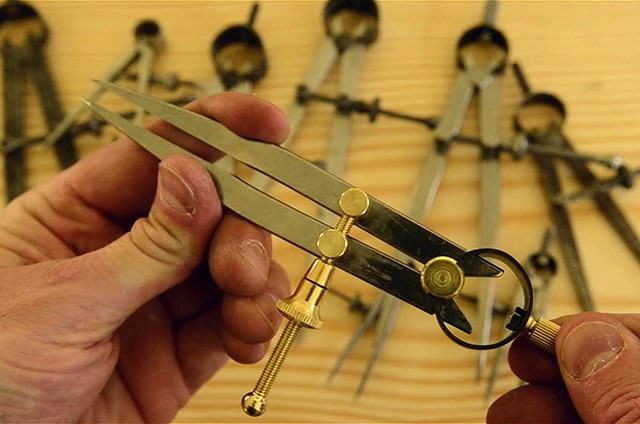
You can find them here. I have the 6-inch dividers. The steel construction is substantial, and the adjusting nut moves very smoothly. Also, another pair of dividers that I love (pictured below), made by the same company has some attractive brass parts. I have the 4-inch size, and like it. But the 6-inch size would work just as well. You can find the brass pair of dividers here.
Quick Links to All of My Recommended Dividers
Buying Marking Gauges & Mortise Gauges
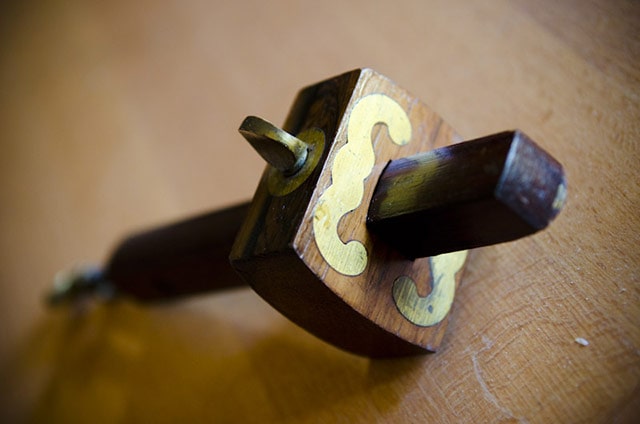
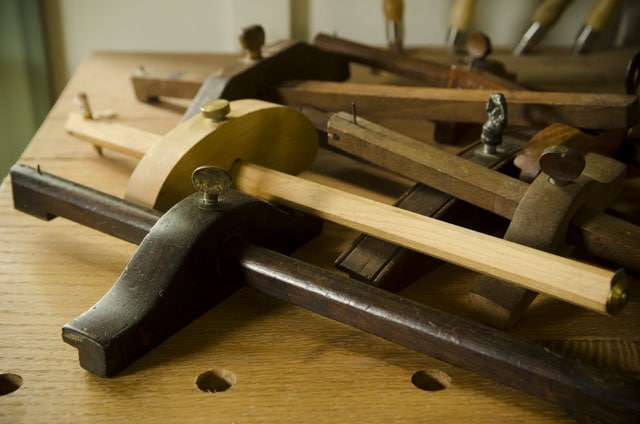
In this section I’ll talk about buying tools for marking your wood joinery, including marking gauges, mortise gauges, and large panel gauges:
Buying a Marking Gauge
Marking gauges are woodworking gauges that are used to scribe accurate reference lines when laying out your furniture joints. And these are woodworking gauges that you definitely want to get right, since they’re so important in helping your joints fit together. There are just so many bad marking gauges on the market. So I’d like to help you understand which marking gauges are the best value.
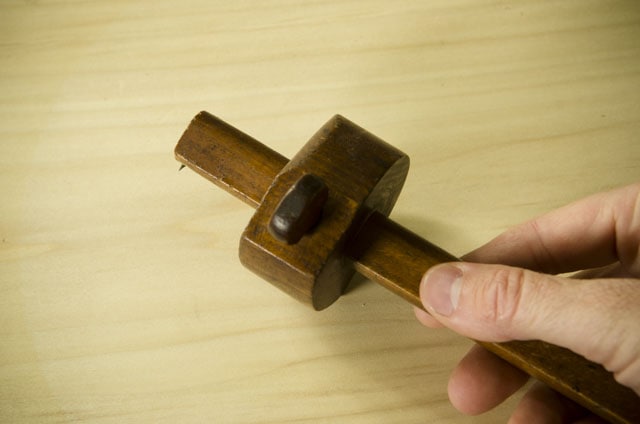
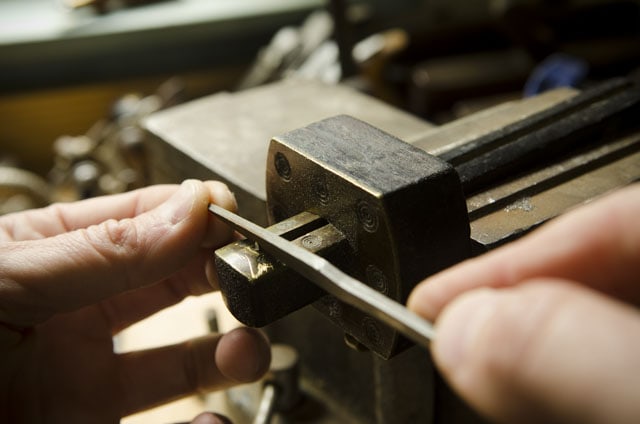
Marking gauges come in a few different styles. Some, like this one have single, nail-like pins. This type of marking gauge does have it’s uses in certain situations, like when you have strong grain, and it’s usually the cheapest to buy and easiest to make. But on most joint layouts, it doesn’t give a very crisp knife line. You want a knife line when you’ll be using a chisel to cut along the line. A pin will give a fuzzy v-shaped line, especially when cutting across the grain.
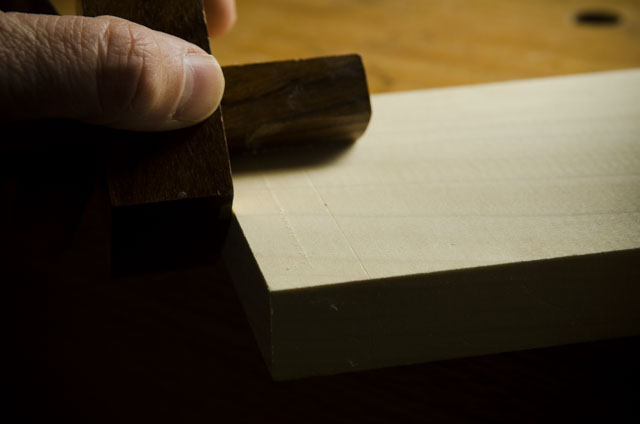
That’s where cutting gauges come in. They’re also called slicing gauges.
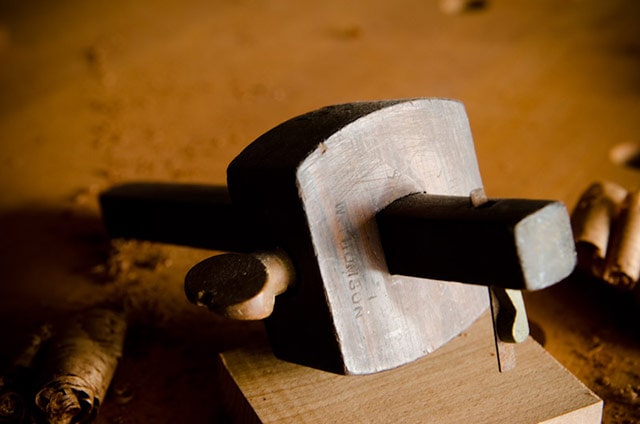
Traditional wooden cutting gauges (like the one shown below) have a cutter that actually slices a crisp and accurate line, especially across the grain.
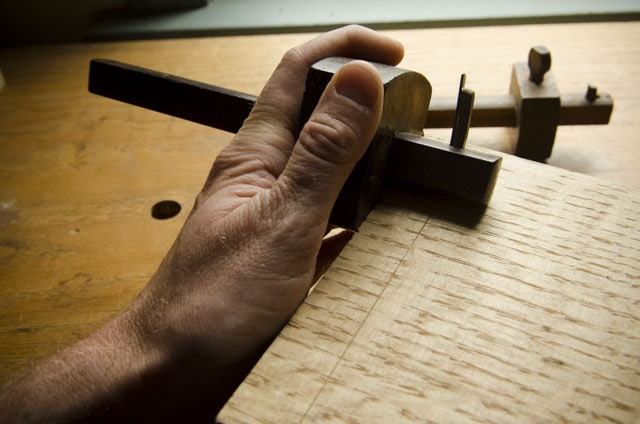
But if you’ve already got a wooden pin-marking gauge, don’t fret! There’s a method for using a file to modify the pin into a slicing cutter, which I showed in my video on rehabbing marking and mortising gauges. I’ll share a link to that video in the notes below.
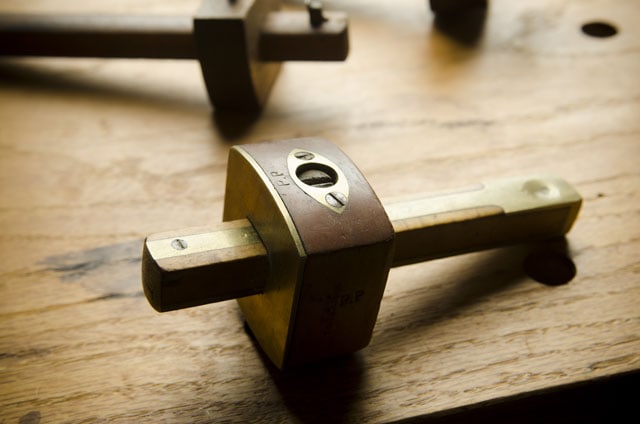
Antique marking gauges, like this one (shown below), with a brass fence and exotic wood can work amazingly, and are lovely. But they can also be quite collectible, which takes them out of a lot of people’s price range.
Which is the Best Marking Gauge?
My personal preference for marking gauges is a wheel marking gauge. The cutter is a round, disc shaped blade that gives a very nice, crisp line.
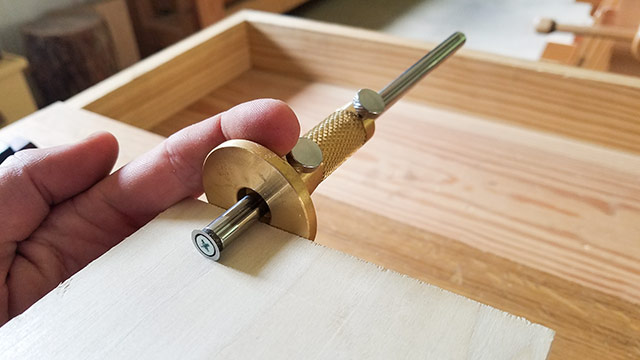
The wheel marking gauge has been made as far back as the 1800’s, but there are a lot of new wheel marking gauges on the market. But I need to warn you that I have tried some of the really inexpensive wheel cutting gauges, and many of them are poorly made. And on the higher end, wheel cutting gauges, like this Tite-Mark wheel cutting gauge, can get up around $90 to $100. And that’s before you buy add-ons. They can jump up around $250. I have used the Tite-Mark wheel cutting gauge, and it really is nice. But another manufacture has made a very similar wheel cutting gauge, and it sells for around $30 or $35 (find it here).
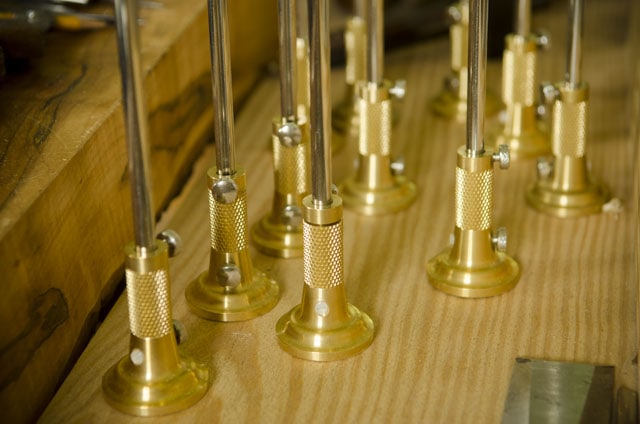
I bought one of them, and loved it so much that I bought a couple more for my school. Now I have these gauges for all of my students. I really prefer this style of wheel cutting gauge because it has an adjustable barrel that moves the cutter up and down, but more importantly because it uses two thumb screws to keep the bar from moving.
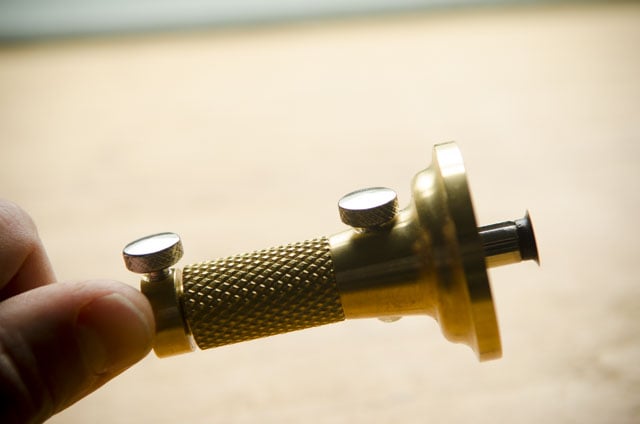
At one time I had enjoyed using this Veritas wheel cutting gauge, made by Lee Valley (pictured below). It runs about $40, plus shipping from Canada, or $35 plus shipping from this seller. But over time I discovered that no matter how tight I screwed it down, the shaft would still slip…unless I was very careful.
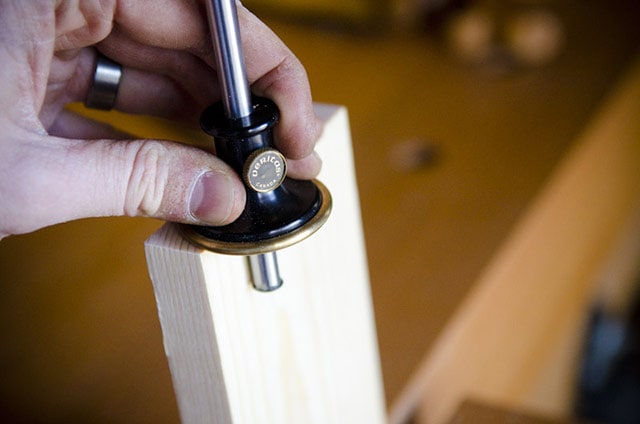
The reason for this, it seems, is that it only uses one thumb screw. I’m not saying that all single screw cutting gauges will slip. I have this one, from another company, and it doesn’t slip. But for some reason the Veritas marking gauges slip. Lee Valley also has a relatively inexpensive, tiny version of their marking gauge, which moves even worse.
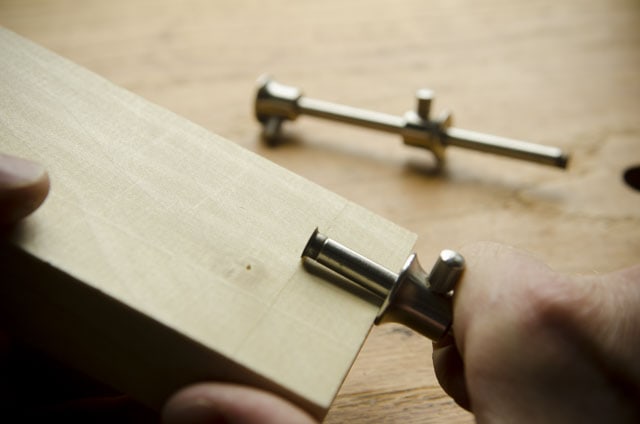
It runs about $25, plus shipping. And I’ve also found that the fence is just too small to be very effective.
Buying a Mortise Gauge
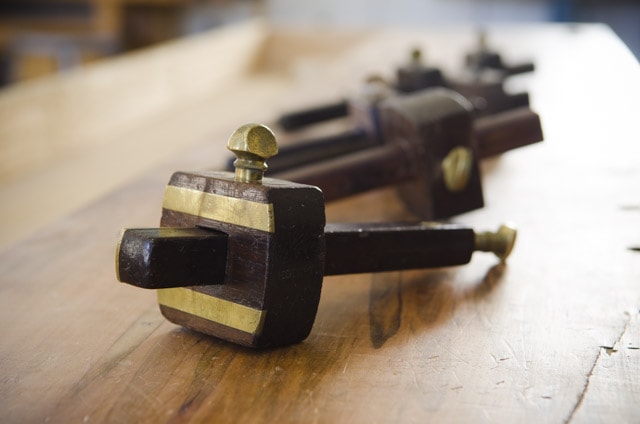
Now that we’ve discussed marking gauges, let’s move onto a very similar gauge, called a mortise gauge. In fact, some gauges double as both a marking gauge and a mortise gauge. Mortise gauges have two pins, or two cutters, instead of just one.
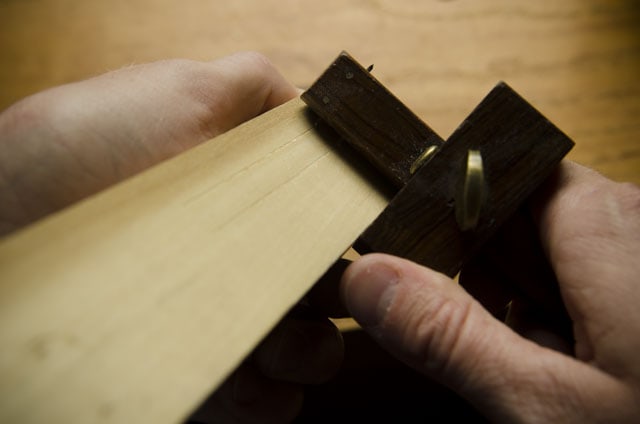
Why? To lay out the shoulders of mortises, like for this table leg mortise and tenon joint. Now let me tell you up front that if you’re on a tight budget, you can most certainly get along with just a marking gauge. It’s a lot less convenient to mark half of the lines on all of the parts first, and then go back and set the marking gauge for the other wall of the mortise, but it can be done.
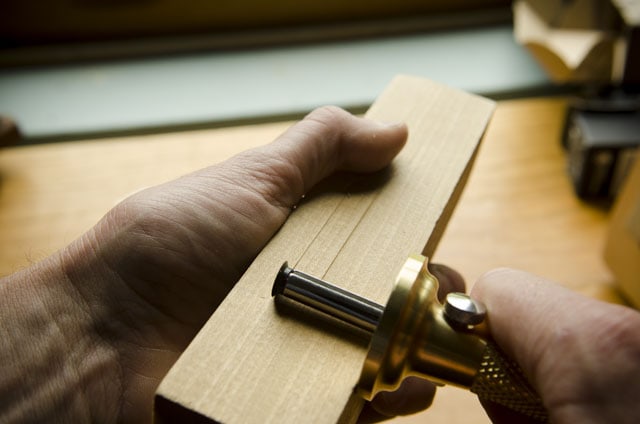
I just don’t want you to feel like you have to go out and buy every single hand tool before you can start making furniture. But, a dedicated mortise gauges saves time, and makes it a little easier to prevent making a mistake.
The options for mortise gauges are just about the same as with marking gauges, so I won’t cover all of that again. But there are a couple of important points I want to mention.
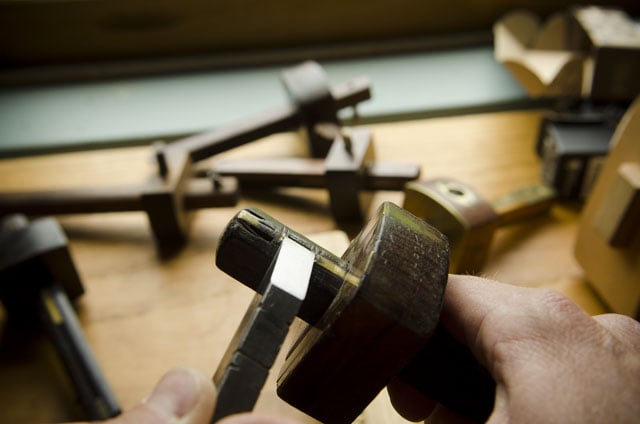
Antique mortise gauges like those pictured above are my favorite, because they tightly hold the measurement that I take from my mortise chisel. But if you’re buying antique wooden marking gauges or mortise gauges, just make sure that the gauge is sturdy when tightened down and that the wooden or metal screws aren’t broken. If the mortise gauge doesn’t have cutters, but pins, that’s okay. Because, just like I mentioned with the marking gauges, you can also use a file to convert the pins into cutters. Here’s a video where I show how to do this:
Which Mortise Gauge is the Best?
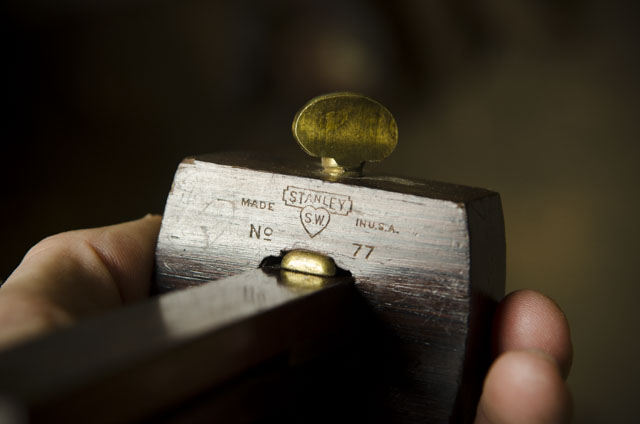
I’ve had really had good luck with these antique Stanley “mustache” style mortise gauges (pictured below), and they are pretty affordable, at about $20-$30, in good condition.
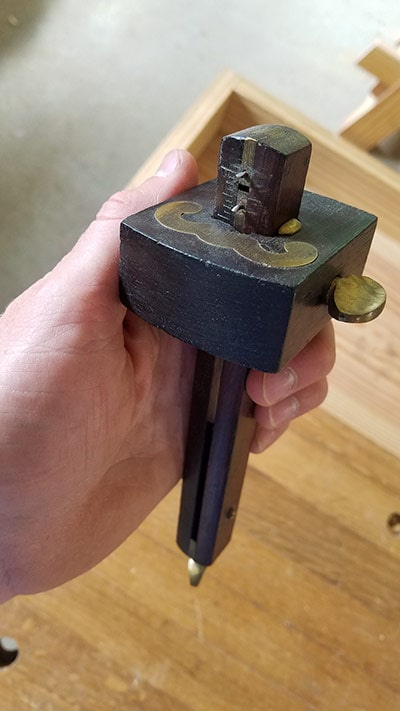
Aside from nice rosewood and brass materials, they double as a marking gauge on one end and a mortise gauge on the other end.
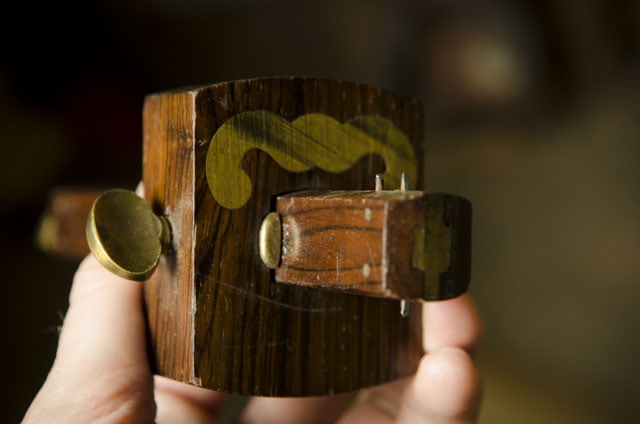
They come with pins, but I converted them to cutters quite easily. You can find these Stanley No. 77 mortise / marking gauges here on Ebay.
This Veritas wheeled mortise gauge (pictured below) is made by Lee Valley, the same company that makes the wheel marking gauge that I mentioned earlier. You can find it for sale here.
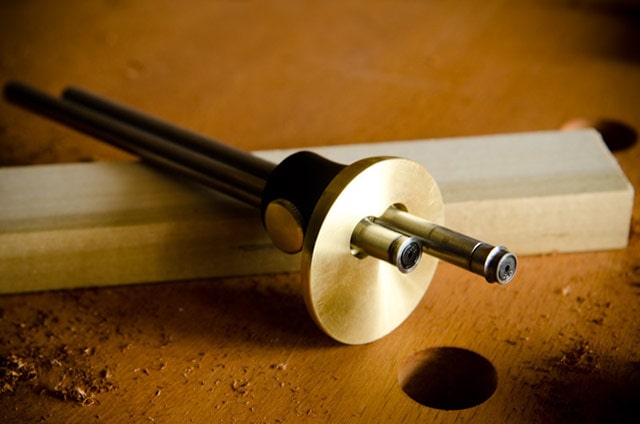
It can be used as a mortise gauge, or it can hold two separate measurements simultaneously if you’re just using it as a marking gauge. This is important for when you’re repeating multiple measurements on multiple furniture parts. This is an appealing gauge for someone just wanting to purchase one gauge, rather than a separate marking gauge and mortising gauge.
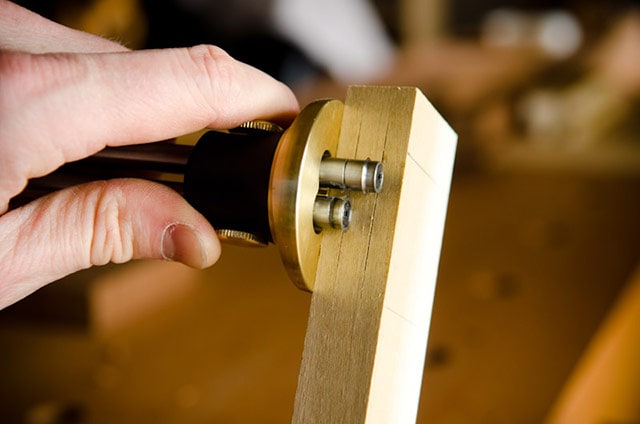
However, it also slips, though not as much as their normal marking gauges. If it weren’t for the slipping issue, and one other issue, this would be the absolute best mortise gauge ever made (in my opinion). Here’s the other problem. When I use an antique style mortise gauge, I can easily move the fence, while keeping the cutters from moving, because the independent pin is advanced by a screw mechanism.
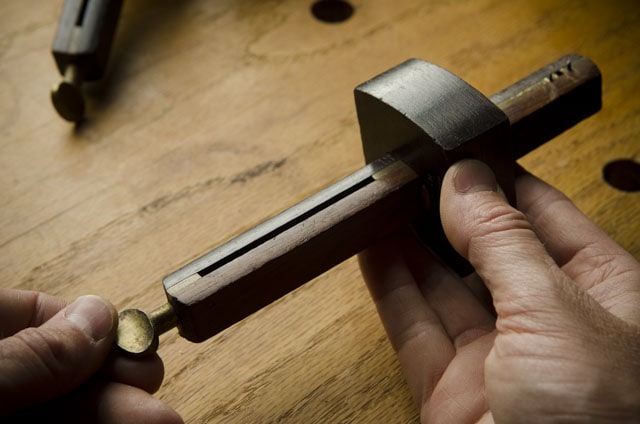
You would do this when you move from marking your mortises to marking the tenons, and you want the cutters to absolutely not move, but you have to move the fence. But as you can see on this wheeled mortise gauge, it’s very difficult to keep the cutters in place when you move the fence.
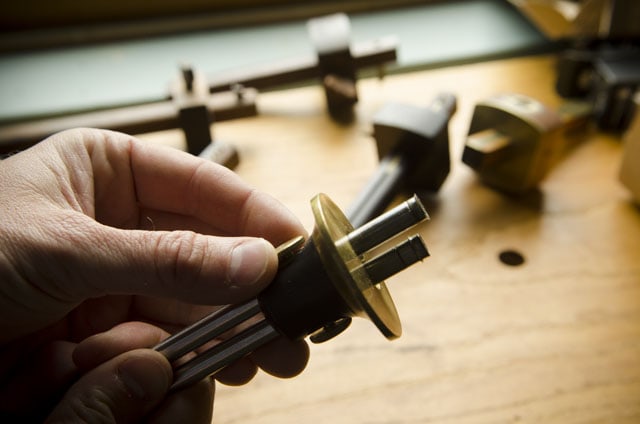
Yes, Lee Valley later released a shaft clamp to solve this problem (see it here), but on their website they charge an extra $11 for it if you just need the clamp, like I do. That kind of bothers me. In my opinion, it should certainly be a feature that’s included, especially for a part that certainly costs under 50 cents to make. The gauge costs about $55 plus shipping without the clamp, and an extra $7 if you want it to come with the clamp. If you don’t mind paying a little extra for the shaft clamp, and if you’re careful to keep the shafts from slipping, then this mortise gauge is a really fine option. And it can certainly double as a normal marking gauge, so you wouldn’t have to buy both.
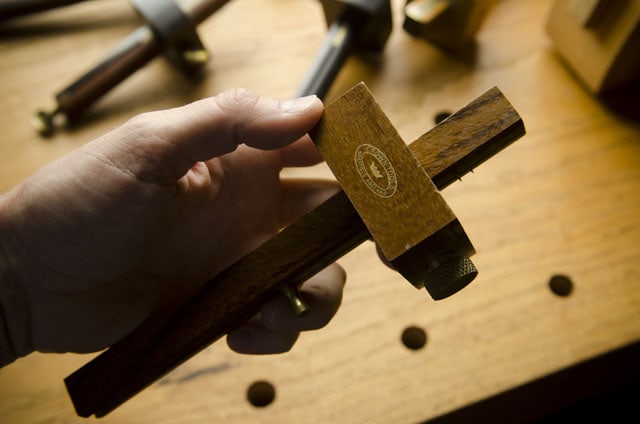
And that leads me to a modern style of mortise gauge that I would strongly caution against buying, due to a similar issue as the previous gauge. This style (pictured above) is very common among cheap, new tools sellers. I have tested out this model, by Crown Tools, and here are some similar ones to avoid. The gauge looks really pretty (brass with Rosewood or Ebony), but when you loosen the thumb screw to adjust the fence, it is very, very difficult to keep the pins from moving. So I would not recommend that you buy one like this.
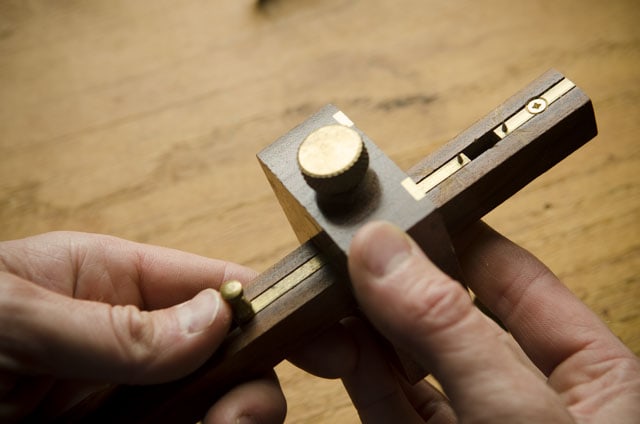
But if you’ve already purchased one of these, don’t throw it in the trash. It is inconvenient, but you can grab a quick-grip clamp, or a piece of painter’s tape, and tighten the sliding bar in place before you loosen the thumb screw. But it sure is inconvenient and awkward.
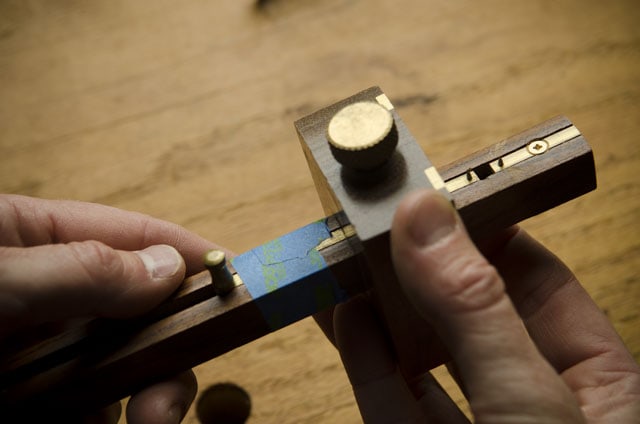
Lastly, if you find an antique wooden marking gauge or mortise gauge at a tool swap or at a flea market, make sure you test the gauge out to see if it moves smoothly, and is sturdy when tightened down. Also check that the screws aren’t broken or the pins missing.

Quick Links to All of My Recommended Marking Gauges & Mortise Gauges
Buying or Making a Panel Gauge
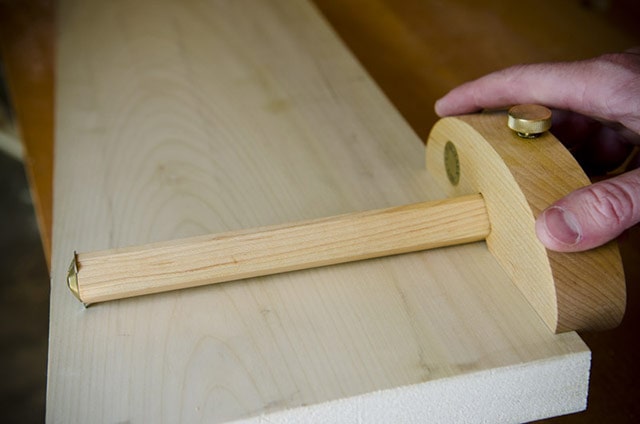
A panel gauge is the largest of the woodworking gauges, and is like a very large marking gauge, and it’s used for sizing your board’s width to show where to rip the board, if your marking gauge isn’t long enough.
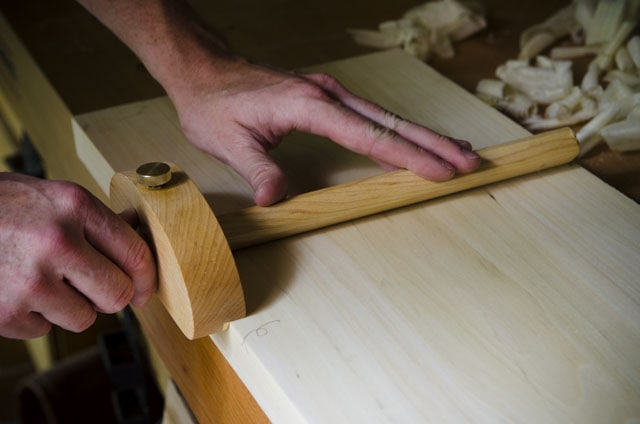
Not many companies make these larger woodworking gauges new, but they can be found on the antique market. I’ve purchased quite a few panel gauges for my personal use, and for my school, and most are a bit wobbly. However, I’ve found that to not be a huge problem, if you hold the gauge fence steady while using it. You can sharpen & rehab these panel gauges the same way as I showed in the above video.
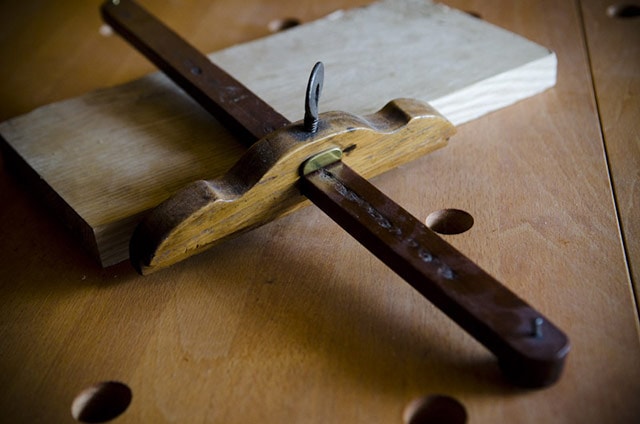
I would categorize panel gauges as a “nice to have” tool, but not a necessary one. You can certainly achieve similar results by measuring the distance of your rip cut at each end of the board, and then strike a line between those two marks with a straight edge, for a shorter board, or a chalk line, for a longer board. And if your board is narrow enough, a 12-inch combination square also works great for marking the width of the board.
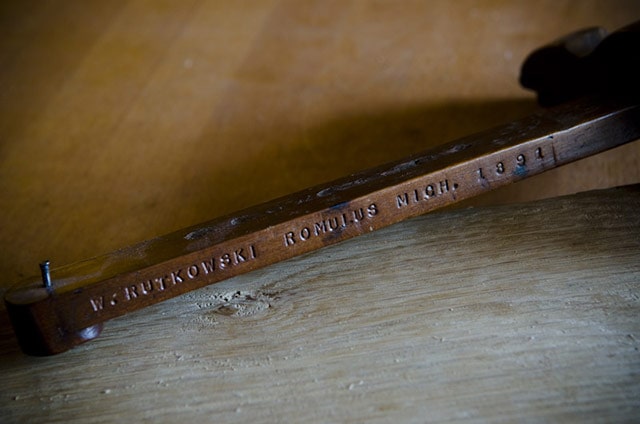
Finding antique panel gauges out “in the wild” may be a bit difficult, but sometimes you stumble on a bunch at one time. I went for a long time without seeing any, and then I bought 5 or 6 at a tool swap in one day. I paid around $15-$25 per panel gauge. You can sometimes find panel gauges on eBay (see some here), but if you don’t want to mess with rehabbing antique panel gauges, you can just purchase one like this maple Lie-Nielsen panel gauge:
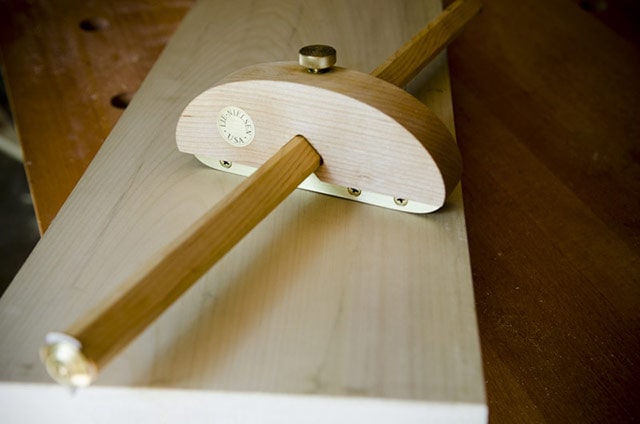
At $85 (I found the best price here) the Lie-Nielsen panel gauge isn’t cheap, but it’s in working shape, and it has a slot to use a cutter or a pencil (I prefer the pencil end in most situations). If you have time and some metal skills, then you should take a stab at making your own panel gauge (here’s a link to a good panel gauge building tutorial).
Buying a Marking Knife / Striking Knife
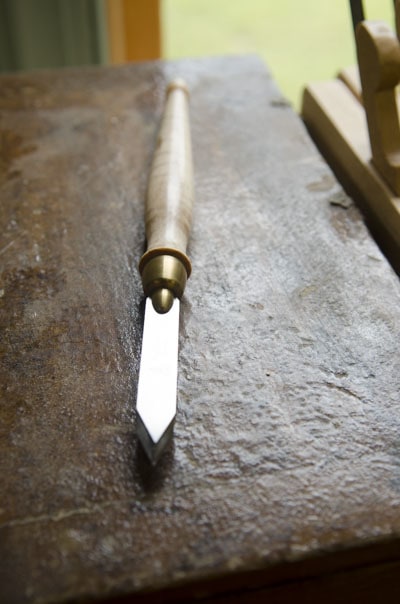
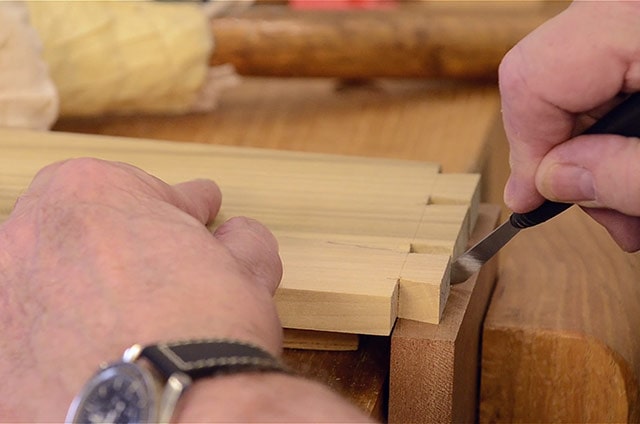
A marking knife, also called a striking knife, is used to make very precise layout lines for your joints, especially where you will be chopping or paring with a chisel. The chisel sits right in the knife line. So you want to buy a knife that keeps a sharp edge. You also want a marking knife that will let you get into tight spaces, especially when trying to layout the tails onto the pin board (or visa-versa) when making a dovetail joint.
Like most tools, marking knives come in different styles. Some marking knives have a flat face with a double-beveled face on the other side. This is nice if you want to keep the flat face against the walls of the joint. This style of marking knife can run anywhere from $5 all the way up to $300. I personally try to stay away from the price extremes. On the upper end, why pay so much money for something that you don’t need to? And on the lower end, I’ve tested a bunch of the sub-ten-dollar marking knives, so I could try to find a good option to recommend to students.
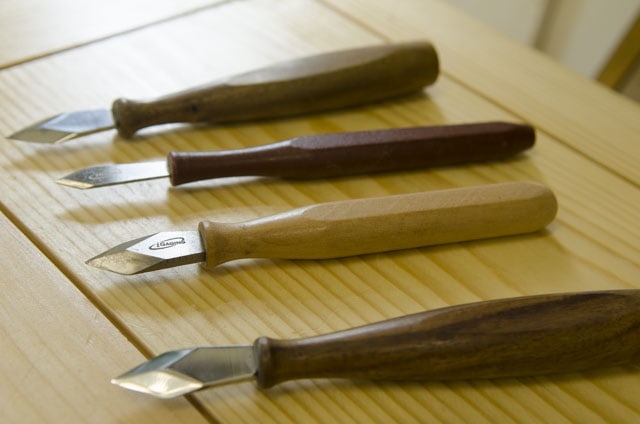
But all the ones that my students and I tried were terrible (see above photo). I discovered that the metal isn’t even hardened, so even after giving them a good sharpening, the edges bend over within a couple minutes of light use. Stay away from iGaging brand marking knives. The other knife (in the foreground of the above photo) didn’t have a brand name, but was on Ebay for around $10.
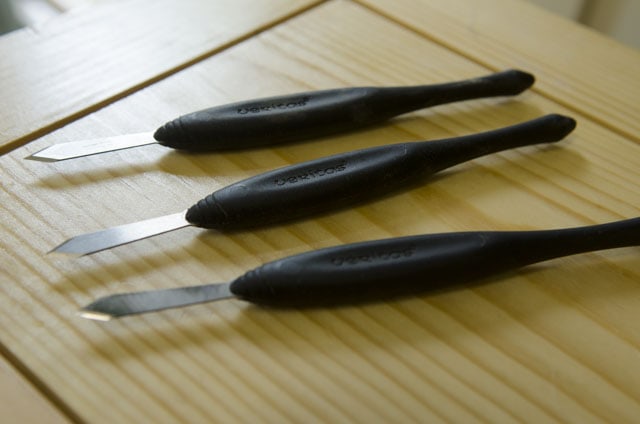
I have, however, found a few nice marking knives, all under $25, that I can recommend after much testing. These Veritas marking knives (pictured below) are one of my favorites, and they are used a lot in my school. They aren’t as pretty as other marking knives, but the blade is very thin, yet holds an edge. And the price is right. You can find them here, for about $18.
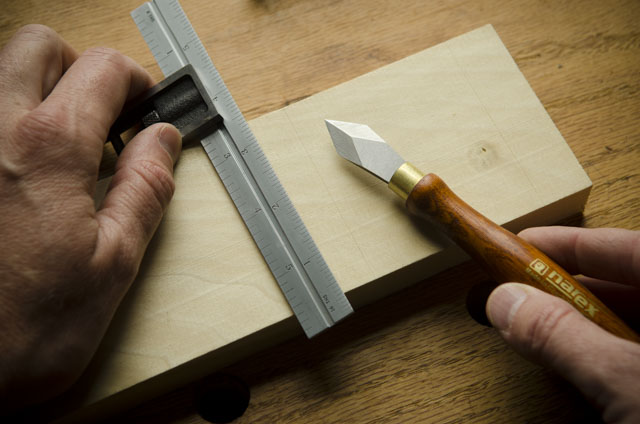
This wood handled, Czech-made Narex marking knife (pictured below) is a few dollars more, at $25 (you can buy it here), but has a really nice look to it, with the hornbeam handle and brass ferrule. And the steel blade comes very sharp out of the box. It isn’t as thin as the black Veritas striking knives, but it seems to fit into all but the thinnest of London-style dovetails. As you can see from the photo below, it leaves a really clean and crisp knife line across the wood grain:
I sometimes also use a simple chip carving knife or even a pocket knife to layout my joints. If you go this route, you just need to make sure to tip the blade to the side slightly, so that the edge of the blade gets right against the square’s edge or against the tail of the dovetail joint.
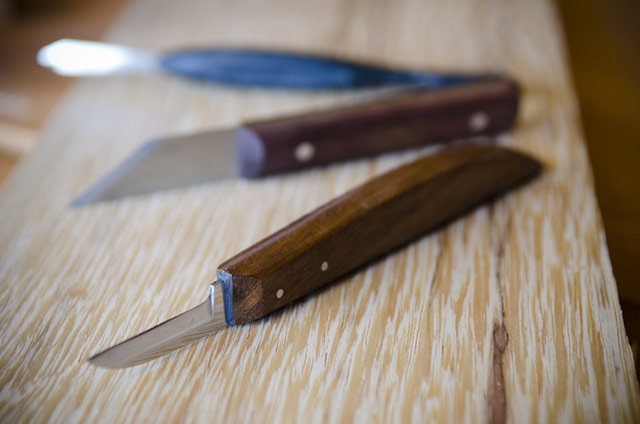
I have purchased several rosewood handle chip carving knives on eBay (here). This guy makes & sells them for around $12 or $13.
I have also recently acquired this Swann dovetail marking knife (pictured below). It comes with very sharp disposable blades that are held into the metal body, similar to a utility knife. I actually really enjoy using this marking knife, because of the blade’s sharpness and the thinness that lets me easily get between thin tails to mark the pins (on a dovetail joint):
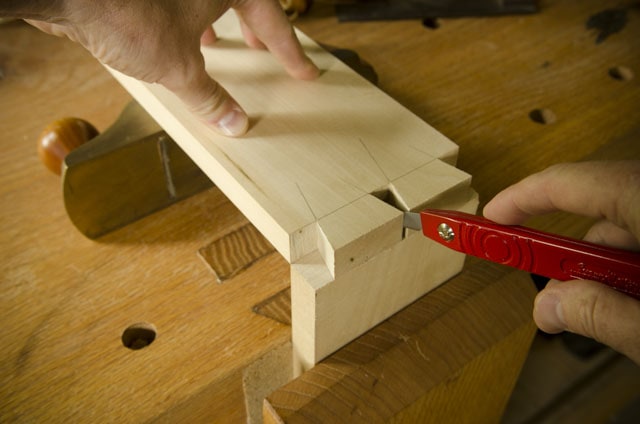
It runs about $18, including the packet of 5 extra blades. You can find it here.
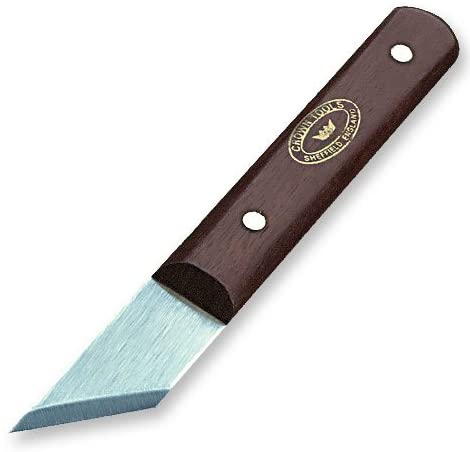
One style of marking knife that I really don’t prefer is this style that has a single angled bevel, made by Crown. It comes in a left hand version and a right hand version. But I just find them too large and inconvenient with the single bevel.
Quick Links to All of My Recommended Marking Gauges & Mortise Gauges
- View the Veritas Striking Knife at Highland Woodworking
- View the Narex Striking Knife at Taylor Toolworks
- View the Swann dovetail marking craft knife at Taylor Toolworks
- View this new chip carving knife that I purchased at Ebay
- View all marking knives / striking knives at Highland Woodworking
- View other new chip carving knives at Amazon
- View new and used chip carving knives at Ebay
Page: 1 | 2


This marking & measuring tool buying guide continues on the next page….