How To Flatten Board Lumber With Woodworking Hand Tools
10 Steps to flatten board from rough lumber into a perfectly square & smooth board, by hand planing wood with traditional woodworking hand tools.
![]() By Joshua Farnsworth | Updated Mar 01, 2022
By Joshua Farnsworth | Updated Mar 01, 2022
How To Flatten Board Lumber With Woodworking Hand Tools
10 Steps to flatten board from rough lumber into a perfectly square & smooth board, by hand planing wood with traditional woodworking hand tools.
![]() By Joshua Farnsworth | Updated Mar 01, 2022
By Joshua Farnsworth | Updated Mar 01, 2022
Disclosure: WoodAndShop.com is supported by its audience. When you purchase through certain links on our site, we may earn a small affiliate commission, at no cost to you. Learn more.
Introduction: How to Flatten Board Lumber with Woodworking Hand Tools
In the above video, and in the below 10 steps, I teach one of the most basic and essential skills in traditional woodworking: how to square, flatten, & dimension your own rough lumber into finished boards. Some people also call this “four squaring lumber” or “Flatten Board Lumber”. Either way, you’re just trying to get a square board for furniture making.
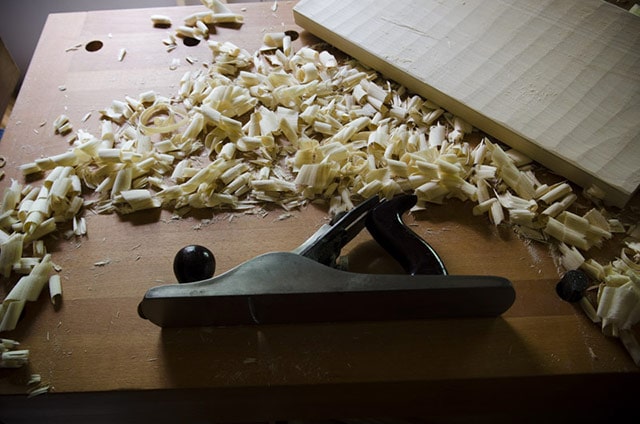
To build quality traditional furniture, you need to start with flat and square lumber. Some people achieve this with power jointers, planers, and table saws. While the electrical power route is more economical for a commercial woodworking workshop, I sometimes prefer the safety, exercise, quiet, and historical feeling that comes from dimensioning my boards by hand. Plus, it just makes you feel cool to flatten board lumber with woodworking hand tools like a hand plane, a hand saw, and more.
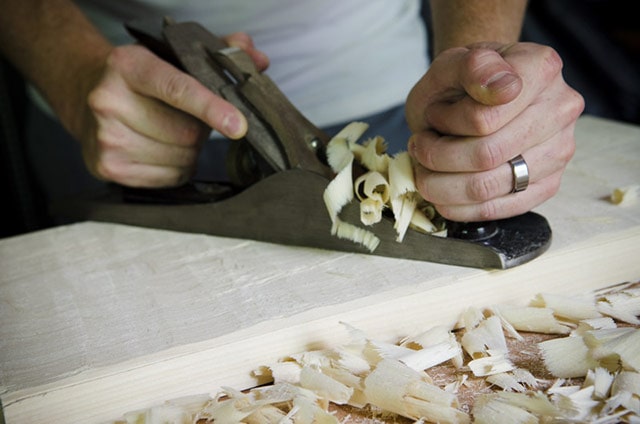
Sure it takes a little longer, but why did you get into woodworking in the first place? To hurry and build a bunch of stuff, or to enjoy yourself? It’s therapeutic to take some things slowly. And with practice, squaring lumber by hand won’t take all that long…ask your ancestors.
Required Woodworking Hand Tools to Flatten Board Lumber
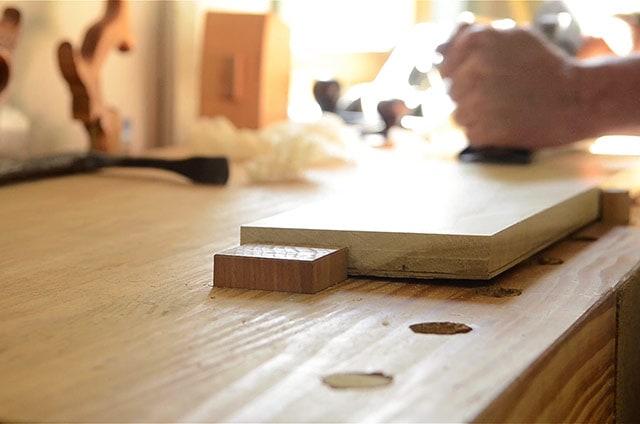
Even though I have a nice tool buying guide (here), I’m still often asked for links to the tools that I use in my videos, so here they are (note that you don’t need all these tools):
Workbench (to flatten board):
It’s very helpful to have a very sturdy woodworking workbench because four squaring lumber requires a lot of hand planing, which will rock a smaller DIY workbench. Read my wood work bench guide to learn about which woodworking bench features are important for you:
Hand Planes (to flatten board):
Most woodworkers use antique wood planes, like Stanley hand planes, but there are some other good vintage and new hand planes on the market for hand planing boards. You won’t need all of these hand planes, just a jack plane, a smoothing plane, a jointer plane, and maybe a block plane. I just wanted to share some options:
- Vintage Stanley No. 5 Jack Plane
- Vintage Stanley No. 4 Smoothing Plane
- WoodRiver No. 3 or No. 4 Smoothing Plane
- Vintage Stanley No. 4 1/2 Smoothing Plane (alternative to No. 4)
- Vintage Stanley No. 7 Jointer Plane
- WoodRiver No. 7 jointer plane
- Vintage Stanley No. 6 Fore Plane (alternative to No. 5 and No. 7)
- Vintage Stanley No. 8 Jointer Plane (alternative to No. 7)
- Vintage Wooden Jointer Plane (alternative to No. 6, 7, 8)
- Stanley No. 60-1/2 low angle block plane
- WoodRiver Low Angle Block Hand Plane
- Lie-Nielsen Low Angle Rabbet Block Plane
Hand Saws (to flatten board):
- Vintage Disston No. 16 Cross Cut Panel Saw
- Vintage Disston No. D-8 Rip Panel Saw
- Vintage Millers Falls Miter box and miter saw
Marking & Measuring Tools (to flatten board):
10 Steps to Squaring Lumber & Flatten Boards with Woodworking Hand Tools
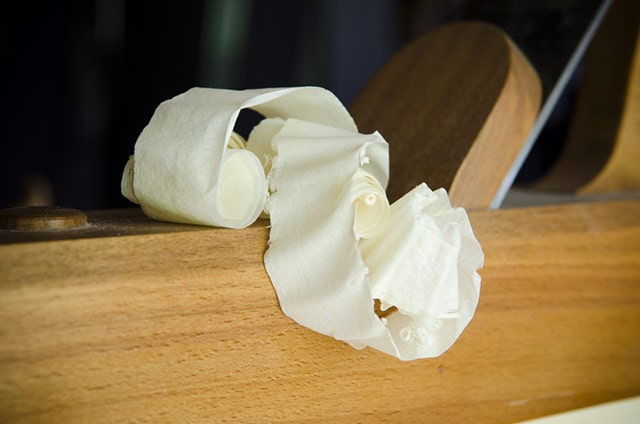
Now that we’ve covered which woodworking hand tools you need to use, here are the 10 steps required for squaring lumber by hand (to flatten board):
Step 1: Cut the Board to Rough Dimensions
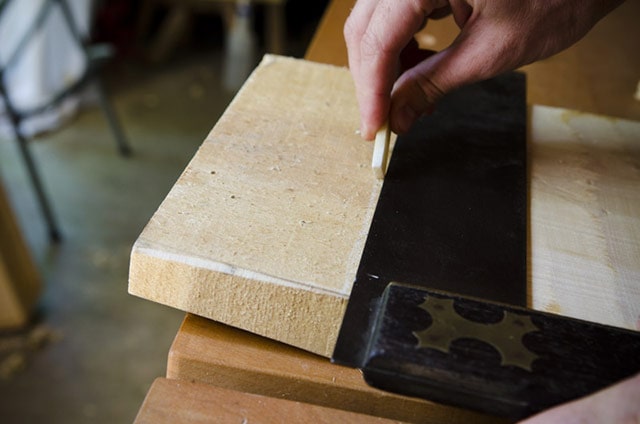
The first step to square a board is to cut the board to rough dimensions. First use a longer try square or combination square or framing square to mark your rough board’s approximate length.
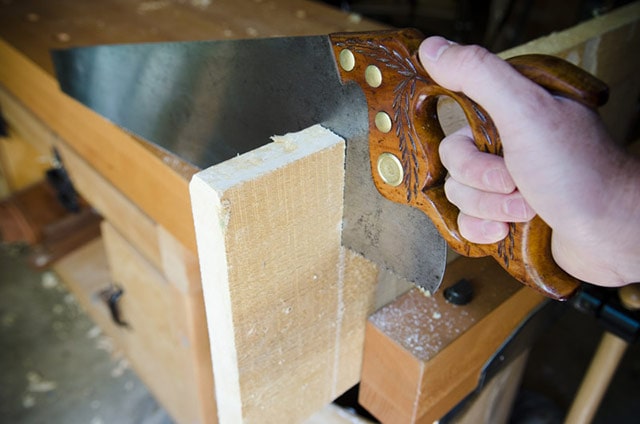
Then use a Cross Cut panel saw to cut your rough board to rough length (across the grain). Keep in mind that this isn’t your final length. You’re just removing any messy wood, and getting to a manageable length; somewhat close to what you’ll eventually arrive at. This is a good time to cut off checked ends or knots.
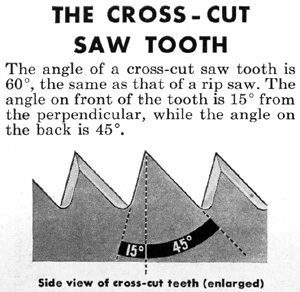
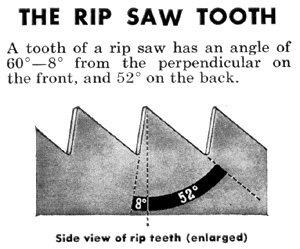
You can also use a Rip Panel saw to rip the board lengthwise (along the grain) to get a manageable width, if needed. Not sure what rip teeth and crossucut teeth are? Here’s an old chart that shows the difference between Cross-cut saw teeth and Rip saw teeth:
Step 2: Flatten a Reference Face with Hand Planes
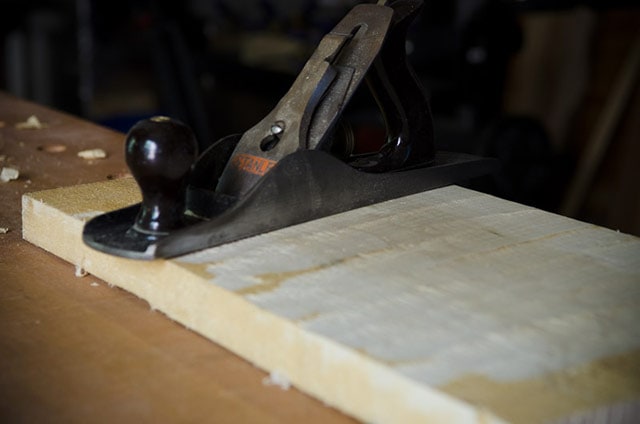
Next, place the board between the bench dogs on your wood work bench, with the cupped face facing down, to avoid rocking. You can also put the cupped face upward, which may make it easier to evenly bring the high edges down with a hand plane, simultaneously. But if you go this route, you may need to use shims if your board is in really bad shape. Use a scrubbing plane or a jack plane with a cambered iron (8 degree camber/arc) to flatten the first face. This jack plane is going to be doing rough work, so don’t worry about tuning it extensively.
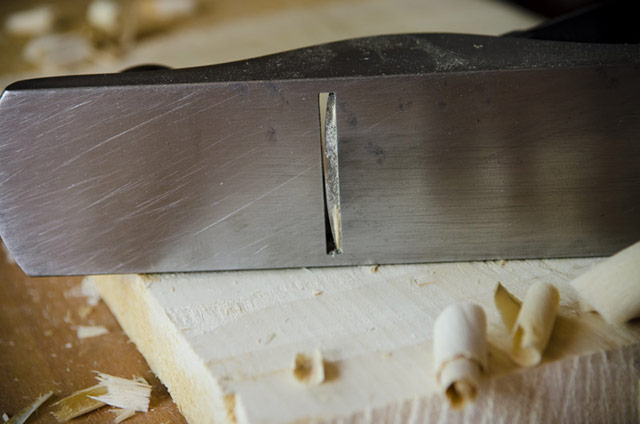
If you have extreme cupping in the board, hand plane down the length of the board, removing the high center to create a valley:
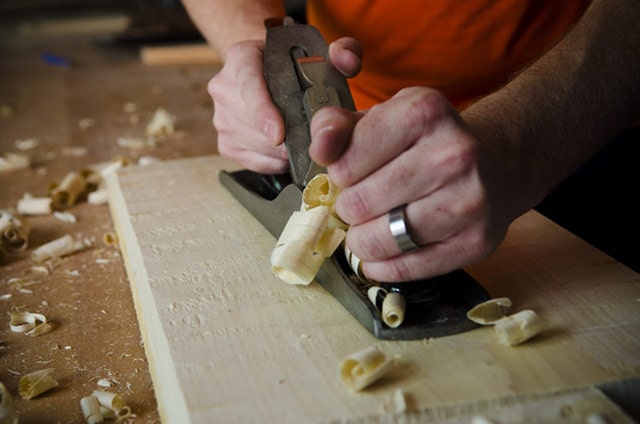
Before hand planning across the grain, bevel the edge that is farthest away from you, to prevent major tear out:
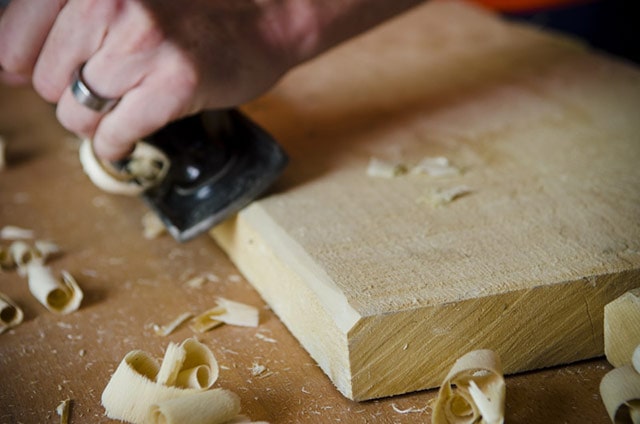
Then hand plane across the grain, from one end to the other:
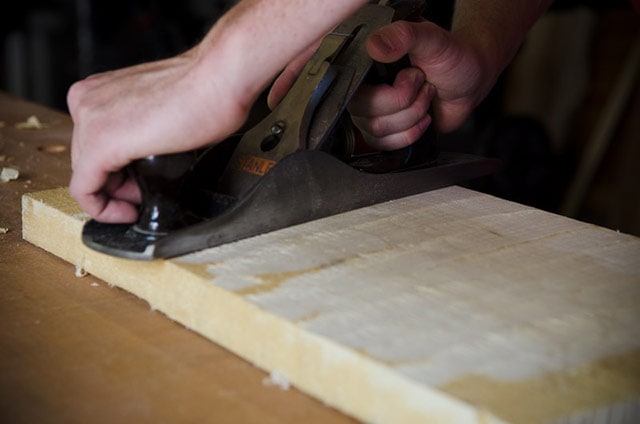
Adjust your hand plane so that your wood shavings are as big as possible, while still being able to move the plane.
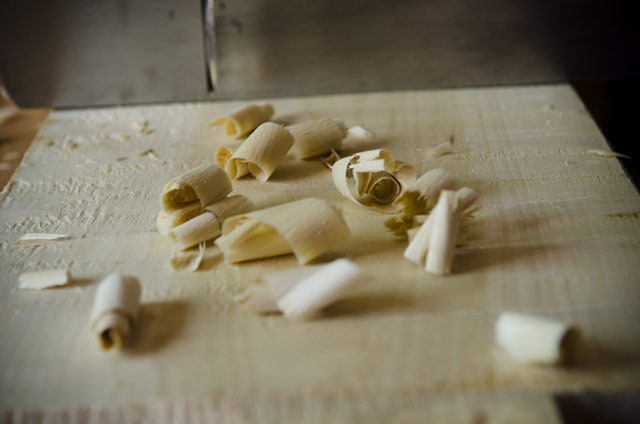
You can also take some diagonal passes with the hand plane both ways, to aid with flattening:
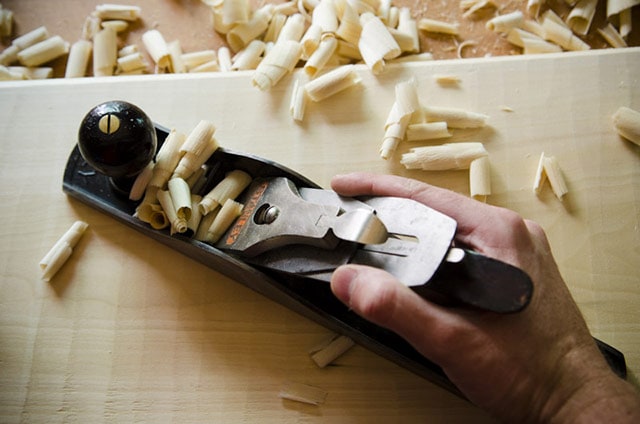
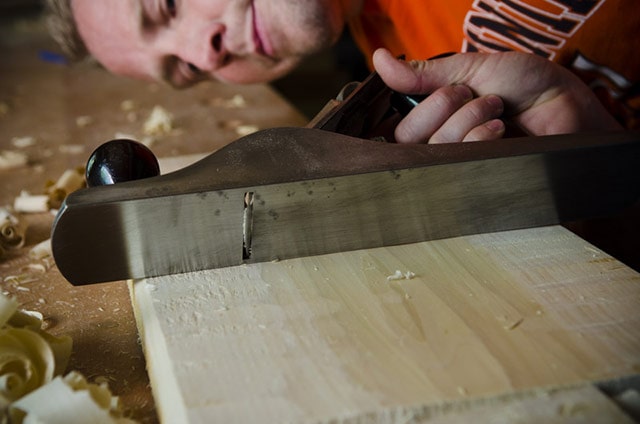
Tilt your jack plane on its edge and drag it along the board to get a rough idea of your progress toward flatness:
Step 3: Test for Twisting with Winding Sticks
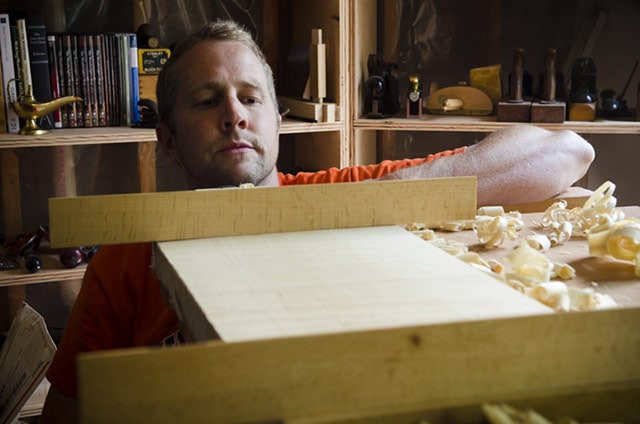
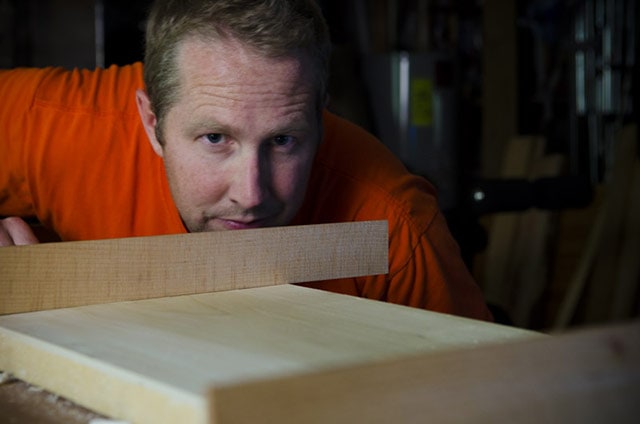
Set a pair of winding sticks (pronounced “why-nding”) parallel to each other on opposite ends of your board and site along the winding sticks. The winding sticks will make any twisting appear more exaggerated, showing you which corners need to be lowered when you continue to flatten board with a hand plane.
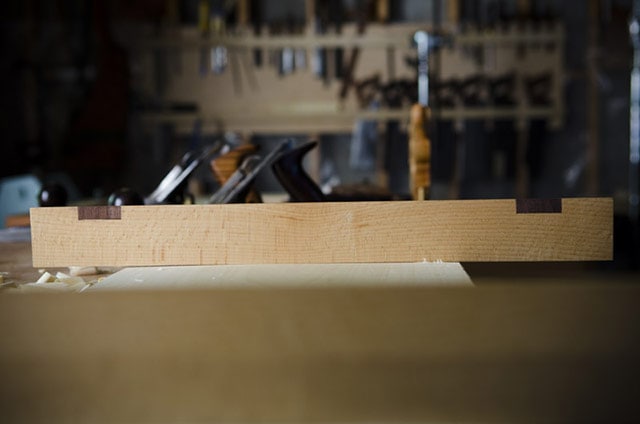
Having dark ends or inlaid bars on one winding stick makes twist easier to spot. You don’t even need to make fancy winding sticks, but can simply use two straight pieces of wood or aluminum angle iron that are the same size.
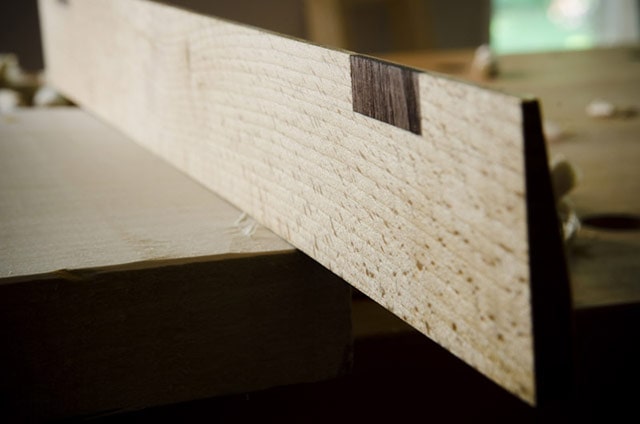
Use your pencil to mark the high corners of the board. Because of how boards twist, the high corners will usually be opposite each other.
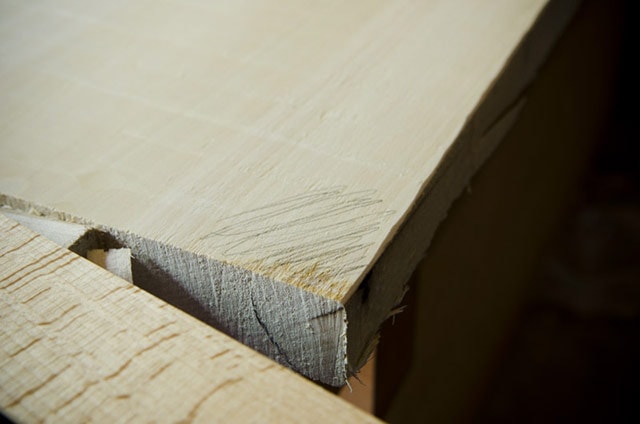
Step 4: Remove the Twist and Flatten the Board Face

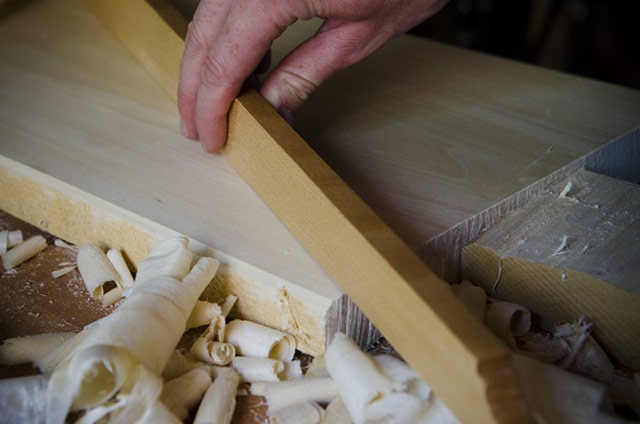
Place your straight edge on the high corners to verify how much wood still needs to be removed with your wood plane.
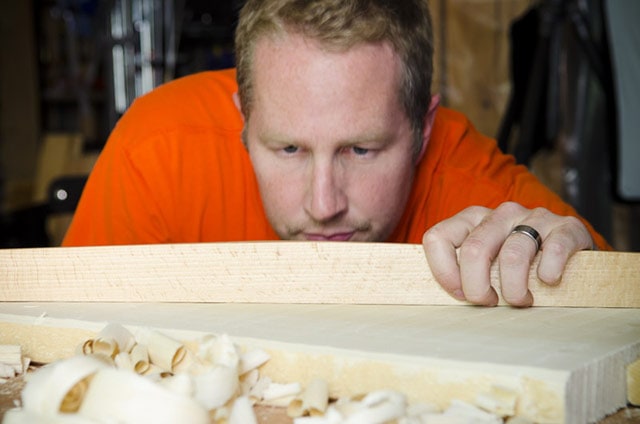
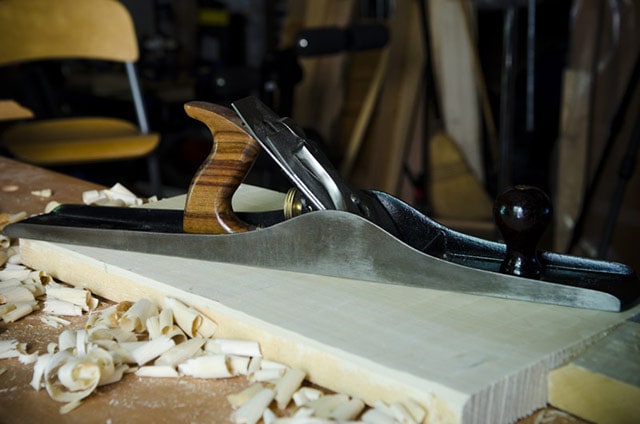
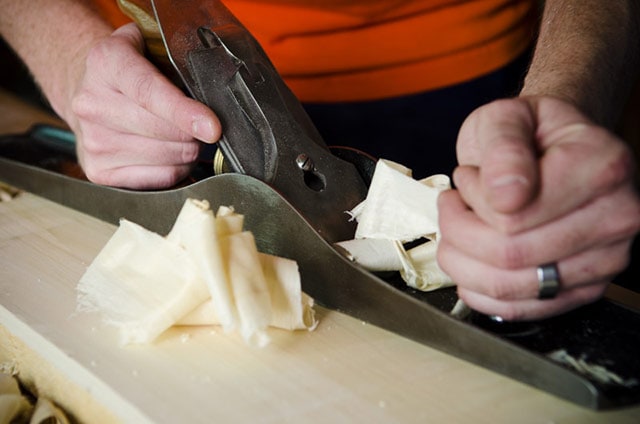
Use a longer fore plane (No. 6) or jointer plane (No. 7 or No. 8) to remove the high corners and check your progress with a straight edge.
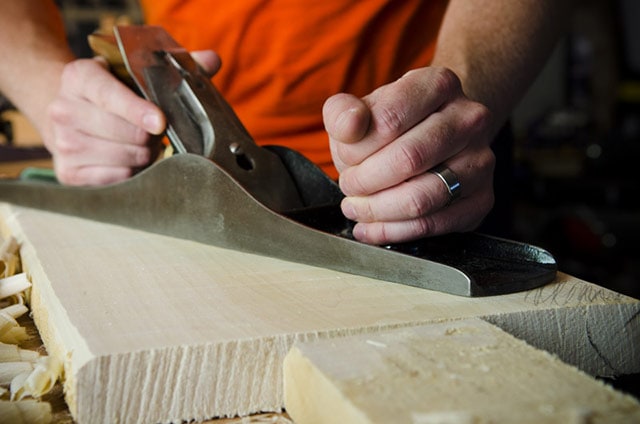
If you are getting “tear-out”, that means that you are hand planing against the grain. Flip your board around and hand plane in the other direction.
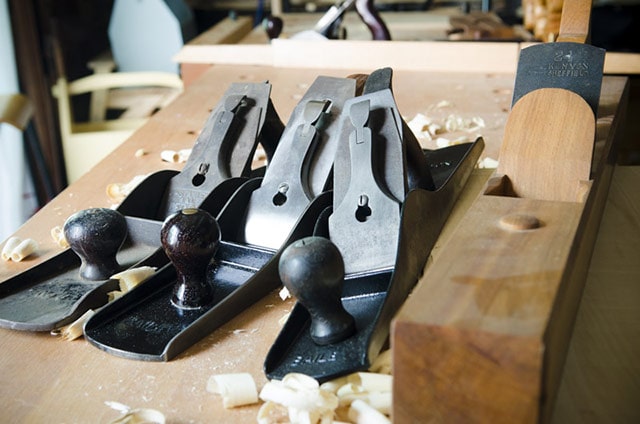
Below are several Stanley plane options for hand planes for flattening the board’s face (from left to right): A Stanley No. 6 “Fore Plane”, a Stanley No. 7 “Jointer Plane”, a Stanley No. 8 “Jointer Plane”, and an 18th century style wooden jointer plane (I built it, so it’s my favorite!):
Your shavings will still be somewhat heavy in this step, but not nearly as heavy as with the scrubbing plane / jack plane.
Just don’t remove too much wood on the corners or you’ll have to lower the rest of the board to match your new low corners. Once the straight edge lies flat across the previously-higher corners, move onto flattening the rest of the board face.
The longer hand plane will uniformly bring the surface downward, skipping all the valleys that a smaller hand plane would fall into. As you’re hand planing be conscious about not introducing a lengthwise arc.
Hand Planing 101 Tip:
Here’s how to avoid getting “valleys” in the middle of your board when hand planing: When your hand plane starts on the board, keep the downward pressure on the front knob of the handplane only:
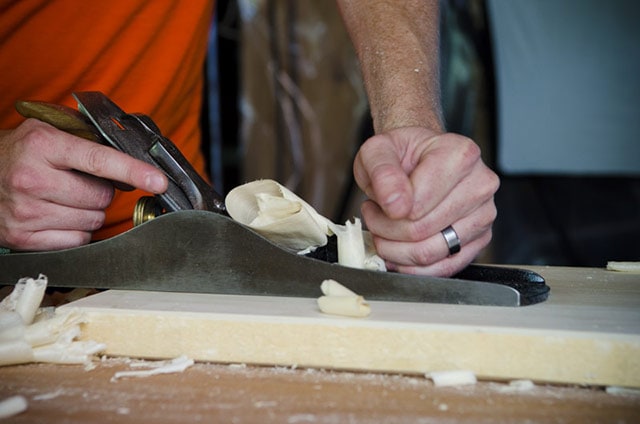
When your handplane is in the middle of the board push downward on both the front knob and the rear handle (or tote):
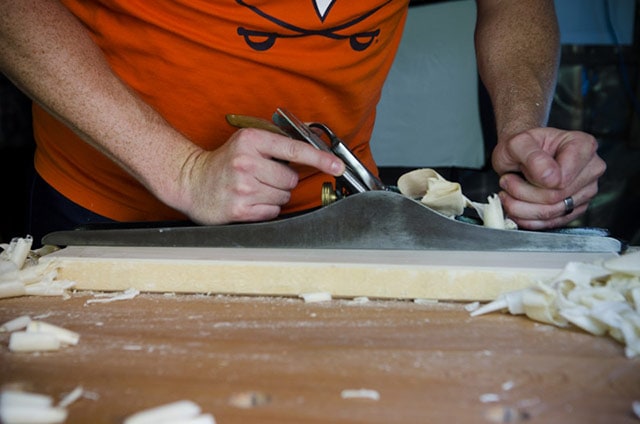
When the front of your handplane moves over the edge of the board, remove the downward pressure from the front knob, and only push downward on the rear handle. For practice you can even remove your hand from the front knob:
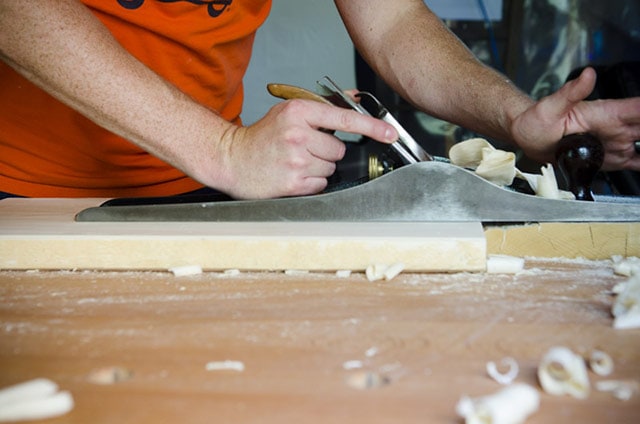
Use diagonal hand plane passes, then lengthwise passes, periodically using a straight edge and your winding sticks to check your progress toward perfect flatness.
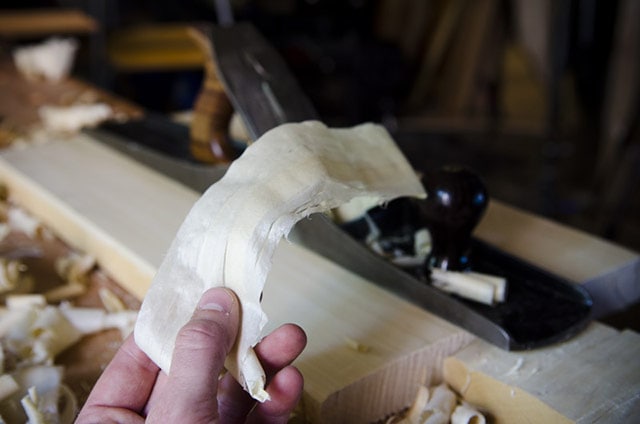
When you’re getting full length and full width wood shavings, and your board’s face starts to look flat and smooth, then you’ll know that the first board face is about ready.
The straight edge should show no gaps no matter which way you turn it on the board’s face:
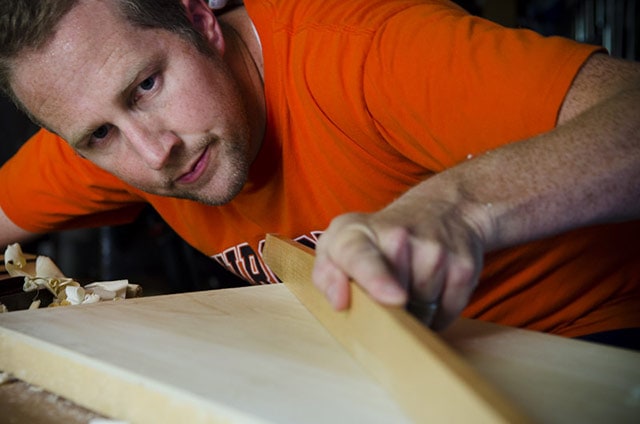
Step 5: Smooth the Reference Face with a Smoothing Hand Plane
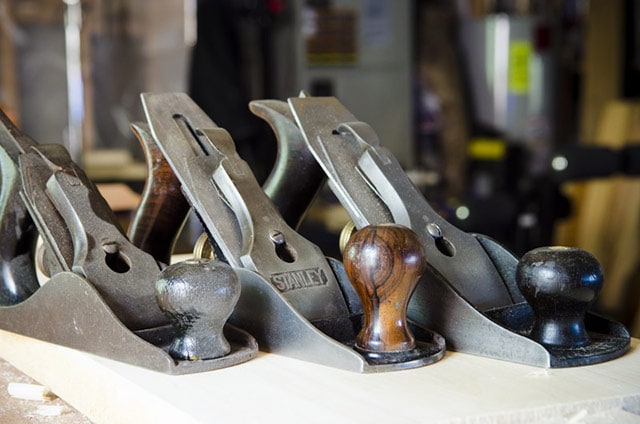
Use a finely tuned smoothing plane (like the below Stanley No. 4 hand plane or No. 4 ½ hand plane) and take a few passes lengthwise to give a better-than-sandpaper surface to your reference face.

You will want to produce very thin and fine shavings in this step, referred to as “gossamer” shavings (like a silk scarf).
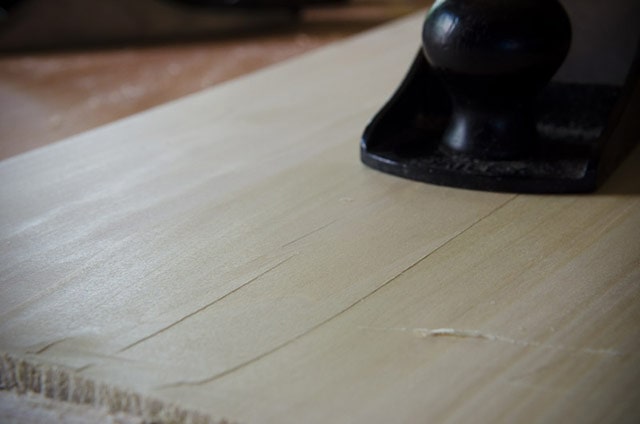
A slightly cambered (i.e. arced) iron (i.e. blade) will prevent “hand plane tracks” (see the lines above) and give you a glassy surface. When I say “slightly” I mean “barely”. Chris Schwarz has the best tutorial on tuning & sharpening handplanes on his DVD: “Super-Tune a Handplane”. You can buy it here or here.
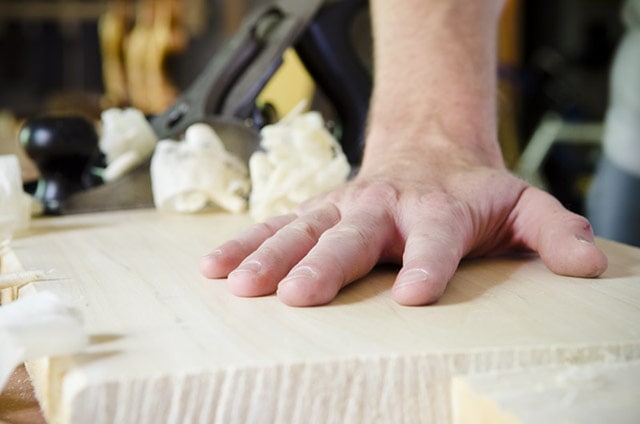
Now that your reference face is perfectly flat & smooth, make a traditional squiggly mark to notate the reference face:
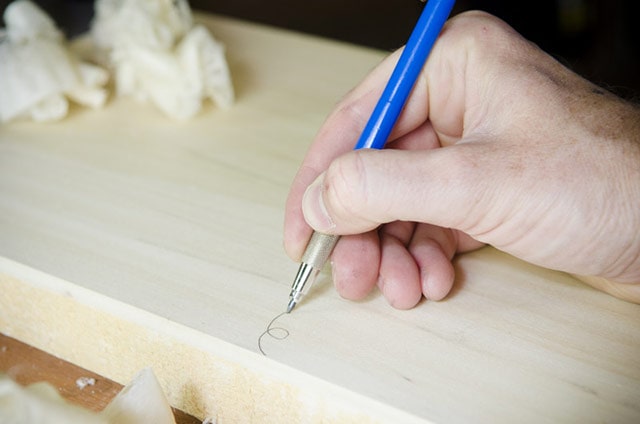
Step 6: Joint the Reference Edge with a Jointer Plane
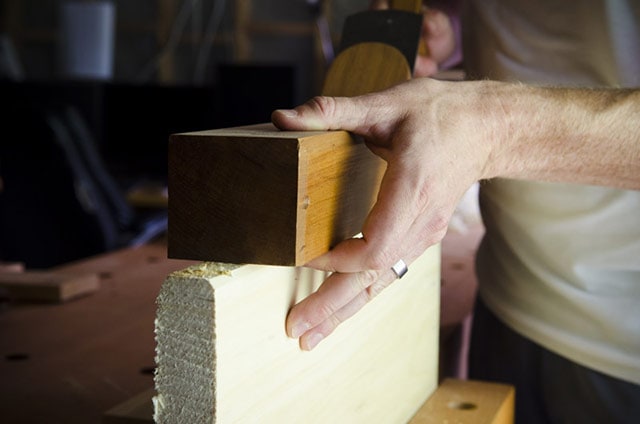
You will use a long jointer plane to “joint” (i.e. true-up or flatten) the first edge of your board, to provide a perfect 90 degree angle between the reference face and reference edge. You can either use a metal jointer plane, like the No. 7 Stanley Plane or No. 8 Stanley plane, or a quality wood plane, like a wooden jointer plane.
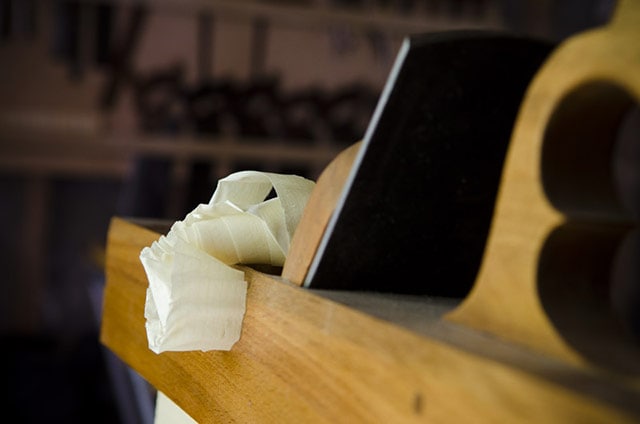
Place the board in your workbench vise, with the reference face toward you. The process used to joint a board’s edge is essentially the same as I used to flatten the reference face in step 4.
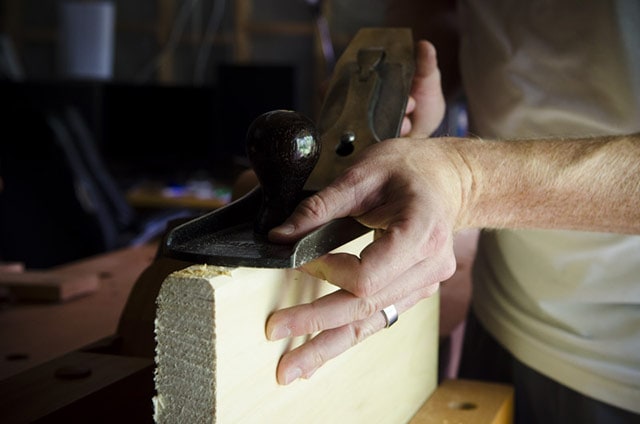
The main difference is how you hold the hand plane. To achieve a reference edge that is 90 degrees to the reference face, pinch the jointer plane with your thumb and index finger, and use your other 3 fingers (hopefully you still have that many digits…I’m talking to you table saw users) as a fence to maintain the 90 degree angle:
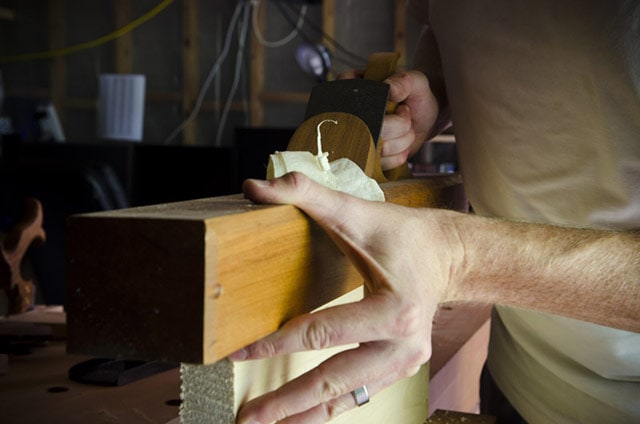
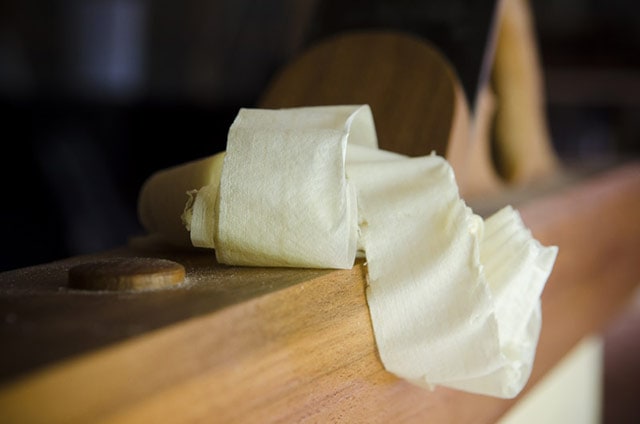
Push the hand plane lengthwise, producing moderately thick shavings, until the board’s edge is flat. Adjust your hand plane so that your shavings are ejecting from the middle of the jointer plane.
You’ll gauge the flatness by placing your straight edge on the board’s edge:
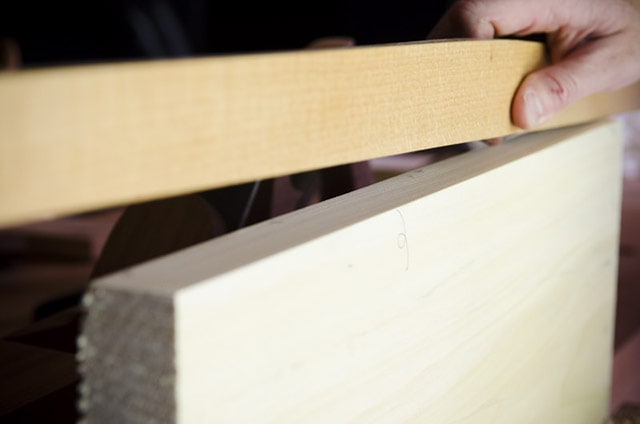
Look under the straight edge to see if there are any gaps. It is common to create a valley from improper hand planing techniques. Just refer back to step 4 for a review on how to avoid valleys while hand planing:
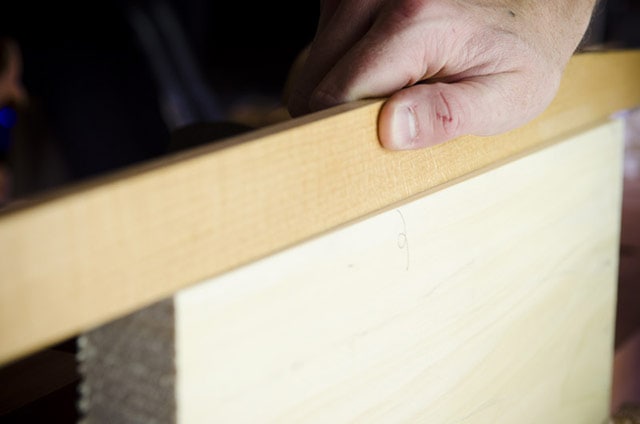
Periodically use a small combination square or try square to check for the 90 degree angle along the entire edge of the board. Don’t ruin your combination square by dragging it, but just take incremental measurements.
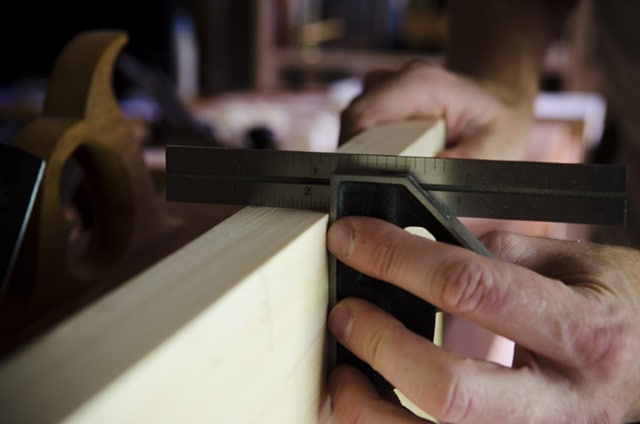
Use your pencil to mark where your high spots are:
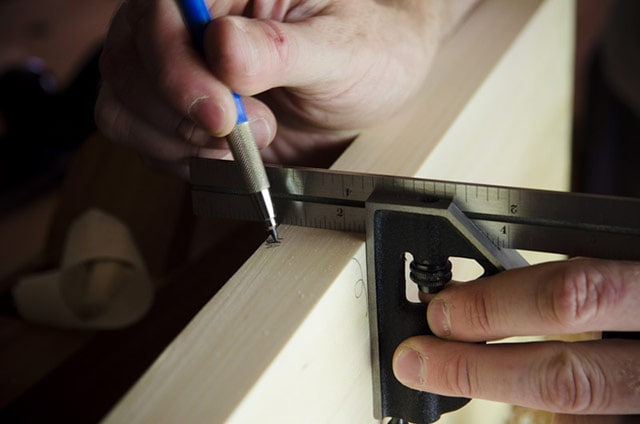
Then tilt your jointer plane to take down the high spots with a pass or two, then take another full pass or two. Then recheck until the entire edge is square to the reference face.
When you first get started, this process can take a little while to figure out, but you’ll eventually be able to quickly achieve a true edge that is square to the reference face. You can also look into making an “edge shooting board” to speed things up when truing edges. I haven’t had much luck with the fence attachments for handplanes. Use your pencil to make a traditional “V” mark on the edge to indicate that this is the reference edge:
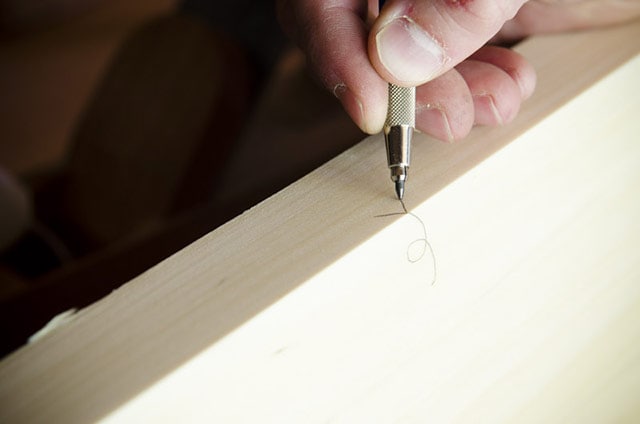
Now you will see a perfect 90 degree angle, from which you will mark the other faces & edges.
Step 7: Create a Parallel Edge with a Panel Gauge or Square
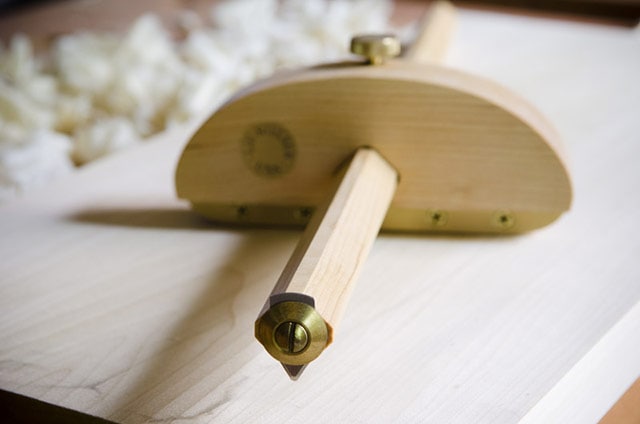
Use an accurate panel gauge (or a 12-inch combination square) to make the next edge parallel to your freshly trued reference edge.
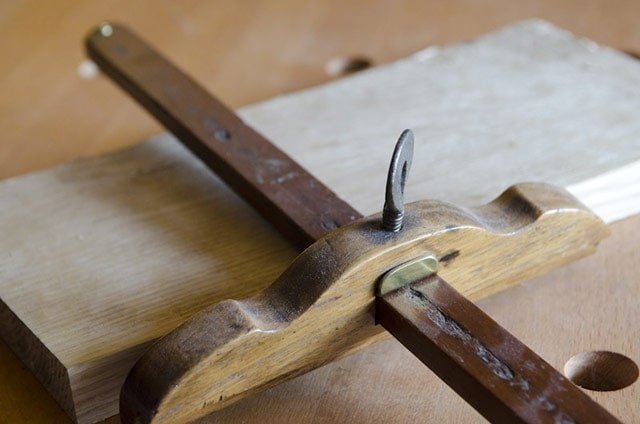
I’ve found that antique panel gauges can be wobbly, so either hold them tightly while scribing, or purchase a new panel gauge, like this excellent new panel gauge at Taylor Toolworks. You can also make one, but it’s tough to beat something as stable as one like this:
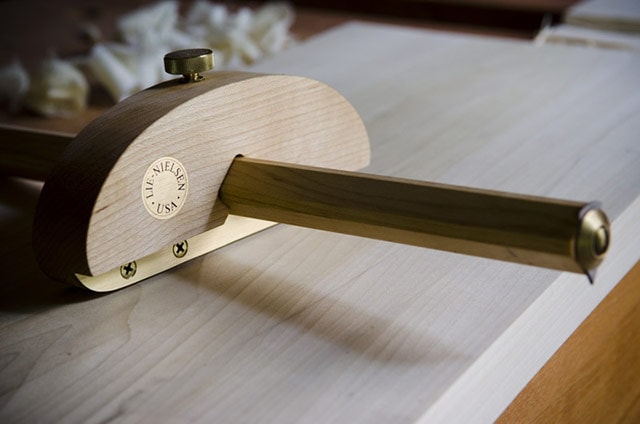
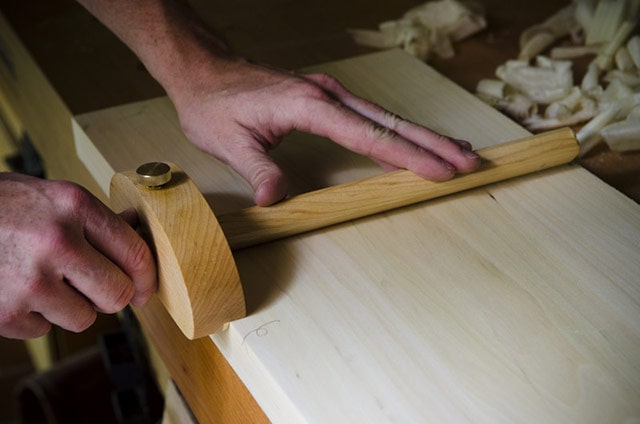
Set the width of the panel gauge to your required width, lock in the measurement (with the screw or wedge), and run the cutter to make your perfectly parallel line. This mark is where you will cut or hand plane down to.
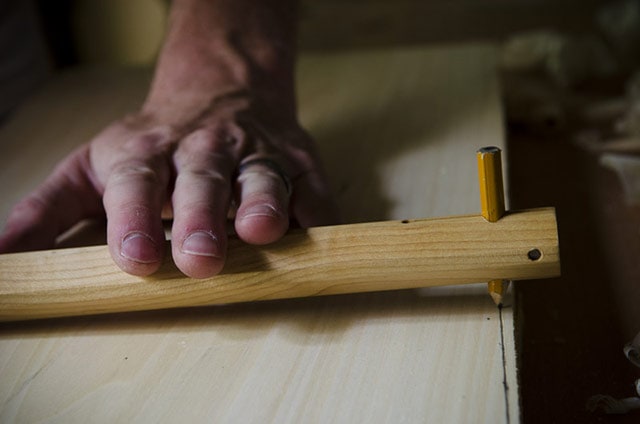
My panel gauge has a slot for a pencil on the opposite end of the handle…just flip it around. Since I’m not cutting on this line (it’s just a visual guide), I prefer the pencil end.
Step 8: True up the Second Edge
If the line you just scribed with your panel gauge is very close to the rough edge, then you can simply use a jointer plane to bring down the small amount of wood.
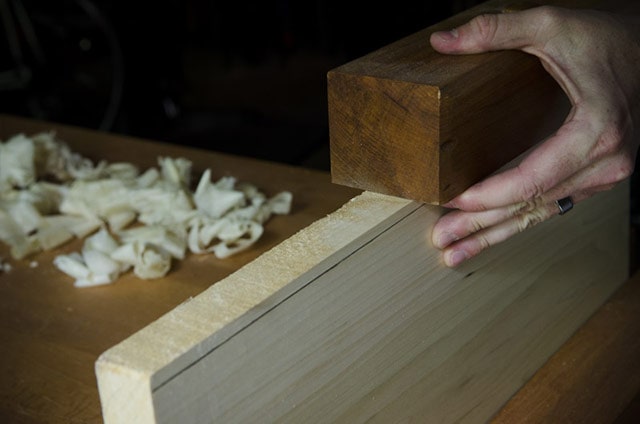
If you find that you have too much wood to remove (and don’t want to spend all day hand planing down to the line with your finely set jointer plane) you have two alternate options:
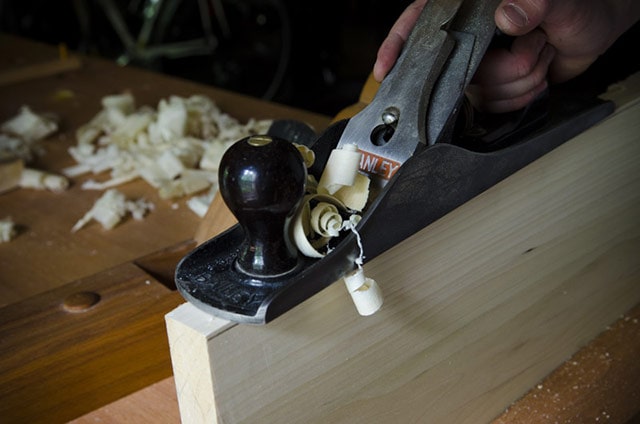
(1) Use a jack plane or scrubbing plane to quickly remove most of the waste wood, and then finish down to the pencil line with a jointer plane:
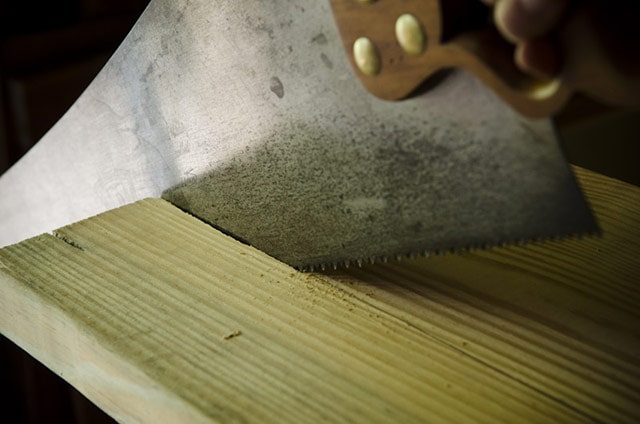
(2) If you have too much waste, even for a jack plane to remove, then use a rip panel saw to get close to your line, then finish up with a jointer plane:
CAUTION: If your board’s width is critical, then make certain to NOT get too close to your line with the jack plane or rip saw. Get somewhat close, and then use your jointer plane to finish the job. Just remember that you may need some extra wood to get the edge square:
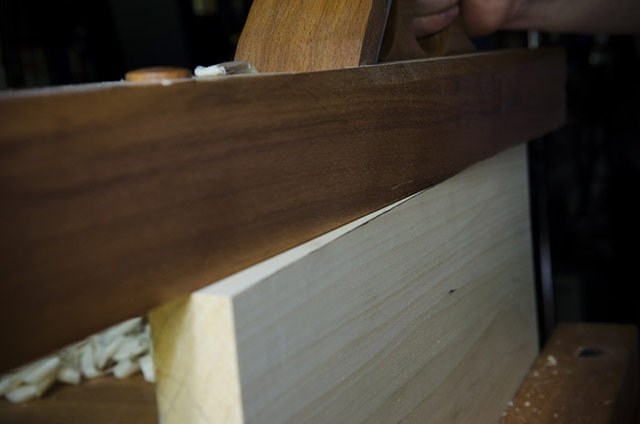
Now you should have two jointed edges that will be perfect in case you need to glue-up a table top or panel.
Step 9: Flatten the Final Board Face
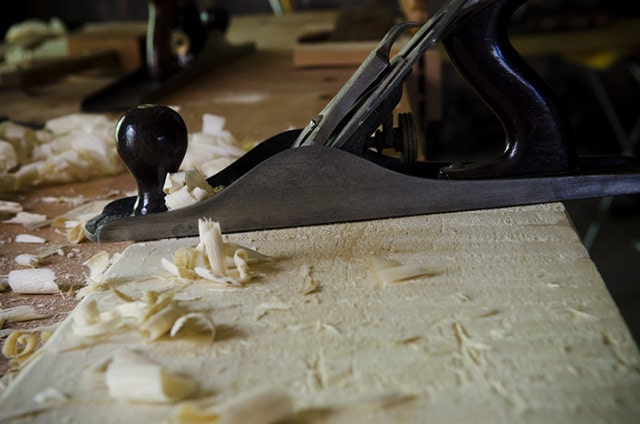
Now that your reference face and both edges are flat and square to each other, use a marking gauge to scribe your final board thickness. Set the marking gauge against your flattened reference face and scribe the thickness onto both edges and ends:
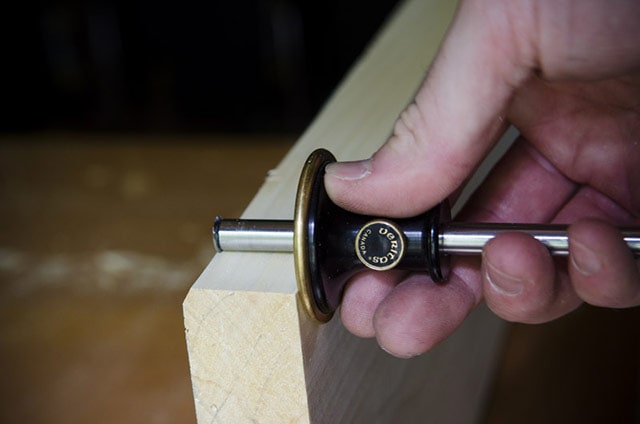
I like to follow the marks with a pencil to make them more visible for when I use the hand planes in the next step:
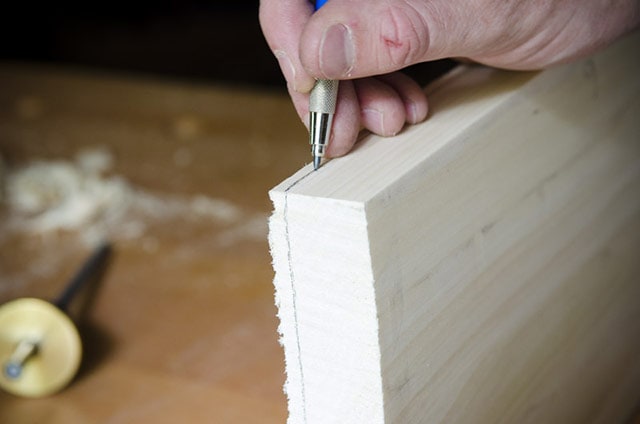
Now you have a line drawn around the parameter of the board. Use a scrubbing plane or jack plane, a jointer plane, and a smoothing plane to flatten & smooth the last face, according to the instructions in steps 2 through 5. But this time you will have the added advantage of guidelines to let you know when you are getting close. But I still use the straight edge and winding sticks to measure my progress:
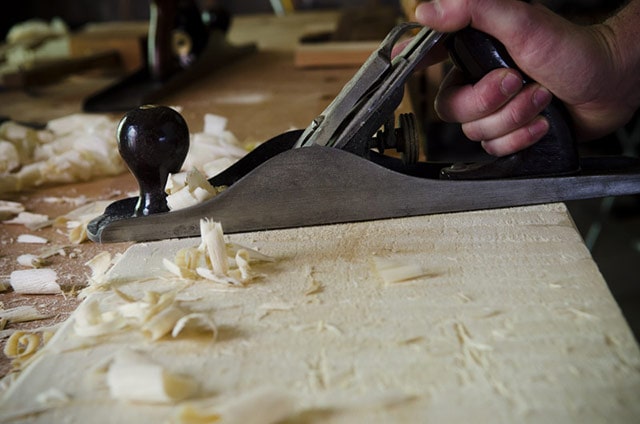
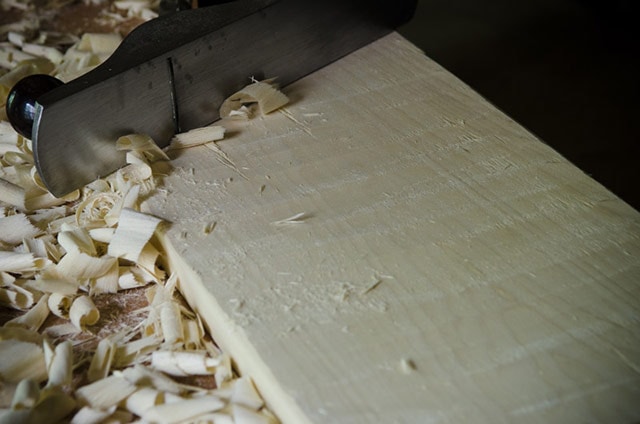
Step 10: Cut the Ends to Final Length
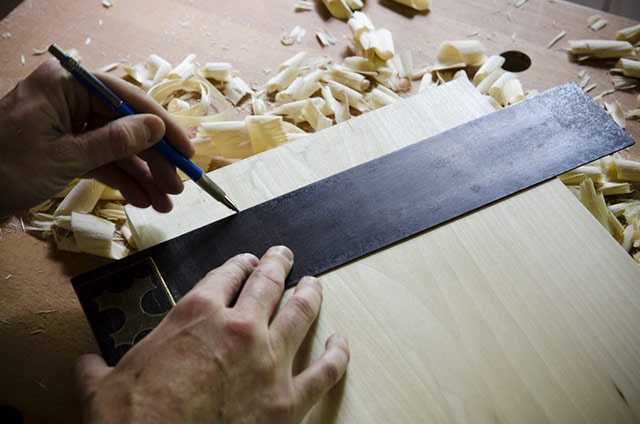
You should now have two perfect faces and two perfect edges. All that remains is two ends that are square to the faces and edges.
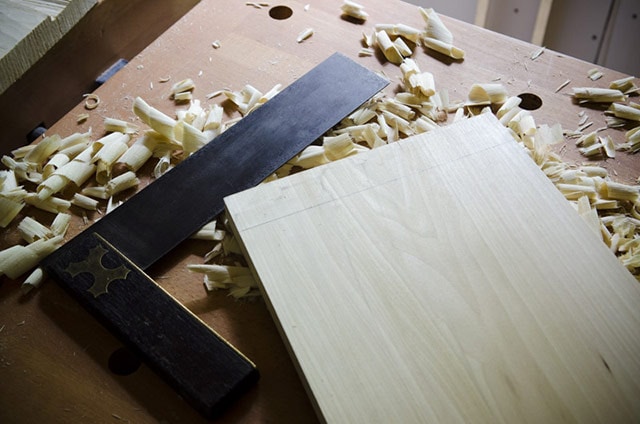
First you should set a larger try square (or combination square) against your reference edge and scribe your first end’s cut line on your reference face with a fine pencil. You can also use a framing square, if your board is too wide for a try square or combination square. Just make sure your try square is actually square. Usually try squares have at least one edge that is true. Refer to my “marking & measuring” buying guide (here) to see how to test a try square for “squareness”.
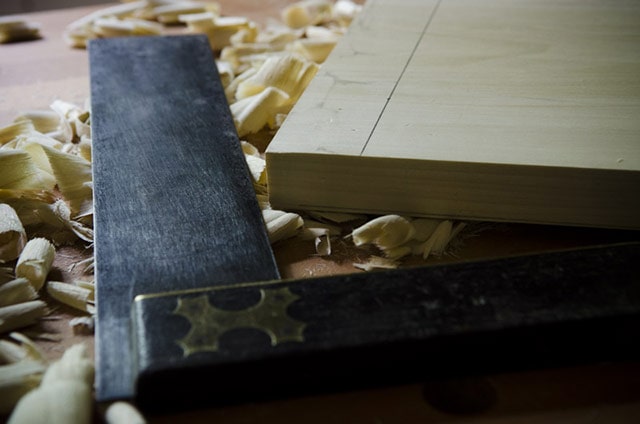
I have found that my miter box and miter box saw are the best solution to creating perfect ends. Make sure that your board’s reference edge is pressed up against the miter box fence, adjust the miter box to cut a 90 degree cut (use your pencil line to ensure the miter box is set correctly), and saw away!
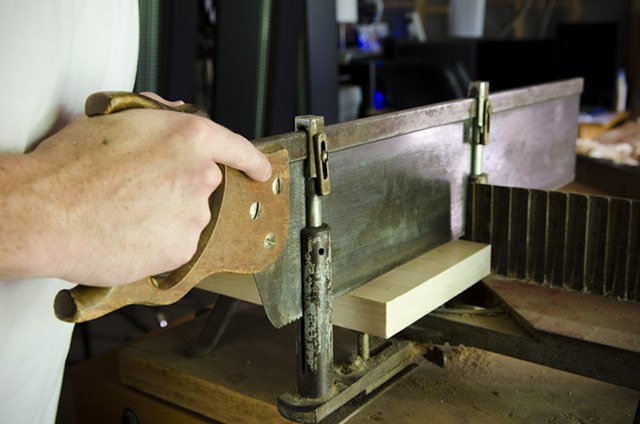
This may take awhile, depending on how wide and thick your board is, and how sharp your saw teeth are. If I have several fatty boards to cut, then I wear a glove on my sawing hand to prevent a blister.
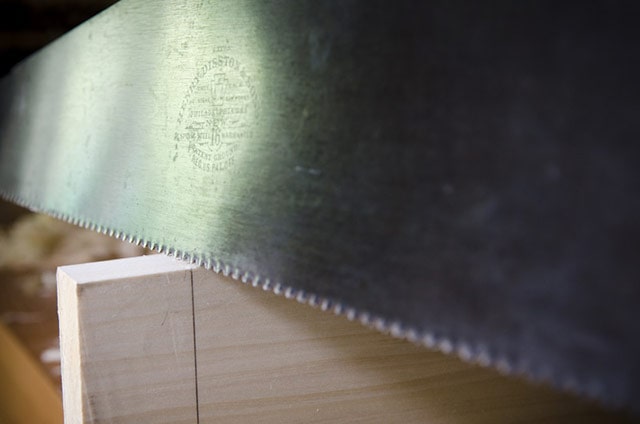
If your board is too wide to fit in a miter box (or if you don’t have a miter box and miter saw), then use a cross cut panel saw (above) to saw close to your line. Then use a very sharp low-angle block plane to get right down to the line:

Just make sure that you hand plane from both directions toward the middle to avoid hand hand planing over the edge. If you don’t heed my advice, the end grain will splinter off the edge of the board.
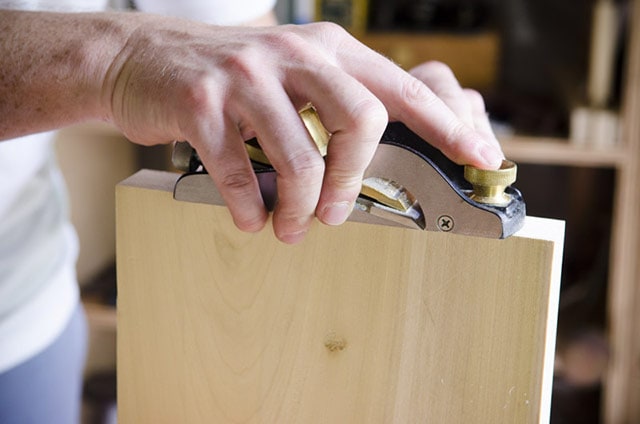
Use a large try square (or framing square) to look for any high or low spots, and continue to use the block plane to make the end become square to the edge and face:
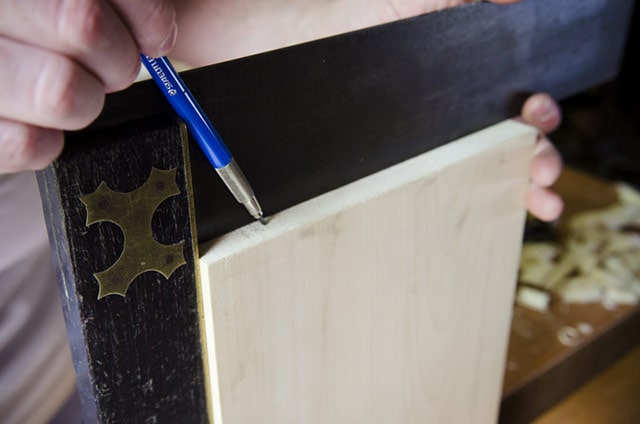
Now use a folding rule or a tape measure to determine your final length. Follow the above process for measuring and cutting the second and final end. Now you should have 6 square & flat surfaces, and a very useful board for gluing-up and building beautiful traditional furniture. Your board should now be “four squared”.

This process may seem overwhelming, but it really speeds up after you’ve dimensioned a few boards. Sometimes it’s even faster than setting up & tuning the big power tools!
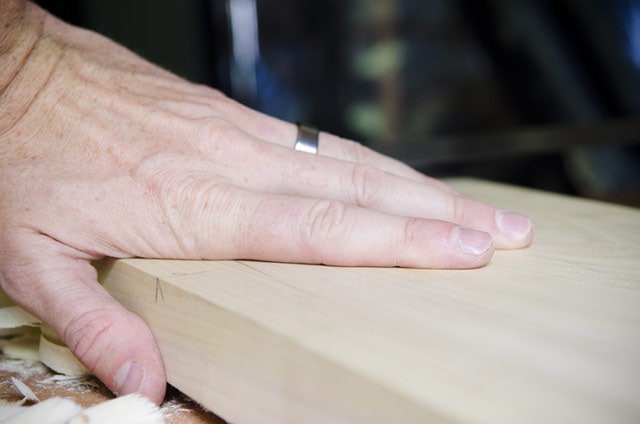
Go back and watch the video at the top of this page to clarify the process.
Conclusion
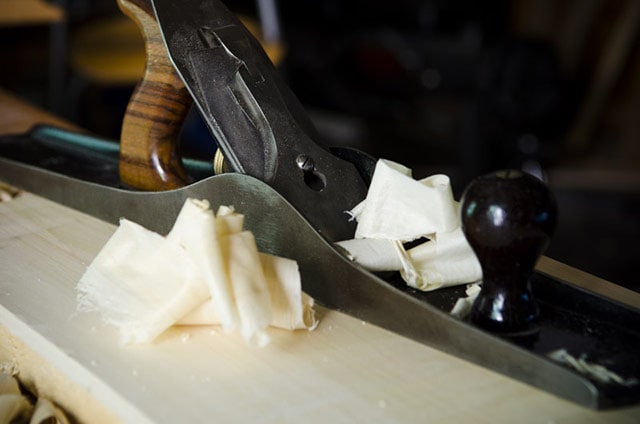
I hope this tutorial was helpful! Feel free to make comments or ask questions below. And if this process of squaring lumber with woodworking hand tools seems too overwhelming for you, then feel free to checkout our tutorial on squaring lumber with power tools (here).



The main reason I’m posting is because I’d like to enter the Damstom D300 giveaway. The clamps look fantastic. That said, I’ve been reading the articles on this blog for quite a while and I always find them very interesting. This article is especially helpful. While I work with both hand and power tools, knowing the basics helps with overall woodworking technique. As far as the prizes for the giveaway, I’m looking forward to winning the clamps. If I’m not… Read more »
This site is amazing. There is so much terrific information! This is one of my favorite and “go to” videos. I love to reference it before I grab my hand planes. Those clamps in the give away look great and I would be rheilled to get them. If I do not win those, I would like the Shaker Candle Stand video. The shirts all look great but i really like the red or brown hand plane shirts. My size is… Read more »
This site is excellent. I had no idea that it existed. I’m going to pour through all of these forums as I am sure that I will be able to glean much! Great idea, Joshua – having a giveaway to bring woodworkers to this site. Kudos!
Glad you found my site Odee! How did you find it?
I have a 2x8x12 plank of wood that is splintered and looks like it’s been through the ringer a few times. Lots of water damage, but it looks beautiful. I want to make a planter box out of it, but it needs to be planed. What is your recommendation?
It couldn’t hurt to use a hand plane to plane it down and see how it looks!
If you need 1/2 or 1/4 inch thick boards for a project, where do you get them from? I find a lot of evidence that people are resawing with a bandsaw, a few who resaw by hand, some people buy wood cut to thickness. In this article you had wood that could be planed to thickness – what if it had needed to be half this thickness. How do you dimension thickness??
I personally resaw using a bandsaw, but this is how the real studs did it in the olden days! https://woodandshop.com/colonial-williamsburg-hay-cabinet-shop-tutorial-resaw-wide-boards/
Joshua, Thanks. I am just getting started with woodworking. I noticed that most of the sources are selling rough stock at 4/4 or larger, but project demos seldom talk about getting it dimensioned to thickness.
Your site is an amazing resource; I just discovered it while hunting for compass/divider advice.
Thanks for such great detailed articles
Hey Chris,
Glad you found me! Yeah, my hand tool buyer’s guides will help you out a bunch: https://woodandshop.com/which-hand-tools-do-you-need-for-traditional-woodworking/
And for smaller boards, you could always use a hand saw to rip it to a more narrow thickness, but it’s a lot of work! Hope to see you asking questions on the forum!
Best,
Joshua
Hi Joshua,
I found your post about hand planing enormously helpful as research for a story I am writing about a 17th century French boy who’s truing up warped boards for a primitive fort. I wonder if you would be so kind as to share with me any sort of accidents or injuries that might occur to someone undertaking this task. Thank you for your consideration.
Dana
Glad it was helpful Dana! That’s neat about your story. I guess there are plenty of minor injuries that could occur, though not to the extent as using power tools. French workers used forged holdfasts, so maybe the boy accidently trapped his hand under a hold fast or hit it with a mallet? Or cut his fingers with a hand saw? :)
Really, 17th century, building a fort. Tough it up.
You build a house today, and you hit your finger with a hammer, are you going to lay down and die?
Seriously, suck it up.
Thanks for the great post and forgive my poor English, I can successfully make the reference face and reference edge now, but from step 7 on, I can not plane it to match the gauge lines all the way across, I get into the situation that somewhere is cut into the line and other place still needed to remove more materials, such like one end is cut into line, the other end is still far above the line, any suggestion… Read more »
I’m sorry, but I don’t quite understand what you’re asking. Please rephrase.
Thanks for your reply, What I means when I have a refrence face, I can not get the opposite face parallel with it, even I have the gauge lines marked here, I always got this face messed up, It’s flat, but it’s not parallet to the refrence face, So I waste too much time on fix it.
In my video & article I show how you use a marking gauge to mark the correct thickness around the board. Then as long as you plane down to those marks, your board will be the same thickness all around.
By far this is the best information that I have been able to find on how to flatten and square a rough board. I bought many books and DVDs over the years and none of them were accurate and detailed enough. I have all the machinery to do this but I chose to learn how to flatten and square rough sawn boards by hand because machines like jointer are never wide enough. Also machines leave marks and I hoping that… Read more »
I’m glad this has been so helpful to you Ali!
I’ve always used the FEE system – Face, Edge, Ends…
Thousands of board feet of all types of wood.
Cedar is the easiest to work for me, especially now that I am getting older!
Nice Dez!