Disclosure: WoodAndShop.com is supported by its audience. When you purchase through certain links on our site, we may earn a small affiliate commission, at no cost to you. Learn more.
Choosing the Best Wood Clamps for Woodworking
By Joshua Farnsworth
In this guide I’ll be helping you to choose the best wood clamps for woodworking. I’ll also help you find the best wood glue, wood screws, and nails for woodworking.
Overall this article will focus on tools and products that are used for holding furniture together, whether temporarily (like woodworking clamps) or permanently (like wood glue, nails, and screws). Below are my recommendations of the products that are useful for woodworkers looking to make quality, long-lasting furniture, whether historical or modern.

Buying the Best Clamps for Woodworking
New woodworkers can feel overwhelmed by all the different wood clamps on the market, and often get puzzled by which clamps they need for woodworking. In this guide I will show you some different woodworking clamps that I use for different situations. But I want you to understand that you don’t need to run out and buy a bunch of clamps to cover all future clamping contingencies. I know a big rack of clamps can look pretty cool in your workshop, but I recommend that you buy woodworking clamps (and other tools) one project at a time. Plan out what you want to build, then build it, and then figure out which woodworking clamps you need to sufficiently clamp that piece of furniture together during the glue-up stage. And then on the next project do the same, and if you feel that you need a couple more woodworking clamps, then go ahead and buy more. Frugality! Below are different types of wood clamps that I use in my woodworking workshop and school:
Popular Types of Wood Clamps for Woodworking:
Hand Screw Clamps
Wooden hand screw clamps have been around for a long time, and are still being manufactured because of how useful they are. The long jaws of a hand screw clamp gives nice reach, and won’t hurt the surface of your wooden furniture. The top and bottom screws are independently operated, which enables you to clamp abnormal work pieces. These woodworking clamps also work great as cauls during panel glue-ups. My most common use for a wooden handscrew clamp is for holding smaller work pieces, and then I place a hand screw clamp in my workbench vise. This helps me get the small piece of wood closer to my face, and gives me quick adjustability. I like to have 2 or 3 different sizes of hand screw clamps on hand. See below for links to hand screw clamps that I recommend.
Parallel Clamps
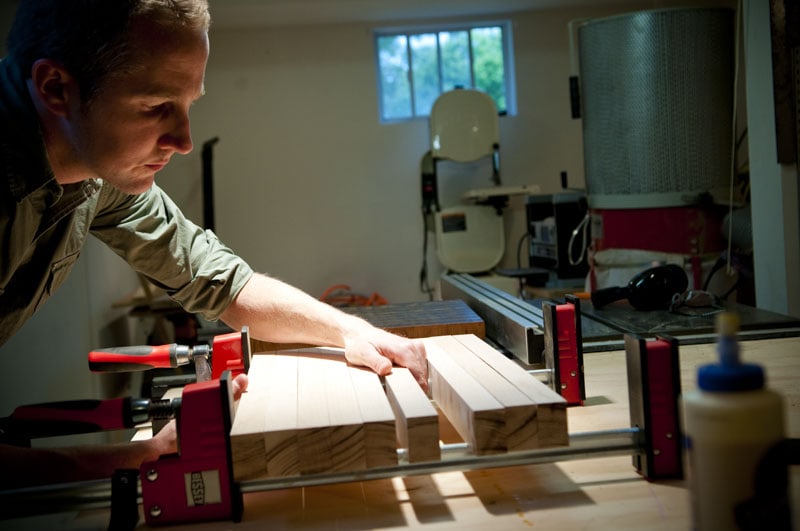
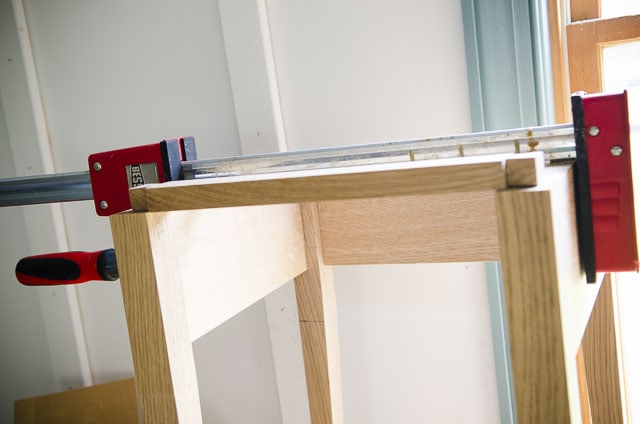
I use parallel clamps more than any other type of woodworking clamp. The immense clamping power, larger jaw size, non-marring padding, and versatility make parallel clamps more appealing to me for most uses than normal I-beam bar clamps or pipe clamps. Bessey invented the “K Body” parallel clamp back in the 1990’s, and since then they have become a standard in woodworking shops due to the advantages mentioned above and due to their square and parallel jaws. Because the jaws are parallel, they distribute even pressure along the surface of the clamp pad. I use 3 different sizes of these woodworking clamps (mentioned below) for a variety of tasks, including panel glue-ups, laminating workbench tops, special clamping of large boards to my workbench, and many other furniture glue-up tasks.
F-Style Clamps
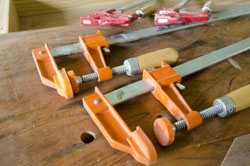
F-style clamps are a simpler design than parallel clamps, and thus less expensive. Rather than providing even pressure along the jaw, this type of clamp concentrates all the pressure at the end of the jaws, where the clamp pad is screwed against your wood work piece. If you need to apply targeted clamping pressure, or if you’re just on a budget and can’t afford enough parallel clamps for the job, then F-style wood clamps may be your best bet. They come in various lengths with various jaw reach. Some F-style woodworking clamps come with rubber pads, and some just have bare metal. I like the rubber padding because it protects the wood surface from impressions, but I’ve found that with some brands, the pad leaves an oily residue on the wood. So just plan to use scraps of wood to protect your furniture.
Pipe Clamps
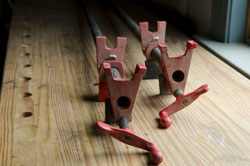
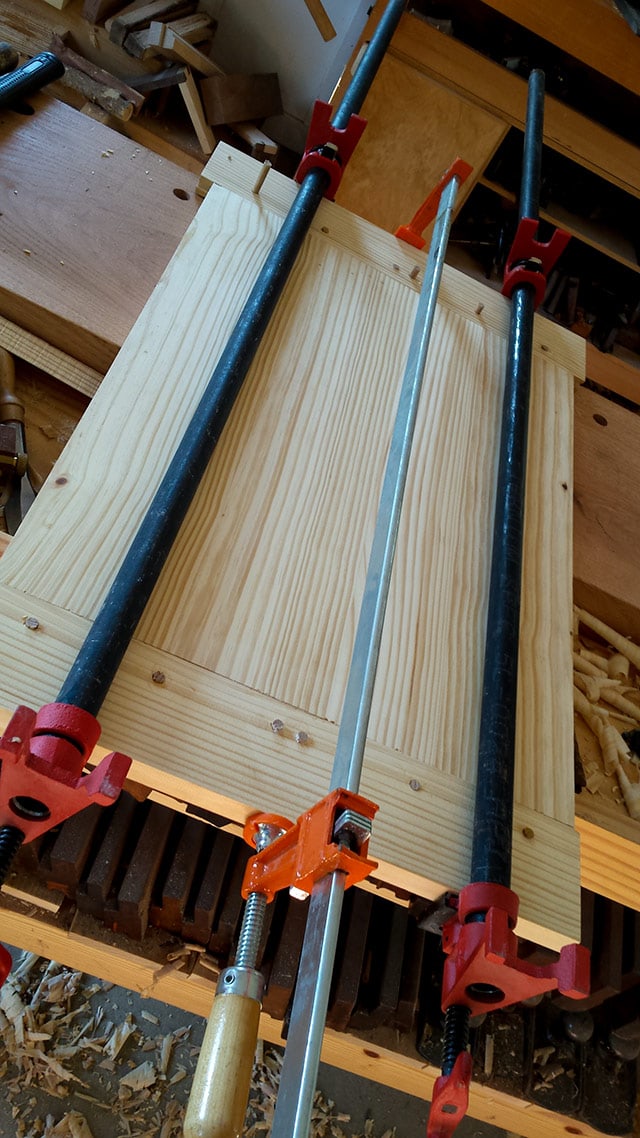
Pipe clamps are very useful for when you need to glue up a piece of furniture or a workbench that is too big for your parallel clamps or F-style clamps. Pipe clamps are also more affordable, because they come with just the two jaws of the clamp. You provide the pipe (1/2-inch or 3/4-inch), which is typically gas pipe. I purchase “black pipe” from my local hardware store, and they cut it to length and cut threads on the ends at no additional charge. Then I just thread the threaded part of the jaw onto one end and slide the other part of the jaw onto the other end. Pipe clamp jaws usually cost about $14 each, and 3/4-inch black pipe usually runs around $2 per foot at your hardware store. So you could buy a 10-foot pipe, cut it in half, and then buy two clamp jaws (for a total of $30) and have two 5-foot pipe clamps for about $25 a piece. That’s not a bad deal.
C-Style clamps
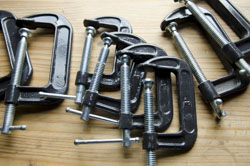
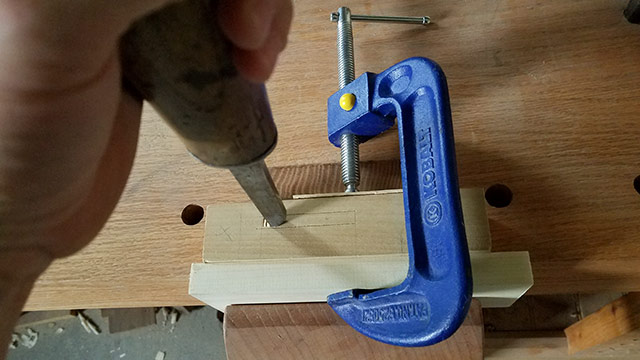
Metal C-clamps are a multi-purpose clamp, with a lot of clamping pressure, that are used for myriad tasks around my woodworking shop. My C-clamps range from 3-inches up to 8-inches. My main uses for C-clamps are keeping panels flat during glue-ups, and for clamping table legs to a board in my vise, so I can securely chop mortises on the workbench surface. We use a lot of C-clamps in our woodworking school, especially when we’re making smaller tool projects, like Try Squares, Bench Hooks, Shooting Boards, etc. Guitar makers, violin makers, and other luthiers use a lot of C-clamps when they bend the frames of their instruments. C-clamps are pretty simple woodworking clamps, but can come with some features like a quick release button, which is quite convenient.
Ratcheting Clamps
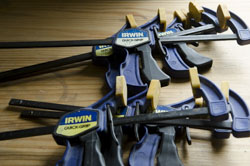
Ratcheting bar clamps lack the clamping power of other woodworking clamps in my workshop, but they make up for it in convenience. Being able to clamp two pieces of wood together when I only have one hand available is appealing, and the quick-release trigger offers additional convenience. The soft rubber pads on the clamp jaws are excellent for clamping delicate work, because the padded jaws protect the surface from indentations and marring. I use ratcheting clamps for glue-ups that don’t require much pressure, for holding wood to the workbench top, and some ratcheting clamps can be reversed to act as a spreader, for giving outward pressure. And best of all, a set of these woodworking clamps are usually quite affordable. I’ll discuss brands further below.
Spring Clamps
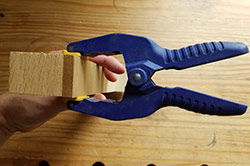
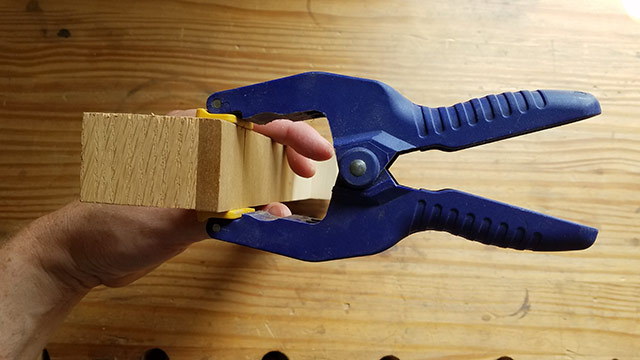
Spring clamps are very affordable for woodworkers, but provide probably the least amount of clamping pressure. This makes spring clamps unsuitable for all but special circumstances, such as glue-ups that require very light pressure, holding delicate objects, edge banding, and temporarily holding tools or random objects in place. Guitar makers and other luthiers use a lot of spring clamps when forming the delicate bodies of their instruments.
Specialty Clamps
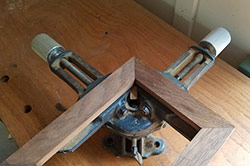
You’ll find a whole lot of other specialized clamps that will occasionally be used in your workshop for woodworking. These can include various clamps for miter joints (like a picture frame clamp), clamp guides (straight edges that clamp to a panel), toggle clamps, strap clamps, hose clamps (for dust extraction), etc… Some of these specialty clamps I use a lot, some I use on very rare occasions, and some I never use. See below for links to specialty clamps that I recommend.

RELATED
Which 20 Woodworking Hand Tools Should You Buy First?
Why Traditional Hand Tool Woodworking?
10 Jaw-Dropping Woodworking Shop Tours
57 Page Moravian Workbench Plans Now for Sale
How to Make a Mortise and Tenon Joint with Woodworking Hand Tools
8 Steps to Cutting Dovetails with Woodworking Hand Tools
Buying Wooden Hand Screw Clamps
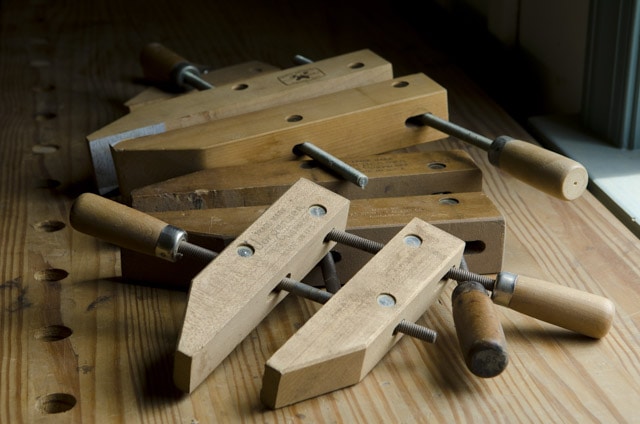
Buying one or two wooden hand screw clamps, of different sizes, is a good idea for any woodworking shop. I like a bigger clamp, around 10-inches or 12-inches, and a smaller clamp, around 6-inches. I’ve had pretty good luck with a variety of new wooden hand screw clamps (both higher-priced and lower priced), and have had good luck with used wooden hand screw clamps, especially Jorgensen brand. The really old wooden hand screw clamps that have wooden screws can also work, but may have broken screw threads, so look carefully. Here are some good places to find wooden hand screw clamps….just compare the reviews to make sure you’re getting a good brand:
Buying Parallel Clamps
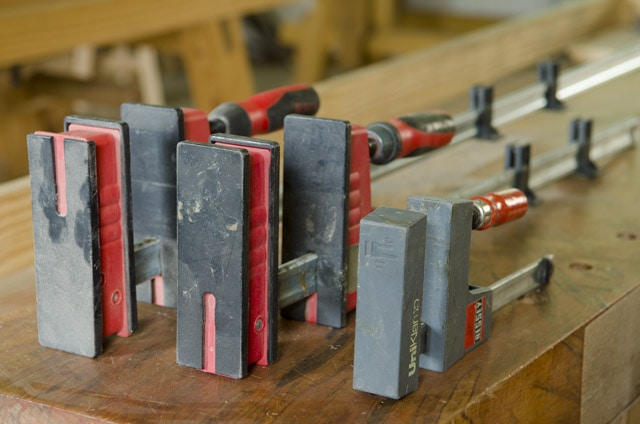
Several manufactures make decent parallel clamps (see the different brands & models here), but I have always used Bessey K-Body style parallel clamps. I use 3 different parallel clamp sizes for a variety of tasks in my workshop, including the following:
- See my 6-inch Bessey UniKlamp parallel clamps on Amazon
- See my 24-inch Bessey Parallel clamps on Amazon
- See my 50-inch Bessey parallel clamps on Amazon
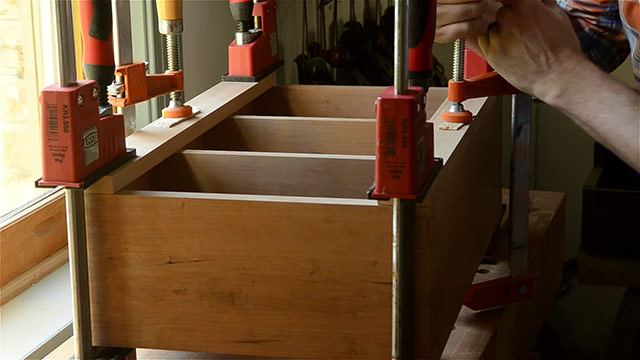
The 6-inch parallel clamps are extremely powerful for their size and I use them very often for gluing up small items. The 24-inch parallel clamps are my mid-sized clamps that are very useful for many case piece glue-ups, and for smaller table top panels (under 24-inches). The 50-inch parallel clamps are really great for most table top panel glue-ups, because most table tops are well under 50-inches wide. This larger size can be a bit heavy for smaller glue-ups, which is why I don’t just own a bunch of 50-inch parallel clamps. Here are some other places to look for parallel clamps:
Buying F-Style Clamps
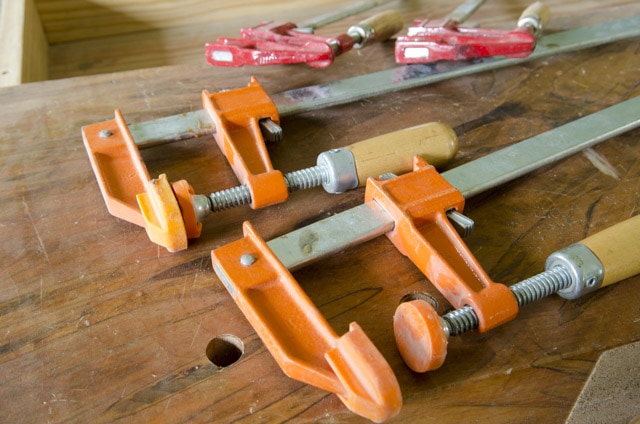
As mentioned earlier, F-style clamps are more economical woodworking clamps than parallel clamps, though most of the time I prefer to use parallel clamps. Occasionally I need to concentrate clamping pressure on a small area, which would make F-clamps or C-clamps a better choice. It’s not a bad idea to have some around, especially when you’ll be using a lot of clamps for a glue-up, and you can’t afford to buy a whole arsenal of parallel clamps. Just make sure the steel of the F-clamp is strong, and the screw threads are deep.
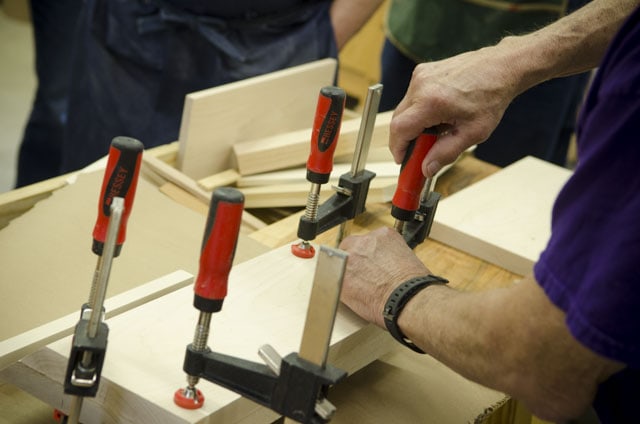
I was given some small, cheaply made F-clamps that won’t hold well, and can bend under too much pressure. As always, check reviews before buying F-clamps, so you can see what experience other woodworkers have had with certain brands. I use Jorgensen and Bessey F-clamps, but there are other brands that work well. You can find them at these stores:
Buying Pipe Clamps
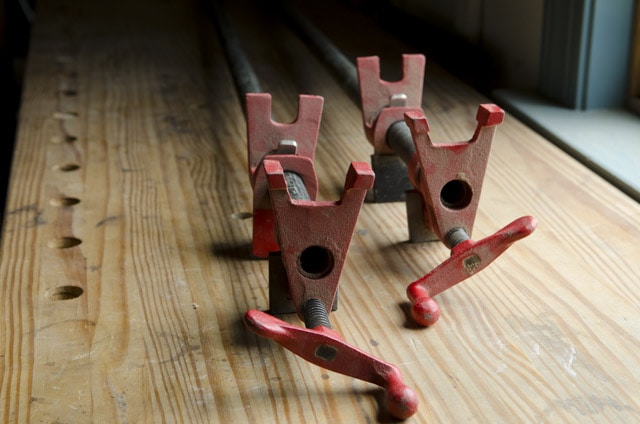
As mentioned above, pipe clamps are a great way to extend your reach while reducing the amount of money that you spend. When I was building 8 workbenches for my woodworking school, I was in great need of some very long woodworking clamps. No other type of woodworking clamp would have reached as far as pipe clamps. I already owned pipe clamps, so I just bought longer pipes, and easily extended my reach. I use 3/4-inch pipe clamps, because they feel stronger to me. I have only ever owned the Bessey brand of pipe clamps, but I’ve heard that PONY brand is also good. Some of the cheaper imported brands seem to be of inferior manufacturing quality, and parts have been known to fall off and threads have been poor, which can prevent you from attaching the pipe. Here are sources for buying good pipe clamps…just check the reviews:
Buying C-Style Clamps
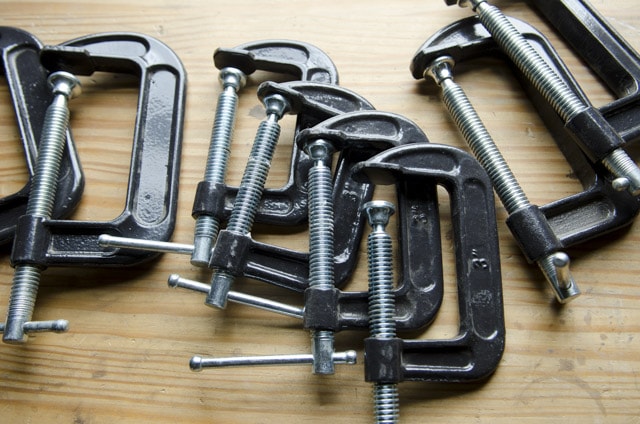
My favorite model of C-clamp was the quick release C-clamps (with the little yellow button), manufactured for Lowe’s hardware store, under the Kobalt brand. But obviously the decision makers at Lowe’s didn’t really understand how good those clamps were, because they’ve replaced it with inferior non-quick release c-clamps. I haven’t seen any other C-clamp that had that cool quick release mechanism, which allowed you to avoid so much turning of the screw. I do occasionally see the Kobalt C-clamps on Ebay, which you can find here.
Aside from that amazing C-clamp, I haven’t found that any of the other brands of C-clamps are too much different from each other. As long as they have good threads and decent manufacturing, I don’t think the brand matters too much. I purchased a whole bunch of C-clamps for my woodworking school, from Harbor Freight (under the PITTSBURGH® brand name), and they have worked just fine, and are very affordable. Here are some links where you can compare prices and reviews on different brands of C-clamps:
Buying Ratcheting Bar Clamps
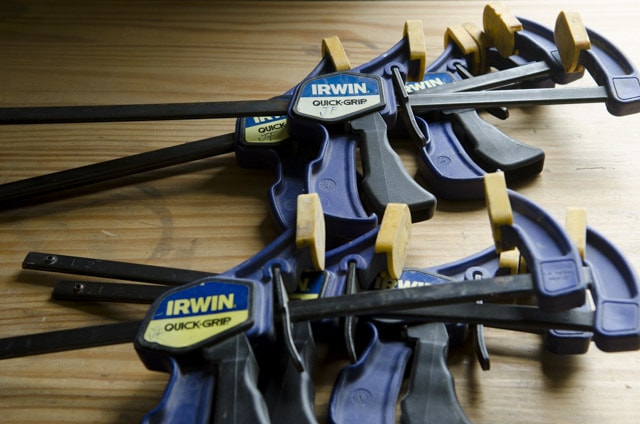
Ratcheting bar clamps aren’t intended to apply an immense amount of pressure, but they are meant to be convenient. I use ratcheting bar clamps all the time, and love them. You can see the uses in the summary box above. I own quite a few Irwin Quick-Grip ratcheting bar clamps, and I like that brand. I’ve tried some other brands, and the clamps slipped too much, so you need to ask around, or read online reviews before trying another brand. I prefer this 12-inch size over the 6-inch size, as the 6-inch ratcheting clamps often have too narrow of a jaw opening for what I need to clamp.
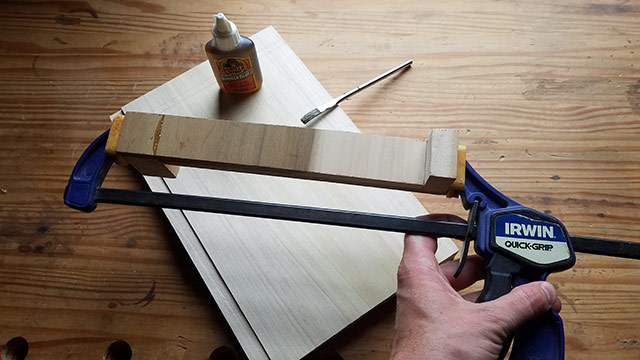
The one drawback of the Irwin Quick-Grip ratcheting bar clamps is that they don’t reverse to act as a spreader, as some other brands do. When you visit the links below, I’d recommend that if you plan on ever using clamps like this for spreading, then buy clamps that mention the word “spreader” in the title or description.
Buying Spring Clamps
As mentioned above, spring clamps (both plastic and metal) are very affordable woodworking clamps, which means you should have a set in your workshop for those occasions when delicate clamping pressure is needed. Just make sure you check reviews when buying spring clamps, because they are not all created equally. Most plastic and metal spring clamps will work decently, but I’ve had some break on me. Here are some places to buy metal or plastic spring clamps…just buy sets that have good star ratings & reviews:
Buying Other Specialty Clamps
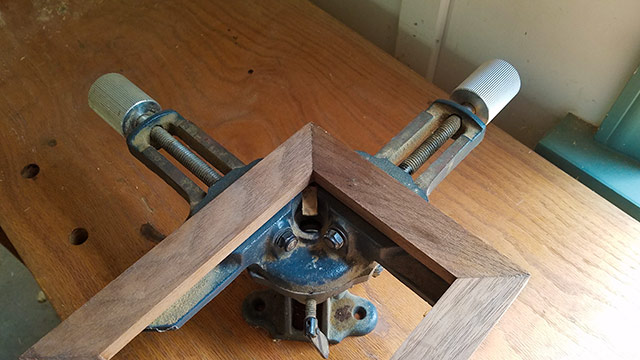
Above I’ve talked about the most common types of woodworking clamps in a workshop, but there are many other types of clamps, for every kind of task imaginable.
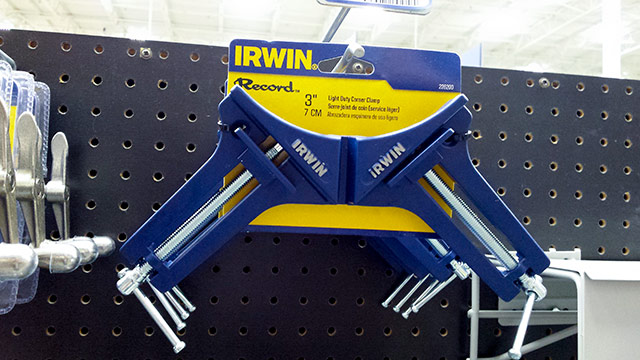
For woodworkers, these might include various clamps for miter joints (like a picture frame clamp that’s shown above), clamp guides (straight edges that clamp to a panel), workbench clamps, toggle clamps, strap clamps, edge clamps, hose clamps (for dust extraction), sash clamps, etc. See all the assortment of the best woodworking clamps at these online stores that I shop at:
5 Wood Glue Options for Woodworkers

In my workshop I use 5 different types of wood glue for woodworking, which I’ve listed below, along with a short summary of their uses and where you can buy them. I’ll help you choose the best wood glue for furniture making. There are other types of glues for woodworking, but these are the types of woodworking glue that I use. Wood glue is strong enough to keep a joint from failing. Sometimes I demonstrate gluing two boards together, edge to edge, then after it cures I smash the new panel. The board always breaks along the grain somewhere else, rather than on the glue line. All of the wood glue options in my workshop are strong enough, so I look at other factors when determining the right glue for the job:
- Open time: how long you have from applying the glue to needing it clamped
- Shelf life: how long the glue will last in the bottle before it loses functionality
- Clamping time: how long you need to leave clamps on for the glue joint to hold permanently
- Pot life: how long you have before a two-part glue will be usable, after it’s mixed (e.g. you’ve got about 5 minutes before “5 minute epoxy” is unusable).
- Curing hardness: how flexible or brittle the glue is, after it cures, to enable it to flex with wood movement
- Resistance to the elements: how the glue holds up to moisture, heat, & solvents
1. PVA Wood Glue (i.e. “yellow glue” / “polyvinyl acetate”)
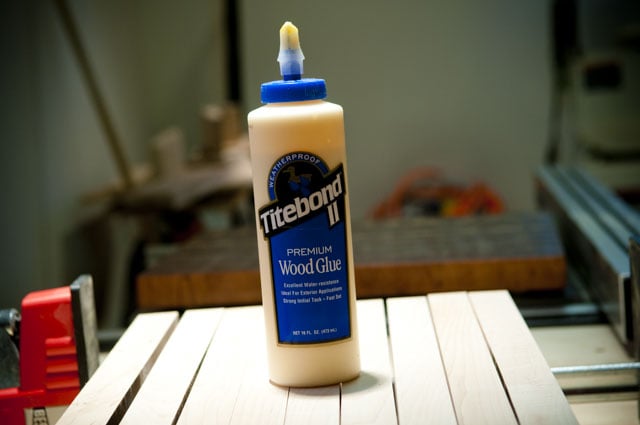
PVA glue, or yellow glue, is probably the most commonly used wood glue among woodworkers, and is known as an all purpose wood glue.
Pros of PVA Glue
- PVA wood glue has a short clamp time (less than an hour for hardwoods, and under 4 hours for softwoods), which is appealing to woodworkers who are in a hurry, or who don’t have a lot of clamps.
- PVA wood glue works great for loose joints, because the moisture in the glue causes the wood to swell and the joints to tighten before it cures.
- PVA wood glue is available pretty much everywhere (I’ll share some brands below).
- PVA wood glue is non-toxic.
Cons of PVA Glue
- PVA wood glue has a short open time, usually under 10 minutes. I have to rush to get furniture glued up, especially if the project can’t be glued up in separate stages.
- PVA wood glue is considered permanent, and isn’t reversible like historical hide glue is. But that may not be something you care about.
- If you wipe running glue off with a wet rag, the watered down glue seeps into the wood’s pores, and spots often can’t be seen until after finish is applied. This can be remedied by waiting for the glue to tack up (become rubbery) and then scrape it off.
- PVA wood glue doesn’t hold up under stress over the long term, like with bent laminations. This may be a non issue for you.
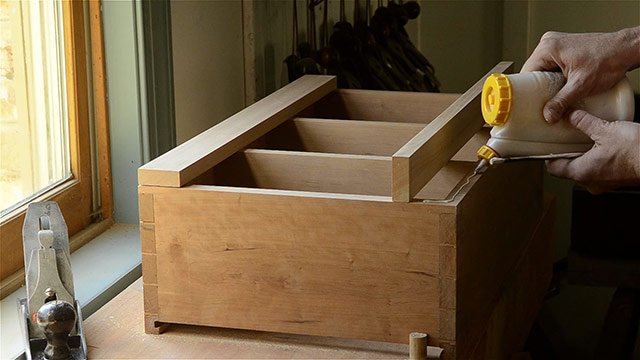
- PVA wood glue doesn’t have a super long shelf life. Some sources say up to 4 years, but I’ve found that it’s about 1 to 1.5 years. Unless you will be using a huge amount of glue in under a year, I’d recommend that you buy smaller bottles, rather than the 1 gallon bottle as shown below:
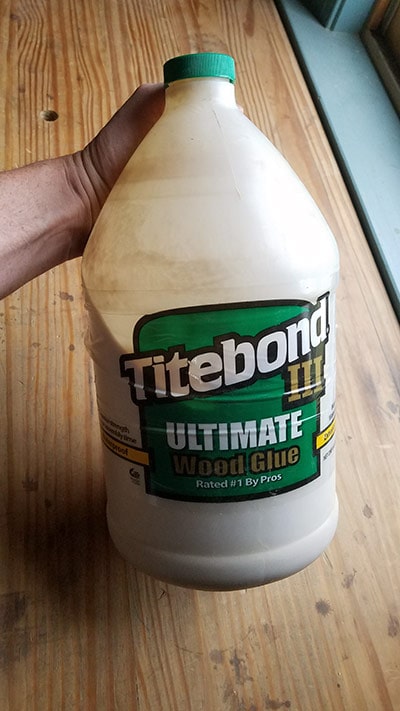
Titebond 3: Perhaps the Best Wood Glue.
I don’t believe there are many wood glue makers. I’ve heard that some less-recognized brands may actually be made by the bigger companies and sold under private labels. But the general consensus of most woodworkers and production cabinet shops that I’ve talked to is that Titebond wood glue is the best wood glue. And Titebond 3 is the best wood glue made by Titebond, and what most woodworkers now use, including me. Titebond 1 wood glue has a very short open time and doesn’t hold up well to moisture. Titebond 2 wood glue is water resistant, and generally works fine for objects like cutting boards, that will have occasional exposure to moisture. But Titebond 3 wood glue is waterproof, and has a slightly longer open time than Titebond 1 wood glue or Titebond 2 wood glue. I use Titebond 3 wood glue for most projects, but especially for any furniture that will be near water, like outdoor furniture, wooden planter boxes, bathroom vanities, wooden cutting boards or kitchen countertops, etc. Titebond 3 wood glue is pretty much the yellow PVA glue of choice for most woodworkers that I know.
2. Hide Glue
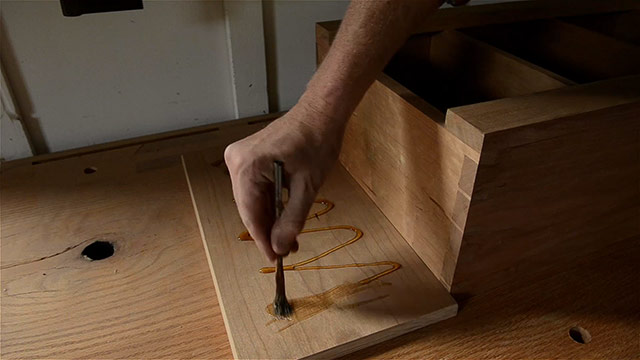
Hide glue is the most traditional of wood glue types, and is popular with traditional furniture makers, furniture restorationists, and those who do veneering. It’s made from cow hides, and comes dry (in pearls or ground powder) and also comes in a liquid form. The dry hide glue needs to be melted, with water, and heated at a constant heat before it can be used. The liquid form is ready to go out of the bottle, though the bottle should be warmed to 80 degrees before use.
Pros of Hide Glue
- Hide glue is reversible. This could also be a con, because it isn’t very resistant to heat and moisture. But for instrument makers and woodworkers who make and restore expensive furniture, this feature is quite important because it makes repairs possible with heat and moisture applied. I’ve found that most interior furniture holds up wonderfully with hide glue. I just wouldn’t use it for furniture that will be outside in high heat and/or humidity. But this reversibility feature is really nice for cleaning up drips on your workbench or floor.
- I find that hide glue cleans up much easier than PVA glue. I can wipe glue squeeze out with a clean, wet cloth and it doesn’t soak into the pores like PVA glue. This is definitely a big consideration for me because I dislike scraping PVA glue and really dislike finding glue blotches after I’ve applied a finish.
- Long shelf life for dry hide glue powder or pearls (indefinite)
- Dry hide glue can be reheated a few times, until it goes bad (starts to stink from bacteria)
- Excellent sandability
Cons of Hide Glue
- In the pros section above, I mentioned that hide glue doesn’t maintain strength in heat and humidity. This can be a pro, but also a con, since furniture glued together with hide glue wouldn’t be ideal for outdoor furniture that will be exposed to heat and humidity.
- Like PVA glue, the open time is short, especially the hot hide glue made from dry granules or powder. However, open time can be altered depending on the level of heat in the pot.
- Hide glue requires long clamping time compared with PVA glue. Up to 12 hours is recommended.
- Dry hide glue requires a heating pot.
- Short shelf life for liquid hide glue (about 1 year max)
Which Types and Brands of Hide Glue are best?
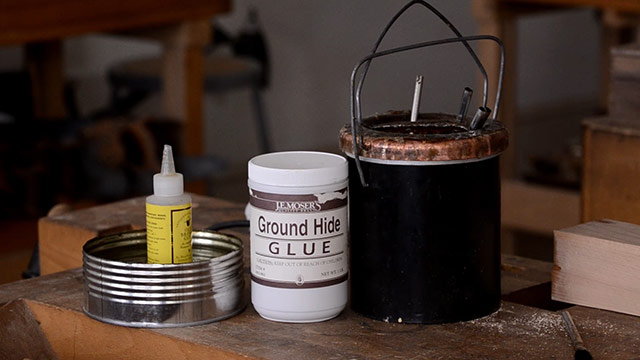
If you’re able to afford a hide glue pot, then I’d recommend using dry hide glue (powder form is more pure, but pearl form works fine too), and making your own hide glue. It will usually give a stronger bond than liquid hide glue (liquid hide glues don’t achieve a good rub joint, but if clamped, both are stronger than wood), and lasts indefinitely. For general furniture purposes, the most commonly available brand of dry hide glue is J.E. Moser’s hide glue (pictured above), which can be purchased here. You can find glue melting pots at this link. You can also achieve the same results with just a saucepan and glass jar (read the article here). If you’re looking for high-grade dry hide glue, for furniture making, then look here for some different options.
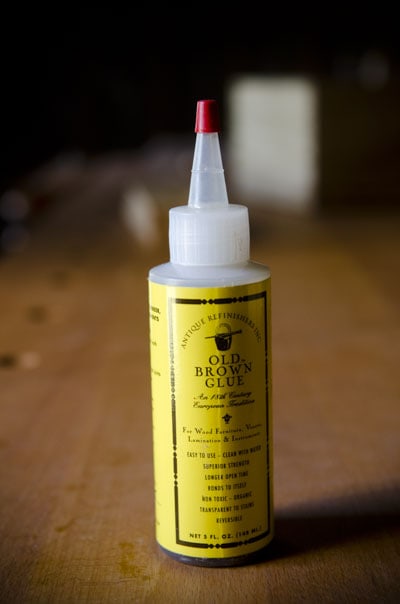
If you don’t want to mess around with melting your own hide glue, or if you want to try hide glue out first, then there are a couple liquid hide glue brands that I’ve tried:
- Old Brown Glue: this hide glue is simply animal collagen and urea, with nothing else added. It tends to tack better than Titebond’s liquid hide glue. But for it’s better performance, you’re going to pay more money, about $12 per 5 oz bottle. But a little goes a long way, and compared to the fancy wood for your furniture, a couple dollars worth of glue is a minor expense. You can buy Old Brown glue here:
- Titebond Liquid Hide Glue: this hide glue has several more additives than Old Brown glue, which may be why it doesn’t tack up much on a rub joint (rubbing two board edges together, without clamps). But I’ve found that this hide glue works fine for most furniture projects, and at about $4 for a 4 oz. bottle, this is the clear choice if you’re on a tight budget, or need a larger amount of glue. And according to this test by Popular Woodworking magazine between the two brands of liquid hide glue, the Titebond edge glue joint held just as well (if not a little better) than the Old Brown glue. You can buy Titebond Liquid Hide glue here:
3. Polyurethane Glue
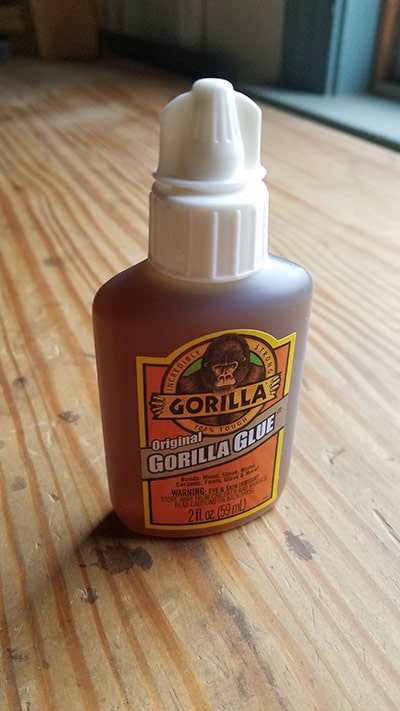
Polyurethane glue is well marketed in the big box stores (“Gorilla Glue” and Titebond are the most recognizable brands), but is only used in special circumstances in my workshop, due to having more cons than pros. So let’s jump right into those.
Pros of Polyurethane Glue
- One of the major pros of polyurethane glue is that it has a much longer open time than PVA glue or hide glue, up to 20 minutes. This makes it a great choice for complex glue-ups with a lot of parts.
- Polyurethane glue works well around moisture and heat.
- Polyurethane glue works well for edge joints.
- It bonds dissimilar materials together, and also works on non-wood products like plastic, rubber, ceramic, metal, etc.
- Polyurethane glue is good for bent laminations and other glue-ups that have bending stress.
- It is widely available in many retail stores and online stores (you can buy it here).
Cons of Polyurethane Glue
- Of all the woodworking glues stress tested in a Fine Woodworking magazine article (“How Strong Is Your Glue” – issue #192) Polyurethane Glue by far held up the worst of all the glues tested on wooden bridle joints.
- You have to moisten the surface of the wood several minutes before you apply polyurethane glue, or else the bond won’t be very strong.
- Polyurethane glue gives a strange foam squeeze out when it begins to set, much like the spray foam insulation. You have to wait for it to completely dry before you chisel or scrape off the foam squeeze out.
- Polyurethane glue shouldn’t be touched with your hands, or you’ll have a very difficult time cleaning it off, also like the spray foam insulation. If you plan on spreading the glue by hand, you must wear rubber gloves.
- Breathing the fumes of polyurethane glue can cause problems for people with respiratory issues, and may cause allergic reactions in others.
- Long clamp time (about 6 hours)
- Short shelf life (less than 1 year)
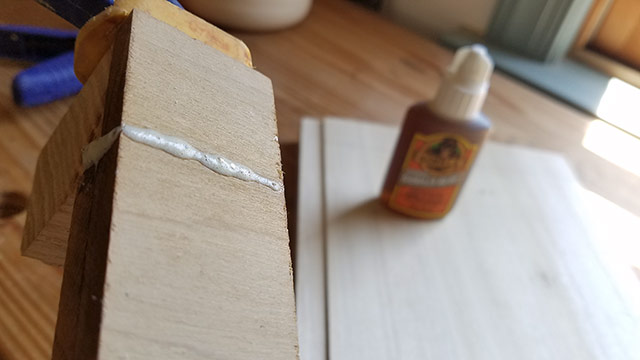
4. Epoxy Glue
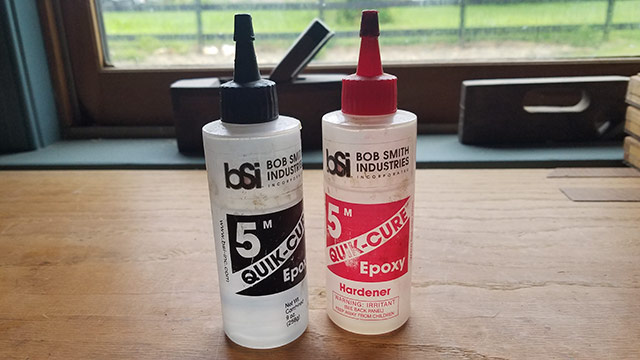
To put it simply, epoxy is a plastic that is created by mixing a resin (pictured above in the black bottle) with a hardener (pictured above in the red bottle). The irreversible chemical reaction created by this mixture provides a very strong bond between all kinds of materials. It has become quite popular lately for making epoxy resin tables, by filling in big gaps on tabletops with colored epoxy. In my workshop I often use it to fill wood knots or to glue two dissimilar materials together, like metal to wood or leather to wood. I often glue knife tangs into wooden scales (handles) or metal chisels to their wooden handles with two-part epoxy. But it also works great in certain wood to wood applications.
Pros of Epoxy
- Epoxy is great for filling gaps in joinery or knots in the wood, especially when mixed with sawdust.
- Epoxy gives a strong bond between dissimilar materials.
- Epoxy is completely impermeable to water and withstands high temperatures, which makes it very useful to boat builders and for outdoor furniture.
- Epoxy can have a very short open time or a long open time, depending on the type of epoxy, the mixture ration, and the temperature. I usually use the 5 minute epoxy, because of the awkward parts I glue together.
- It has a long shelf life (about 3 years)
Cons of Epoxy
- Epoxy isn’t friendly to your skin, your eyes, or your lungs, so take care to wear rubber gloves, a respirator, and safety glasses, especially when using a lot of it.
- Epoxy isn’t very affordable in larger quantities. Fortunately I just use it for small specialty tasks, but I’ve had friends tell me about the big bucks they had to spend when they tried to seal a slab table top.
Which brands of Epoxy are best?
To be honest, I use epoxy in such small volume that I don’t have much experience with a lot of the professional, high-volume brands. For my small tasks I use a two part epoxy recommended by other woodworker friends, which is made by Bob Smith Industries. You can buy it here on Amazon. I’ve used the syringe type epoxy in the past, and didn’t like the delivery method.
If you are looking for a larger, gallon-sized volume of epoxy, I’d recommend that you search here on Amazon and read the reviews to find the best brand of epoxy. Rockler Woodworking also has a good selection of epoxy for woodworking, which you can find here. Or go talk with a boat builder.
5. Cyanoacrylate Glue (i.e. “CA glue” / A.K.A. “Super Glue” / A.K.A. “Krazy Glue”)
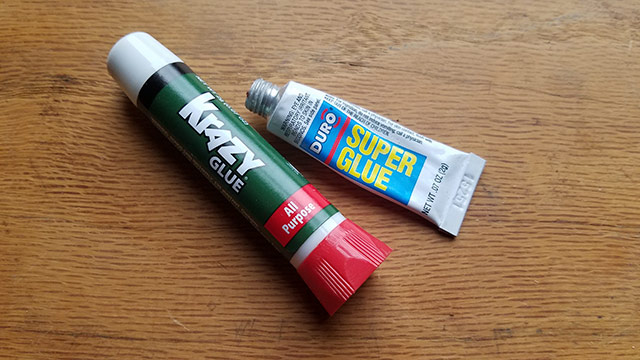
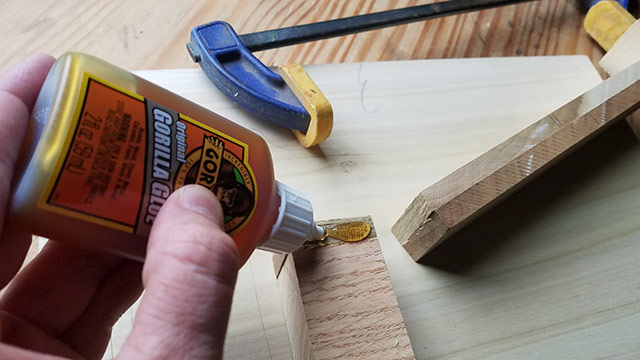
You’ve most certainly heard of “Super Glue” or “Krazy Glue”. Well, those are Cyanoacrylate Glues, usually referred to by woodworkers as just “C.A. glue”. There’s not a lot that I can say about C.A. glue, other than that it’s really useful for quick, small tasks; usually for mistakes that I’ve made when splitting off a small sliver of wood or get a small split. I just apply a little bit of C.A. glue and use a light clamp or body weight (or painter’s tape) to hold it down for a minute or two, and then I can get back to work. I usually just buy small tubes (as seen above), but if you plan on making a lot of mistakes you can get a whole bottle!
Buy Glue Brushes and Glue Applicators

One last product that you’ll need for woodworking glue-ups is some glue brushes. I use the big packs of flux brushes (I buy mine here for under $8). Some people dispose of these brushes after one use, but I wash them and they last for a long while. Except when I forget to wash them in water after applying glue with them. Then they’re useless, which is why I have to eventually buy more. But a 36 pack lasts me for several years. For larger glue-ups I use foam brushes, and for really big glue-ups (like laminating a workbench top) I use a small paint roller. Both of these can be found at a paint store or hardware store.
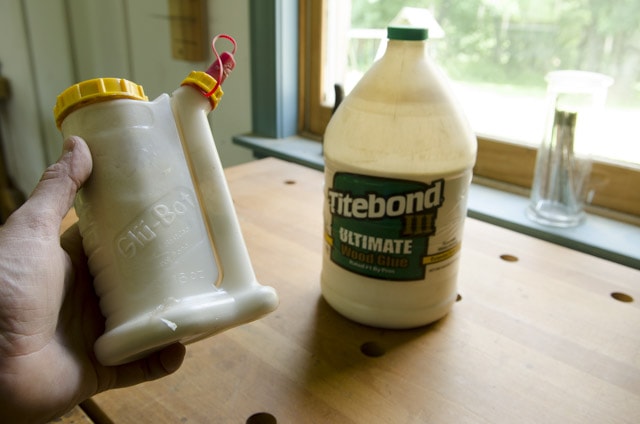
All other glue items seem like gimmicks to me. I usually don’t buy gimmicky products, but I fell for the Glu-Bot glue bottle (pictured above). It worked alright for a short time, but then clogs easily, the seal broke, and it’s too difficult to squeeze glue out when the bottle is less than half way full of glue. I still use it, but it’s because I’ve got to use up my gallon size of Titebond 3 wood glue, and I need a smaller bottle to dispense my glue. But as soon as the big bottle of Titebond is gone, I’ll just go back to the good ol’ 16 oz. bottle of Titebond 3 wood glue.
Buying Historical Fasteners: Screws & Nails
A lot of modern woodworkers have a skewed view of the history of using fasteners, like nails and screws in fine furniture. Nails seem to be looked down on. But inspecting antique furniture reveals that nails and screws are more historically accurate than many woodworkers realize. But not all nails and screws are created equally, and there are certain types that I prefer to use, both because they’re more historically accurate, because they look great, and because they just work better than modern versions. First, let’s start with woodworking nails.
Buying Historical Nails for Woodworking
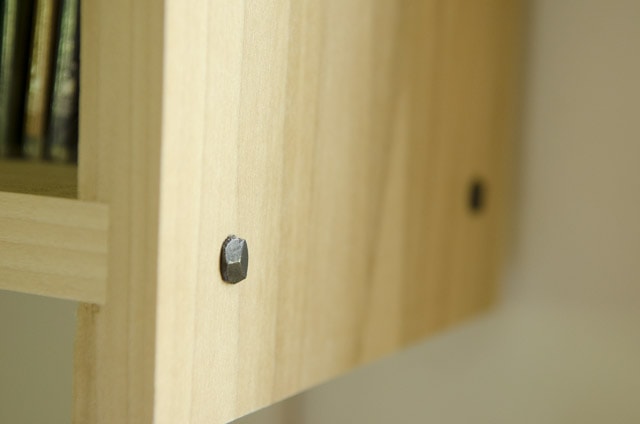
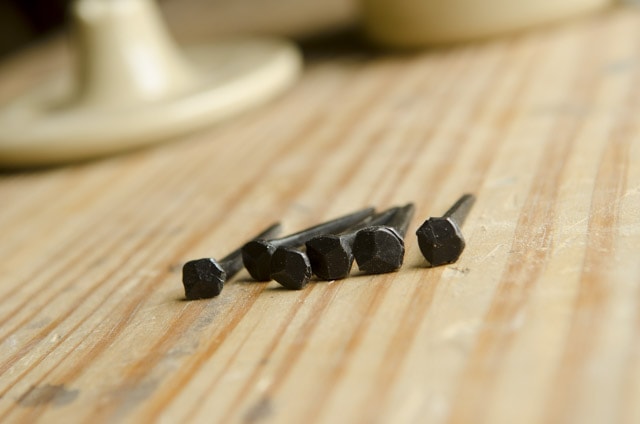
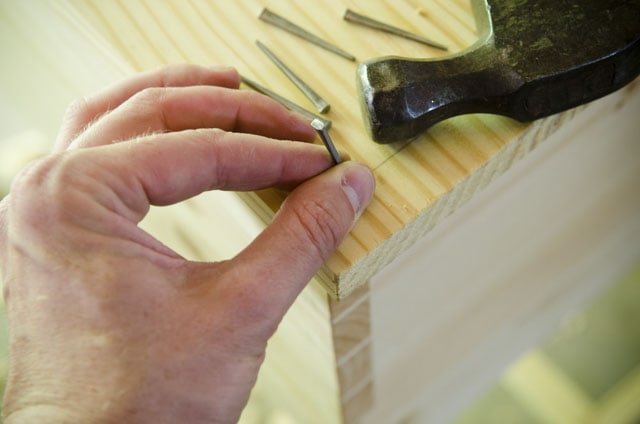
If you’ve ever walked through a historical building you may have noticed rectangular headed nails or round, rose-shape headed nails in the flooring and furniture. The round headed nails are called “wrought nails” and were originally forged by blacksmiths for centuries (and still are, at a premium price). The heads of these nails sit proud of the surface (as seen above). The rectangular headed nails are called “cut nails”, and were introduced in the 1700’s. They are set below the surface of the wood. Both of these styles of historical nails not only look better than modern “wire nails” but also have much better holding power. The wedge shape has much better holding power than a thin wire. Modern wire nails are really good at coming loose in no time at all.
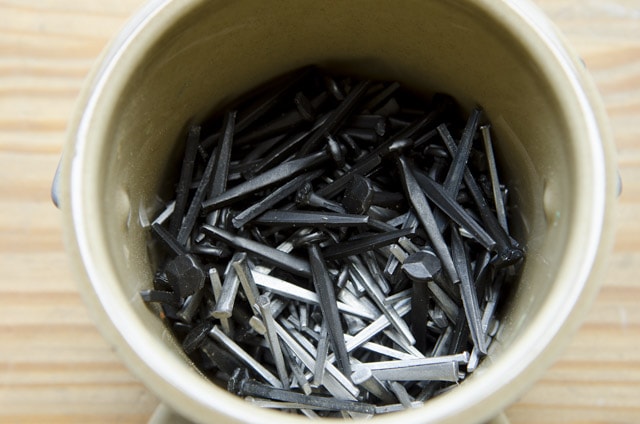
Then why did modern-day wire nails take the place of the much-better antique nails? Because wire nails are much cheaper to manufacture, and now most people don’t know the difference anyway. Christopher Schwarz wrote an interesting “treatise” on historical nails, which you can read here. He also shared another helpful article on which nails you need for woodworking, which you can read here.
I typically use wrought or cut nails to attach the backs of cupboards, the bottoms of chests, and the tops of case pieces, among other tasks. They hold “tight as a tick” (as my friend Will Myers says) and they look great. I use the wrought style nails on hidden cabinet backs or on furniture where I want to display the pretty nails. I use cut nails in areas where I want them to be hidden, such as on visible parts of furniture, in trim (fine cut headless brads) or on the bottoms of boxes, where the nail needs to be below the wood surface.
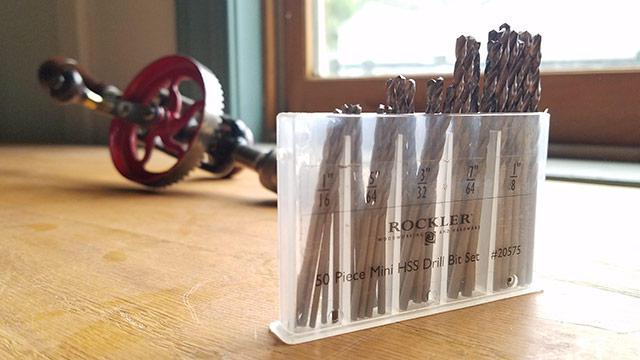
The only downside to using these tapered wrought & cut nails is that you need to take a little extra care to prevent your wood from splitting. Drilling an appropriate sized pilot hole is important before driving the nail in. You can read about how to do this on Schwarz’s article above. And I’ve found a great little pack of 50 small drill bits, that contain various common sizes, all stored in a perfect little plastic case with a snug fitting lid. This pack of High Speed Steel drill bits are sold at Rockler (buy them here). To further prevent splitting you should also orient the nail so that it’s longest side runs parallel with the wood grain.
Where can you find wrought nails and cut nails?
Option A: Buy or find antique wrought nails and cut nails:
I’ve been given antique nails over the years. Some had just been lying around, unused. And others had been extracted from old buildings or furniture when they were torn down or broken. This is the best method of obtaining wrought or cut nails, since they are absolutely authentic and amazing. The only drawback is that you usually have to remove rust, and you have to find these nails.
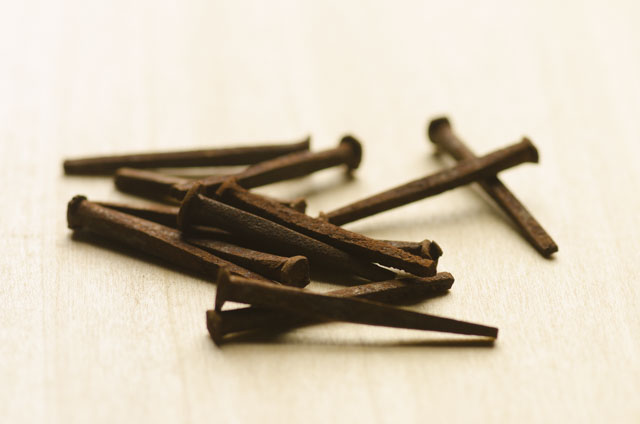
So where do you find antique nails like this?
- Honestly, the easiest way to find these is on Ebay. You can search here for these antique nails.
- The next best place to find antique nails is by visiting an architectural salvage store near you, like Black Dog Salvage in Roanoke, Virginia, where I used to rummage around (yes, these are the guys who now have a TV show). Companies like this specialize in taking out all the special materials when a historic home has to be demolished.
- Try stopping by a Habitat for Humanity store, which also receives a lot of historical home material.
- Some antique stores will carry some jars full of antique nails that you can sift through. But don’t expect the nails, or anything else for that matter, to be affordable in an antique store.
- Become a scavenger. Ask around for old, broken furniture or architectural materials. If people know you’re looking for antique nails, then they’ll eventually show up.
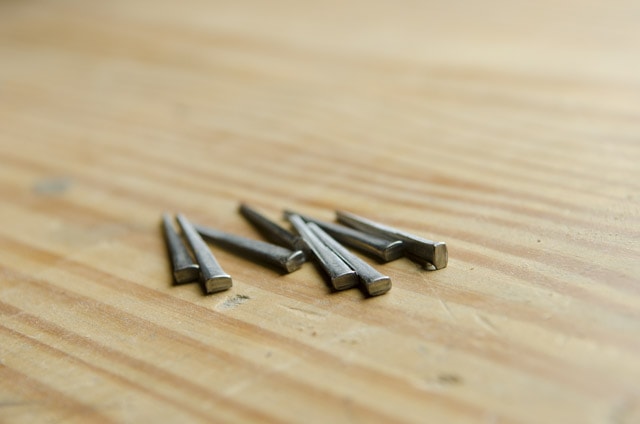
Option B: Buy new wrought nails and cut nails:
If you’re not keen on treasure hunting, and you haven’t found some good antique nails on Ebay (or they were too expensive), then don’t fear. There are options to buy wrought nails and cut nails new. Here are some sources:
- Find a local blacksmith. From what I understand, wrought nails will usually cost about $1 per nail. That sounds expensive, but if you’re making a nice piece of furniture, and you only need a handful of nails, then it’s not all that expensive overall. And you’ll have authentic forged wrought nails on your furniture. That’s just plain cool. You can find people selling new wrought nails on Ebay (look here), on Etsy (look here), and maybe some other botique maker markets.
- Buy machine made wrought nails (that look forged) and machine made cut nails. Here are some sources:
-
- Tremont Nail company manufactures great historical steel cut furniture nails in Mansfield, Massachusetts. I’ve used these a lot and have been happy with them. You can see their nails here.
- Clouterie Rivierre manufactures lovely historical die-forged nails in France. I haven’t used these, but have heard great things about their holding power, and they are surprisingly affordable for being imported from France. You can see their nail selection here. You can also buy some of their nails from Lee Valley here. This is probably the best deal. Especially their assorted 140 nail packs of different nail sizes, which works out to about $0.17 per nail
- Rockler sells a 50-pack of “wrought head nails” for super cheap (between $6 and $8, depending on the length). They aren’t quite as nice as the above nails, but I’ve used them and they do look nice and hold well…and the price is right. You can buy them here. After economy shipping, they work out to be about $0.22 per nail.
Here’s a really cool video that shows a blacksmith forging wrought nails:
Buying Historical Wood Screws for Woodworking
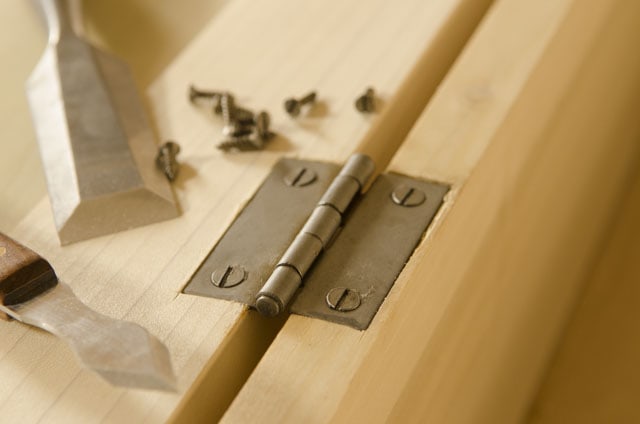
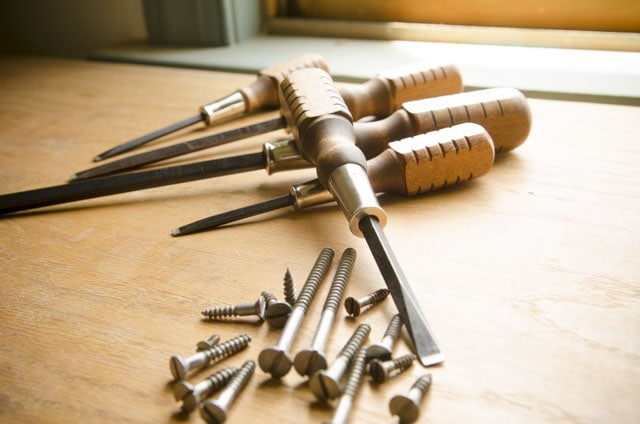
Screws are required for attaching hardware, like hinges and locks to your furniture, and attaching wood to wood. And nothing looks more ugly (in my opinion) than using shiny, zinc-coated Phillips head screws. This photo below illustrates how lovely furniture looks with historical slotted wood screws.
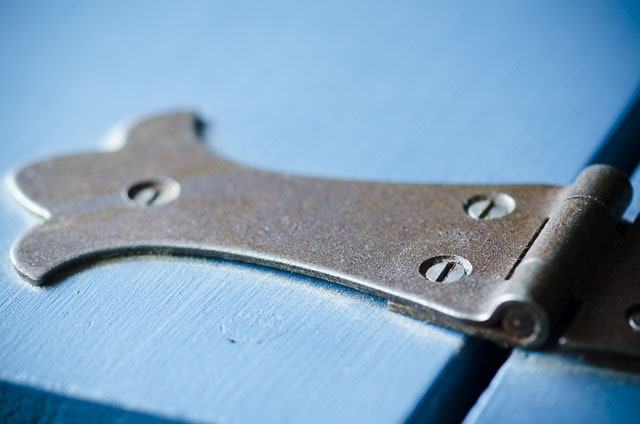
Wood screws are usually the fastener of choice for attaching hardware, but how about for fastening pieces of wood together? Although screws are usually stronger at holding wood together, I personally think that historical wrought nails or cut nails look better.
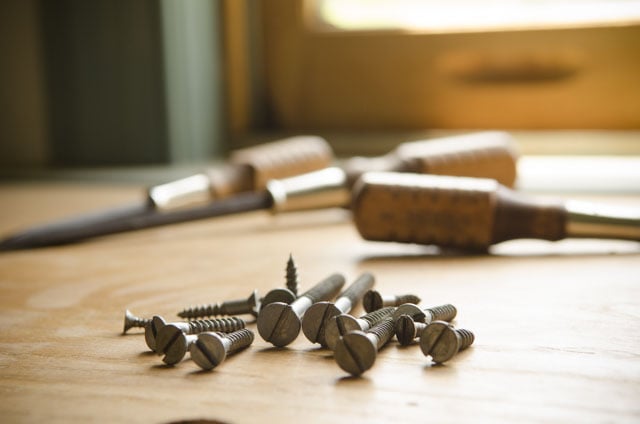
But on the other hand screws are reversible, whereas wrought and cut nails are often pretty hard to remove. So you just need to decide on which type of fastener is best for your particular furniture project at hand. I usually just stick with using nails for holding two pieces of wood together (like attaching moldings, backs of cupboards, the bottoms of chests & boxes, and the tops of case pieces, clenching, etc.) and use screws for hardware…unless I choose to use really old hardware that requires “clenching”. Clenching is where you drive an old nail through the two pieces of wood, bend a hook on the point, and drive it back into the wood. I also often hang furniture on the wall with screws, because it’s removable.
Where can you find historical-style slotted screws?
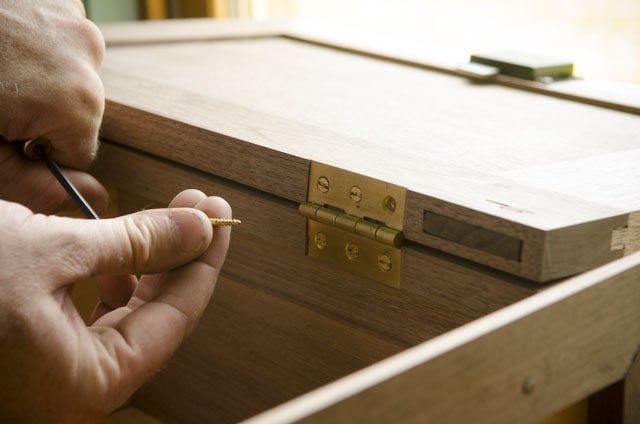
If you’re attaching quality brass hinges, then slotted brass screws usually come with the hinges. But most non-brass hardware either comes with no screws, or ugly Phillips head screws that have shiny zinc coating on them. This will stand out on your lovely furniture like a huge pimple on a beauty queen. So where can you find antique style slotted screws? You can certainly try buying antique slotted screws, but I’ve found most of them to be rusted. Rust on nails usually isn’t a big deal, but I’ve found that rust on antique screws means that the thin threads weaken and often flake off. Some companies sell vintage screws (that have been used) and “new old stock” screws, which have never used. Usually these are large quantities of screws found in an old factory. I have friends who shop at some of these online stores, but I personally feel like I have a better option.
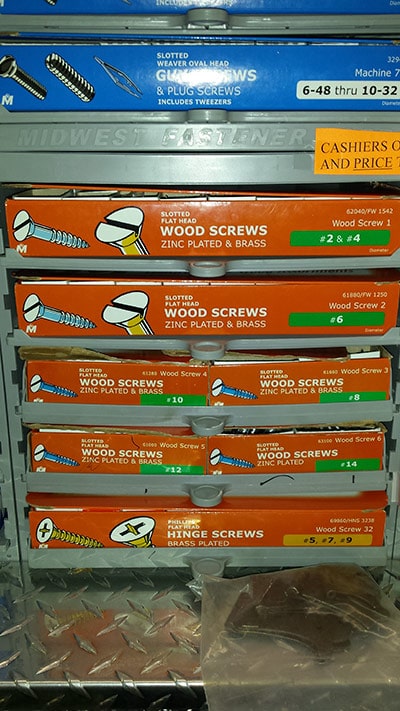
I buy new slotted steel wood screws and strip the zinc coating off of them. And they look exactly like the “new old stock” screws that some of the companies sell, and usually better. In fact, I’m almost certain that one of the companies is just buying new screws and stripping the zinc coating off of them, and selling them for a lot more money as “new old stock wood screws”.
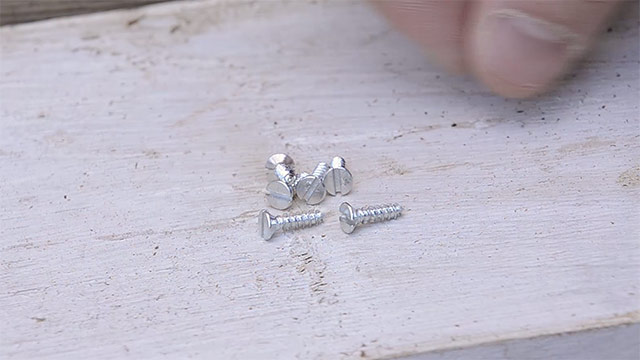
You can read my article and watch my video titled: “Make Historical Wood Screws Using Toilet Bowl Cleaner“. I usually buy a bunch of different sizes of slotted wood screws, and do bulk zinc removal.
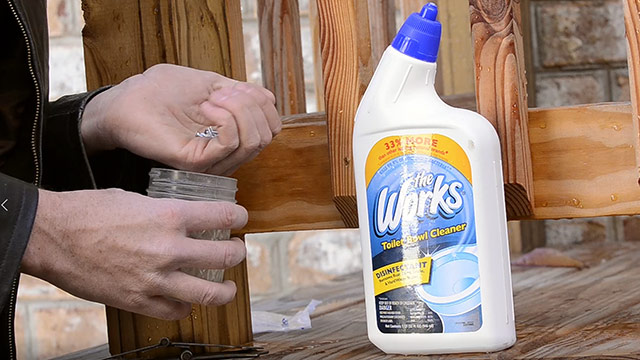
This method only takes a few minutes, and the resulting screws look amazing. Oh yeah, and they are much more affordable than “new old stock” slotted wood screws. Just make sure you keep them oiled, to prevent rusting, and use appropriately-sized flat head screw drivers, like these amazing Grace USA screwdrivers (which can be found here):
Continue to the Wood Carving Tool Buying Guide (#12)…
TOOL GUIDE SHORTCUTS:

HAND TOOL BUYER’S GUIDES
- Intro to Buying Woodworking Hand Tools
- Workbench & Tool Storage
- Layout, Marking, & Measuring Tools
- Handplanes
- Handsaws
- Chisels
- Sharpening & Honing Supplies
- Mallets & Hammers
- Hand Drills, Braces, & Bits
- Tools for Curved Work
- Tools for Green Woodworking
- Woodworking Clamps, Gluing & Fasteners
- Tools for Wood Carving
- Products for Wood Finishing, Sanding & Scraping
- Wood Turning Tools & Lathes



You stated that the Irwin Quick-Grip ratcheting bar clamps don’t reverse to act as a spreader. I have a pair of Irwin Quick-Grip ratcheting bar clamps that do reverse. I’m not sure where they were purchased from. They were given to me around 15 years ago.
This is a superb article – full of useful, thoughtful information. As one woodworker to another: thank you.