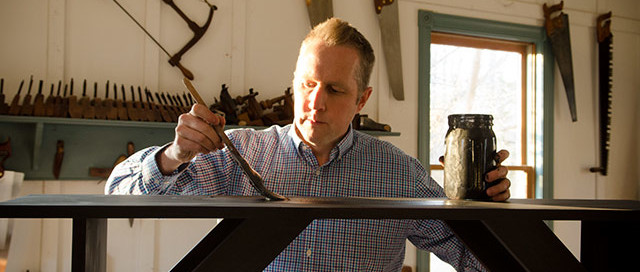
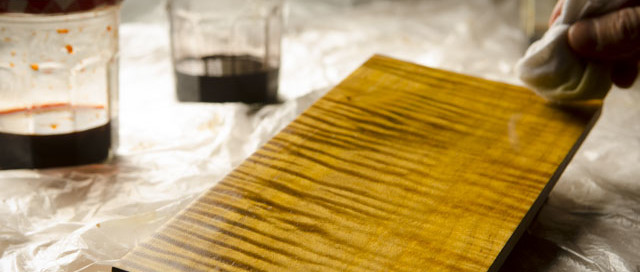
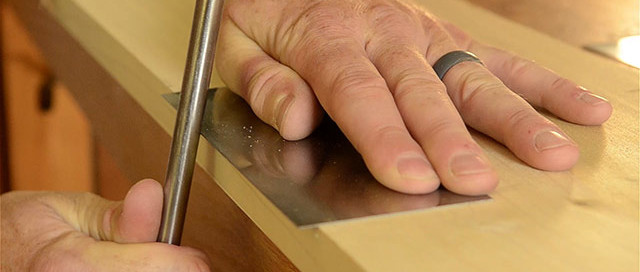
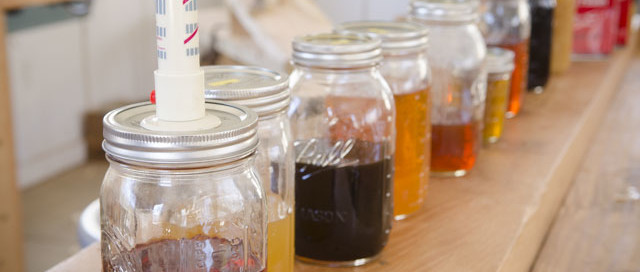
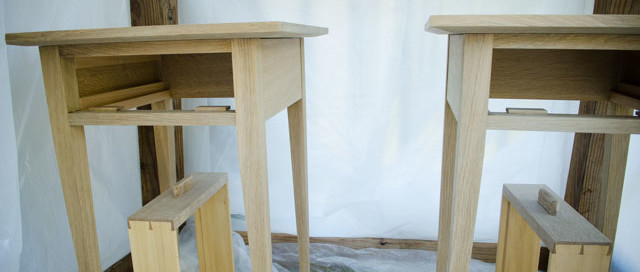
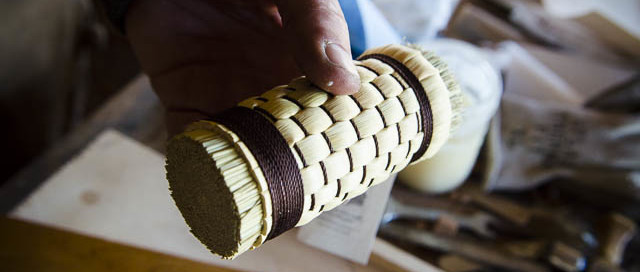
Videos and articles about wood finishing traditional wood projects, including recommendations about the best wood finishing products for woodworkers.

Beeswax Wood Finish Now For Sale!

Ad Banner

Beeswax Wood Finish Now For Sale!

Check out our new Beeswax Wood Finish for Furniture and our new Beeswax Cutting Board & Wood Spoon Finish

Joshua Farnsworth Portrait  By Joshua Farnsworth  |  Mar 28, 2022

Share This Article:

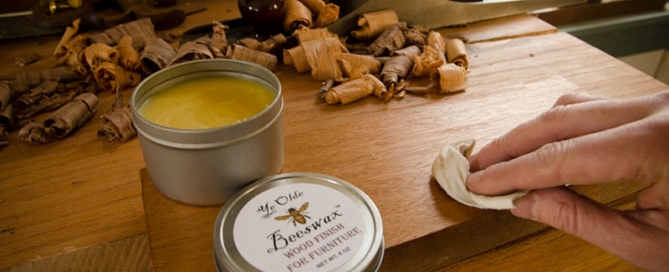
Ye Olde Beeswax Wood Finish On Mahogany With Hand Plane

Beeswax Wood Finish Now For Sale!

Ye Olde Beeswax Wood Finish On Mahogany With Hand Plane

Check out our new Beeswax Wood Finish for Furniture and our new Beeswax Cutting Board & Wood Spoon Finish
Joshua Farnsworth Portrait  By Joshua Farnsworth  | Mar 28, 2022

Share This Article:

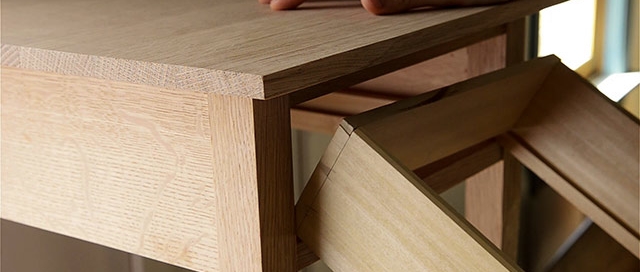
The Best Beeswax Wood Finish for Furniture?

For many years I’ve been experimenting with a historic beeswax wood finish recipe that was given to me by one of the furniture makers at the Anthony Hay’s Cabinetmaker shop at Colonial Williamsburg.

Brian Weldy Hand Planing A Board At The Colonial Williamsburg Hay Cabinet Wood Shop On A Wood Work Bench

The old recipe used three simple ingredients: Beeswax, Turpentine, and Boiled Linseed Oil. And it gave a pretty good finish to most of my furniture projects, except those that required a tough film finish for moisture protection.

Ye Olde Beeswax Wood Finish Applied To Dovetail Drawer

But the recipe only showed a ratio of ingredients, with no directions for the best way to make the beeswax wood finish. And I found that the ratio wasn’t ideal, so I spent several years experimenting with different techniques and ingredient ratios until I came up with the best beeswax wood finish that balances penetrating depth, protection, and buffing sheen for furniture.

Ye Olde Beeswax Wood Finish On A Walnut Board

It’s called, “Ye Olde Beeswax Wood Finish For Furniture“. It also works great as a beeswax furniture polish, over existing finishes on new and antique furniture. Although for antique furniture I recommend doing a test application in an inconspicuous area, because turpentine is a solvent, and it may dissolve an old wax-based finish. This has never happened to me, but it’s best to be safe.

Ye Olde Beeswax Wood Finish On A Walnut Board With Stanley Planes Behind On A Roubo Workbench

My beeswax wood finish also works great for the workbenches and woodworking hand tools in my school. You can buy and learn more about my new beeswax wood finish here:

Ye Olde Beeswax Wood Finish On A Board

The Best Bees Wax For Cutting Boards & Wooden Spoons?

Ye Olde Beeswax Cutting Board Finish Spoon Finish

I also went through the same experimentation process to come up with what I feel is the best beeswax finish for cutting boards, wooden spoons, wooden bowls, wooden rolling pins, wooden baby toys, wooden countertops, and any other wooden surfaces that will have contact with food or mouths.

Ye Olde Beeswax Cutting Board Finish Spoon Finish

It’s called, “Ye Olde Beeswax Cutting Board & Wood Spoon Finish“. I didn’t just add a trace amount of beeswax so I could claim that this is a food safe beeswax finish, but I added the perfect amount to give this finish the perfect balance of ease of application and protection.

Ye Olde Beeswax Cutting Board Finish Spoon Finish

I apply this cutting board finish to my cutting boards, wooden spoons and wooden bowls every time after I wash & dry them. And this cutting board finish is firm enough to last for a long time.

Ye Olde Beeswax Cutting Board Finish Spoon Finish

You can buy, and learn more about my Beeswax Cutting Board & Wood Spoon Finish here:
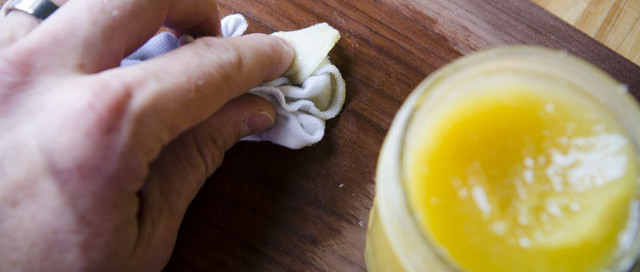
Beeswax Wood Finish Now For Sale!2022-04-14T14:02:54-04:00

Anatomy of an End Table and Drawer

Ad Banner

Anatomy of an End Table and Drawer

Learn How Tables and Dovetail Drawers Fit Together, so you can Build Your Own Furniture with Drawers

Joshua Farnsworth Portrait  By Joshua Farnsworth  | Updated Mar 11, 2022

Share This Article:

Introduction: Anatomy of a DIY End Table and Drawer

Quartersawn White Oak Diy End Table Night Stand With Half Blind Dovetail Drawers

Are you planning on building a DIY end table or do you want to make a table of any other type? Then this article and video will uncover the mystery behind how tables fit together, especially tables with drawers or any other furniture with drawers!

Joshua Farnsworth Showing How To Make A Table Or A Diy End Table

Tables with drawers are really enjoyable to build, but how everything fits together can be confusing for beginner woodworkers. So I’m going to show you how my quartersawn white oak nightstands fit together. And in case you like my table design, here are the plans that I designed, in case you want to buy them for only $4.99.

I did some research and discovered a major lack of written specifics on the anatomy of tables, especially how the inside drawer-holding parts fit together. I flipped through new and old books, and checked a bunch of DVDs, and virtually all of them just skip over the details.

Parts Of A Diy End Table Interior Drawer

So a new woodworker would have to search extremely hard, or inspect well-built antique furniture to uncover the mystery. You certainly won’t find it by looking at most modern furniture. I just think most beginners would have trouble trying to figure it all out on their own. So I’m going to walk you through how a simple table and drawer fits together over the process of a build. This information will be invaluable when you make a table.

How To Make A Table And Build Dovetail Drawers With A Dovetail Saw For A Diy End Table

In case you’re curious, this particular set of end tables is made out of the lovely quartersawn white oak lumber that I milled up with my friend Todd Horne from a fallen tree, as featured in this video. Before I talk about how all the joinery and parts fit together, lets first look at the names of all the parts of this DIY end table with a drawer.

Build A Trestle Table Video With Will Myers

Learn to Build Your Own Table!

5+ Hour Dining Table Build Video on DVD or Download!

Parts of a DIY End Table

How To Make A Table And Build Dovetail Drawers For A Diy End Table With Mortise And Tenon Joints

The below photo diagrams show the different parts of a DIY end table with drawers. For more details, certainly watch the video at the top of this article. I’ve divided the table anatomy into (A) visible exterior parts, (B) hidden interior parts, and (C) drawer parts:

A. Visible exterior parts of an end table with a drawer

Parts Of A Table Diagram On How To Make A Table

“Table Top”: The table top is the horizontal flat part that protects the interior contents of the table, and offers a surface for setting items on. These particular table tops were made by gluing up several smaller pieces of quartersawn white oak because I wanted less seasonal moisture movement, but mostly because I wanted wood figure on the entire top. It’s really hard to find figured wood that’s 18″ wide.

“Apron”: The aprons (sometimes called “skirts”) are the sides and back that enclose three sides of the table. The aprons have tenons that fit into mortises cut into the legs. The rear tenons are beveled with a 45 degree angle to allow the side and rear tenons to meet in the rear legs without getting in the way of the other.

“Tapered Leg”: Table Legs are thin vertical pieces that hold the table up. Legs can be tapered (as pictured above), straight, turned on a lathe (with circular elements), carved, or a mixture of any of these. I prefer the delicate and simple appearance of tapered table legs, which is representative of the Shaker style of furniture. But you may like straight legs from Arts & Crafts furniture or more fancy turned or carved legs from classical furniture styles.

“Drawer Pull”: A drawer pull is a handle or knob that is attached to a drawer front to enable the opening of the drawer. Drawer pulls can be attached with screws or, in the case above, a wedged tenon.

“Drawer Rails”: Drawer rails connect the two front legs, and create a frame for insertion of the drawer.

How To Make A Table Diagram Of Table Parts Showing A Double Mortise And Tenon Joint

The lower drawer rail has a double tenon that fits into two small mortises in the front legs, and the upper drawer rail has dovetailed ends that are lapped into the tops of the front legs.

Parts Of A Table Diagram Showing A Lapped Dovetail Joint On An Upper Drawer Rail

Moravian Workbench Plans

B. Hidden Interior parts of an end table

How To Make A Table Tutorial Inside Parts Of A Table Diagram

“Spacers”: Spacers (or “doublers”) fill in the space between the table legs and apron to offer a lateral limit to the drawer, to prevent the drawer from moving side to side.

Dovetail Drawer Spacers Or Doublers To Build A Table

Historically these spacers were made from a secondary wood, like Tulip Poplar or some species of Pine. The spacers in the above photo are made from poplar. They are glued to the side rails. Glue is sufficiently strong to hold the spacers in place.

“Drawer Runners”: Drawer runners give the drawers a surface to slide on, and prevent the drawer from dropping out of the bottom opening of the table.

Dovetail Drawer Runners To Build A Table

Drawer runners are simply glued onto the drawer spacers. The runners are level with the lower drawer rails.

“Kickers”: Drawer kickers are like runners, as they restrain the movement of the drawer.

Dovetail Drawer Kickers To Build A Table

But they sit level with the upper drawer rail and help keep the drawer pushed snugly against the drawer runner.

“Drawer Rails”: As mentioned above, drawer rails connect the two front legs, and create a frame for insertion of the drawer.

Dovetail Drawer Rails To Build A Table

Moravian Workbench Dvd Cover

Build Your Dream Workbench

Buy our 7+ hour Workbench Build Video on DVD or Download!

C. Parts of a Drawer

Make A Table Parts Of A Dovetail Drawer Diagram

“Drawer Front”: The drawer front is the only visible part of a closed drawer (aside from the pull) and is made from primary wood (like quartersawn white oak, in this case). Drawer fronts usually feature the most visually pleasing wood on the table, as it is the most visible of all table parts. A groove is plowed into the inner side of the drawer front to accept the drawer bottom.

Make A Dovetail Drawer To Make A Table

“Drawer Sides”: The left and right drawer sides are connected to the drawer front with half-blind dovetails. Drawer sides are usually made from a secondary wood, like Tulip Poplar or some species of Pine. This saves the furniture maker money, and lightens the drawer. The drawer sides also have grooves plowed into the inner sides to accept the drawer bottom.

Make A Dovetail Drawer To Make A Table Half Blind Dovetails

“Drawer Back”: Like the drawer sides, the drawer back is also made of a secondary wood, and is connected to the drawer sides via through-dovetail joints. The drawer bottom is shorter than the drawer sides and front, to allow the drawer bottom to escape underneath it when seasonal changes in humidity cause expansion and contraction of the drawer bottom.

Make A Dovetail Drawer To Make A Table

“Drawer Pull”: A drawer pull is a handle or knob that is attached to a drawer front to enable the opening of the drawer. Drawer pulls can be attached with screws or, in the case above, a wedged tenon. I made these pulls with chisels, rasps, and sandpaper.

Dovetail Drawer With A Drawer Pull And Quarter Sawn White Oak

“Drawer Bottom”: The drawer bottom holds all the contents of the drawer, and prevents them from falling out. Drawer bottoms can be made of plywood (because it doesn’t expand and contract much), but a superior custom drawer is made out of solid wood, like poplar or pine (secondary woods).

Drawer Bottom Of A Dovetail Drawer To Make A Diy End Table

Solid drawer bottoms allow a thicker bottom, with edges that are beveled with a handplane to fit into the grooves in the sides and front. Antique drawers usually have the handplane marks on the bottom. I used a bandsaw to resaw a poplar board for my bottom, milled up the two halves, and glued them together to form a solid bottom.

Drawer Bottom Of A Dovetail Drawer To Make A Diy End Table

As mentioned above, the drawer is built to manage the seasonal movement of the drawer bottom. Wood doesn’t expand and contract lengthwise, but it does expand & contract widthwise. So furniture makers arrange the drawer bottom in a way to allow the expansion to occur out the back of the drawer.

Diagram Showing Parts Of A Table Drawer Bottom

As the above photos show, the drawer bottom sits in the grooves that were plowed into the drawer sides and drawer front, and then sits on the drawer back. The drawer bottom is screwed into the drawer back with one or two screws (only one screw for a small drawer like this). The pilot hole in the drawer bottom is drilled wider than the screw to prevent the drawer from splitting with seasonal movement. It’s like wearing stretchy pants during the holiday season.

Furniture Making Dvds Woodworking

Learn to Make Tables & Chairs

Browse our traditional woodworking video classes available in Digital Download and DVD.

How an End Table & Drawer are Assembled

Two Night Stand End Tables In A Plastic Ammonia Fuming Tent

Now I’ll talk about how all the parts fit together when you make a table, including (a) Constructing the Table Frame (visible exterior parts), (b) Constructing the Spacers & Runners (Hidden Interior parts), (c) Drawer Construction and Drawer Fitting, and (d) How to Attach a Table Top. I’ll also include a section on finishing the tables. 

Portable Moravian Workbench Plans Used To Make This Collection Of The Best Collapsible Workbench

Traditional Woodworking Store

Check out our Tools, Videos, Plans, Apparel, and More!

A. Constructing the Table Frame (visible exterior parts)

Assembling A Diy End Table With Mortise And Tenon Legs

This DIY end table fits together with tenons on the aprons, inserted into mortises that are cut into the four legs. The rear tenons are beveled to allow them to clear each other inside the mortise. The rear legs, of course, each have a mortise on each side to accept the aprons.

Joshua Farnsworth Showing How To Make A Table Assembling The Legs Mortise And Tenon Joint

The front two legs are different. Like the rear legs, they have mortises that accept the apron tenons, but on the interior faces are mortises that are cut to provide an opening for the drawer.

Joshua Farnsworth Showing How To Make A Table Assembling The Legs Mortise And Tenon Joint

These mortises hold the drawer rails. The lower drawer rail uses a double tenon and double mortise to prevent the rail from twisting over time:

Lower Drawer Rail Being Inserted Into A Table Leg With A Double Mortise And Tenon Joint

The upper drawer rail uses a dovetail lapped into the top of the leg (pictured below). The dovetailed rail sits proud of the top of the leg so it can be hand planed down later when fitting the table top. Don’t worry if your rail dovetails look ugly. They’ll be covered with the table top later.

Lapped Dovetail Joint Drawer Rail Inserted Into A Table Leg

For aesthetic purposes I set my drawer rails back about 1/16 of an inch from the front of the table legs to create a “reveal”, as pictured above and below:

Drawer Rails Attached To A Table Leg With Lap Dovetail Joint And Double Mortise And Tenon Joint

The reveal adds visual interest to the rails and the tapered leg. The tapers on the table legs usually start a few inches down from the drawer rails:

Tapered Table Leg For Building A Diy End Table

Woodworking Videos And Woodworking Dvds

Woodworking DVDS and Digital Videos

Browse our traditional woodworking video classes available in HD Streaming / Download and on DVD.

B. Constructing the Spacers, Runners, & Kickers (Hidden Interior parts)

Dovetail Drawer Rails, Spacers, Runners, And Kickers Used To Build A Diy End Table

After the table frame is glued up, it’s time to make custom spacers, runners, and kickers. These parts are made out of a secondary wood, like Poplar or pine, and can be permanently attached to the table frame with wood glue. The glue is certainly strong enough to keep them attached, without using nails or screws. I like to use this liquid hide glue for this step.

Dovetail Drawer Runners, Kickers, And Spacers Or Doublers To Build A Table

I first glue on the top and bottom spacers (or doublers). I use plenty of wood clamps to ensure that the spacers will stay snugly against the table aprons:

Using Wood Clamps To Glue Drawer Spacers To Build A Table

The spacers are made to be flush with the four legs (pictured above). Leave the clamps on for a couple of hours.

Next, the drawer runners and kickers are glued to the spacers. The drawer runners give a platform for the drawer to run along, and the kickers are added up top to keep the drawer tight against the runners.

Dovetail Drawer Kickers To Build A Table

So essentially the drawer rails, drawer runners, drawer kickers, and drawer spacers create the boundaries to ensure your drawer will fit nice and snug. The more precise you are with building these interior parts, the better your drawer will fit in the table.

Parts Of A Table Interior Drawer Runners, Kickers, And Spacers

Woodworking T-Shirts And Apparel

Woodworking T-Shirts and Apparel

Browse our traditional woodworking clothes to show off your cool hobby!

C. How to Attach a Table Top

There are a variety of methods for attaching table tops, which I’ll mention here:

Wooden Buttons

One traditional method to attach table tops is making wooden buttons. To do this you cut shallow mortises into the rear apron, side kickers, and front rail, and make wooden “buttons” that hold the table top tight, while allowing seasonal wood movement.

Attaching A Table Top With Buttons

The button mortises should be cut before gluing up the table. I chisel out the button mortises with a ¼” chisel. Buttons are made out of scrap wood, and historical slotted screws are driven into pre-drilled pilot holes.

Table Aprons Inserted Into A Table Leg. Also Table Top Button Mortises.

Metal Button Fasteners

You can also buy inexpensive metal versions of the button style of fastener (see below). This is much easier than making your own wooden buttons.

Table Top Fasteners On A Diy Table

You can find this style of table top fastener here for not very much money. Table top buttons do, however, take a long time to install, because you either have to chop mortises or cut them with a plunge router.

Figure 8 Table Top Fasteners

Even more than table top buttons, I’m particularly fond of the figure eight table top fasteners. They are also called Desk Top Fasteners. These are my favorite style of table top fasteners, and in my opinion, the easiest to install:

Table Top Fasteners Figure 8

With this style of table top fastener you just bore shallow half circles into the top of your table aprons (same depth as the thickness of the fastener) and screw the other side into the table top. I clamp a sacrificial board to the inside of each apron so I can bore these holes.

Table Top Fasteners Figure 8

You can find the lowest prices on good figure 8 table top fasteners here. 

Pocket Screw Holes

Another method for attaching a table top is using pocket holes. I don’t mean using a Kreg jig (unless you want to). I mean using a carving gouge and a wood screw. You can see this method here:

Attach A Table Top With A Pocket Hole Screw

This is a very historical method for attaching table tops.

This is currently the most economical place to purchase table top fasteners. All of these table top fasteners allow for seasonal wood movement, if installed correctly.

I prefer to use an undercut bevel for the tops of my end tables, to give it the aesthetics of a thinner top, but the strength of thicker top. And the slope gives it a nice look. I use a hand plane to make these undercut bevels. Beveling with a handplane is faster than making undercut bevel table saw jigs. But if you plan on making a lot of these tables, using the table saw is the way to go. An undercut beveled top is one sign of quality in an end table like this.

D. Drawer Construction and Drawer Fitting

Make A Dovetail Drawer To Make A Table

When building a drawer for a table I make sure that I build the drawer a tad wider than the drawer opening in the table. Why? Because I want the drawer to fit perfectly snug, and I want to make a custom fit. If you build the drawer box to the exact dimensions of your opening, then there’s a good chance that the drawer will be too lose in the opening. I try to make the drawer about 1/16th of an inch wider than the opening. If you build the drawer any wider, then you’ll be doing a whole lot of handplaning in the drawer fitting stage.

Assembling the Dovetail Drawer Box

Now it’s time to assemble the drawer parts. The sides of the drawers are attached to the drawer front using half-blind dovetail joints, and the sides are attached to the back using through-dovetail joints.

Assembling A Half Blind Dovetail Joint On A Drawer To Make A Table

I first attach one drawer side to the drawer front, with the half-blind dovetail joint (pictured above. I then attach the drawer back to that first drawer side.

Assembling A Half Blind Dovetail Joint On A Drawer To Make A Table

I finish assembling the drawer frame by attaching the second side to the drawer front and drawer back:

Assembling A Dovetail Drawer To Make A Table

Next I glue up the dovetail drawer box, taking extra care to ensure that the drawer box is square before the glue dries. But I don’t add the drawer bottom yet, since I’ll be sliding in a solid drawer bottom after I ammonia fume and finish the drawer front and drawer box.

Fitting the drawer to the table

Make A Table Diy End Table

After the glue on the drawer box is dried (I wait overnight, just to be careful), I fit the drawer box to the opening of the table.

Using A Smoothing Plane To Fit A Drawer To Make A Table

As I mentioned earlier, I make the drawer box about 1/16-inch wider than the opening, so I can custom fit the drawer with a hand plane. The drawer shouldn’t fit in the opening at first. I use a smoothing plane (see my handplane guide here) to take fine shavings from both sides of the drawer box until the drawer box slides in perfectly.

How To Fit A Dovetail Drawer When You Make A Table

The drawer fitting process also includes handplaning a tad off the top and bottom of the drawer front, to create a very slight space above and below the drawer front, called a “reveal”. The top and bottom reveal prevents the drawer from hanging up, and also helps aesthetically balance the reveal that was created when handplaning the drawer sides.

How To Fit A Dovetail Drawer When You Make A Table

To me, a perfect fit means that the drawer requires a little pressure to get the drawer box to go inside the table, but not so much that it requires too much effort. And a loose drawer would be wobbling around. Watch my video at the top of this page to see how my drawer slides in.

How To Fit A Dovetail Drawer When You Make A Table

I know this was just a quick explanation on fitting a drawer, but the topic of fitting a drawer could require a whole article on it’s own, depending on how deep you want to delve. You can either just go ahead and experiment with what I just mentioned, or if you want a really good lesson on drawer fitting, here is a great DVD on making fine custom-fit drawers:

Building A Classic Drawer With Alan Turner Dvd

Finishing the drawer box

After my drawers are glued up and snugly fit to the table, I use a block plane to bevel the tops of the drawer sides to prevent dings from showing up. You can also see how nice the half-blind dovetails look after the drawer sides have been hand planed for fitting.

How To Fit A Dovetail Drawer When You Make A Table

The marking gauge line remains visible, which is historically accurate, so don’t try to sand them out! I also finish the secondary wood parts of the drawer (sides, back, and bottom) with a few coats of thinned down dewaxed shellac (scuffing between coats with steel wool). And later, after finishing the drawer front and table, I add a beeswax wood finish / beeswax polish for a little extra protection and sheen.

Applying Ye Olde Beeswax Wood Finish To A Drawer

The shellac and beeswax wood finish gives the drawer box a slight amount of moister protection. Thinned shellac only takes a few minutes to dry, and applying a wax only take s a minute or two, so this process is very quick.

You can buy my “Ye Olde Beeswax Wood Finish For Furniture” here. 

Applying Ye Olde Beeswax Wood Finish To A Drawer

You don’t have to do any finishing on the interior drawer parts if you don’t want to. I just find that it makes the drawer interior look nicer for a longer period of time. And it offers protection from dirt and grime, and also moisture (when I wipe clean the drawer with a damp cloth).

I did an ammonia fuming on these tables and drawers, so the Shellac prevented the drawer box from any darkening.

Unfinished Quartersawn White Oak Diy End Table Night Stand With Half Blind Dovetail Drawers

Drawer stops are added to stop the drawer from going too far into the table. They stop the drawer front even with the drawer rails. I simply glue little blocks on the lower front drawer rail.

Quarter Sawn White Oak Table With Drawer Stops

On these particular night stands I used a historical finishing method called “fuming” with ammonium hydroxide, or Ammonia as it’s known to most people. In a confined space, the ammonia will react with the tannin in the white oak, darkening it. You can check out my article and video tutorial on fuming these tables here.

Two Night Stand End Tables In A Plastic Ammonia Fuming Tent

After a couple days of fuming in my plastic tent, the end tables look dark and lovely. But not as lovely as when adding a finish. The grain just pops when adding a finish like this. A recipe and instructions for this great penetrating, yet protective, wipe on finish can also be found below.

Quartersawn White Oak End Table Night Stand With Half Blind Dovetail Drawers

I then add a drawer bottom. As mentioned earlier, the drawer bottom’s grain runs side to side, which means the wood will move front to back. This is why the drawer back is kept out of the way.

Attaching A Drawer Bottom Into A Drawer Frame On A Nightstand Table With A Screw And Screwdriver

The drawer bottom is beveled with a hand plane, slid into the drawer bow, and then attached to the drawer bottom with a screw. The screw hole in the drawer bottom is slightly larger than the screw, so that seasonal wood movement won’t destroy the drawer. I make the hole oval shaped. I like to use historical-style slotted screws for this purpose. You can check out my video blog post on making affordable historical slotted screws here.

Bonus: Wiping Varnish Finish Recipe for Tables

Applying A Wiping Varnish Finish To A White Oak Night Stand

This is an easy, lovely, and protective wood finish recipe that is based on a recipe that my friend Will Myers shared with me. I like it because it brings out the figure and gives depth with some oil, but offers protection that a table needs, without getting a plastic look.

  • Mix Natural Danish Oil and Satin Polyurethane in a 50/50 mixture. I like to use a small jam-sized canning jar (8 oz – 12 oz. size).
  • Use a lint-free cloth, or old t-shirt scraps to wipe on a first coat. Wait 10-15 minutes, and then wipe off the excess with a clean cloth. Let the first coat dry for three days.
  • Lightly sand or scuff between coats with 0000 steel wool, an ultra fine Scotch-Brite pad, or very fine sandpaper. This finish really doesn’t build enough film to need wet sanding, so just lightly dry scuff between coats.
  • Repeat the above steps two more times.
  • After the last (third) coat has dried for three days, lightly scuff the surface again, and buff with a nice furniture wax and a cotton cloth (an old T-shirt). You can buy my “Ye Olde Beeswax Wood Finish For Furniture” here. Waiting a week before applying a wax finish is even better so that the oil finish gets a nice long time to harden. Don’t leave the wax on longer than 10 minutes before buffing it with a soft cotton cloth.
  • Tip: This finish will thicken up in the jar and be unusable after a few weeks, so if you have leftovers, I spray a bit of Bloxygen to preserve it and then close the lid. I also spray this into my danish oil can and polyurethane can (and all my varnishes). Bloxygen is argon gas that displaces the oxygen, which preserves your wood finishes. It has saved me a lot of money in wasted wood finish. It’s especially good to spray in Waterlox, which tends to coagulate more quickly than other finishes I’ve used.

Conclusion

And here are the finished end tables! Hopefully this has educated you on the anatomy and process of making tables with drawers.

Two Quartersawn White Oak Night Stands Sitting On A Roubo Workbench Slab

The construction process gets a bit more complex when introducing more than one drawer, but that will be a lot easier for you to understand now. I get educated more and more each time I build something, so now go and build a table of your own!

(This article was originally published Dec 01, 2017)

Anatomy of an End Table and Drawer2022-06-17T08:50:55-04:00

How to Make Historic Beeswax Furniture Polish

Ad Banner

How to Make Historic Beeswax Furniture Polish

5 Steps to Make Historic Beeswax Furniture Polish Finish with Beeswax, Oil & Turpentine

Joshua Farnsworth Portrait  By Joshua Farnsworth  |  Updated Mar 14, 2022

Share This Article:

How to Make Historic Beeswax Furniture Polish

5 Steps to Make Historic Beeswax Furniture Polish Finish with Beeswax, Oil & Turpentine

Joshua Farnsworth Portrait  By Joshua Farnsworth  |  Updated Mar 14, 2022

Share This Article:

Disclosure: WoodAndShop.com is supported by its audience. When you purchase through certain links on our site, we may earn a small affiliate commission, at no cost to you. Learn more.

In this article (and the video above) I teach how to mix melted wood seasoning beeswax, boiled linseed oil, and turpentine to create a lovely historic wood finish and beeswax furniture polish.

Beeswax Furniture Polish With Wood Seasoning Beeswax, Turpentine, And Boiled Linseed Oil On A Walnut Board

This beeswax polish leaves your furniture looking and feeling silky smooth. This beeswax furniture polish recipe was taught to me by the woodworking furniture makers at Colonial Williamsburg and also the Frontier Culture Museum.

Ye Olde Beeswax Wood Finish On Mahogany With Hand Plane

Ye Olde Beeswax Wood Finish for Furniture

Make your furniture silky smooth with our historic beeswax wood finish!

Step 1: Melt the Refined Beeswax

Melting Beeswax On A Double Boiler For Beeswax Furniture Polish

The first step to make this historical beeswax furniture polish is to start melting some refined pure beeswax in a double boiler setup. There’s no special beeswax for wood, just normal refined beeswax. And this is the most affordable beeswax I have purchased, though it comes in a 10 pound package. You can also find refined beeswax here at Ebay. And you can alternatively buy raw beeswax from local beekeepers and refine it yourself.

Langstroth Beehive For Beeswax Furniture Polish

Simply break up pieces of the pure refined beeswax and place them in a clear glass bowl (like a Pyrex bowl). There’s no need to use a cheese grater as some people suggest. That’s messy. Then place the glass bowl on top of a pot of boiling water and let the beeswax melt.

Wood Finishing

It is important that you use refined beeswax so particles of debris won’t scratch your furniture. In one of my recent videos, Don Williams (retired Senior Furniture Conservator at the Smithsonian Institution) shared a tutorial on his simple method for refining raw beeswax (watch it here). This is more-or-less the method that I now use.

Ye Olde Beeswax Cutting Board &Amp; Wood Spoon Finish

Ye Olde Beeswax Cutting Board & Wood Spoon Finish
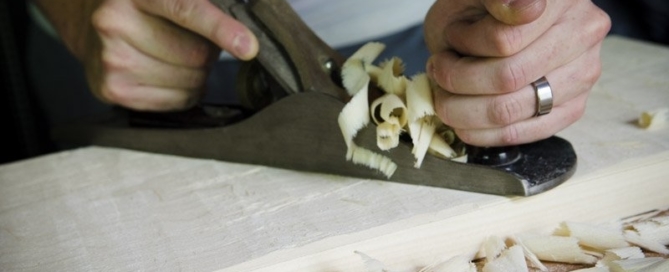
Protect your wooden spoons, bowls, and cutting boards with our historic beeswax wood finish!

Step 2: Mix Turpentine and Boiled Linseed Oil in a Jar

Ball Canning Jar Boiled Linseed Oil And Turpentine For Mixing Beeswax Furniture Polish

While the beeswax is melting you can mix the turpentine and boiled linseed oil. You will not be heating the boiled linseed oil or turpentine in my method, as I prefer to keep my face intact. Please don’t try methods that recommend heating the entire mixture. There is no need. Get a small canning jar, and mix equal amounts of turpentine and boiled linseed oil.

Ball Canning Jar For Mixing Beeswax Finish

I like the small 6 ounce canning jars because the jars have a 2 ounce mark, 4 ounce mark, and 6 ounce mark. This is perfect for adding an equal mixture of all three ingredients (1/3 of each).

Pouring Boiled Linseed Oil For A Beeswax Furniture Polish

The boil linseed oil acts as a penetrating agent to bring out depth and enhance the figure of the wood. That’s the secret ingredient that makes this a wood seasoning beeswax finish. But oil is optional. Some historical recipes use just beeswax and turpentine. Turpentine is a solvent derived from pine tree sap, and is used to keep the beeswax from hardening too much.

Pouring Turpentine For A Beeswax Furniture Polish

As I just mentioned, some of the historic beeswax furniture polish recipes use just beeswax and turpentine, when surface penetration is not desired. But I like the addition of boiled linseed oil because I use this as more of a wood finish than just a furniture polish. I like how the oil darkens the wood over time.

Applying Beeswax Furniture Polish To A Moravian Footstool

But don’t use raw linseed oil, because your finish will take weeks to dry. Modern boiled linseed oil isn’t actually boiled, but uses chemical dryers to accelerate the drying process of the oil. Go ahead and use a clean stick or spoon to mix the boiled linseed oil and turpentine.

Moravian Workbench Plans

Step 3: Add the Melted Beeswax

Double Boiler For Making Beeswax Furniture Polish

Next you will use hot pads to carefully pour the melted beeswax from the hot glass bowl into the jar that contains the turpentine and boiled linseed oil. You can add the same amount of beeswax as the other ingredients (1/3 oil, 1/3 turpentine, 1/3 beeswax) or you can add slightly less or more beeswax. This just depends on how you prefer your finish. There really are so many variations, so that’s why it’s good to just start off with this simple recipe of three equal parts.

Pouring Melted Beeswax From Glass Bowl Into Mixture Of Turpentine And Boiled Linseed Oil For Beeswax Furniture Polish

I’ve found that adding 1/3 beeswax (or less) will give you a softer beeswax polish, which gives you more time before you have to buff the finish out. But it also gives you less sheen after buffing. If you add more than 1/3 beeswax you’ll get a higher sheen. But be sure to buff the finish out in about 10-15 minutes or else you’ll have a difficult time getting it buffed. It’ll be sticky instead of smooth. Just experiment. You can always add more beeswax later if you want the polish to be harder. You can also add more turpentine later, if the polish is too hard.

Mixing A Beeswax Furniture Polish With Pure Beeswax, Boiled Linseed Oil, And Turpentine

Stir the beeswax wood polish mixture together immediately after pouring in the hot wax, and then put the jar lid on. The beeswax will clump up a bit and look cloudy, which is normal for wax hitting cool liquid. The turpentine will eventually dissolve the beeswax clumps.

Woodworking Dvds Wood And Shop

Woodworking DVDS and Digital Videos

Browse our traditional woodworking video classes available in HD Streaming / Download and on DVD.

Step 4: Set the Beeswax Furniture Polish Near a Window

Jar Of Beeswax Polish Finish Melting Next To A Sunny Window

Place the jar of freshly mixed beeswax furniture polish near a warm sunny window and let it sit for at least a day to dissolve the beeswax and thicken the polish. This is what the equal parts mixture looks like when it’s dissolved and ready to use:

Beeswax, Turpentine, And Boiled Linseed Oil Wax Furniture Polish Finish On A Walnut Board With Wiping Cloth

Step 5: Apply and Buff the Beeswax Furniture Polish

Of course, the beeswax furniture polish finish will be thin and creamy at first because it has been sitting near a warm window, but it gets more solid when it’s stored out of the warm sunlight. In the winter months it will be hard and you’ll have to soften it up in a heated room before using it.

Turpentine, Boiled Linseed Oil, And Beeswax Furniture Polish Finish Applied On A Walnut Board

Apply the beeswax wood polish with a clean cloth (like an old T-shirt), and then buff it out with a clean cloth after 10-15 minutes, or else the wax may become too hard. This will be even more important if you use more beeswax in your mixture. Another application method is to use a French Polissoir. I created another video of Don Williams teaching how to use a French Polissoir to burnish a beeswax finish (watch it here).

French Polisher Polissoir Used By Don Williams To Apply Beeswax Furniture Polish

Wood Finishing

Woodworking DVDS and Digital Videos

Browse our traditional woodworking video classes available in HD Streaming / Download and on DVD.

Conclusion

I hope you’ve enjoyed this tutorial on making historical beeswax furniture polish! At the bottom of this page you can ask questions or tell me how you like this polish. You can also subscribe to receive more free woodworking articles and videos like this:

How to Make Historic Beeswax Furniture Polish2024-02-07T16:29:16-05:00

How to Square, Flatten, and Dimension Rough Boards with Hand Tools

Ad Banner

How To Flatten Board Lumber With Woodworking Hand Tools

10 Steps to flatten board from rough lumber into a perfectly square & smooth board, by hand planing wood with traditional woodworking hand tools.

Joshua Farnsworth Portrait  By Joshua Farnsworth  |  Updated Mar 01, 2022

Share This Article:

How To Flatten Board Lumber With Woodworking Hand Tools

10 Steps to flatten board from rough lumber into a perfectly square & smooth board, by hand planing wood with traditional woodworking hand tools.

Joshua Farnsworth Portrait  By Joshua Farnsworth  |  Updated Mar 01, 2022

Share This Article:

Disclosure: WoodAndShop.com is supported by its audience. When you purchase through certain links on our site, we may earn a small affiliate commission, at no cost to you. Learn more.

Introduction: How to Flatten Board Lumber with Woodworking Hand Tools

In the above video, and in the below 10 steps, I teach one of the most basic and essential skills in traditional woodworking: how to square, flatten, & dimension your own rough lumber into finished boards. Some people also call this “four squaring lumber” or “Flatten Board Lumber”. Either way, you’re just trying to get a square board for furniture making.

Flatten Board With Stanley Hand Plane On A Sjobergs Workbench

To build quality traditional furniture, you need to start with flat and square lumber. Some people achieve this with power jointers, planers, and table saws. While the electrical power route is more economical for a commercial woodworking workshop, I sometimes prefer the safety, exercise, quiet, and historical feeling that comes from dimensioning my boards by hand. Plus, it just makes you feel cool to flatten board lumber with woodworking hand tools like a hand plane, a hand saw, and more.

Flatten Board By Hand Planing With A Stanley Plane

Sure it takes a little longer, but why did you get into woodworking in the first place? To hurry and build a bunch of stuff, or to enjoy yourself? It’s therapeutic to take some things slowly. And with practice, squaring lumber by hand won’t take all that long…ask your ancestors.

Moravian Workbench Plans

Required Woodworking Hand Tools to Flatten Board Lumber

A Hand Planing Stop Supports A Board For Hand Planing With A Stanley Hand Plane On A Pine Wooden Workbench To Flatten Board

Even though I have a nice tool buying guide (here), I’m still often asked for links to the tools that I use in my videos, so here they are (note that you don’t need all these tools):

Workbench (to flatten board):

It’s very helpful to have a very sturdy woodworking workbench because four squaring lumber requires a lot of hand planing, which will rock a smaller DIY workbench. Read my wood work bench guide to learn about which woodworking bench features are important for you:

Hand Planes (to flatten board):

Most woodworkers use antique wood planes, like Stanley hand planes, but there are some other good vintage and new hand planes on the market for hand planing boards. You won’t need all of these hand planes, just a jack plane, a smoothing plane, a jointer plane, and maybe a block plane. I just wanted to share some options:

Hand Saws (to flatten board):

Marking & Measuring Tools (to flatten board):

Woodworking Dvds Wood And Shop

Woodworking DVDS and Digital Videos

Browse our traditional woodworking video classes available in HD Streaming / Download and on DVD.

10 Steps to Squaring Lumber & Flatten Boards with Woodworking Hand Tools

Curled Hand Plane Wood Shavings Ejecting From The Mouth Of A Wooden Jointer Plane To Flatten Board

Now that we’ve covered which woodworking hand tools you need to use, here are the 10 steps required for squaring lumber by hand (to flatten board):

Wood Finishing

Step 1: Cut the Board to Rough Dimensions

The first step to square a board is to cut the board to rough dimensions. First use a longer try square or combination square or framing square to mark your rough board’s approximate length.

Using A Try Square To Cut Off A Board End To Flatten Board

Then use a Cross Cut panel saw to cut your rough board to rough length (across the grain). Keep in mind that this isn’t your final length. You’re just removing any messy wood, and getting to a manageable length; somewhat close to what you’ll eventually arrive at. This is a good time to cut off checked ends or knots.

Using A Hand Saw To Cut Off A Board End To Flatten Board

You can also use a Rip Panel saw to rip the board lengthwise (along the grain) to get a manageable width, if needed. Not sure what rip teeth and crossucut teeth are? Here’s an old chart that shows the difference between Cross-cut saw teeth and Rip saw teeth:

Cross-Cut-Saw-Tooth-Profile

Rip-Saw-Tooth-Profile

Step 2: Flatten a Reference Face with Hand Planes

Flatten Board By Hand Planing With Stanley Hand Plane On A Wood Work Bench

Next, place the board between the bench dogs on your wood work bench, with the cupped face facing down, to avoid rocking. You can also put the cupped face upward, which may make it easier to evenly bring the high edges down with a hand plane, simultaneously. But if you go this route, you may need to use shims if your board is in really bad shape. Use a scrubbing plane or a jack plane with a cambered iron (8 degree camber/arc) to flatten the first face. This jack plane is going to be doing rough work, so don’t worry about tuning it extensively.

Flatten Board By Hand Planing With Stanley Hand Plane With Cambered Iron Blade On A Wood Work Bench

If you have extreme cupping in the board, hand plane down the length of the board, removing the high center to create a valley:

Flatten Board By Hand Planing With No. 5 Stanley Hand Plane With Cambered Iron Blade On A Wood Work Bench

Before hand planning across the grain, bevel the edge that is farthest away from you, to prevent major tear out:

Flatten Board By Hand Planing With No. 5 Stanley Hand Plane By Beveling Edge On A Wood Work Bench

Then hand plane across the grain, from one end to the other:

Flatten Board By Hand Planing With No. 5 Stanley Hand Plane By Beveling Edge On A Wood Work Bench

Adjust your hand plane so that your wood shavings are as big as possible, while still being able to move the plane.

Hand Planing Shavings From A No. 5 Stanley Hand Plane From Flatten Board

You can also take some diagonal passes with the hand plane both ways, to aid with flattening:

Flatten Board By Hand Planing With No. 5 Stanley Hand Plane On A Diy Workbench

Tilt your jack plane on its edge and drag it along the board to get a rough idea of your progress toward flatness:

Flatten Board By Hand Planing With No. 5 Stanley Hand Plane On A Diy Workbench

Wood Finishing

Woodworking DVDS and Digital Videos

Browse our traditional woodworking video classes available in HD Streaming / Download and on DVD.

Step 3: Test for Twisting with Winding Sticks

Flatten Board Lumber By Looking At Winding Sticks To Find Twist In The Board

Set a pair of winding sticks (pronounced “why-nding”) parallel to each other on opposite ends of your board and site along the winding sticks. The winding sticks will make any twisting appear more exaggerated, showing you which corners need to be lowered when you continue to flatten board with a hand plane.

Flatten Board Lumber By Looking At Winding Sticks To Find Twist In The Board With Stanley Planes

Having dark ends or inlaid bars on one winding stick makes twist easier to spot. You don’t even need to make fancy winding sticks, but can simply use two straight pieces of wood or aluminum angle iron that are the same size.

Inlay Winding Stick To Flatten Board With Hand Plane
Use your pencil to mark the high corners of the board. Because of how boards twist, the high corners will usually be opposite each other.

Flatten Board By Marking Low Spot With Pencil

Step 4: Remove the Twist and Flatten the Board Face

Wooden Straight Edge For Hand Planing To Flatten Board With Hand Plane

Place your straight edge on the high corners to verify how much wood still needs to be removed with your wood plane.

Joshua Farnsworth Using A Wooden Straight Edge To Flatten Board

Use a longer fore plane (No. 6) or jointer plane (No. 7 or No. 8) to remove the high corners and check your progress with a straight edge.

Flatten Board By Hand Planing With No. 7 Jointer Stanley Plane On A Wood Work Bench

If you are getting “tear-out”, that means that you are hand planing against the grain. Flip your board around and hand plane in the other direction.

Flatten Board By Hand Planing With No. 7 Jointer Stanley Plane On A Wood Work Bench

Below are several Stanley plane options for hand planes for flattening the board’s face (from left to right): A Stanley No. 6 “Fore Plane”, a Stanley No. 7 “Jointer Plane”, a Stanley No. 8 “Jointer Plane”, and an 18th century style wooden jointer plane (I built it, so it’s my favorite!):

Wood Plane Or Hand Planer Collection For Hand Planing On A Sjobergs Workbench

Your shavings will still be somewhat heavy in this step, but not nearly as heavy as with the scrubbing plane / jack plane.

Flatten Board By Hand Planing With No. 7 Jointer Stanley Plane On A Wood Work Bench With Wood Shavings

Just don’t remove too much wood on the corners or you’ll have to lower the rest of the board to match your new low corners. Once the straight edge lies flat across the previously-higher corners, move onto flattening the rest of the board face.

Joshua Farnsworth Using A Wooden Straight Edge To Flatten Board

The longer hand plane will uniformly bring the surface downward, skipping all the valleys that a smaller hand plane would fall into. As you’re hand planing be conscious about not introducing a lengthwise arc.

Hand Planing 101 Tip:

Here’s how to avoid getting “valleys” in the middle of your board when hand planing: When your hand plane starts on the board, keep the downward pressure on the front knob of the handplane only:

Flatten Board By Hand Planing With No. 7 Jointer Stanley Plane On A Wood Work Bench

When your handplane is in the middle of the board push downward on both the front knob and the rear handle (or tote):

Flatten Board By Hand Planing With No. 7 Jointer Stanley Plane On A Sjobergs Workbench

When the front of your handplane moves over the edge of the board, remove the downward pressure from the front knob, and only push downward on the rear handle. For practice you can even remove your hand from the front knob:

Flatten Board By Hand Planing With No. 7 Jointer Stanley Plane On A Sjobergs Workbench

Use diagonal hand plane passes, then lengthwise passes, periodically using a straight edge and your winding sticks to check your progress toward perfect flatness.

Joshua Farnsworth Using Wooden Winding Sticks To Flatten Board

When you’re getting full length and full width wood shavings, and your board’s face starts to look flat and smooth, then you’ll know that the first board face is about ready.

Flatten Board By Hand Planing With No. 7 Jointer Stanley Plane On A Wood Work Bench Showing Wood Shavings

The straight edge should show no gaps no matter which way you turn it on the board’s face:

Joshua Farnsworth Using A Wooden Straight Edge To Flatten Board

Portable Moravian Workbench Dvd

Step 5: Smooth the Reference Face with a Smoothing Hand Plane

#4 Stanley Hand Planes Or Smoothing Plane Sitting On A Wood Work Bench

Use a finely tuned smoothing plane (like the below Stanley No. 4 hand plane or No. 4 ½ hand plane) and take a few passes lengthwise to give a better-than-sandpaper surface to your reference face.

Using A Stanley Plane To Smooth The Face Of A Board To Flatten Board

You will want to produce very thin and fine shavings in this step, referred to as “gossamer” shavings (like a silk scarf).

Using A Stanley Plane To Smooth The Face Of A Board To Flatten Board With Plane Tracks

A slightly cambered (i.e. arced) iron (i.e. blade) will prevent “hand plane tracks” (see the lines above) and give you a glassy surface. When I say “slightly” I mean “barely”. Chris Schwarz has the best tutorial on tuning & sharpening handplanes on his DVD: “Super-Tune a Handplane”. You can buy it here or here.

Feeling A Freshly Hand Planed And Smooth Board After Flatten Board

Now that your reference face is perfectly flat & smooth, make a traditional squiggly mark to notate the reference face:

After Flatten Board Face With Hand Plane, Use Pencil To Mark Reference Face

Step 6: Joint the Reference Edge with a Jointer Plane

Jointing The Edge Of A Board With A Wood Plane Or Jointer Plane To Square And Flatten Board

You will use a long jointer plane to “joint” (i.e. true-up or flatten) the first edge of your board, to provide a perfect 90 degree angle between the reference face and reference edge. You can either use a metal jointer plane, like the No. 7 Stanley Plane  or No. 8 Stanley plane, or a quality wood plane, like a wooden jointer plane.

Wood Shavings From Jointing The Edge Of A Board With A Wood Plane Or Jointer Plane To Square And Flatten Board

Place the board in your workbench vise, with the reference face toward you. The process used to joint a board’s edge is essentially the same as I used to flatten the reference face in step 4.

Jointing The Edge Of A Board With A #7 Stanley Plane Or Jointer Hand Plane To Square And Flatten Board

The main difference is how you hold the hand plane. To achieve a reference edge that is 90 degrees to the reference face, pinch the jointer plane with your thumb and index finger, and use your other 3 fingers (hopefully you still have that many digits…I’m talking to you table saw users) as a fence to maintain the 90 degree angle:

Jointing The Edge Of A Board With A Wood Plane Or Jointer Plane To Square And Flatten Board

Push the hand plane lengthwise, producing moderately thick shavings, until the board’s edge is flat.  Adjust your hand plane so that your shavings are ejecting from the middle of the jointer plane.

Wood Shavings From Jointing The Edge Of A Board With A Wood Plane Or Jointer Plane To Square And Flatten Board

You’ll gauge the flatness by placing your straight edge on the board’s edge:

Using A Wooden Straight Edge To Flatten Board With Hand Plane

Look under the straight edge to see if there are any gaps. It is common to create a valley from improper hand planing techniques. Just refer back to step 4 for a review on how to avoid valleys while hand planing:

Using A Wooden Straight Edge To Flatten Board With Hand Plane
Periodically use a small combination square or try square to check for the 90 degree angle along the entire edge of the board. Don’t ruin your combination square by dragging it, but just take incremental measurements.

Using A Starrett Combination Square On Board Edge To Flatten Board With Hand Plane

Use your pencil to mark where your high spots are:

Using A Starrett Combination Square On Board Edge To Flatten Board With Hand Plane

Then tilt your jointer plane to take down the high spots with a pass or two, then take another full pass or two. Then recheck until the entire edge is square to the reference face.

When you first get started, this process can take a little while to figure out, but you’ll eventually be able to quickly achieve a true edge that is square to the reference face. You can also look into making an “edge shooting board” to speed things up when truing edges. I haven’t had much luck with the fence attachments for handplanes. Use your pencil to make a traditional “V” mark on the edge to indicate that this is the reference edge:

Flatten Board By Marking Reference Face And Reference Edge With Pencil

Now you will see a perfect 90 degree angle, from which you will mark the other faces & edges.

Woodworking T-Shirts And Apparel

Woodworking T-Shirts and Apparel

Browse our traditional woodworking clothes to show off your cool hobby!

Step 7: Create a Parallel Edge with a Panel Gauge or Square

Flatten Board With Lie-Nielsen Panel Gauge

Use an accurate panel gauge (or a 12-inch combination square) to make the next edge parallel to your freshly trued reference edge.

Square And Flatten Board With Vintage Panel Gauge

I’ve found that antique panel gauges can be wobbly, so either hold them tightly while scribing, or purchase a new panel gauge, like this excellent new panel gauge at Taylor Toolworks. You can also make one, but it’s tough to beat something as stable as one like this:

Square And Flatten Board With Lie-Nielsen Panel Gauge

Set the width of the panel gauge to your required width, lock in the measurement (with the screw or wedge), and run the cutter to make your perfectly parallel line. This mark is where you will cut or hand plane down to.

Square And Flatten Board With Lie-Nielsen Panel Gauge

My panel gauge has a slot for a pencil on the opposite end of the handle…just flip it around. Since I’m not cutting on this line (it’s just a visual guide), I prefer the pencil end.

Square And Flatten Board With Lie-Nielsen Panel Gauge Pencil

Wood Finishing

Woodworking DVDS and Digital Videos

Browse our traditional woodworking video classes available in HD Streaming / Download and on DVD.

Step 8: True up the Second Edge

If the line you just scribed with your panel gauge is very close to the rough edge, then you can simply use a jointer plane to bring down the small amount of wood.

Jointing The Edge Of A Board With A Wood Plane Or Jointer Plane To Square And Flatten Board

If you find that you have too much wood to remove (and don’t want to spend all day hand planing down to the line with your finely set jointer plane) you have two alternate options:

(1) Use a jack plane or scrubbing plane to quickly remove most of the waste wood, and then finish down to the pencil line with a jointer plane:

Rough Jointing The Edge Of A Board With A #5 Stanley Jack Plane To Square And Flatten Board

(2) If you have too much waste, even for a jack plane to remove, then use a rip panel saw to get close to your line, then finish up with a jointer plane:

Ripping A Board With A Rip Panel Hand Saw

CAUTION: If your board’s width is critical, then make certain to NOT get too close to your line with the jack plane or rip saw. Get somewhat close, and then use your jointer plane to finish the job. Just remember that you may need some extra wood to get the edge square:

Jointing The Edge Of A Board With A Wood Plane Or Jointer Plane To Square And Flatten Board
Now you should have two jointed edges that will be perfect in case you need to glue-up a table top or panel.

Step 9: Flatten the Final Board Face

Flatten Board By Hand Planing With No. 5 Stanley Hand Plane Or Jack Plane On A Sjobergs Workbench

Now that your reference face and both edges are flat and square to each other, use a marking gauge to scribe your final board thickness. Set the marking gauge against your flattened reference face and scribe the thickness onto both edges and ends:

Checking Board Thickness With Wheel Marking Gauge To Flatten Board By Hand Planing

I like to follow the marks with a pencil to make them more visible for when I use the hand planes in the next step:

Using A Pencil To Mark Board Thickness To Flatten Board By Hand Planing
Now you have a line drawn around the parameter of the board. Use a scrubbing plane or jack plane, a jointer plane, and a smoothing plane to flatten & smooth the last face, according to the instructions in steps 2 through 5. But this time you will have the added advantage of guidelines to let you know when you are getting close. But I still use the straight edge and winding sticks to measure my progress:

Flatten Board By Hand Planing With No. 5 Stanley Hand Plane Or Jack Plane On A Sjobergs Workbench

Flatten Board By Hand Planing With No. 5 Stanley Hand Plane Or Jack Plane On A Sjobergs Workbench

Flatten Board With No. 5 Stanley Hand Plane Or Jack Plane By Beveling Edge On A Wood Work Bench

Flatten Board By Hand Planing With No. 5 Stanley Hand Plane Or Jack Plane On A Diy Workbench

Hand Plane Shavings From A No. 5 Stanley Hand Plane Or Jack Plane From Flatten Board

Flatten Board By Hand Planing With No. 5 Stanley Hand Plane Or Jack Plane On A Diy Workbench

Step 10: Cut the Ends to Final Length

Using A Try Square And Pencil To Mark The Square Edge Of A Flatten Board

You should now have two perfect faces and two perfect edges. All that remains is two ends that are square to the faces and edges.

Using A Try Square And Pencil To Mark The Square Edge Of A Flatten Board

First you should set a larger try square (or combination square) against your reference edge and scribe your first end’s cut line on your reference face with a fine pencil. You can also use a framing square, if your board is too wide for a try square or combination square. Just make sure your try square is actually square. Usually try squares have at least one edge that is true. Refer to my “marking & measuring” buying guide (here) to see how to test a try square for “squareness”.

Using A Try Square And Pencil To Mark The Square Edge Of A Flatten Board

I have found that my miter box and miter box saw are the best solution to creating perfect ends. Make sure that your board’s reference edge is pressed up against the miter box fence, adjust the miter box to cut a 90 degree cut (use your pencil line to ensure the miter box is set correctly), and saw away!

Using A Miter Box And Miter Saw To Cut A Square Edge To Flatten Board

This may take awhile, depending on how wide and thick your board is, and how sharp your saw teeth are. If I have several fatty boards to cut, then I wear a glove on my sawing hand to prevent a blister.

Using A Hand Saw To Cut Off A Board End To Flatten Board

If your board is too wide to fit in a miter box (or if you don’t have a miter box and miter saw), then use a cross cut panel saw (above) to saw close to your line. Then use a very sharp low-angle block plane to get right down to the line:

Using A Lie-Nielsen Low Angle Rabbet Block Plane To Flatten Board End Grain

Just make sure that you hand plane from both directions toward the middle to avoid hand hand planing over the edge. If you don’t heed my advice, the end grain will splinter off the edge of the board.

Using A Lie-Nielsen Low Angle Rabbet Block Plane To Flatten Board End Grain

Use a large try square (or framing square) to look for any high or low spots, and continue to use the block plane to make the end become square to the edge and face:

Using A Vintage Try Square On Board Edge To Test For Flatten Board

Now use a folding rule or a tape measure to determine your final length. Follow the above process for measuring and cutting the second and final end. Now you should have 6 square & flat surfaces, and a very useful board for gluing-up and building beautiful traditional furniture. Your board should now be “four squared”.

Vintage Try Square On Board Face To Test For Flatten Board

This process may seem overwhelming, but it really speeds up after you’ve dimensioned a few boards. Sometimes it’s even faster than setting up & tuning the big power tools!

Reference Face And Reference Edge Marks To Flatten Board

Go back and watch the video at the top of this page to clarify the process.

Poplar Cathedral Wood Grain After Flatten Board

Flatten Board With Woodworking Hand Tools

Conclusion

Flatten Board Face With A #7 Stanley Plane Or Jointer Hand Plane With Wood Shavings

I hope this tutorial was helpful! Feel free to make comments or ask questions below. And if this process of squaring lumber with woodworking hand tools seems too overwhelming for you, then feel free to checkout our tutorial on squaring lumber with power tools (here).

Milling Or Squaring Lumber Boards With Felder Jointer Planer

How to Square, Flatten, and Dimension Rough Boards with Hand Tools2024-09-09T15:24:07-04:00

How to Make Milk Paint from Scratch

Ad Banner

By Joshua Farnsworth

In the above video I share a tutorial on how to make historical milk paint from scratch! The article below shares the same information (in case you’re reading this at work…).

Painting Red Milk Paint On A Shaker Bench

In a previous video (here) I showed how to build this shaker bench from just three pine stair treads, and I asked my viewers to let me know if they wanted a video on making milk paint from scratch. Well, I got a positive response, so here’s the tutorial:

Shaker Bench With Black Milk Paint With Red Undercoat In Home Made Milk Paint Tutorial

What is Milk Paint & Why Do I Use It?

Mixing Red Paint Pigment Into Home Made Milk Paint

Milk paint is a historical paint that has been used for thousands of years. I love it because it’s durable, it’s non-toxic, I can easily mix my own custom colors, and it’ll accept most top coat finishes. And lastly, it was a common furniture finish on my two favorite styles of furniture: Shaker and Colonial. I really love making provincial country-style furniture.

Hancock Shaker Village Bedroom With Milk Painted Furniture

In modern times milk paint has become popular again, even on contemporary furniture, but most people can only buy it in powder form. Powdered milk paint can be expensive, and it’s only available online and at some specialty hardware stores. And no, the canned stuff isn’t real milk paint. But if you consider your time and the convenience of being able to mix up small batches, then the commercial powdered milk paint is still the way to go.

Mixing Powder Milk Paint

But, I do love trying to replicate historical processes from scratch, so homemade milk paint is fun. And it isn’t very expensive. In fact, most of the items you need are probably in your fridge and garden shed. You may only need to buy color pigment powder. I happen to use pigment to make my own colors with powdered commercial milk paint, so I always have some sitting in my shop.

Mixing Yellow Paint Pigment Into Powdered Milk Paint In A Plastic Container

I use natural earth pigments in my paint, and years ago I got this recipe from the company that makes my color pigments, so you can see a link to their pigments below, along with a list of all the ingredients, and where you can find them.

Joshua Farnsworth Standing In His Woodworking Workshop Over A Shaker Bench

Alright, let’s get started!

Ingredients & Supplies for Making Milk Paint from Scratch

Joshua Farnsworth Painting A Shaker Bench With Homemade Milk Paint From Scratch

Here are the ingredients & supplies to make your own milk paint from scratch (some links may be affiliate links, but won’t cost you anything):

* 1 Gallon Skim Milk (Room temperature) 

* 2 Cups  Distilled White Vinegar (Room temperature) 

* Cheese cloth: https://amzn.to/2vd81vm

* 3/4 Cup Hydrated Lime: https://amzn.to/3962HZ3

* 3/4 Cup Water

* Paint Filters: https://amzn.to/2vm1MoV

* My 1.5″ Paint Brush: https://amzn.to/2wOo8zG

* Paint pigments on Amazon: https://amzn.to/2wfbEAI

* Paint pigments at The Earth Pigments Company: https://www.earthpigments.com/

* Plans for the Shaker bench: https://store.woodandshop.com/product…

Making Milk Paint from Scratch

Adding Black Color Pigment To Home Made Milk Paint From Scratch

Alright, so I need to make a confession: I have milk in my fridge, but I only buy fat free skim milk when I’m making milk paint, because it’s super gross. If you’re going to drink milk, drink the good stuff! Anyway, I start off by pouring the whole gallon of skim milk into a large pot. Make sure it’s at room temperature.

Wood Finishing

Then I add 2 cups of distilled white vinegar, and stir it up.

Wood Finishing

Then I let the mixture sit in a warm room, and I don’t touch it again for at least a few hours. Overnight is better. The vinegar will curdle the milk, just like when you’re making cheese.

Wood Finishing

You’ll know it’s ready when the milk has separated into curds and whey. The curds, or “quark”, has  a lot of concentrated milk protein, which gives the paint its durability.

Mixing Milk Paint From Scratch Using Skim Milk, Vinegar, And Hydrated Lime Powder

Then I put a pasta strainer in the sink, and I lay a couple layers of cheese cloth inside. I pour the curds and weigh into the strainer, and give it some time to drain the whey.

Mixing Milk Paint From Scratch Using Skim Milk, Vinegar, And Hydrated Lime Powder

Next I rinse the vinegar and whey off of the quark a couple times.

Mixing Milk Paint From Scratch Using Skim Milk, Vinegar, And Hydrated Lime Powder

I gather the quark up in the cheese cloth, and further squeeze out more of the water. But I don’t get it too dry, or I’d end up with cheese! Yes, at this point I think you can still back out and have some nice farm cheese…although it probably won’t taste great because there’s no fat in it.

Mixing Milk Paint From Scratch Using Skim Milk, Vinegar, And Hydrated Lime Powder

This next step is where the quark becomes inedible. First I add ¾ cups of Hydrated Lime into a glass container.  Make absolute sure you don’t use quick lime. I bought hydrated lime at a nearby farm supply store. $5 for a 50 pound bag, or $8 for a smaller bag. But the small bag is more than you’ll need. You can also order small bags of it online (see above in the ingredient section).

Mixing Milk Paint From Scratch Using Skim Milk, Vinegar, And Hydrated Lime Powder

Then I add the same amount of water onto the lime, and mix them together.

Mixing Milk Paint From Scratch Using Skim Milk, Vinegar, And Hydrated Lime Powder

Eventually the mixture will become smooth, with no clumps.

Mixing Milk Paint From Scratch Using Skim Milk, Vinegar, And Hydrated Lime Powder

Then I dump the quark onto the lime, and do my best to scrape as much of the quark off the cheesecloth as possible. I mix this mess up for a couple minutes until it’s as smooth as possible, then I let it sit for about 15 minutes to let the lime further break it up.

Mixing Milk Paint From Scratch Using Skim Milk, Vinegar, And Hydrated Lime Powder

Then I come back and do my best to break up remaining  clumps.

Mixing Milk Paint From Scratch Using Skim Milk, Vinegar, And Hydrated Lime Powder

I put the kitchen strainer over another clean bowl, and strain the mixture again through some clean cheese cloth.

Mixing Milk Paint From Scratch Using Skim Milk, Vinegar, And Hydrated Lime Powder

Paint filtering funnels like this work well too, though it takes longer to filter this thicker mixture.

Mixing Milk Paint From Scratch Using Skim Milk, Vinegar, And Hydrated Lime Powder

If you’re doing a base color and a top color like me, then you can divide the mixture up into two containers. I’m using some old disposable plastic containers.

Wood Finishing

Mixing Paint Pigment into the Milk Paint

Mixing Red Paint Pigment Into Home Made Milk Paint From Scratch

Now I get some of my color pigment from the container. I start off with a small amount so I can see how the color will turn out.

Red Paint Pigment In A Tablespoon For Use In Home Made Milk Paint From Scratch

I put it into a small cup, and mix some water in with it. I use about twice as much water as pigment, and thoroughly mix it up.

Mixing Red Paint Pigment With Water For Home Made Milk Paint From Scratch

Then I pour the pigment into the milk paint base. I like to use a disposable plastic spoon to thoroughly mix it up. If you want you can use a little bit of water to get the last bit of pigment out of the cup.

Mixing Red Paint Pigment Into Home Made Milk Paint From Scratch

Now you need to decide if this is a dark enough color. It’s plenty dark for my under coats.

Mixing Red Paint Pigment Into Home Made Milk Paint From Scratch

I’m doing a black coat on top of the red coat, so I add black pigment to the other container of milk paint.

Mixing Black Paint Pigment Into Home Made Milk Paint From Scratch

This mixture didn’t look dark enough to me, so I added more pigment.

Mixing Black Paint Pigment Into Home Made Milk Paint From Scratch

Now I like to strain each of the paint colors through a fine automotive paint strainer. My wife tells me these are the same strainers they have at the hospital for patients to pee into to catch gall stones. Hmmm…Who knew?

Home Made Milk Paint From Scratch Being Poured Into Paint Strainer And Into A Canning Jar

Anyway, I like to strain the paint into glass canning jars, because I can seal the lids and shake the jars to mix up the paint before using it each time.

Canning Jar Used For Making Home Made Milk Paint From Scratch

You could also recycle pasta sauce jars or something similar. Just make sure they’re clean.

Home Made Milk Paint From Scratch In Canning Jars

Testing the Milk Paint Before Using It

Testing Homemade Milk Paint From Scratch By Painting It On A Scrap Board Of Pine With Jar Of Red Milk Paint

Before I use the paint on my furniture, I like to make sure it’s thin enough. I mix it up, remove excess foam, and paint some strokes on a scrap board to make sure the paint spreads out at least a foot in length. This looks pretty good to me.

How to Paint with Milk Paint

Joshua Farnsworth Painting A Shaker Bench With Homemade Milk Paint From Scratch

Now it’s time to paint the shaker bench! Every time I shake up the jars, it tends to create foam. I try to spoon out as much foam as possible before I paint, but it honestly is nearly impossible to do. Foam forms every time I shake the jar. You can see the initial foaminess in this photo:

Joshua Farnsworth Painting A Shaker Bench With Homemade Milk Paint From Scratch

Just make sure that you go back repeatedly over any painted surface to make sure the foamy paint gets spread out. It’ll eventually get smooth.

Joshua Farnsworth Painting A Shaker Bench With Homemade Milk Paint From Scratch

I paint carefully in every nook and cranny, and go back over any spots that look like they need better coverage. But the first coat will not look amazing, so don’t worry if the coverage isn’t great at this point.

Joshua Farnsworth Painting A Shaker Bench With Homemade Milk Paint From Scratch

And between coats make sure you store the milk paint in the fridge. Some people say to use all of the milk paint in the same day, but this is impractical. I’ve found that you can use it for up to two weeks…or until it starts to smell bad.

Joshua Farnsworth Using Sandpaper To Smooth Between Milk Paint Coats On A Shaker Bench With Homemade Milk Paint From Scratch

After the first base coat has dried for a couple hours, I can lightly sand over it with a fine grit sandpaper. I’m using 220 grit here. I just sand enough to make the rough surface feel smooth to the touch, but I try to not sand through to bare wood. I feel every part of the bench to make sure I didn’t miss a spot.

After using my air compressor to spray off the paint dust (outside the shop), it’s time for a second coat of red. Again, you’ll see some foaminess in the paint. This seems to be more unique to homemade milk paint. But if you keep coming back and spread the paint with the brush, the foaminess will eventually disappear. And you’ll find that the second coat looks much better than the first coat did.

Joshua Farnsworth Using Sandpaper To Smooth Between Milk Paint Coats On A Shaker Bench With Homemade Milk Paint From Scratch

After letting the second coat dry for another couple hours, or overnight, I again do a light scuff sanding as before.

Joshua Farnsworth Painting A Shaker Bench With Homemade Milk Paint From Scratch

Now it’s time for the first black coat to go on. For some strange reason I find that the black pigments that I bought don’t bond to the homemade milk paint quite as well as other colors do, so I have to be more diligent in going back over the paint with the brush if I see some separation.

Joshua Farnsworth Painting A Shaker Bench With Homemade Milk Paint From Scratch

But the black coats of paint sure look nice. I find that at least two coats of black are required to make the finish look nice.

Joshua Farnsworth Painting A Shaker Bench With Homemade Milk Paint From Scratch

After letting the final coat of milk paint dry for at least a day, I use 4-aught (0000) steel wool to buff the surface until I see a sheen. The sheen may not be noticeable unless you look at it with the right angle of window light, or with a lamp.

Joshua Farnsworth Using Steel Wool To Rub Down A Shaker Bench With Homemade Milk Paint From Scratch

I can also do a little extra buffing in areas where I may want some of the red paint to show through, like on the edges & corners. This gives the furniture an aged look, which I like a lot. I just try to not overdo it.

Joshua Farnsworth Using Steel Wool To Rub Down A Shaker Bench With Homemade Milk Paint From Scratch

Adding a Top Coat Over the Milk Paint Finish

Joshua Farnsworth Adding A Coat Of Wiping Varnish That Was Applied Over 4 Coats Of Homemade Milk Paint On A Shaker Bench

Finally, after using my air compressor again to remove the paint dust, I add a top coat. You can use pretty much any top coat you like, but I’m using a wiping varnish, because I like how the oil in the varnish penetrates the paint, and imparts some depth to the finish, and also some protection for all the rear-ends that’ll be sitting on it.

Joshua Farnsworth Adding A Coat Of Wiping Varnish That Was Applied Over 4 Coats Of Homemade Milk Paint On A Shaker Bench

I also like using a wiping varnish, because it wipes on quickly and wipes off quickly, and doesn’t require too much time to build up a finish. After spending so much time with the paint job, I’m not in the mood for a long, drawn out process of applying a complex top coat! Shellac is also a great option, if you like working with Shellac.

Joshua Farnsworth Using A Rag To Rub Off A Wiping Varnish That Was Applied Over 4 Coats Of Homemade Milk Paint On A Shaker Bench

Conclusion

Joshua Farnsworth Standing In His Woodworking Workshop Over A Shaker Bench

Now wasn’t that fun? I had fun, and I hope you had watching! Here are a few photos of the completed Shaker Bench:

Shaker Bench With Black Milk Paint With Red Undercoat In Home Made Milk Paint Tutorial

Shaker Bench With Black Milk Paint With Red Undercoat In Home Made Milk Paint Tutorial

Lap Dovetail On A Shaker Bench With Black Milk Paint In Home Made Milk Paint Tutorial

Shaker Bench With Black Milk Paint With Red Undercoat In Home Made Milk Paint Tutorial

So have I switched to only using homemade milk paint? No. As I already mentioned, there can sometimes be a couple inconvenient drawbacks from making milk paint from scratch, and commercial milk paint sure is more convenient when you’ve got a small project to paint.

Joshua Farnsworth Painting On Yellow Milk Paint Over Dovetails On A Small Wooden Poplar Tool Chest

But it sure is fun using a finishing method that’s been around since caveman times. If you’re interested in trying out historical methods like I am, or you just don’t want to go hunting for powdered milk paint, then I hope you give this a try.

If you’ve found this article to be helpful, consider buying the $5 plans for the Shaker Bench (see below), and I hope you’ll leave a comment at the bottom of this page, and consider subscribing to my free articles (here) and to my YouTube channel (here). Thanks for joining me!

Pointing Finger Vertical

How to Make Milk Paint from Scratch2021-06-16T18:25:08-04:00

How to Make Figured Maple Pop!

Ad Banner

By Joshua Farnsworth

Figured maple is a gorgeous wood, and is perfect for bringing attention to your furniture because of the way the translucent waves reflect the light. But with a quick & easy process using aniline dyes and boiled linseed oil, you can create amazing contrast and make the figure really stand out, or “pop”.

I start with a sample board, cut from the same figured maple board as the furniture I’ll be building, and sand it through the grits to 220 grit.

Sanding Curly Figured Maple Board On A Woodworking Workbench

Get three packets of water soluble aniline dye ready:

    • A dark brown dye or black.
    • An reddish dye
    • A yellow Dye

Packets Of Lockwood'S Aniline Dye

You can either buy powdered dye, or pre-mixed concentrated dye. Here are a couple brands that I’d recommend, along with other items needed below:

* Lockwood Dye Colors I used: “Golden Yellow”, “Dark Brown Walnut”, and “Bright Red Cherry”
* TransFast dyes (by Jeff Jewitt) are excellent powder dyes
* TransTint dyes (by Jeff Jewitt) are excellent concerntrate dyes
* J.E. Moser’s dyes are also excellent
* Antique Oil Finish
* Boiled Linseed Oil

Pour a little bit of hot water into three containers (distilled water if you have it). You don’t need much because of how concentrated this powder is.

Pouring Water Into Three Jars In Preparation For Mixing And Applying Three Different Shades Of Lockwood Aniline Dye

Stir each solution with a small stick from your board so you can see if the dye is strong enough. Let the dyes dissolve for 10 minutes.

Mixing Aniline Dye In Jar With Red Streaks In The Water

Using a pad made from an old cotton t-shirt, dampen the wood with a little water, then apply the dark brown dye. The water keeps the dye from going on too strong.

Wiping Dark Walnut Aniline Dye Onto A Curly Maple Board

Let the dark dye dry for 15-20 minutes. It should look like this:

Dark Walnut Aniline Dye Coloring A Curly Maple Board

Then after it’s dry, sand the surface with 220 grit sandpaper until you can only see the dark dye in the figure:

Sanding The Dark Walnut Aniline Dye Coloring Off Of A Curly Maple Board

Repeat the whole process with the reddish dye (apply, dry, sand)…

Wiping Cherry Red Aniline Dye Onto A Curly Maple Board

…and then again with the yellow dye. But I don’t sand again after the yellow dye.

Making Figured Curly Maple Grain Pop With Aniline Dye

I leave the board to dry until the next day, and then use another cotton pad to rub in a small amount of boiled linseed oil. The linseed oil will add some depth to the figure.

Wiping Boiled Linseed Oil Onto A Curly Maple Board That Has Been Colored With Aniline Dyes

The wood looks lovely at this point, and you can see that adding the oil removes the bright yellow look:

Wiping Boiled Linseed Oil Onto A Curly Maple Board That Has Been Colored With Aniline Dyes

After just a couple minutes, I wipe the linseed oil off the board with a clean cotton cloth.

Jar Of Minwax Antique Oil Finish With Jars Of Aniline Dye In The Background

Then I apply a clear top coat. In my opinion, if you plan on applying a water-based clear top coat, then you should probably wait a couple days for the oil to dry. But if you’re using an oil-based top coat, then there’s no need to wait. As you can see here, adding a finish brings a nice wet contrast to the wood, and makes the figure pop!

Wiping Minwax Antique Oil Finish On A Curly Maple Board

That’s all there is to it! Here are the before & after photos of my above sample board, so you can see the difference:

Bare Curly Figured Maple Board On A Woodworking Workbench

Making Figured Curly Maple Grain Pop With Aniline Dye

Here you can see a knife handle that I recently made with this exact process (and also polished with wax after the finish had dried):

Curly Maple Knife Handle With Can Of Mylands Wax In The Background

I’ve also done variations of this process, where I only used the dark brown dye, which gave me a nice figured & aged walnut look, like on this colonial pipe box I made for a client:

Colonial Pipe Candle Box With Curly Maple Wood And Green Candles

But I didn’t sand this pipe box down as much as I did in the above steps.

Colonial Pipe Candle Box With Curly Maple Wood And Green Candles

Please comment at the bottom of this page and let me know what you’ve tried to make the figure in your maple pop.

Making Figured Curly Maple Grain Pop With Aniline Dye

How to Make Figured Maple Pop!2021-06-16T18:25:31-04:00

5 Easy Steps to Sharpen a Card Scraper for Woodworking

Ad Banner

By Joshua Farnsworth

Have you struggled to sharpen a card scraper? If so, don’t feel embarrassed! Years ago when I first started using a woodworking card scraper, I certainly struggled too. In this video and article I share my simplified method for sharpening a woodworking card scraper, in five easy steps. And I share a little trick that I discovered that helped me to get my card scrapers cutting every single time. But first, let’s answer a couple important questions:

What is a Card Scraper, and why do you need one for Woodworking?

A Woodworking Card Scraper Scraping Wood On A Moravian Workbench

A card scraper is a thin rectangular sheet of flexible steel that has temporary high-angle hooks, or burrs created on all four long edges. A card scraper is used by flexing it between your fingers (with your thumbs on back) and pushing it along the board to smooth the wood, by removing thin wood shavings in areas of difficult wood grain. A card scraper excels where a traditional handplane may cause tear out, and where sandpaper may leave a fuzzy surface.

Woodworking Card Scraper Hook Or Burr Illustration On Curly Maple Wood

What Tools do you need for Sharpening a Card Scraper?

Turning The Burr On A Woodworking Card Scraper With A Burnisher On A Moravian Workbench

There are a few tools that you need to sharpen your card scraper. If you sharpen other woodworking tools, then there’s only one other tool that you’ll need. Here are the tools that I use to sharpen card scrapers in my woodworking school:

  1. Card Scraper: As mentioned above, this is a rectangular piece of steel used to shape or smooth areas with difficult wood grain. Card scrapers can be purchased or can be made by cutting up an old hand saw.
  2. Burnisher: A hardened and smooth steel rod that draws out the burr (see step 4), and turns the hook (see step 5). This is the only specialized tool I use for sharpening card scrapers.
  3. File Jointer: A piece of metal or wood that holds a mill file at a 90 degree angle. I use the file jointer that I sharpen my handsaws with.
  4. Mill File: A metal file used to flatten, or joint the edges of a card scraper. I also use the mill file that I sharpen my handsaws with.
  5. Honing Stones: Natural or synthetic stones used to smooth and polish a card scraper before drawing out the burr. These are the stones that I use to sharpen my handplane irons and chisels. I prefer water stones for this job, but oil stones or diamond stones can also be used.

Here are Links to my Card Scraper Sharpening Tools:

Crown Tools Card Scraper Burnisher Sitting On A Board Next To Two Metal Woodworking Card Scrapers

How do you Use a Card Scraper?

Using A Woodworking Card Scraper On A Board

To use a card scraper, grip the card scraper between your two hands and push on the back of the card scraper with your two thumbs until it flexes slightly. Then push the card scraper forward, tipping it forward at an angle. Experiment with the angle until it cuts. If it produces nice shavings, like those produced by a sharp handplane, then go ahead and use it. If it doesn’t produce nice shavings, then proceed with the steps below:

5 Steps for Sharpening a Card Scraper

A Vertical Row Of Woodworking Card Scrapers Sitting In Slots On A Wooden Shelf For Woodworking

Step 1: Test the Card Scraper

Woodworking Card Scraper Creating Saw Dust Which Means It Is Dull

The first step in setting up a card scraper, is to first test it to see if it actually needs to be fully resharpened. If it produces nice shavings, then it can be used for scraping. But if the card scraper produces dust or poor shavings, then the you either need to turn the hook again (you can do this 1-3 times before resharpening), or start all over preparing the card scraper. The following steps show how to “prepare”, or start sharpening a card scraper from scratch:

Step 2: Joint the Card Scraper Edges

Woodworking Card Scraper Sharpening With A File And Jointer Called Jointing

The next step is to joint the two long edges of your card scraper to ensure they are flat and that the old burrs are completely removed. I use a metal jointer that holds a bastard mill file at a 90 degree angle and push the jointer along the card scraper 2-3 times until I can feel that it is cutting the entire length. You can also use a wooden block to hold your file.

Step 3: Remove the File Burrs & Smooth the Card Scraper

Woodworking Card Scraper Sharpening Polishing The Face With A 1,000 Grit Water Sharpening Stone

In this next step I remove any burrs created by the file, and polish the card scraper. I alternate rubbing the faces of the card scraper on a 1,000 grit water stone, about 1/2-inch in from each edge.

Woodworking Card Scraper Sharpening Polishing The Edge At A Skewed Angle With Water Sharpening Stone

I then flip the card scraper vertically and remove any burrs on the edges. But I hold the card scraper at a skewed angle to prevent creating a groove in your honing stone. Several passes on each side is all you need, before moving to a 4,000 grit stone. I repeat the same process on the 4,000 grit stone until the card scraper feels smooth and burr-free. You really should watch my above video to make this step more clear. Now you have what I call a “prepared” card scraper, all ready for drawing out the burr (step 4) and turning the hook (step 5).

Step 4: Draw out the Burr

Woodworking Card Scraper Sharpening By Drawing Out A Burr With A Burnisher

After drying off the card scraper, it’s time to use the hardened steel burnisher to “draw out” the metal on the card scraper. Running the burnisher flat on each edge two or three times will harden and stretch out the metal. This prepares the metal for turning the hook. Do this on all four long edges.

Step 5: Turn the Hook

Turning The Hook With A Burnisher During Woodworking Card Scraper Sharpening

Next, move the card scraper so that it just overhangs the edge of the workbench. Place your burnisher upright, against the card scraper, then tilt it a couple degrees toward the card scraper. Then push the burnisher forward, applying pressure to the card scraper as you move along, from front to back. Do this one to two times, and then use your fingernail to feel all along the new burr.

Turning The Hook With A Burnisher And Feeling For The Hook During Woodworking Card Scraper Sharpening

If your fingernail catches, and even flakes off, then you know that you have a properly turned hook. If part of the edge catches your fingernail, but other parts do not, then just return to the non-cutting sections and turn the hook more on those sections. This is where my method differs from others that I’ve seen: I turn the hook by feel, rather than just hoping that it has been turned. This is what your edge should now look like if you’ve done both sides:

Woodworking Card Scraper Sharpening Graphic Of A Burr Hook

Repeat the process on the other two sides, and you will have four cutting surfaces that will do an excellent job in smoothing the areas with difficult wood grain.

What tips do you have to successfully sharpen a card scraper? Please share your comments at the bottom of this page…

5 Easy Steps to Sharpen a Card Scraper for Woodworking2022-01-13T15:49:01-05:00

Pump that Preserves Wood Finish & Saves Money

Ad Banner

Have you ever opened a jar of wood finish that you mixed months ago, only to find that it looks like this? A semi-solid gelatinous mass?

Solidified Bottle Of Wood Finish

While it looks cool, and feels cool when you touch it, it also means money down the drain. When most wood finishes are exposed to oxygen, the finishes become ruined over time. For many years I would just crush the cans inward to reduce the amount of oxygen that could stay in the can. But this method just delays the inevitable. I’ve still got a number of cans with ruined finish sitting on my shelves.

Empty Cans Of Wood Finish Including Waterlox, Minwax Antique Oil Finish And Watco Danish Oil

Several years ago I researched other methods for displacing oxygen in the wood finish cans. I didn’t feel comfortable adding kerosene to the wood finish, as some people suggested. Some manufactures sell plastic squeeze bags that looked promising, but seemed a bit expensive over time. Bloxygen sounded like the most popular & safe method, so I tried that for awhile. Bloxygen is a can of compressed argon gas, which apparently settles below the oxygen in the container, extending the life of your wood finish (you can read more about Bloxygen here).

Hand Holding A Can Of Bloxygen Argon Gas For Finish Preservation

I tried emailing the company with questions, but wasn’t able to get a response. But, my order did go through just fine, and now it’s my go to way to preserve wood finishes. You can find the Pump-N-Seal® pump here, for $34.95 (including shipping). The way I figure it, that’s the cost of a quart of Waterlox varnish, so it should pay for itself P.D.Q.

Pump-N-Seal Sitting On A Jar Of Wood Finish With Other Colorful Jars Next To It

The pump is quite easy to use. I use glass canning jars that are left over from when we preserve peaches or pickles or salsa. You can even recycle pasta sauce jars, jam jars, or peanut jars. Just make sure the metal lid has a functional rubber seal.

Thumb Tack Pushed A Hole In A Ball Canning Jar

Punch a tiny hole in the top of the lid (they even provide a thumb tack), the place the little yellow sticker (called a “tab check”) over that hole. Press it down firmly.

Pump N Seal Yellow Sticker Over Hole On Ball Canning Jar Lid

Place the pump over the hole, and then start pumping away (10 times seems to work fine). The pump can be easily removed by pulling up on the suction cup tab.

Pump-N-Seal Sitting On A Jar Of Wood Finish With Other Colorful Jars Next To It

The wood finish lasts a long time, and the lid can be sealed over, and over again, without having to replace the yellow tab check. This is a major benefit over argon gas, which has to be sprayed each time you finish up using the wood finish. That’s it!

What do you do to keep your wood finish from going bad? Please comment at the bottom of this page to share your ideas. Also, here are some upcoming classes at the Wood and Shop Traditional Woodworking School:

Wood Finishing

Pump that Preserves Wood Finish & Saves Money2021-06-16T18:27:58-04:00

How to Darken Oak Furniture with Ammonia Fuming

Ad Banner

In this video I show a historical method for darkening white oak furniture with industrial strength Ammonia, inside a makeshift plastic fuming tent, and I do it on a pair of Shaker style quartersawn white oak end tables. My most recent video & article showed how these end tables fit together (here) and I previously shared a video & article on experimenting with lower-strength home center ammonia to fume an oak Moravian footstool (here).

Unfinished Quartersawn White Oak End Table Night Stand With Half Blind Dovetail Drawers

So what is Ammonia Fuming?

For those who aren’t familiar with what ammonia fuming is, it is a chemical method that furniture makers use to deeply darken and bring out the nice figure in certain woods, typically prior to adding a finish.

Ammonia Fuming Quartersawn White Oak End Tables And Drawers In A Plastic Tent

The furniture is placed in a confined space, and Ammonia, or Ammonium Hydroxide, is left in a little container for a period of time. The ammonia isn’t applied directly to the wood. The ammonia fumes react with the tannins in the wood, and darkens the wood. White oak is the wood of choice for ammonia fuming because this wood has a particularly high tannin content. Quartersawn white oak in particular works nice because ammonia fuming brings out the figure and “ray flecks”. Several other woods also react to ammonia fuming, including cherry, birch, maple, and butternut.

Many woodworkers (including myself) prefer ammonia fuming over staining because stain generally sits on the surface of the wood, and a ding or scratch can expose the unstained wood below. But ammonia gasses penetrate deeper into the wood, which allows a repair without having to darken the wood around the ding or scratch. Stain can also be absorbed unevenly in different parts of the furniture. You can read more about the benefits of Ammonia Fuming over staining here.

History of Ammonia Fuming

Ammonia fuming was apparently discovered by accident in England when oak boards stored in horse stables were found to darken considerably when being stored near the fumes from horse urine. Eureka! (Or I guess you could say “Uric-A”…sorry if you don’t get my joke).

Wood Finishing

The process became especially popular during the late 1800’s Arts & Crafts movement in Britain and the United States. Furniture buyers loved the effect of the ammonia causing the ray flecks in the quartersawn wood to “pop” with contrast.

Ammonia Fuming Safety:

Even though ammonia is a common and readily-available cleaning product, it can be dangerous and very unpleasant to inhale. Because of this hazard, ammonia fuming was discontinued by most large furniture manufactures and replaced with less dangerous methods that mimicked the results. But a lot of modern-day woodworkers have found that they can safely incorporate ammonia fuming if they follow a few safety precautions. So only try this if you accept the risk and use proper safety practices.

Pouring Ammonium Hydroxide Ammonia In A Glass Pan For Ammonia Fuming White Oak End Tables And Drawers

You must wear rubber gloves and safety glasses or a face shield, and from personal experience I recommend a mask or respirator mask. And don’t try to open your containers while indoors, as the fumes will make any interior room unbearable within just a few seconds.

How to Fume Oak Wood with Ammonia: 5 Steps

Quartersawn White Oak End Table Night Stand With Half Blind Dovetail Drawers

Below you’ll find my five steps to darkening furniture with the Ammonia fuming process:

Step 1: Make an Ammonia Fuming Tent or Container

Ammonia Fuming Tent With Chicken Coop In The Background

The first consideration that you need to take care of is making an air-tight, or mostly air-tight container, to hold your furniture piece. In this case I used leftover posts from when I built paddock fencing around some of my property. I definitely employed low-quality construction techniques, as this fuming tent was a temporary structure…and my wife didn’t like having such an ugly homeless shelter sitting on our front porch. Next time I need to fume something large, I’ll just screw this tent back together. But definitely don’t use huge 4×4 posts unless that’s all that you’ve got. Simple 1×2 or 2×4 construction lumber is plenty rigid. 1×2’s  would be nice because you could actually lift the tent, and lower it onto the furniture rather than using a flap/door. And drywall screws are great for holding your fuming tent together. I stapled thicker plastic sheeting around the tent, and left a flap at the front. I also draped some thinner painter’s plastic over the top to give an extra barrier and to hold the ammonia gasses in better. I placed some scrap wood around the base and on top of the tent to keep the plastic weighed down.

Interior Of An Ammonia Fuming Tent

So what if you have a small piece of furniture to fume? In my last article on fuming, I showed how I use a simple cooler. They’re portable, mostly air-tight, and easy to keep outdoors. Just keep it in a covered, dry place outdoors or rain will get in.

A Gloved Hand Setting An Oak Moravian Footstool Inside A Cooler For Ammonia Fuming

Step 2: Pour Ammonia into a Shallow Container

I pour somewhere between 1/2 cup and 1 cup of 28% Ammonium Hydroxide (Ammonia) into a shallow glass container, like a Pyrex pie dish (shallow so it doesn’t get tipped over). Make sure to cover your eyes and mouth, because the gasses are a bit overpowering (see safety section). The gasses get more overpowering as the fuming process progresses, so be aware when you open the tent flap.

Wood Finishing

So where do you find industrial strength Ammonia? Industrial ammonia (25%-28% Ammonium Hydroxide) is a bit difficult to find locally these days. Back in the mid 90’s when I took architecture classes in high school (down the hall from my woodworking class), ammonia was quite common. The school stored ammonia because we had a blueprint machine for printing our blueprint plans. Local architects and engineers also used ammonia. So a lot more companies supplied it. But now days, with the advent of computer printers, there is less demand for ammonia and fewer local suppliers. I eventually tracked down a laboratory supply company that carried it in Richmond, Virginia (about an hour drive from me…here it is for anyone living in Virginia). And then, after buying it from Richmond I discovered that you can purchase it on Amazon (here) for about what I paid, including shipping. Oh well.

Step 3: Check the Furniture Periodically

Two Night Stand End Tables In A Plastic Ammonia Fuming Tent

Some people use test sticks, or small scraps of wood from the same lumber that they’re fuming (tucked just inside the tent) to gauge the progress of their furniture in the  fuming tent. I personally like to see the whole piece of furniture, so I open the tent flap very briefly every few hours. These end tables were left in the fuming tent for a little over two days. But some people leave theirs in for shorter periods of time. Just go according to your preference. I do, however, do some sample test sticks prior to fuming the furniture, to get a rough idea of how long the fuming will take. But this is optional. If you can find clear plastic sheeting, that’s an even better option. I had opaque plastic sheeting in my garage, so that’s what I used.

The furniture pieces will have a dull gray appearance for the duration of the fuming, so don’t leave them in until they look stunning…because they won’t look stunning until you apply your finish. Just use your judgement.

Step 4: Remove Your Furniture from the Fuming Tent

Two Ammonia Fumed Quartersawn White Oak Night Stands In A Woodworking Workshop

When you feel that your fuming process has reached it’s desired results, open the plastic tent flap door, carefully remove the ammonia. Dilute it really well and dispose of it…or just pour it into the toilet. Ammonia is a cleaner, so just scrub your toilet with it. And urine contains ammonia, so there’s no problem here. Plus, this ammonia has lost much of it’s strength after fuming. Just be careful to never mix ammonia with bleach. The combination will create a deadly gas!!

After you’ve safely disposed of the ammonia, just leave the tent flap open for a couple hours, and let the furniture piece “gas off”. Take the furniture piece back to your workshop, and let it re-acclimate to the humidity level of your workshop for a couple days before applying a finish.  Here’s a photo of the end tables before the fuming so that you can contrast it with the fumed tables above.

Two Unfinished Quartersawn White Oak Night Stands In A Woodworking Workshop

Step 5: Apply a Finish

Applying A Wiping Varnish Finish To A White Oak Night Stand

The most gratifying moment comes when you apply the first coat of finish on the newly fumed oak furniture. You can use virtually any finish over the top of ammonia fumed furniture. Two of my favorite methods are blow.

Wood Finishing

OIL / SHELLAC / WAX FINISH INSTRUCTIONS:

For furniture pieces that won’t get much abuse, I really like using boiled linseed oil with dewaxed shellac, and a wax top coat. Apply the boiled linseed oil liberally until the wood won’t absorb anymore, then wipe the oil off with a clean cotton cloth after letting it sit for 10-15 minutes. Then, after at least one day, apply several coats of thinned dewaxed shellac with a cotton cloth. If the shellac isn’t mostly dry within 30 seconds (after blowing on it), then thin it with more denatured alcohol. This will prevent running and will allow a nice build up of the shellac. This is why it’s a good idea to use a test board that you’ve fumed with your furniture. Lightly sand after the first coat of shellac, then apply a couple more coats of shellac. You really only need to wait for less than a minute between coats of shellac, if it’s been properly thinned. After the final shellac coat has dried for at least an hour, you can then apply a paste wax with 0000 steel wool. Buff it out with a clean cloth within 10 minutes or less. A top coat can be applied over the shellac, before the wax, as long as you use dewaxed shellac, and not normal shellac. A protective top coat won’t stick to waxy shellac very well. Below is a great protective finish.

Wood Finishing

WIPING VARNISH FINISH RECIPE & INSTRUCTIONS:

This is an easy, lovely, and protective wood finish recipe that is based on a recipe that my friend Will Myers shared with me. I like it because it brings out the figure and gives depth with some oil, but offers protection that a table needs, without getting a plastic look. It’s also pretty easy.

  • Mix Natural Danish Oil and Satin Polyurethane in a 50/50 mixture. I like to use a small jam-sized canning jar (8 oz – 12 oz. size).
  • Use a lint-free cloth, or old t-shirt scraps to wipe on a first coat. Wait 10-15 minutes, and then wipe off the excess with a clean cloth. Let the first coat dry for three days.
  • Lightly sand or scuff between coats with 0000 steel wool, an ultra fine Scotch-Brite pad, or very fine sandpaper. This finish really doesn’t build enough film to need wet sanding, so just lightly dry scuff between coats.
  • Repeat the above steps two more times.
  • After the last (third) coat has dried for three days, lightly scuff the surface again, and buff with a nice furniture wax. Waiting a week before applying a wax finish is even better so that the finish gets a nice long time to harden. Be sure to follow the can’s instructions because leaving wax on too long before buffing it out can cause you problems. I think 10 minutes is a typical max wait time for buffing.
  • Bonus Tip: This finish will thicken up and be unusable after a few weeks, so if you have leftovers, I spray a bit of Bloxygen to preserve it and then close the lid. I also spray this into my danish oil can and polyurethane can (and all my varnishes). Bloxygen is argon gas that displaces the oxygen, which preserves your wood finishes. It has saved me a lot of money in wasted wood finish. It’s especially good to spray in Waterlox, which tends to coagulate more quickly than other finishes I’ve used.

Two Quartersawn White Oak Night Stands Sitting On A Roubo Workbench Slab

Please leave your comments or questions below!

Graphic Showing White Oak Night Stands Saying

How to Darken Oak Furniture with Ammonia Fuming2021-11-12T11:11:13-05:00

18th Century Beeswax Wood Finishing with a French Polissoir (Don Williams Workshop Tour Part 4)

Ad Banner


In part four of the above video workshop tour, Don Williams teaches how to use a French Polissoir with a beeswax wood polish to create an incredible 18th century historic furniture wood finish.

Don Williams Holding His French Polissoir (For Wood Polish) That Is Based Off The Polisher Shown In The Andre Roubo Book L’art Du Menuisier

WHAT IS A FRENCH “POLISSOIR”?

A polissoir (polisher) is essentially straw broom bristles tightly bound together with string. You can make your own polissoir or you can purchase one. You can buy Don’s fancy polissoirs on his website (here).

Don Williams Holding A Board Rubbed With Beeswax Wood Polish And French Polissoir Or Polisher

A polissoir was historically used to burnish, smooth, and polish wood furniture with plain beeswax or a beeswax furniture wax . According to Andre Roubo in his book “L’Art du Menuisier” in the 18th century this was considered a standalone finish (rather than simply a top protective finish). Below Andre Roubo describes the polissoir (translated from French):

Illustration From Rouobo'S L’art Du Menuisier Of A French Pollisoir Pollisher Figures 8 And 9

The polisher, figures 8 & 9, is a sheaf of ordinary grass or straw, about 4 thumbs long, by about 2 thumbs in diameter. This sheaf is bound tightly along its length.  Before making use of it, one soaks it in molten wax, which one lets cool, after which one rubs the polish on a piece of wood to smooth it and make it proper to polish the work. There are polishers of diverse forms and sizes, in order to be able to get into all parts, nooks and crannies.”


HOW TO USE A FRENCH POLISSOIR WITH BEESWAX WOOD POLISH:

Don Williams said that although he has been a professional wood finisher since the 1970’s, his discovery of this historic finishing tool has really changed and improved the way he works. He suggests that prior to polishing with the polissoir you should rub it against fine grit sandpaper to create a smooth crown on the end, and then dip the end in melted beeswax (and let it dry).

Don Williams Holding A French Polissoir That He Made Based Off Polishers Shown In The Andre Roubo Book L’art Du Menuisier

The Polissoir can even be used to polish the bare wood without a wax, and it will compress the wood fibers and add a gloss to the wood’s surface when rubbing it back and forth. This is similar to the trick that I use when I rub wood shavings onto mouldings that I’ve cut with my moulding planes. And when you submerge the polissoir in melted beeswax and then use it in concert with a paste wax of some sort (like this beeswax/shellac wax blend that Don makes and will be selling soon) it will give an even greater polished and finished surface. It also has the advantage of filling the grain while you’re working. It’s best to wait a few minutes before buffing the paste wax off with a lint-free cloth. This was a very common finishing process used in the 18th century when Andre Roubo was alive; both on high-style and country-style furniture.

A Jar Of Beeswax And Shellac Wax Wood Furniture Polish Or Paste Furniture Wax Made By Don Williams

As mentioned, you can be added to Don’s wait list to be notified when his proprietary Mel’s Wax is released (click here).

Don then buffs the finish to get a higher polish. He uses lint-free lithography pads to do his buffing. Don believes that Webril is the only company still making this type of pad. You can find the Webril Handi-Pads on Amazon here.

Webril Lint-Free Handi-Pads Package 100% Pure Cotton Non-Woven Fabric For Don Williams Wood Finishes

In the video Don also demonstrates the use of his archival quality lotion polish (also soon to be released), which is similarly formulated from his purified beeswax and shellac wax. This wood furniture polish was used to preserve historical furniture for the United States government, including valuable furniture in the U.S. House and Senate buildings and the Smithsonian Museum.

A Jar Of Beeswax And Shellac Wax Wood Furniture Polish Lotion Made By Don Williams

Like Mel’s Wax, this lotion polish can also be used as a finish all by itself.

Don Williams Portrait In His Workshop Sitting In Front Of A Display Of Hand Planes Or Hand Planers

If you are interested, you can learn more about the history and use of french polissoirs here.  If you missed the previous parts of the tour of Don Williams’ Barn Workshop, click here to see them.

Don Williams Old Timber Frame Barn On White Run In Highland County Virginia

This workshop tour consists of four parts:


18th Century Beeswax Wood Finishing with a French Polissoir (Don Williams Workshop Tour Part 4)2021-09-27T14:34:22-04:00
Go to Top