WoodAndShop.com is supported by its audience. When you purchase through certain links on our site, we may earn a small affiliate commission, at no cost to you. Learn more.
In the above video and in my article below, I share a simplified 6 step tutorial on how to sharpen hand saws for woodworking. Hand saw sharpening is a skill that does take some time to develop. However, a suitable hand saw sharpening job can be done after a couple of tries, so don’t feel too intimidated!
Before jumping into the hand saw sharpening tutorial, it’s important to first understand which hand saw sharpening tools you need for hand saw sharpening. I’ll also define and simplify some important concepts, such as tooth count, tooth shape, fleam, rake, and set. Alright, let’s go!
Tools Required for Sharpening Hand Saws
Before jumping into the 6 steps to sharpen hand saws, I want to talk about a few hand saw sharpening tools that you should acquire to make hand saw sharpening easier. These hand saw sharpening tools are discussed in-depth in my Hand Saw Sharpening Tools Guide, but I’ll summarize these tools here:
A. Hand Saw Sharpening Vise
A special hand saw sharpening vise is used to hold your saw plate steady while you joint and file your hand saws. You can either make your saw vise or buy a new or antique hand saw vise. A shop-made hand saw sharpening vise can be as simple as some basic wooden jaws that clamp into your workbench vise, or as complex as wooden jaws with wooden screws (like Tom’s in the above video). Almost all shop-made hand saw sharpening vises that I’ve seen clamp into a workbench vise.
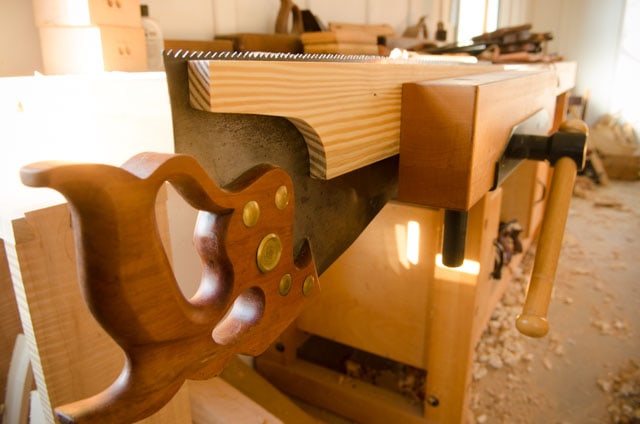
You can find antique cast iron hand saw sharpening vises that work quite well (I own a couple), and are typically pretty affordable. However, they are usually not as long as a shop-made vise, so you’ll need to move your longer saws an extra time, which really isn’t that big of a deal. Most of these metal hand saw sharpening vises have a metal screw clamp which makes it easy to clamp to almost any surface, including a counter top or kitchen table. Above you’ll see the simple vise that I made for my longer hand saws.
Here are some free saw vise plans and tutorials, and links to antique vises:
Antique Metal Hand Saw Vises:
Wooden Hand Saw Vise Plans & Tutorials:
- Close Grain: Building a Lie-Nielsen Hand Saw Vise
- Shop-made Saw Vise by Robert W. Lang
- Shop Built Saw Vise by Dominic Greco
B. Triangular Hand Saw Sharpening Files and handles
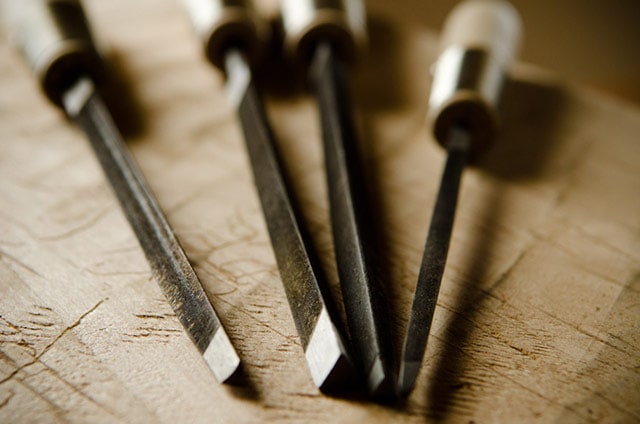
Triangular hand saw files are used to shape western-style hand saw teeth. These triangles are 60 degrees on each angle, so the space between your saw teeth will always be 60 degrees. The size of hand saw file to purchase depends on the size of the teeth on your hand saw (or the size of the teeth that you’re going to create).
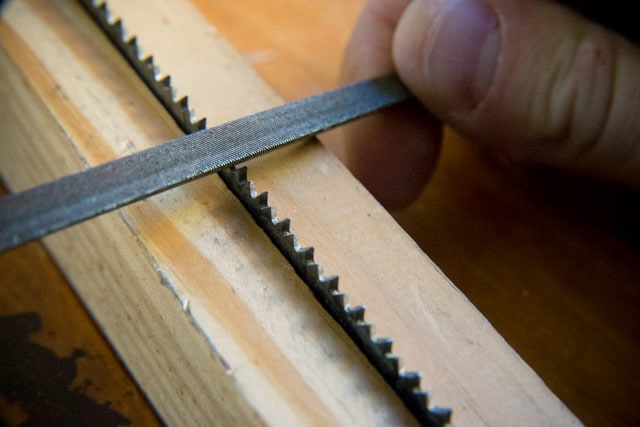
Smaller hand saw teeth (more teeth per inch) would require a smaller triangular hand saw file, while larger saw teeth require larger triangular hand saw sharpening files. Pretty simple, huh? There are many charts to help you determine which size hand saw file is needed, but if you ever mix up your hand saw sharpening files, just realize that you need each side of your triangular file to be twice the size of the saw tooth (see photo below).
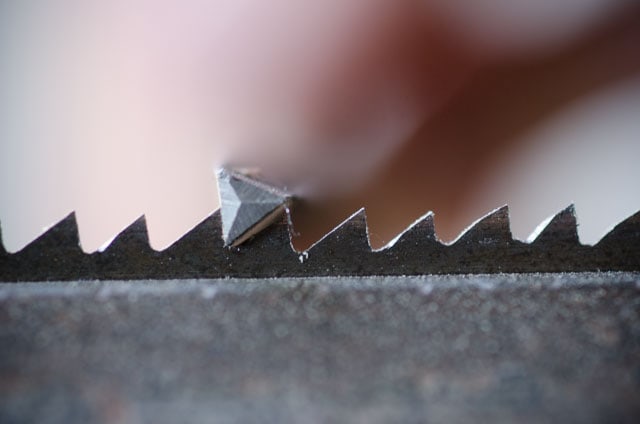
This will help you conserve your files and money because it allows you to use up both halves of a file side. Even though all files have the same 60 degree shape, using files that are too big will misshape your teeth, because they have rounded edges, rather than sharp edges as found on small files. Here is a chart of recommended triangular hand saw file sizes (you can, of course, be a little flexible):
Recommended Triangular File Sizes |
|
| PPI | File Size |
| 4 – 5 1/2 | 7-in. regular taper |
| 6-7 | 7-in. slim taper |
| 8 | 6-in. slim taper |
| 9-10 | 6-in. extra slim taper |
| 11 | 6-in. double extra slim taper |
| 12-14 | 5-in. double extra slim taper |
| 15-20 | 4-in. double extra slim taper |
Best Hand Saw Sharpening Brands:
Not all triangular hand saw sharpening files are made to the same quality. Some of them wear out much faster than others. Here are some of the best hand saw file brands that I’ve used and some that have been recommended to me by other woodworkers and hand saw sharpeners:
Bahco hand saw sharpening files:
- See Bahco saw files at Amazon
- See Bahco saw files at Ebay
- See Bahco saw files at Lee Valley / Veritas
Grobet hand saw sharpening files (also branded as “Vallorbe” and “Glardon” in some areas):
Simonds hand saw sharpening files:
Nicholson hand saw sharpening files:
Nicholson’s quality isn’t as good as it used to be, but some people still like them…
C. Hand Saw Sets
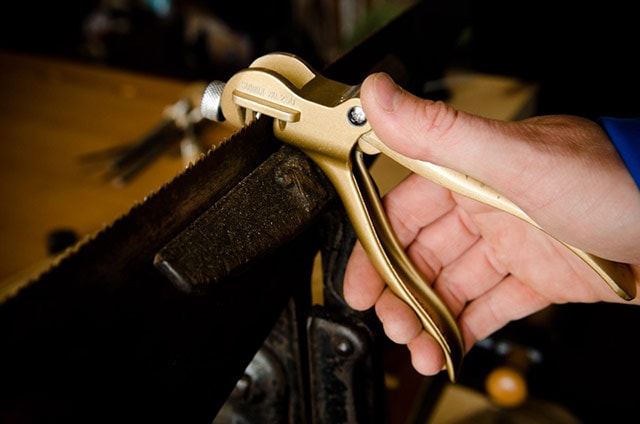
A hand saw set is used to slightly bend each saw tooth to give clearance so a hand saw won’t bind up in the wood. Stanley made some popular hand saw sets, including the No. 42 and No. 42X pistol grip saw sets. Tom Calisto loves the antique No. 42X hand saw set and I really like the modern Japanese Somax No. 250 saw sets. You can find them all here:
D. Guide for Hand Saw Sharpening Files
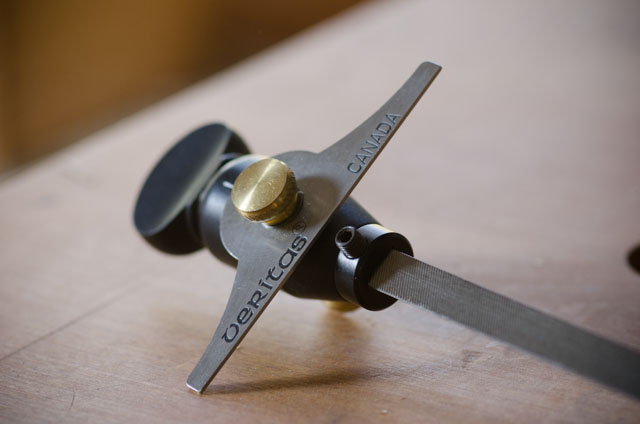
To accomplish uniform saw filing, it’s important to hold the triangular hand saw file at a consistent angle for each hand saw tooth. This can be accomplished as simply as attaching a small block of wood to your triangular saw file, or as sophisticated as using a store-bought hand saw file guide that fits on the end of your triangular hand saw sharpening files. I’ve used both methods over the years, and can admit that I really love using a commercial file guide. I own the Veritas / Lee Valley’s file guide.
E. Bastard Mill File & Saw Jointer
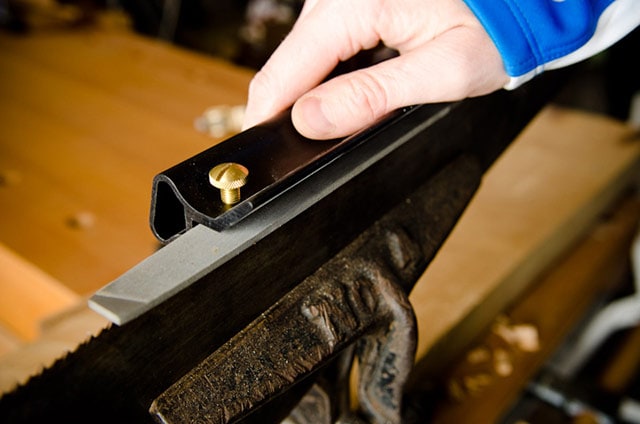
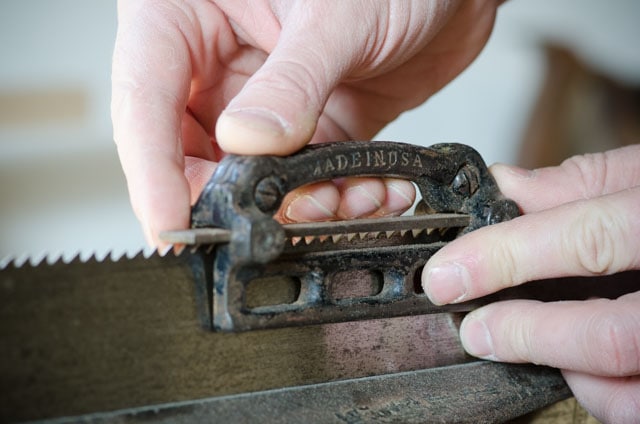
A bastard mill file is ideal for jointing (i.e. flattening/leveling) the tops of the hand saw teeth so that they are all a uniform height. The mill file needs to be held at 90 degrees to the saw plate so that the teeth are square to the saw plate’s face. The mill file can either be held in a wooden block or in a metal file holder. Here’s an example of an antique hand saw jointer and file:
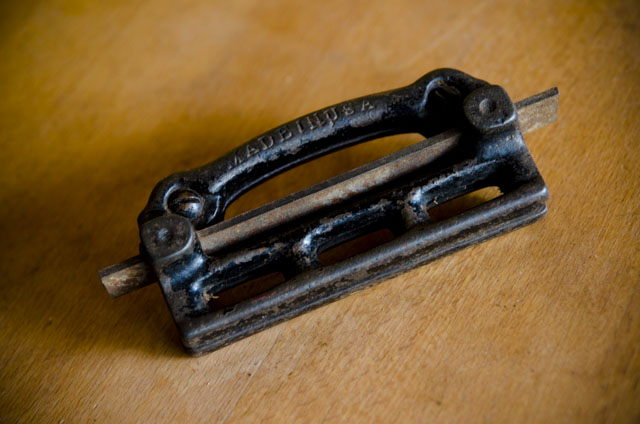
Click Here to buy the hand saw jointer that I use. And click here to find the bastard mill file that I use.
F. Magnification & Lighting for Saw Sharpening
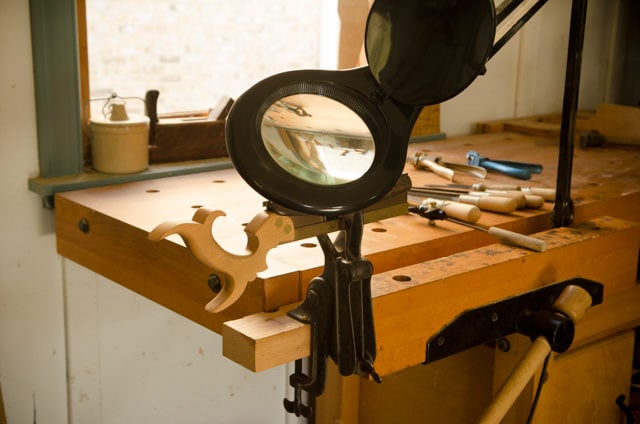
Filing and setting small hand saw teeth can be difficult to see, so many woodworkers use some sort of magnification solution. These solutions can include a magnifying lamp that sits on your workbench (my favorite option), reading glasses, or even a magnifying headset. A closeup light source, like a lamp or a sunny window, is imperative. A movable and flexible lamp is especially helpful.
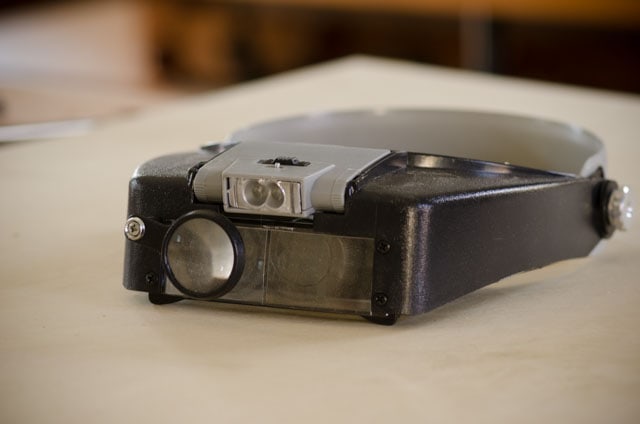
Here is my favorite magnifying lamp, which I use all the time, along with some other magnifying tools that make it easier to sharpen hand saws:
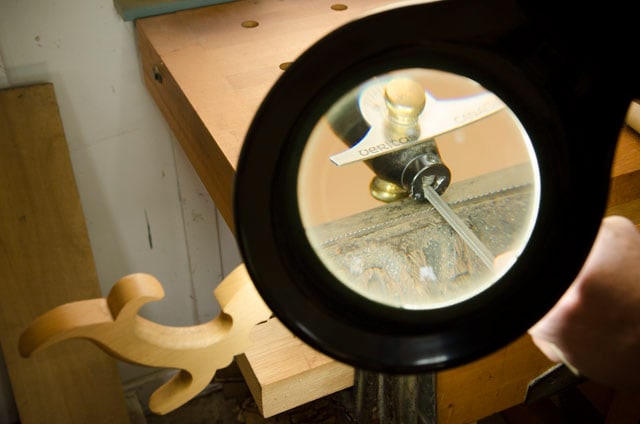
- My favorite magnifying workbench lamp (I own this one)
- See other magnifying workbench lamps at Amazon
- See magnifying head lamps at Amazon (I own this one)
- See magnifying head lamps at Highland Woodworking
G. Protractor
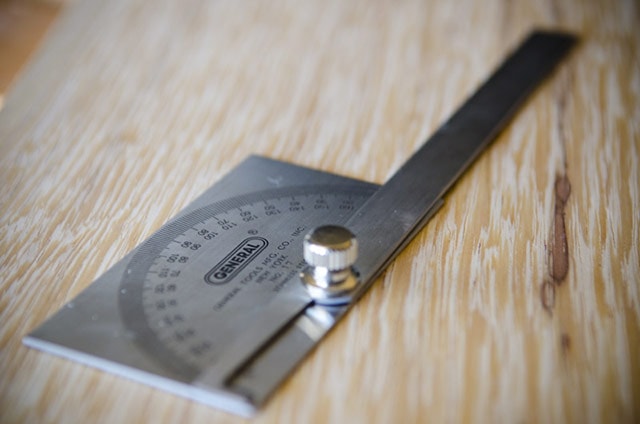
A protractor is very useful for generating your desired hand saw tooth geometry angles. For example, I use a protractor to set the fleam angle so I can draw visual guides on some painter’s tape which I apply to my hand saw sharpening vise. I own this General Tools 17 Square Head Metal Protractor (buy it on Amazon).
H. Diamond Hone
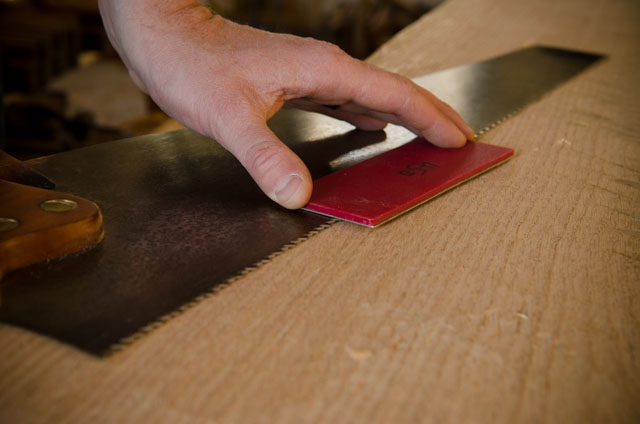
A small diamond plate is used to adjust the set on saw teeth, and also to remove burrs to give extra sharp saw teeth. Here are the two diamond hones that I use:
I. Calipers
Below you’ll learn how I use calipers to see how much set I’ve added to my hand saw teeth. This is an optional tool, but it is helpful. Calipers come as dial calipers (the classic style) or digital calipers. Dial calipers are more expensive than digital calipers, so I own digital calipers. This is my digital calipers that I’ve used for many years now, and haven’t even had to change the battery yet.
Understanding Hand Saw Tooth Count or “Pitch”

The number of hand saw teeth per inch (or points per inch) is also called the “pitch”, and is another important factor in selecting a hand saw for a particular purpose. Large hand saw teeth will cut quickly through the wood, but can leave a rough surface. Small hand saw teeth will cut finely and accurately, but are not practical for cutting long lengths or widths.
When dealing with normal hand saws or frame saws, “Rip” teeth are typically larger than “Cross Cut” teeth.
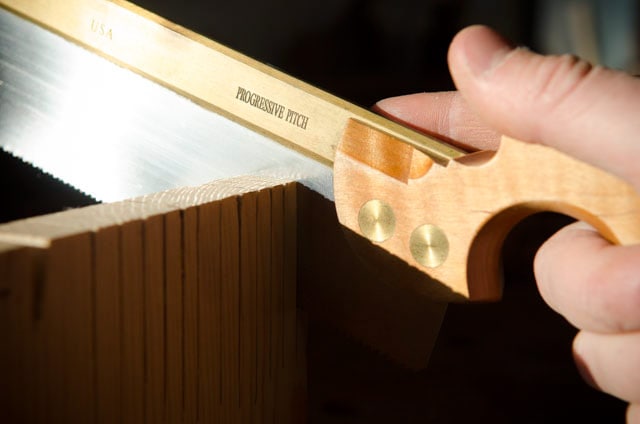
In back saws, rip and cross-cut teeth can vary in size. The number of teeth per inch are usually expressed as “points per inch” (ppi) or “teeth per inch” (tpi) and the number is often stamped into the saw plate (see the photo at the top of this section). However, you can change the tooth count during your hand saw sharpening process.
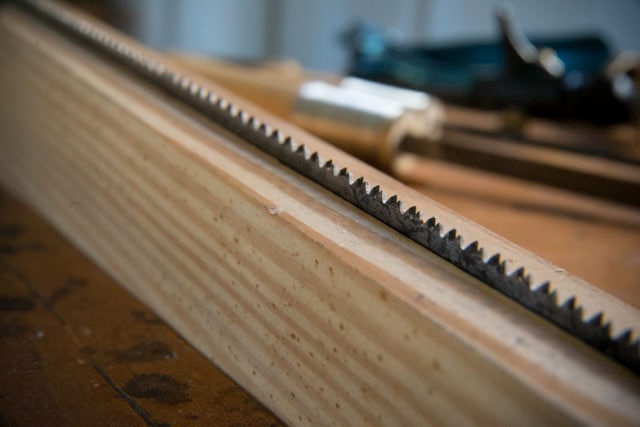
Many woodworkers would agree that for woodworking hand saws, there is no need for saw teeth smaller than 15 ppi. Here are examples of large (rough) and small (fine) hand saw teeth:
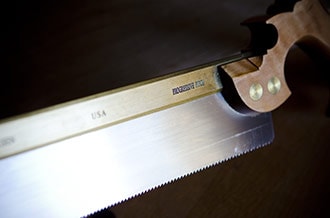
This photo shows a dovetail back saw with rip teeth filed to a tooth count of about 15 ppi.
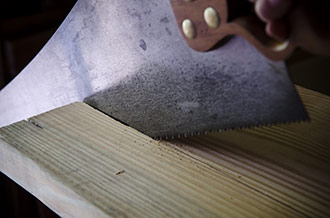
This photo shows a hand saw with rip teeth filed to a tooth count of about 5 ppi.
Understanding Hand Saw Tooth Shape & Geometry
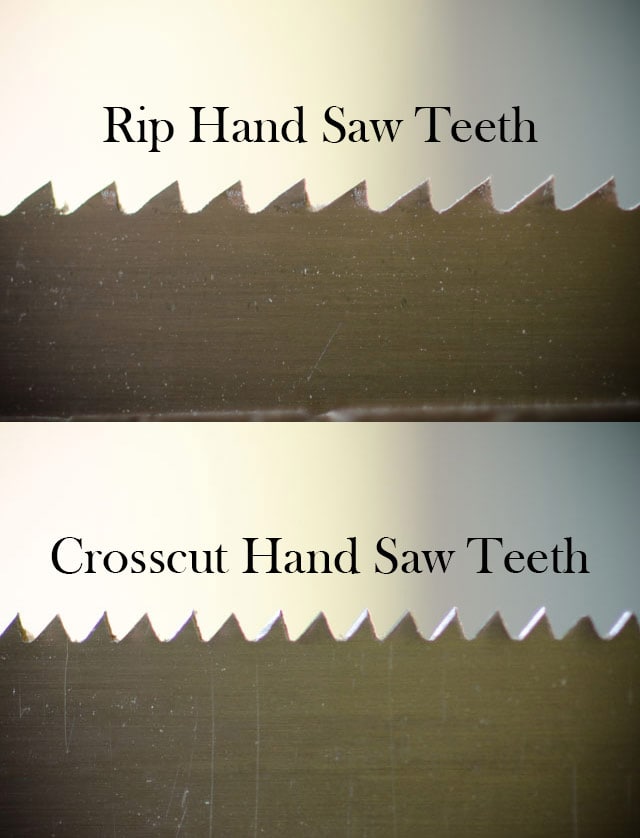
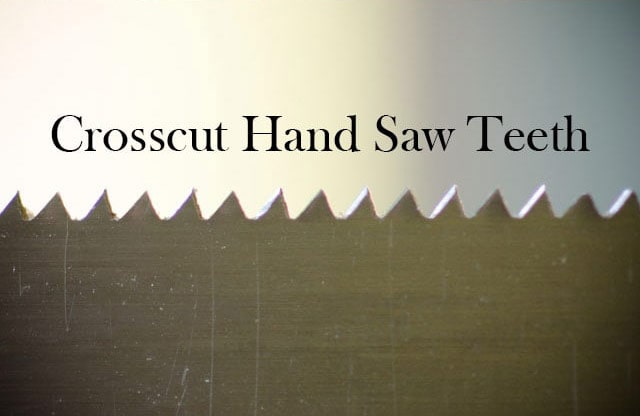
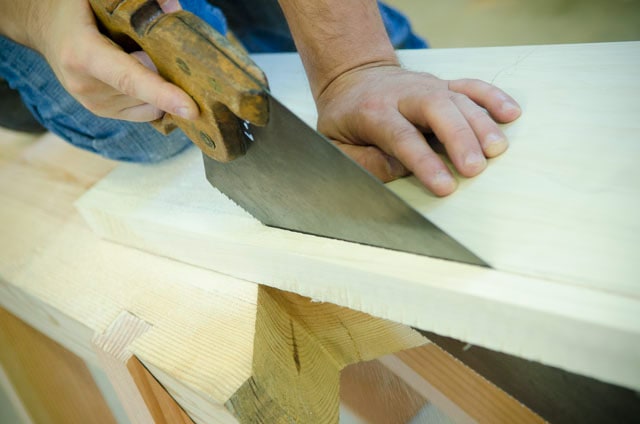
Hand saw blades are usually sharpened to two different tooth configurations: “Rip” and “Cross Cut”. Rip is for cutting along the grain, and crosscut is for cutting across the grain. You can change any saw’s tooth shape with saw sharpening tools. There is also a hybrid hand saw tooth configuration that is in between a Rip and Cross-cut shape, called a “Sash” tooth configuration, which is useful if you can only afford one hand saw.
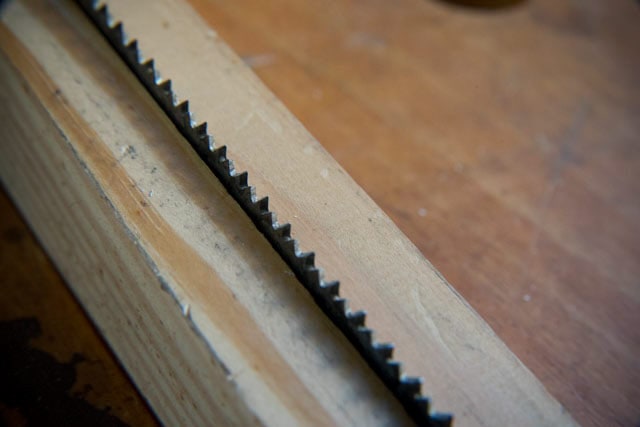
But it’s not as proficient at either ripping or cross-cutting). Sash saws were historically used by window makers (e.g. window sash) who needed to cut many types of cuts and didn’t want to switch between two backsaws. Here are some tooth shape diagrams:
RIP SAW TEETH
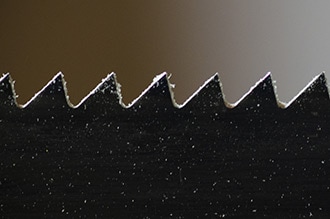
Hand saws with “Rip” teeth will cut along the length of the board’s grain (“ripping”). The tooth is shaped like a woodworking chisel, and pushes through the wood like a chisel.
CROSS-CUT SAW TEETH
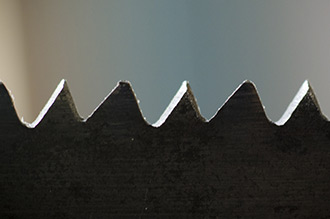
Hand saws with “Cross Cut” teeth cut across the grain (“cross cutting”). The tooth is shaped like a knife blade. It cleanly severs the wood grain, just as if you used a knife.
6 Steps to Sharpen Hand Saws for Woodworking
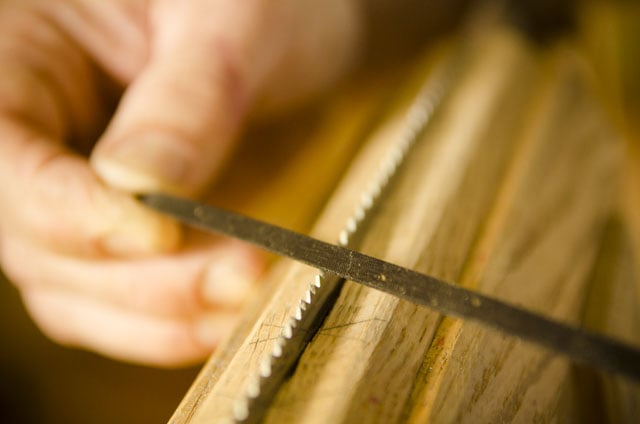
Now that we’ve established tools needed for hand saw sharpening, tooth count, and tooth shape, let’s talk about how to sharpen a hand saw. If you’ve got a cheaper hand saw to practice on, that would be helpful for practicing on before sharpening your favorite hand saw.
{Tip: These affordable “Gent’s Saws” are good to practice on, and can also do quite well as a primary backsaw after they’re sharpened}.
Sharpening a hand saw includes several steps, including jointing the saw teeth (leveling) filing the teeth (shaping), setting the teeth (bending), and stoning the teeth (Deburring). As always, there are many different great ways to sharpen a tool, and most of them work fine. Most methods include these same steps, but some people change the order of the steps. It would be arrogant to claim that this is the only acceptable way to sharpen a hand saw, but it works for many people.
Step 1: Joint the Saw Teeth (If Uneven)

The first jointing of the hand saw teeth involves leveling the teeth to the same height with a file and holder. This file holder / jointer holds the file 90 degrees to the saw plate.
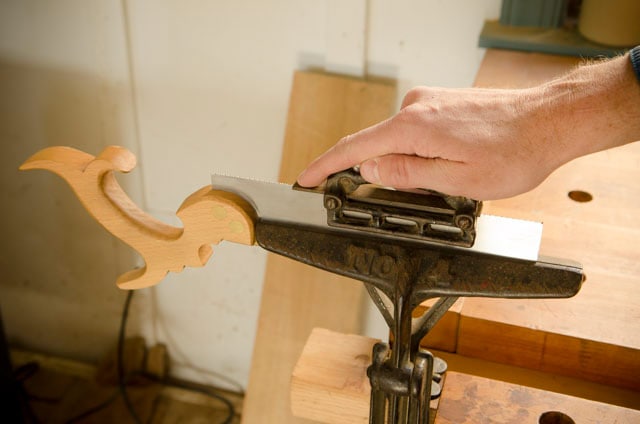
If you are sharpening a hand saw with newly punched teeth that are all the same height, then you can skip this first saw jointing, since the teeth are already the same height. The same applies to any saw that you know has been properly sharpened recently. If you’re unsure if the teeth are the same height, then just lightly dust the top of the teeth with the file to expose a small shiny, reflective flat spot.
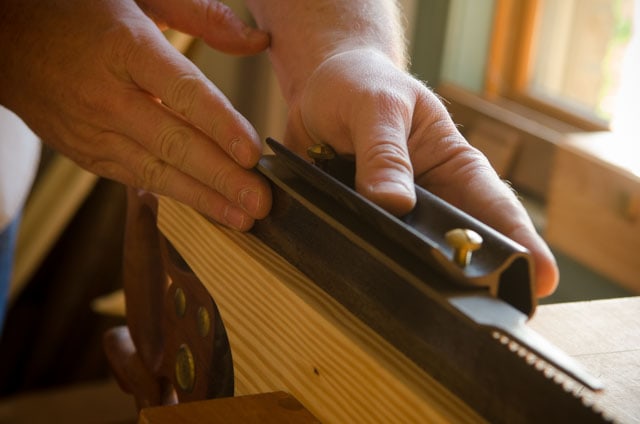
Just make one or two light passes, from heel to toe, following the flow of the teeth. This will show if most of the teeth are all the same height. Certainly do not keep jointing to get every single tooth level. Some teeth may have been broken off or chipped, and jointing until you flatten these teeth would remove too much of your good teeth. Too many passes with the jointer will require too much work to reshape the teeth, which will unnecessarily wear out your files and waste your time. I speak from experience.
Step 2: Set the Hand Saw Teeth (If Needed)
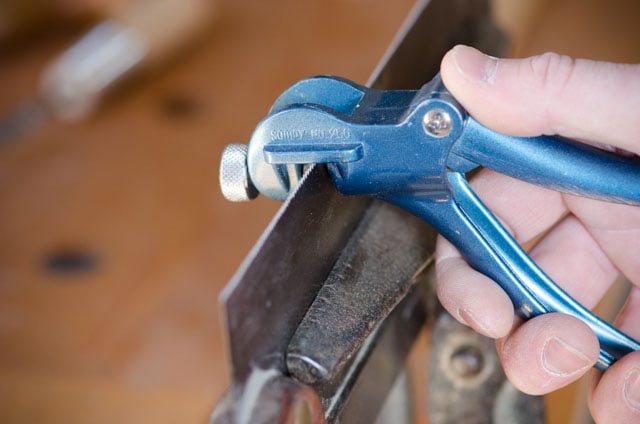
Setting hand saw teeth involves adding a very slight bend to the teeth so that the saw plate doesn’t bind (or get stuck) in the kerf that’s being cut. Hand saws that need to cut aggressively (like for ripping through wet green wood) would have more set than saws that need to cut more finely (like for cutting joints in dried hardwood).
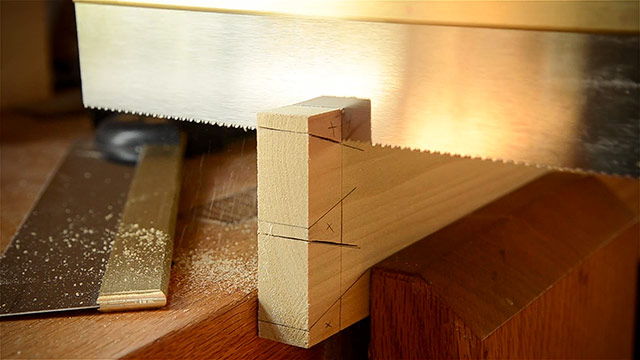
Many people save the tooth setting process for later in the saw sharpening process, but setting them before shaping makes it easier for you to see which tooth needs to be filed, especially on cross cut teeth. If your saw teeth look like they have already been set, then don’t set them again, unless your hand saw binds at the last step. If your hand saw has freshly punched teeth that have never been shaped or set before, then this step is especially applicable.
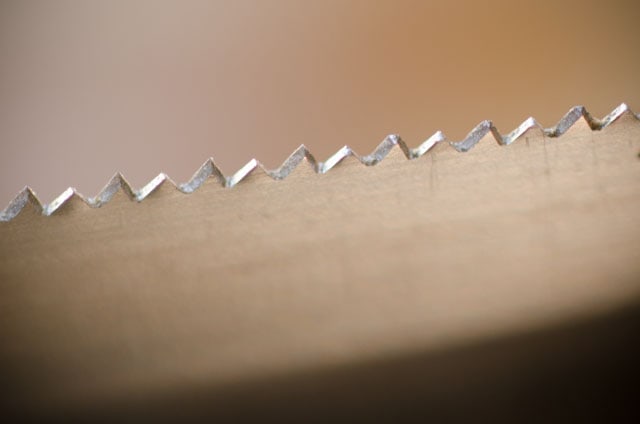
As a general rule, you would file the face of the tooth that is pointing away from you. A hand saw really only needs to be set about every 3-6 sharpenings (when the teeth get worn down, and the set becomes less wide). Otherwise setting too often can weaken and break saw teeth. Especially take care to never set, or bend a tooth in the opposite direction that it has already been set. This will more than likely break the tooth.
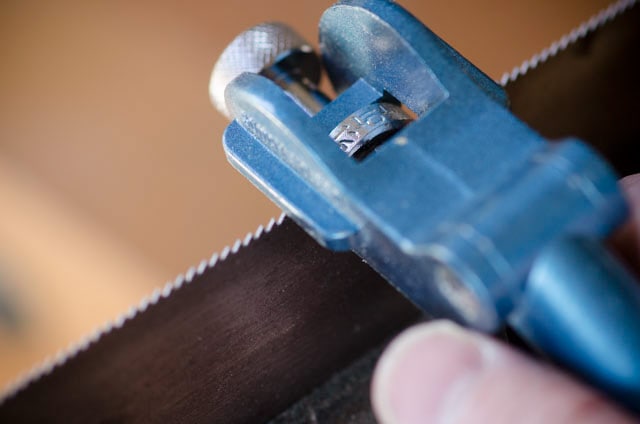
Only the top 2/3 of the saw tooth will be set, and your hand saw setting tool will keep you from setting more. If you set the saw teeth without a special tool, you will have to take extra care not to set too much of the handsaw tooth. Also pay extreme attention to make sure you set every other tooth in opposite directions.
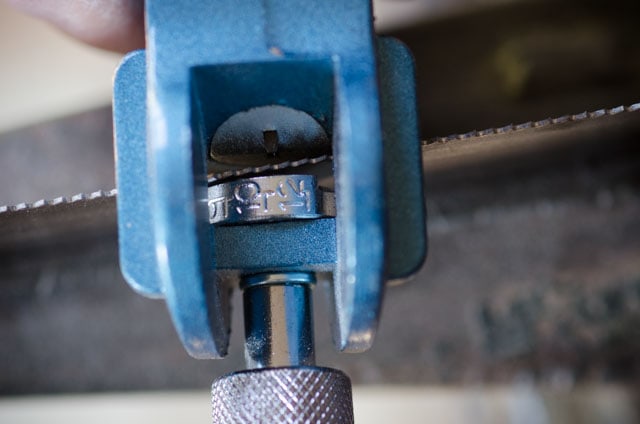
Saw setting tools have a small dial that determines how far the tooth will be bent away from you. It’s a good idea to use as little set as possible. After all, it’s easier to add more set later, than it is to remove set. For example, on the above photo “12” is the smallest amount of set. The instructions for these Somax saw sets say, “The adjustable hardened steel anvil on both models is graduated from 4 to 12. Contrary to popular belief, the numbers are not representative of the teeth per inch on the saw blade, but are rather gauges or indicators for repeatability.”
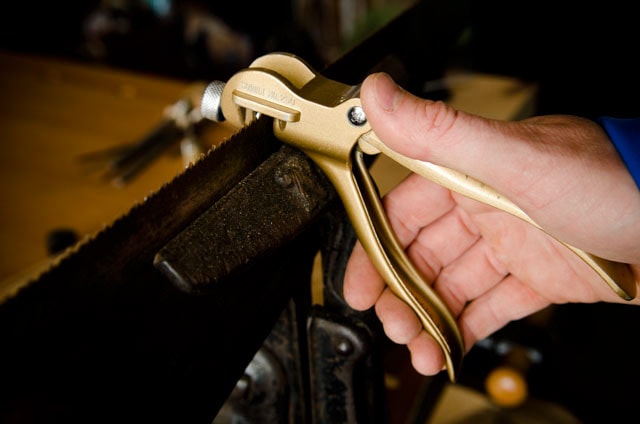
I use two saw setting tools: one for hand saws with smaller teeth and one for hand saws with larger teeth. Why? The “Standard” gold saw set (on the right) has a larger plunger, and is for larger saw teeth (from 4 to 12 tpi). The “Fine” blue saw set (on the left) has a smaller plunger and is better suited for smaller teeth (from 12 to 26 tpi) , like on dovetail saws and tenon saws (and other backsaws).
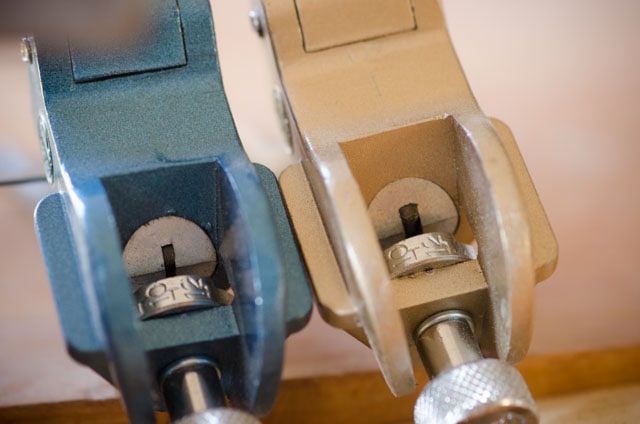
These little metal plungers push the tooth against a little metal anvil. The metal anvil (with the numbers on it) restricts the bending of the tooth. The little plunger ideally should be no bigger than the base of the tooth that you’re trying to set. If it’s wider than the tooth, it probably won’t do a good job. Above you can see on my Somax No. 250 Saw Setting Pliers the size difference between the little metal plungers.
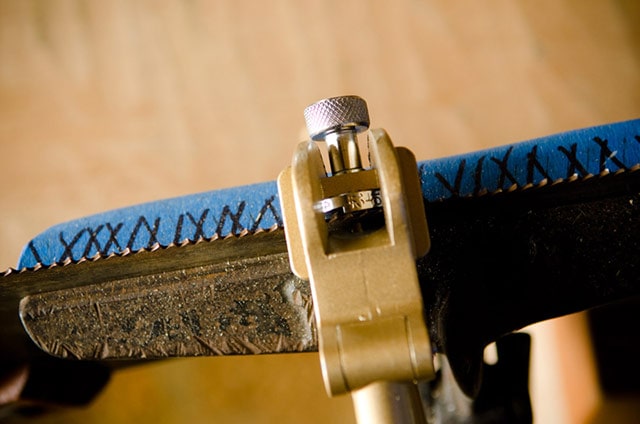
If needed, antique hand saw sets can be modified so that the little plunger is smaller. You would just file it smaller to accommodate your smaller saw teeth.
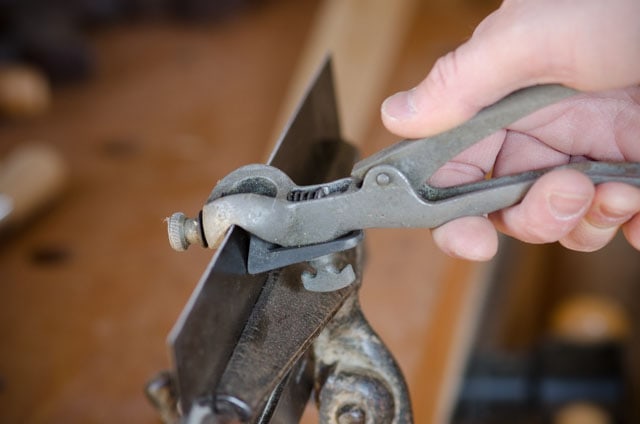
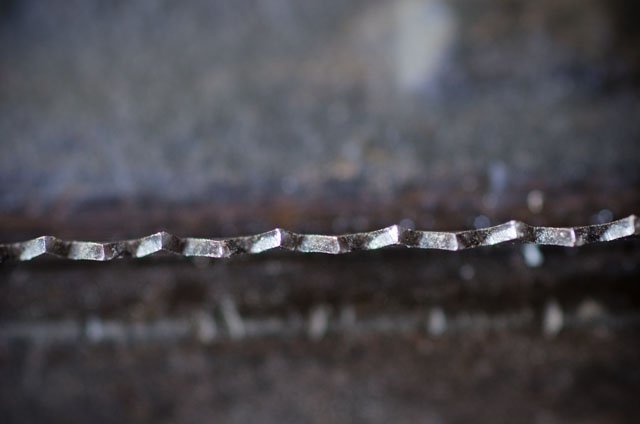
Use the saw set on every other tooth, bending it away from you. Then flip the saw around, and bend every other tooth (that hasn’t yet been bent) and use the saw set tool to bend it away from you (in the opposite direction as the already-bent teeth). Here you can see a macro view of set teeth that have been bent in opposite directions:
If you have dial calipers (or digital calipers, like this one that I use), it can be helpful to measure the set. You can bend each tooth 5/1000 to 8/1000 of an inch per side. First, you can set about 1-inch of teeth closest to the heal of the saw (both sides) to test your set, and see how much set your set tool is giving you. With the calipers, measure your saw plate thickness, and then measure the total width of two opposing set teeth.
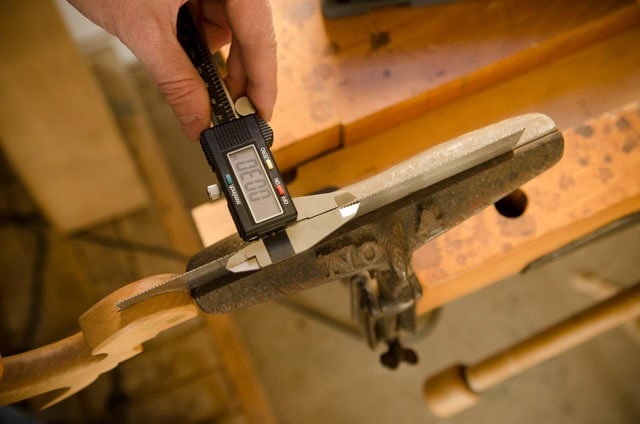
Subtract the thickness of the saw plate from the total width of the two set teeth to give you the total amount of set for both teeth together. Divide that by two, and you will know the amount of set on each tooth. If it looks good, then proceed with setting the rest of the teeth.
This, of course is an optional practice, and you can just see how the saw cuts to determine whether more or less set is required. Even a pretty dull hand saw will cut, so don’t wait to start sawing until you’ve perfected saw setting & sharpening.
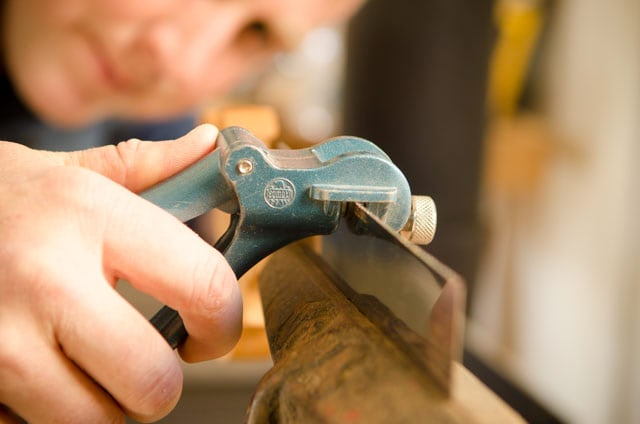
To make the setting easier, look at the next tooth that you’ll be setting right before you skip a tooth to the next tooth. You can also use a Sharpie marker to mark a dot on every other saw tooth, to make sure you don’t set the wrong tooth. This is especially helpful on small hand saw teeth.
Step 3: Shape the Hand Saw Teeth (If needed)
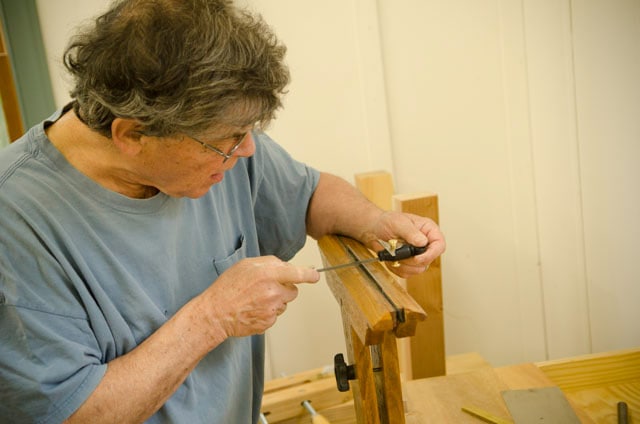
The shape of the hand saw teeth determines the performance and use of the hand saw. No one tooth shape is the “best” shape. Different woods and different jobs require a different shape.
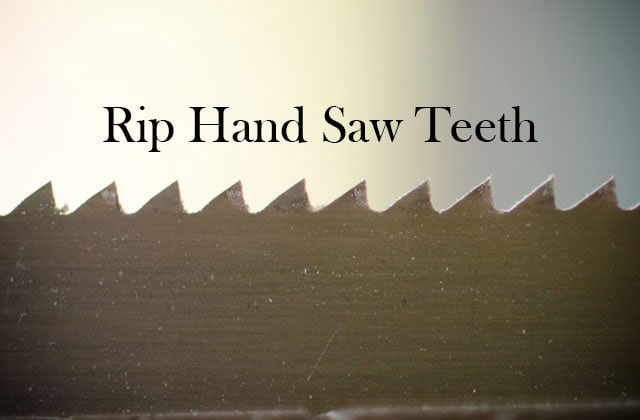
For example, a rip tooth shape is better for cutting along the grain of the wood (like a chisel) and a cross cut tooth shape is better for cutting across the grain of the wood (like a knife).
Several terms are imperative to understand if you want to shape your hand saw teeth correctly for your given job:
Rake Angle
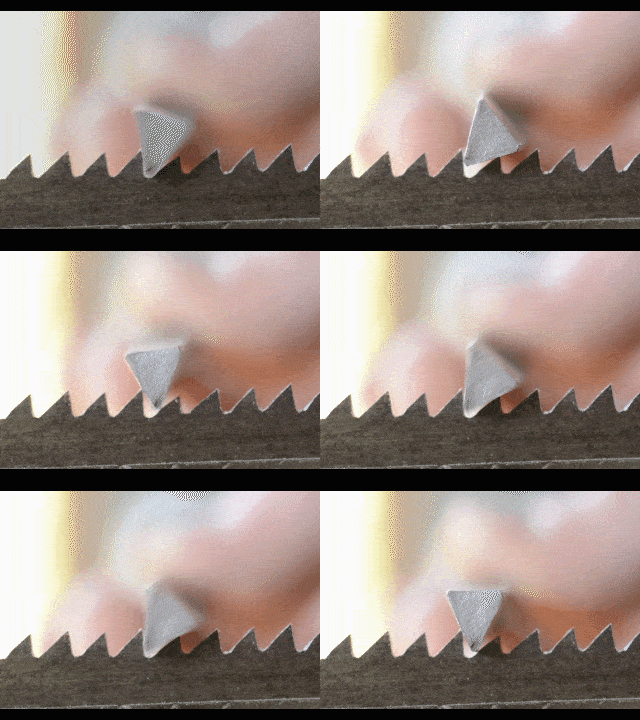
As the above GIF image shows, rake is the angle that the file slopes back from 90 degrees. Both rip saws and cross cut saws can have rake. Rip saws generally have 0-8 degrees of rake and Crosscut saws generally have between 8-15 degrees of rake. A 90 degree, vertical tooth would have zero degrees of rake. The less rake a hand saw has, the more aggressive it cuts, but the harder it is to start and cut. Laying the tooth back a bit with a slight rake angle will make the cutting easier, but less aggressive. A high amount of rake will move really smoothly through a cut, but it won’t cut aggressively.
Balance is key. Ideally you would have multiple rip-toothed hand saws and multiple crosscut-toothed saws (like some people do) and have different tooth geometry for different jobs. But most people will only be able to afford a few hand saws. So there are some good general purpose recommendations for the most common types of work. Here’s a chart to help you decide which rake angle to add to your hand saws when shaping the teeth:
| Type | Crosscut Saws | Rip Saws | Back Saws |
| Softwoods | 8-15 degrees | 0-6 degrees | 12-16 degrees |
| Hardwoods | 8-15 degrees | 6-10 degrees | 12-20 degrees |
A 12 degree rake angle is a popular angle for crosscut saws.
Fleam Angle
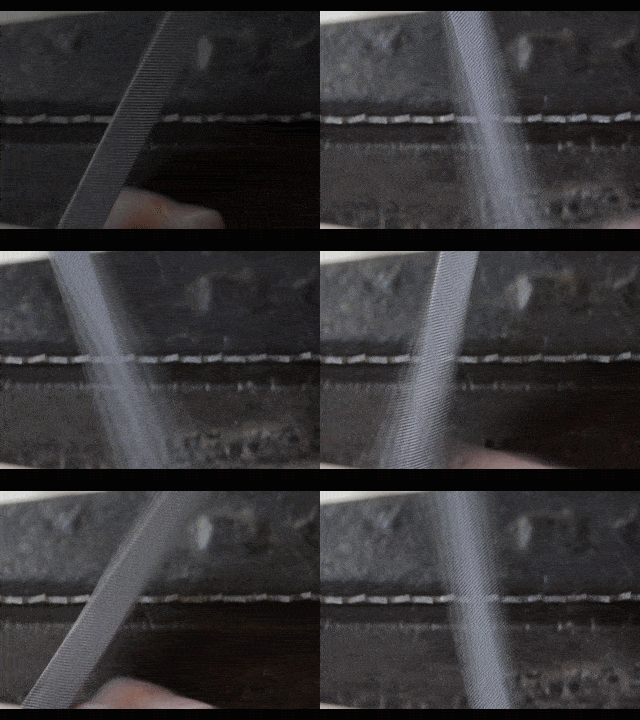
Fleam is the angle at which you would file across the saw. A zero degree (or very minor) fleam is used on rip saws and the triangular hand saw sharpening files sit perpendicular to the saw. As soon as the hand saw file is turned left or right, fleam has been introduced. Fleam is typically only used for crosscut saws, as it is what creates the knife shape on the teeth. Here’s a chart to help you decide which fleam angle you may want to add to your hand saws when shaping the teeth:
| Type | Crosscut Saws | Rip Saws | Back Saws |
| Softwoods | 20-25 degrees | 0-6 degrees | 20-30 degrees |
| Hardwoods | 15-20 degrees | 0-6 degrees | 15-30 degrees |
The fleam angle can be drawn right on the saw vise (on tape) or on a piece of paper that sits right below your saw vise. With the paper guide, you can move the paper along the workbench as you progress down the saw teeth.
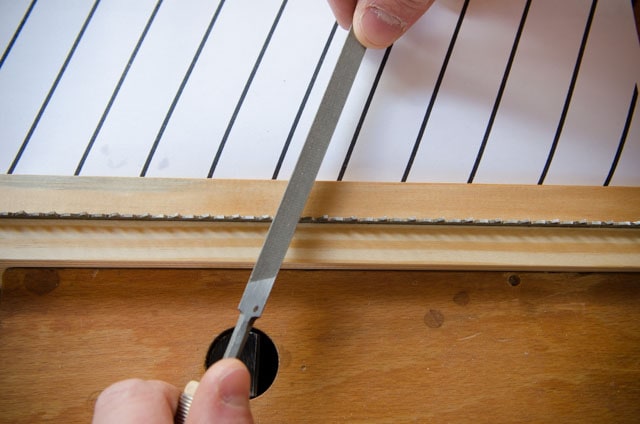
A popular fleam angle for most woodworkers is between 15 and 20 degrees. You can download my free printable PDF sharpening guides here:
- Download the Wood And Shop 15 degree saw filing guide
- Download the Wood And Shop 20 degree saw filing guide
The Veritas saw filing guide that was shown in the tool section also helps with the fleam angle and rake angle. A “Sash”, or hybrid saw usually has a 10 degree fleam angle and 10 degree rake angle.
Slope
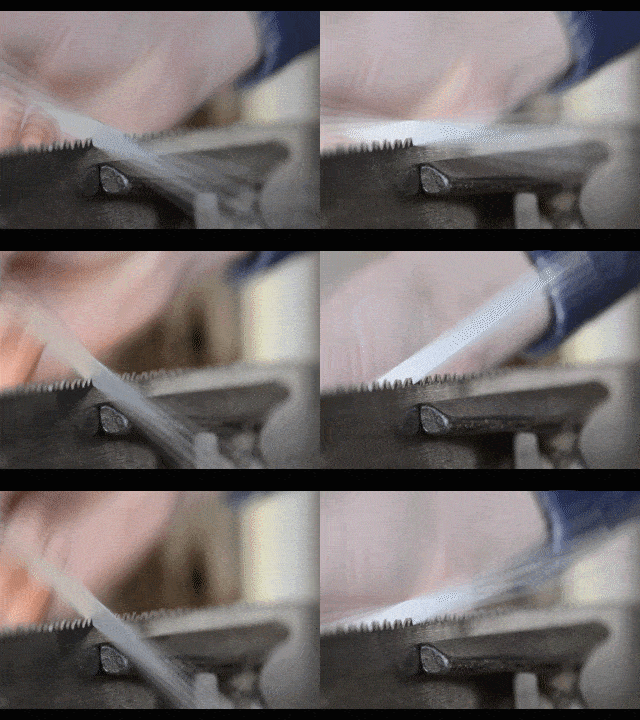
Slope is the angle at which the triangular file rests on the saw plate. See the above animation. For almost all hand saw sharpening, just keep the slope perfectly horizontal (perpendicular to the saw plate).
Shaping the teeth
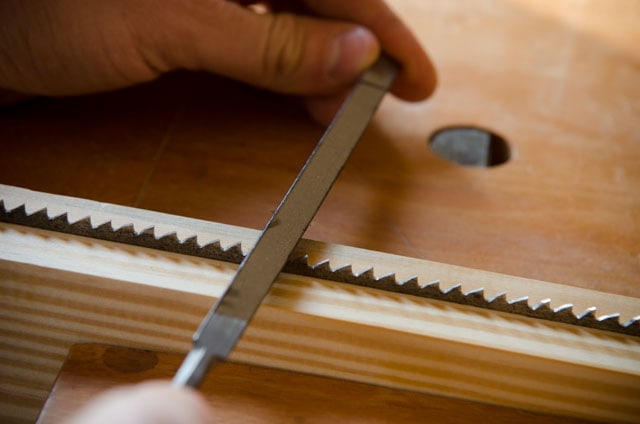
If your hand saw teeth have been shaped already, then reshaping is unnecessary (assuming you want to keep the same shape) and you can more-or-less just follow the existing shape, and skip this step. You would only need to lightly joint (step 4 below) and then file for sharpness (step 5 below).
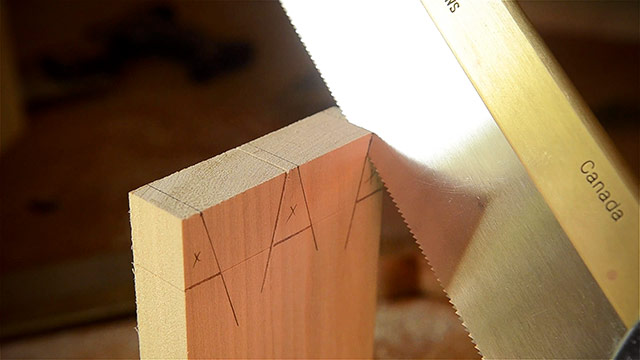
But I’m going to assume that you want to shape your teeth. Once you have determined the desired rake angle and fleam angle, set those angles on your block guide or commercial file guide, and start shaping the teeth. I like to use my Veritas filing guide with the paper guide to give extra consistency. Sit or stand near a window, or next to a good lamp.

Make sure the saw teeth are just peeking up above the saw vise, to avoid vibration. Get them level to the vise, and as low as possible.
Start filing at the heal of the saw (end closest to the handle), and work your way to the toe of the saw plate. This way your ugly shaped teeth will be on the least-used end of the hand saw! No matter how long you’ve been sharpening saws, your final strokes are always nicer than your first strokes. You eventually get in a consistent rhythm and muscle memory.
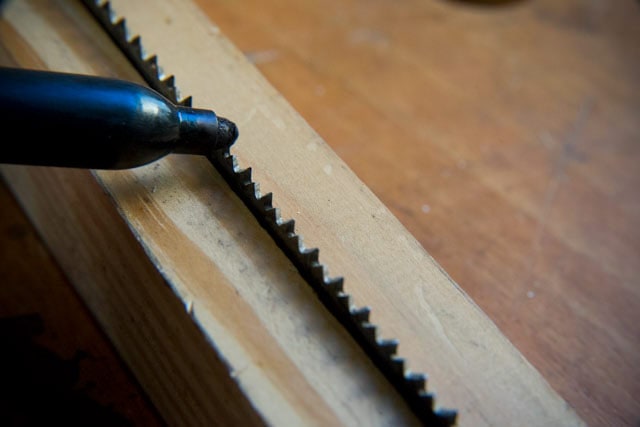
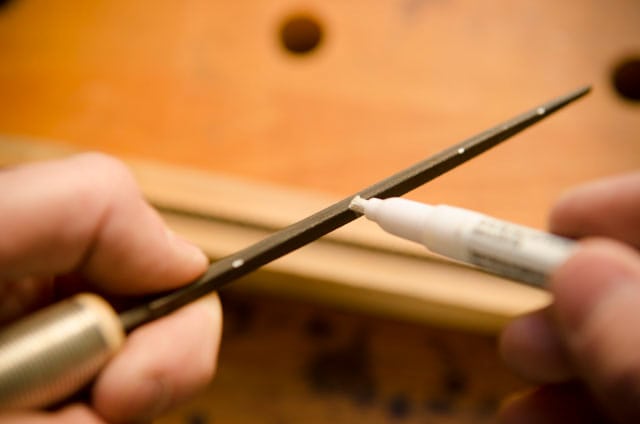
Some people like to run a black marker along the tops of the teeth to measure your progress. If you jointed your teeth before this step, the fresh shiny metal will help you measure your progress. It’s also a good idea to mark each of the three triangular file edges with black marker or white grease pencil. This will ensure that you fully wear out one edge of the file before using the next two edges.
For Rip saws, you can file all the teeth from one side. For cross cut saws, you will need to file every other tooth from different sides. So start from one side and file every other tooth, then file every other tooth from the other side. You will need to adjust your filing guide when you move to the other side of the saw file. File the face of the tooth that is pointing away from you. Use a push stroke, holding onto the file handle with one hand and the file guide with the other hand.
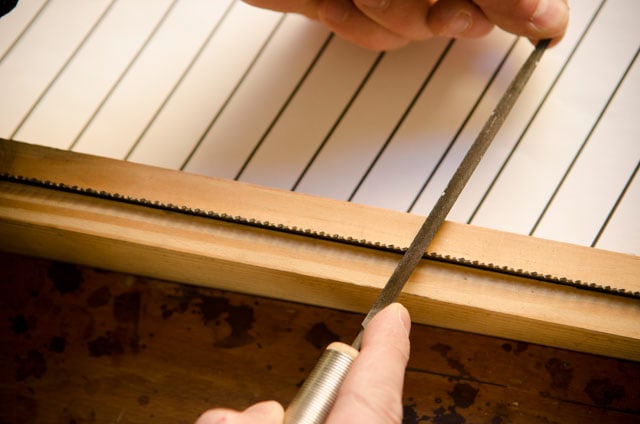
The number of strokes required for the initial shaping can vary, but for newly punched teeth, like in the above video, 2-3 strokes per tooth should shape the tooth most of the way.
After you finish shaping the teeth, site down the length of the saw plate to make sure the teeth are aligned and aren’t filed too low.
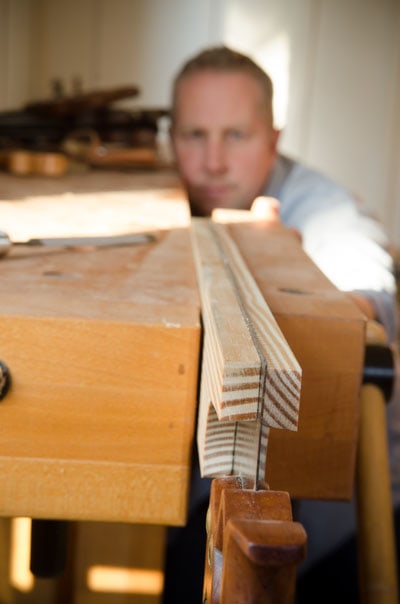
At this point, the hand saw teeth should feel pretty sharp, and they’ll grab the skin of your fingers. But they will get sharper in the following steps.
Step 4: Lightly Joint the Saw Teeth Again

If you are sharpening a hand saw with newly punched teeth that are all the same height, then you will just lightly dust the top of the teeth with the jointer and file to barely expose a small shiny, reflective flat spot on the top of each tooth. Joint from heal to toe, following the flow of the teeth. This will usually be one or two light passes with the file. This shiny “flat” on the top of each tooth will aid in the final sharpening (step 5 below).
Step 5: Sharpen the Hand Saw Teeth (Final Filing)
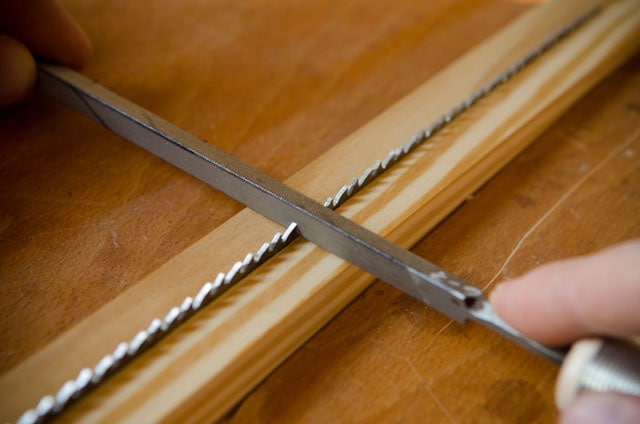
Now that the hand saw teeth have a very small reflective flat surface on top (from jointing), it’s time to do the final filing to get the hand saw teeth really sharp. Place a bright light right above the teeth so that the flats have maximum reflection, and move it around as needed.
Look at the flat reflection, make a judgement, and remove half of the reflection on the first side of teeth, if they’re cross cut teeth. Then as you file from the other side, file the remaining half of the reflection from the other side of each tooth. Some teeth may require a full stroke or two, and some may only require half a stroke to remove half of the reflective flat.
If the teeth grab your finger when you lightly rub across the tops, then the hand saw is very sharp.
Step 6: Test Cutting, Adjusting, & Dressing
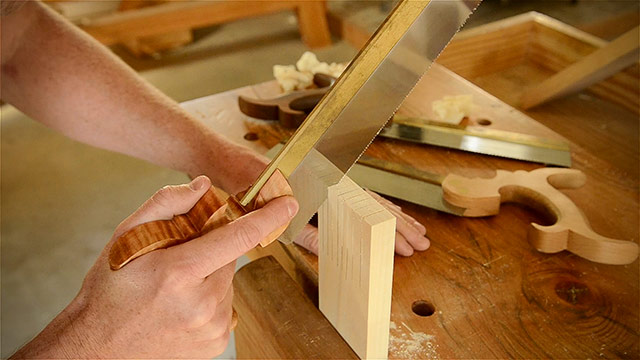
Using a combination square or try square draw a straight line down a board and make a test cut along the line. If the saw cuts straight and cleanly, then it’s ready to use.
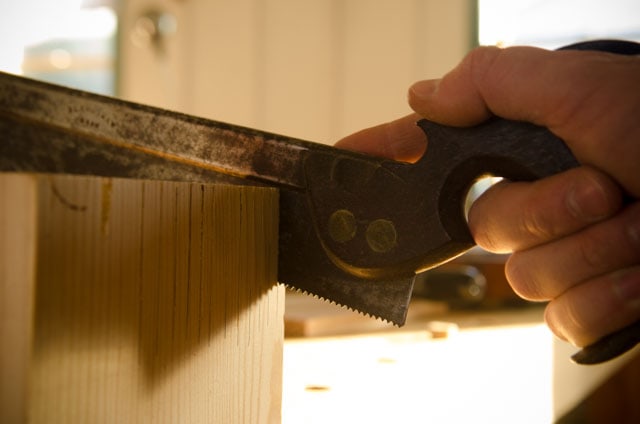
If the saw binds in the cut, then there isn’t enough set, and a bit more set should be added to the teeth. If the saw tracks one way or the other from the straight line, then there may be too much set on that wandering side of the teeth. For example, if your saw wanders to the right side of the line, then too much wood is being removed by the teeth on the right side, and you need to slightly reduce the set on the right side of the hand saw. Just make sure that the wandering isn’t caused by your bad sawing skills (learn how to cut straight with a dovetail saw here).

But if you’re confident that your sawing skills aren’t the problem, then move forward with stoning the teeth to adjust the set on the teeth. Lay the saw plate on a flat surface and lightly run a fine diamond stone or slip stone 1-2 times along the wandering side.
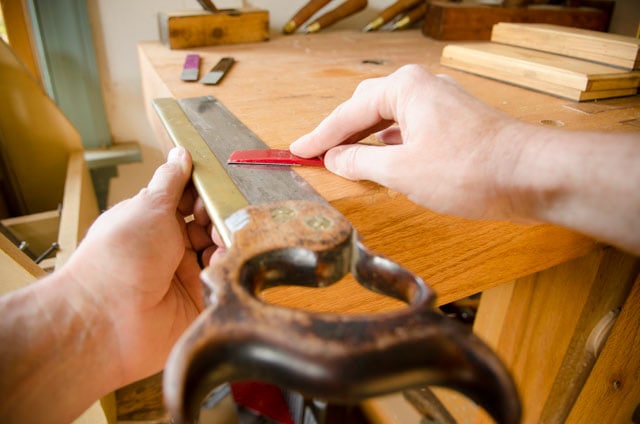
Then repeat a test cut to see if the saw cuts straight along the line. Repeat this process until the saw is cutting straight.
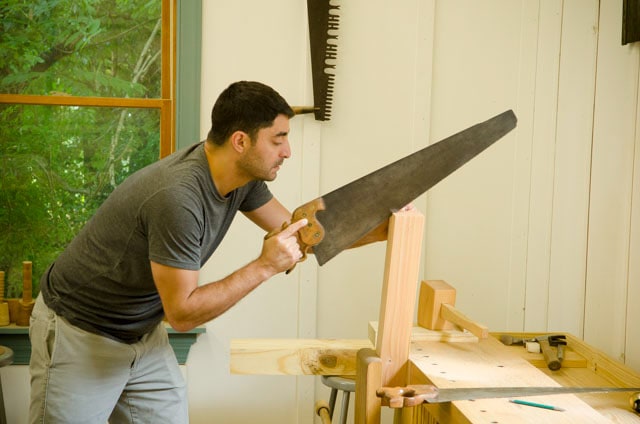
Once your saw is cutting straight and not binding in the kerf, then you can do one final thing to get the teeth a little bit sharper. Run the same diamond stone or slip stone very lightly once along both sides of the saw teeth to remove any burr. Then take another test cut to see how finely the saw will cut.
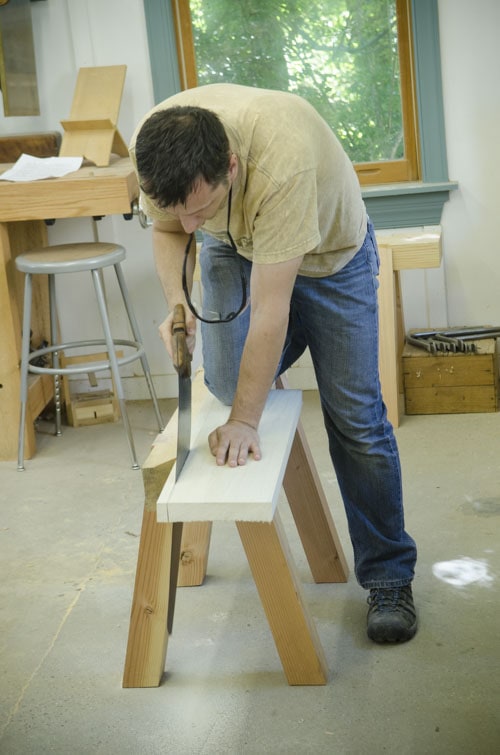
Finally, you can wipe some oil on the saw plate and teeth to prevent rusting and corrosion. This is a good maintenance practice after each use of your hand saw, along with occasionally tightening your hand saw nuts.
Conclusion
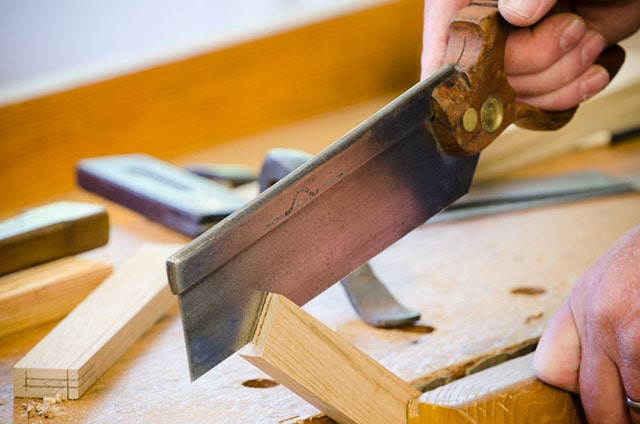
I sure hope you enjoyed my tutorial on how to sharpen a hand saw! Got any tips to add? Questions? Please share them in the comment box below!







Thanks for taking the time to put together this tutorial, saw sharpening has always been a bit of a black art to me, this makes it nice & clear!
Glad I could help Robert!
Thanks for this Joshua. Very detailed and clear. Now I will go watch the video I got after the class last year to really study the process. Brad
Glad you liked it Brad! I haven’t been following the news…did you ever get back to work?
One easy read. I’m just starting out with sharpening and found your article very informative. Thank you for your help.
Glad it was helpful Frank!
This is the article I need. I was going to buy a saw-set on Lee Valley, per the article, but alas they no longer sell any. I’ll have to take my chances on Yamalzon.
BTW, “heel” not “heal.” Heel & Toe, eh?
Glad it helped Meryl! And thanks for catching my spelling error!
Lee Valley sell a ‘jointer-edger’ for about $20. But you may have or be able to easily find or borrow an ‘edging’ tool which is used to sharpen the metal edges on skis and snow boards. Ffor about the same price and often less. You might even be able to borrow one.
This is a GREAT article! Thank You
Great content, I am a professional carpenter and I have many tools for woodworking, but i will mostly use hand saw, even i have already miter saw, circular saw. with my 6 years experience, i will recommend hand saw instead of other cutting tools. Moreover, this post is very important and valuable for every woodworker. After reading this post they will be able to sharp hand saw very well. Thanks for sharing your thought with us and keep up the… Read more »
Great! I love this.
Great article.. Thank you! I’ve sharpened a few saws with successes between stratospheric and dudly…. I suspect the duds are mostly impatience or being distracted. My biggest dud was an old skool 20+ inch miter-box saw… an agonizing 200+ teeth… I think I ended in a psychomotor trance… One question, and I’m being kinda paranoid here… when setting a crosscut saw, teeth are angled so the cutting edge of the tooth is on the outermost part of the blade…. correct… Read more »
With the right hand saw sharpening tools and proper technique, anyone can become skilled at sharpening hand saws. Don’t be intimidated by the process, give it a try!
This is a terrific resource! Thank you for putting it together.
You’re most welcome Paul!
Absolutely brilliant definative guide to saw sharpening.
Thank you very much for taking the time to put together this excellent tutorial.
You are most welcome Bob! And your guitars look lovely!