How to Choose the Best Wood Turning Tools and Wood Lathe for Beginners
Joshua shares which wood lathe, wood turning tools, and wood turning accessories are needed for new woodworkers and wood turners.
![]() By Joshua Farnsworth | Updated Mar 01, 2022
By Joshua Farnsworth | Updated Mar 01, 2022
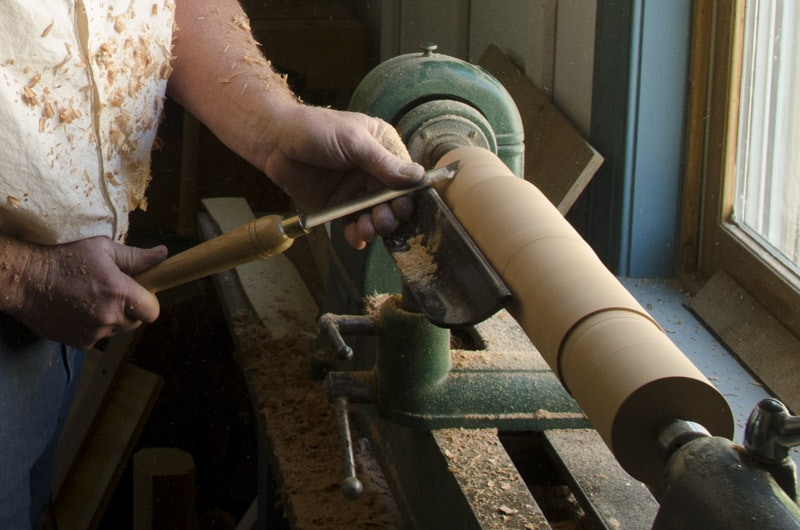
How to Choose the Best Wood Turning Tools and Wood Lathe for Beginners

Joshua shares which wood lathe, wood turning tools, and wood turning accessories are needed for new woodworkers and wood turners.
![]() By Joshua Farnsworth | Updated Mar 01, 2022
By Joshua Farnsworth | Updated Mar 01, 2022
Disclosure: WoodAndShop.com is supported by its audience. When you purchase through certain links on our site, we may earn a small affiliate commission, at no cost to you. Learn more.
Turning furniture parts on a spinning wood turning lathe is extremely satisfying and fun to see the wood take shape so quickly. But wood turning also has a steep learning curve, but for the woodturning skills and for understanding which wood lathes and wood turning tools are needed to get started in turning wood. In this article I’ll share my simplified advice on choosing a wood lathe and the best wood turning tools for beginners.
Choosing a Wood Lathe + Lathe Accessories for Woodturning
A wood turning lathe, sometimes called a wood lathe or a wood turning machine, is basically a motorized machine that spins wood at high speeds in order to add circular elements to a wooden furniture part. There are a lot of options to look at when acquiring a wood turning lathe. Newer wood lathes have a lot of incredible features, including variable speed control, digital displays, etc. Really old style lathes, like treadle lathes and spring pole lathes don’t offer any modern technology, but they do offer simplicity and physical exercise (way better than goat yoga).
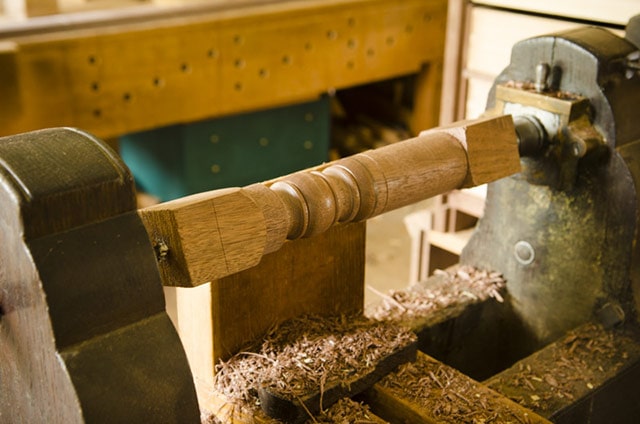
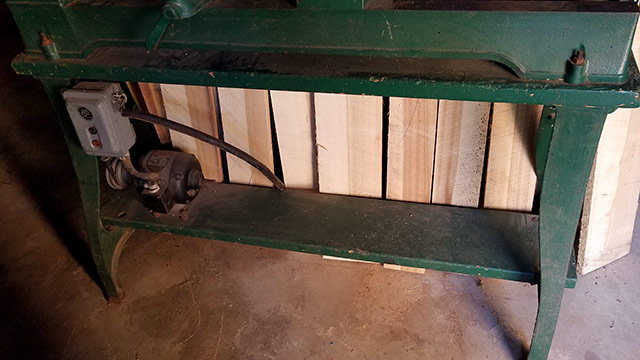
My two heavy cast iron wood lathes are somewhere in between. They were built prior to World War 2 and have required some work to get them just how I want them, but they do what they need to do: turn a piece of wood between to center points. And though they are low tech, they do have some cool features. But my favorite feature is how well and solid they were built.
RELATED
Woodturning Basics with Will Myers Part 1: Turning Tools, Lathe, & Roughing a Spindle
Woodturning Basics with Will Myers Part 2: Shaping the Dried Spindle
Woodturning Basics with Will Myers Part 3: Refining the Spindle
Which 20 Woodworking Hand Tools Should You Buy First?
Best Wood Chisels for Woodworking?
Parts of a Wood Lathe
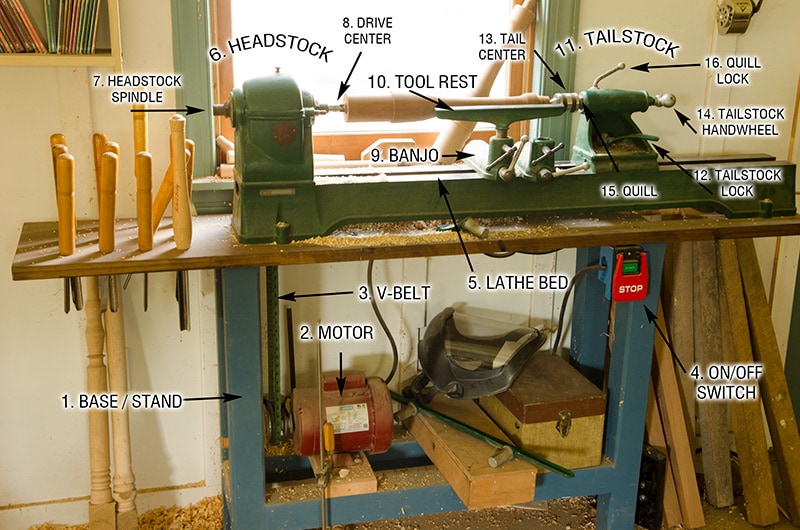
Above you’ll find a simplified diagram that shows the different parts on my first wood lathe. Below I’ve shared basic descriptions of the different parts of a wood turning lathe. The numbers in the diagram correspond to the sections below. I’ve also shared my experience of piecing together the different parts of my vintage lathes, which may be helpful to you. Some lathes differ a bit (especially treadle lathes and spring pole lathes), but most will basically have the same parts:
1. Wood Turning Lathe Base
This is the base or legs that support the wood turning lathe. “Bench top” wood lathe models don’t have a base, but rely on the wood lathe sitting on the top of a workbench. All other models come with a dedicated base. The first wood lathe I purchased (used for $250) was a Pre-World War II Tauco lathe. It is an international version of the popular Delta Rockwell lathe. It was manufactured in the United States, but sold in New Zealand. So over the years, as it was transported by the original owner’s son back to the United States, the heavy base was left behind. Because the wood turning lathe didn’t have a base, I had to build a custom base (see the blue base in a preceding photo). When setting up a wood turning lathe, having a comfortable height is quite important so your wood turning motions are natural and unstrained. I prefer to have the spindle somewhere around the height of my naval. This is not a hard fast rule, but just a height that I’ve found gives my arms a nice 90 degree angle when standing straight for woodturning. If your wood lathe is a bit too tall for you, then you can put a couple floor pads under you to give you a little extra height. If your lathe is a little low for you, then you can either build your own stand or add blocks under the current stand. Just make sure it doesn’t cause your wood turning lathe to be unstable.
2. Wood Turning Lathe Motor
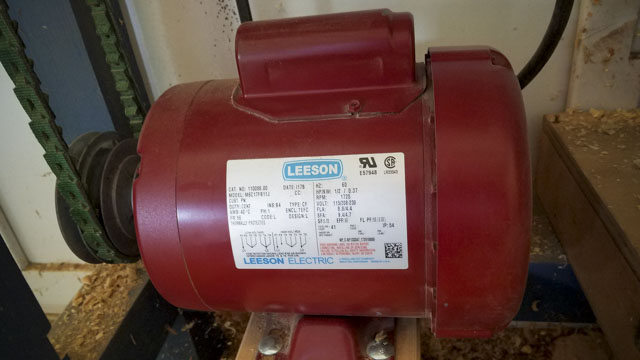
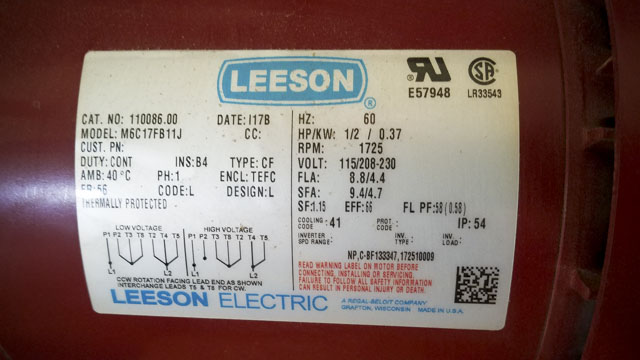
The wood turning lathe motor turns the belt, which spins the spindle V-belt. Most new and vintage lathes will come with a motor, and it’ll likely work just fine. My first vintage wood lathe didn’t come with a motor (again, it was also left in New Zealand). And my second wood lathe (also vintage) came with a 3-phase motor, which I couldn’t use with my electrical setup in my workshop. So while I was putting together my first wood lathe, I did a lot of research on finding the best motor for a wood lathe like mine. Talking with mechanically-inclined friends and other woodturners, I decided that the best motor for a wood turning lathe like mine would be a 1/2 HP 1 phase 115/230V 56 frame electric motor that runs at 1725 RPM. This is the Leeson brand motor that I purchased on Ebay (model 110086.00) for around $160 (free shipping) and it has worked great, and I expect it to do so for many years.
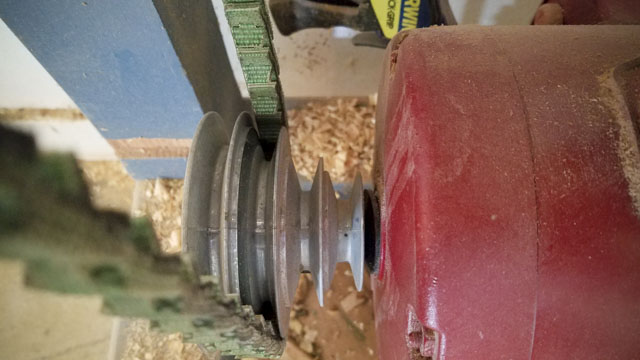
Another important consideration is the motor pulley that fits on the motor. This required some trial and error for me, because I needed a pulley that would fit the V-belt and also that would align perfectly with the 4 slot spindle pulley on my headstock. When purchasing a pulley for your lathe’s motor, you need to measure your headstock spindle pulley, the size of your belt, and the size of the arbor on your motor (the shaft that the pulley slides onto). In my case, I purchased this pulley: Chicago Die Casting 141 5/8 V-Groove Four Step Pulley 5/8″ Bore for 4L. It allows me four different speeds; one for each slot:
3. V-Belt (i.e. “Vee Belt”) for Wood Turning Lathe Motor
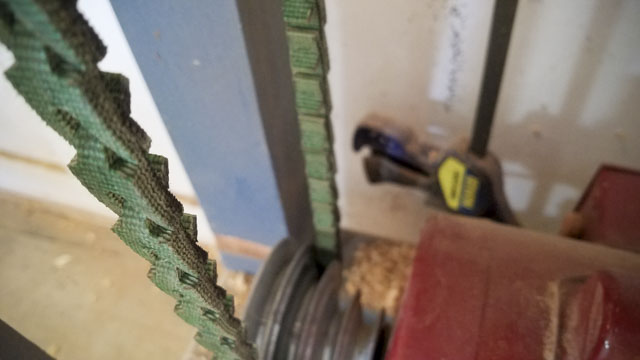
The rubber or chloroprene belt which turns the headstock spindle. Most wood turning lathes come with rubber belts, similar to what you’ll find under your car’s hood. But a friend talked me into adding a Link belt. A link belt is a chain of chloroprene links that fit together for a custom sized belt. Why did I choose to use a link belt for my wood turning lathe motor?
- Because the headstock doesn’t need be disassembled to add a new belt, which saves a ton of time.
- Over time a rubber belt can stretch and become loose, requiring a belt change or a creative system with a stack of metal washers. With a link belt, you would just remove a link if it ever became loose.
- Link belts offer a better fit, which reduces vibration.
For my wood turning lathe pulleys I used the 1/2-inch V-belt style, which you can either buy in longer lengths or by the foot. Here is the 5 foot length that I purchased on Amazon. Link belts like this can also be used on other machinery in your workshop (bandsaw, jointer, table saw, etc).
4. On/Off Paddle Switch for a Wood Turning Lathe
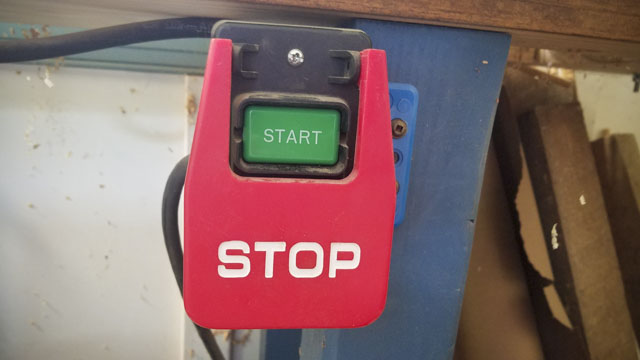
The switch that controls the power to the wood turning lathe motor. This feature may not sound all that important, but a good lathe should have a power switch that is easy to see and use, especially in an emergency. Since my first vintage lathe didn’t even have a motor, it also didn’t have a power switch. I wanted a power switch that had a larger stop paddle, in case the lathe needed to be shut off quickly. I’ve have an experienced woodturner friend who accidentally wore a shirt with loose sleeves while woodutrning, and the shirt sleeves got sucked into the lathe. Fortunately his power switch was easy to access, so he was able to stop the lathe in time, before his whole body got sucked in! This is the paddle switch box that I bought and wired to my wood turning lathe’s motor. It was easy to wire to the lathe motor, and mount on the leg of my lathe base. However, get some help from a qualified electrician if you aren’t experienced.
5. Wood Turning Lathe Bed
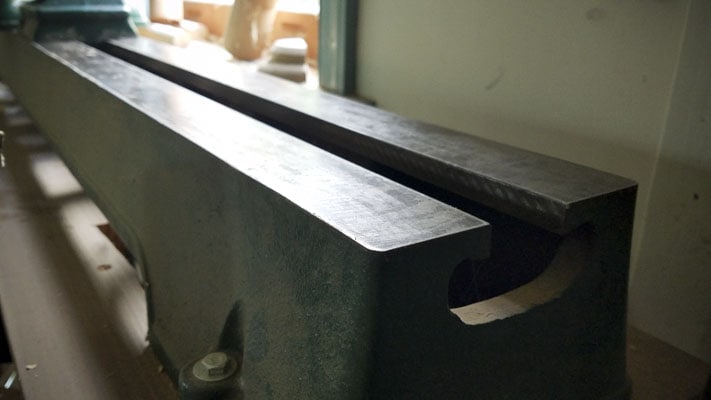
The wood lathe bed is the solid casting that supports the headstock, tailstock, banjo, and tool rest for a wood turning lathe.
6. Headstock for a Wood Turning Lathe
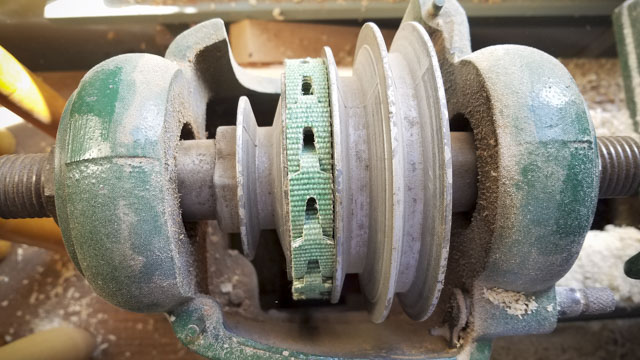
The headstock is the assembly that holds the motor-turned spindle and pulley system. The headstock is attached to the bed of the lathe. Some headstock pulleys (like mine) have an indexing mechanism (see below) that is convenient for fluting or reeding table legs or cutting sliding dovetails for a candle stand with a router (the indexing mechanism should never be engaged while the lathe is running).
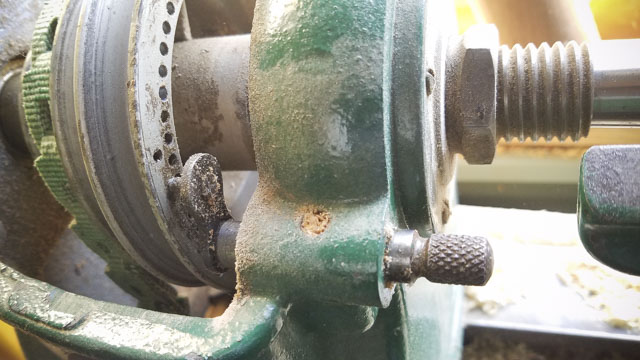
7. Headstock Spindle on a Wood Turning Lathe
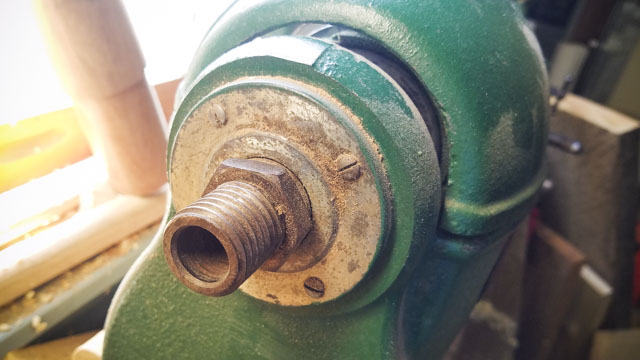
The metal spindle that is rotated by the belt and pulley, and into which the tapered drive center is attached.
8. Drive Center on a Wood Turning Lathe
The drive center is a removable tapered steel shaft that presses its point and teeth into the wood blank, securing it to the headstock spindle. On the other end, the drive center wedges into the headstock spindle with a “Morse Taper”. Most wood turning lathes use a #2 Morse Taper.
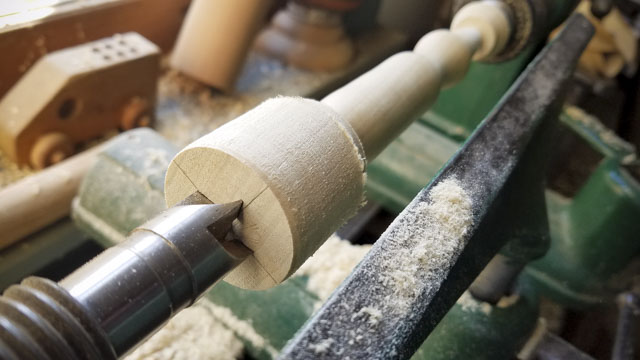
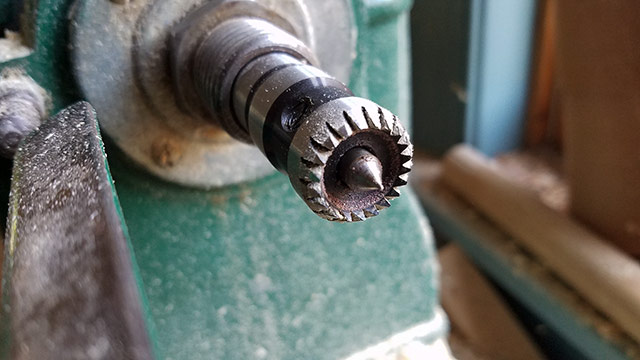
Most older lathes, like mine, came with a “Spur Center”, which is a 4 prong drive center as seen above. The prongs are pounded into the end grain of the wood blank. While many people still use this, a safer drive center has emerged called a “Steb Drive” or “Steb Center” (or even “Stebcentre” in the UK). Steb Centers have small teeth around the circumference of the spring loaded point in the center:
This design acts like a clutch on a hand drill when you get a catch on the lathe. Rather that the tool catching on the wood, and ripping a big chunk out of the wood (and likely causing you to run for a change of pants), the wood stops on your wood turning chisel, and the Steb Center just spins. This is especially comforting for new woodturners who are nervous about the dangers of a wood catch, especially with a skew chisel.
- This is the 5/8-inch Steb Center that I use for spindle turning and other tasks like turning chisel handles, and it works great.
- Here is another good Steb Center that I’ve had recommended to me, made by Robert Sorby
- You can search other Steb Center drives here on Amazon (note: they may not all be called “Steb”. Just make sure that they look similar to the above steb drive centers).
Here is a good video that demonstrates how effective steb centers are at preventing catches when using a wood turning lathe:
9. Banjo on a Wood Turning Lathe
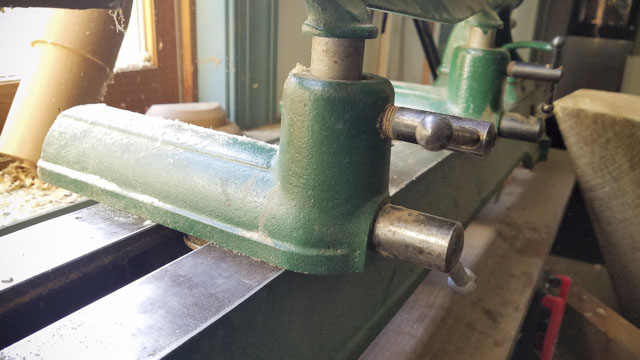
A banjo is a locking mechanism that holds the wood turning lathe tool rest, and slides back & forth and side to side, along the bed of the lathe.
10. Wood Turning Tool Rest
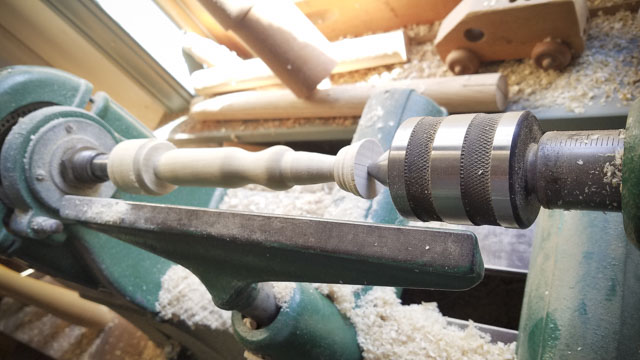
The wood turning tool rest fits into the banjo(s) and adjusts up and down to allow support of the wood turning tools while they cut the spinning wood. My first lathe came with three different sized tool rests, so I have always had nice tool support whether I’m turning a small cabinet knob or a long spindle. Many wood turning lathes come with a medium sized tool rest, which will work, but will limit the amount of a longer spindle that you can work on without having to move the wood turning tool rest. For example, if you are roughing a wood blank for a spindle, it would be inconvenient to not be able to move the roughing gouge along the entire blank at the same time. However, long 24-inch tool rests can be quite expensive, and require two banjos to work with your wood turning lathe.
Tool rests are usually made of metal. If you find a wood turning lathe with a tool rest, make sure to use a metal file to smooth out the part of the tool rest where your tools will glide, and remove any dings or dents. Anything but a smooth tool rest will copy the dings into your wood spindle while woodturning. But if you find a wood lathe that doesn’t have a tool rest, you have a couple options. The more difficult option is to make a tool rest out of wood, metal, or a combination of wood and metal. Just do an internet search for ideas. But the easiest option is to simply buy an aftermarket tool rest or search on Ebay for an original tool rest that was made for your lathe. Some people even purchase a nicer tool rest to use in place of the one that came with their wood lathe.
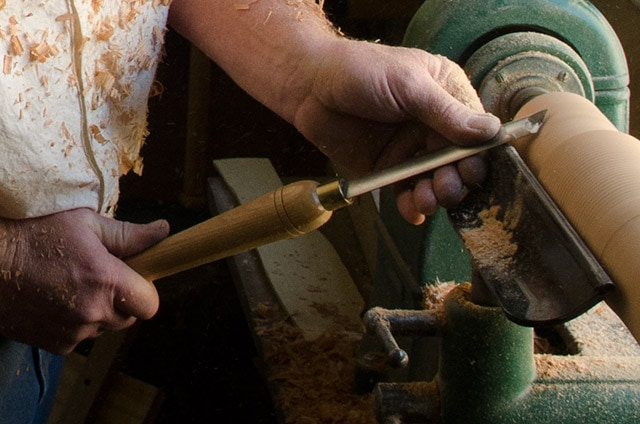
One of our instructors brings his own special tool rest (B.Y.O.T.R.) when he comes to teach at my school (see photo above). He uses the Robust brand wood lathe tool rests pictured above (buy them here) because of the round & smooth hardened steel rod, which doesn’t dent and gives a single fulcrum point. But here are a variety of wood lathe tool rests to check out (just make sure the post diameter will fit into your lathe’s banjo):
11. Tailstock for a Wood Turning Lathe
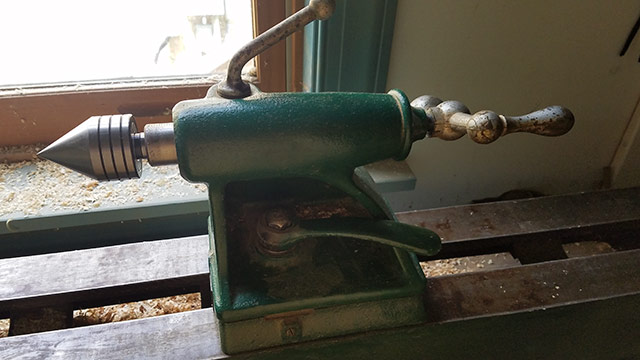
The assembly that holds the right end of a wood blank, on the opposite end from the headstock. Like the headstock, the tailstock is attached to the bed of the wood lathe, but it slides back and forth depending on the size of the spindle being turned. Below are some different parts of the tailstock:
12. Tailstock Lock
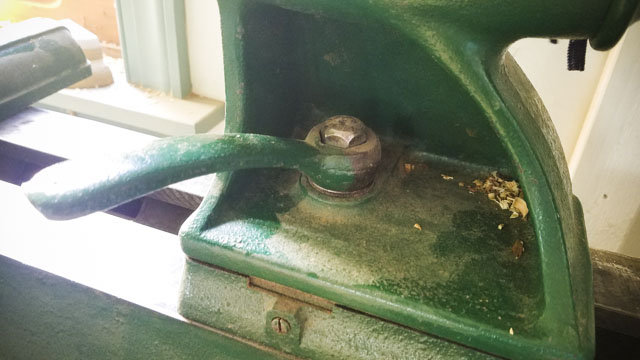
This lever loosens and tightens the tailstock to the bed of the wood lathe. When you want to move the tailstock along the bed, just loosen this lever, slide the tailstock left or right, and then tighten this lever back down.
13. Tail Center
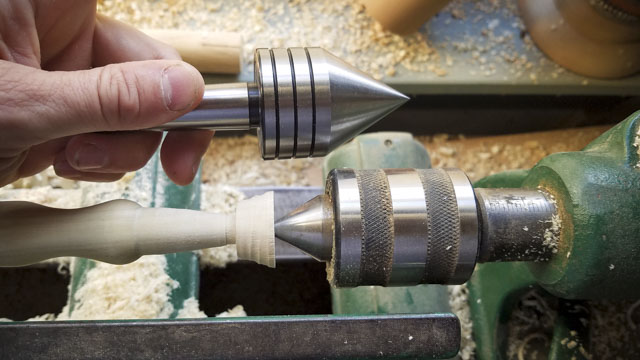
The removable tapered steel shaft that presses its point into the wood, securing it to the tailstock, while still allowing it to spin. Vintage tail centers were fixed “dead centers” where the wood had to spin around the metal point. I found this type of tail center to be problematic. Most people now prefer a “live center” as pictured above. With a live center, the center itself spins, which I feel gives better holding power and stability.
Live centers come in a normal point-shape, like I have (above) or in cup shape (cup live centers). I haven’t used a cup live center, but have heard that it does offer a bit more support. But my normal point-shaped live tail centers work much better than the vintage dead center that I used to use on my wood lathe.
14. Tailstock Handwheel on a Wood Turning Lathe
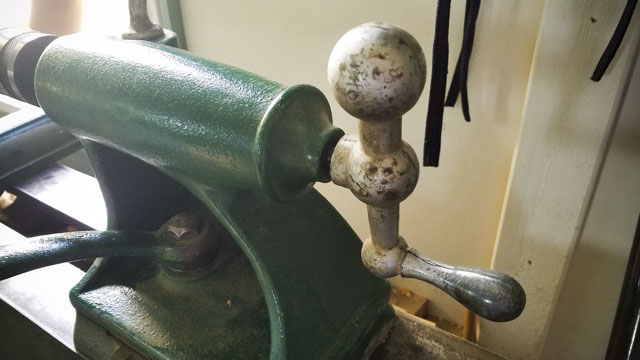
A wheel or handle that extends the Quill and Tail Center back and forth. I get the tail center close to the wood blank by pushing the whole Tailstock along the wood lathe bed, and when it’s close, I micro adjust the Tail Center and Quil outward with the Handwheel, until it snugs the wood blank against the Drive Center. Finally I lock the whole Tail Stock in place with the Tail Center Lock (see above) and lock the Quil and Handwheel in place with Quil Lock (see below).
15 & 16. Quill & Quill Lock
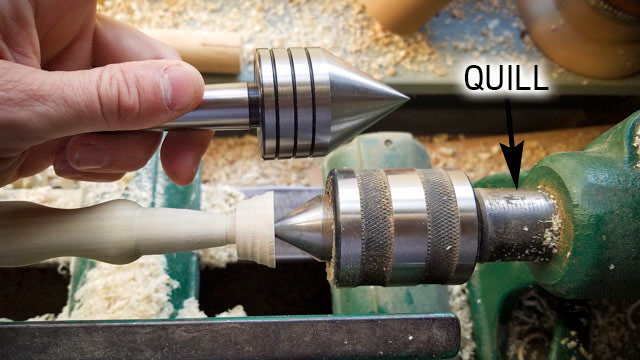
The “Quill” is the tapered spindle that moves in and out of the tailstock as the Tail Stock Handwheel is turned. Then the “Quill Lock” lever locks the quill in place:
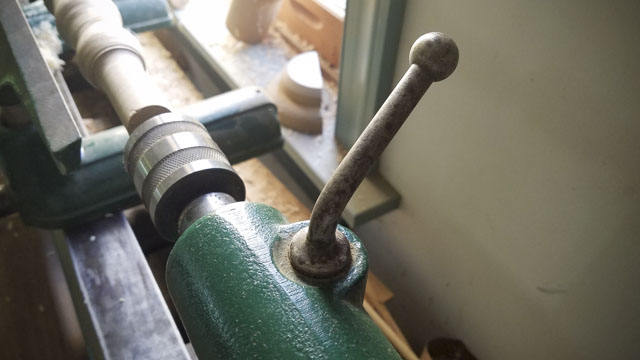
The quill lock is sometimes referred to as a “Spindle Lock”.
Choosing the Best Wood Turning Tools
In this section you’ll read about my recommendations on which wood turning tools you need to get started in spindle woodturning for furniture making. When I first bought a wood lathe, I got a lot of accessories with the lathe, along with two vintage sets of turning tools. But one thing that I learned over time is that I don’t use many of the accessories or wood turning tools that came in the sets. I only use about four wood turning tools. I’ve also purchased some new wood turning tools. But before I share the best wood turning tools, first let’s talk briefly about tool steel on wood turning chisels:
Wood turning Tool Steel: High-Carbon Steel vs. High Speed Steel (HSS)
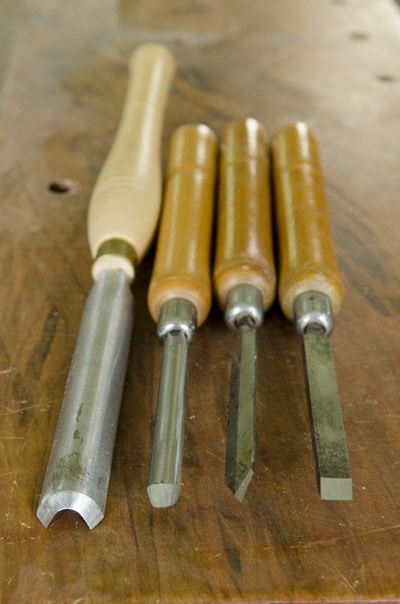
I like to divide wood turning tools into two main steel types: traditional high-carbon steel woodturning tools and modern High Speed Steel woodturning tools (HSS). My vintage wood turning tools are made out of traditional carbon steel and my modern woodturning tools are made out of High Speed Steel. The main benefit of HSS turning tools is that the edge lasts longer between sharpening than carbon steel wood turning tools, which is important because a woodturning tool touches the spinning wood much more than a typical wood chisel. Also HSS wood turning tools won’t loose their temper as easily as carbon steel tools when grinding.
Because of these benefits most modern wood turning tools that you’ll find on the market today are made out of HSS. But don’t worry, HSS wood turning chisels are affordable, and aren’t usually any more expensive than new quality woodworking chisels. And in my opinion, you only need about four woodturning chisels.
However, if you’ve inherited or purchased an affordable vintage set of carbon steel wood turning tools, don’t throw them out. Learn to sharpen and use these tools and add some HSS tools to your kit over time, if you feel the need to do so. Remember that a lot of beautiful turned furniture was made before HSS was introduced to the market. Just make sure that you keep a good edge on your tools, and regularly cool down the carbon steel wood turning tools with water when grinding.
Modern High Speed Steel wood turning tools are divided further into a few different types, including M2, Kryo M2, M4, and PM. If you’re just starting out, don’t worry about all the different types of High Speed Steel, and just get the most common (and thus more affordable, but not inferior) M2 High Speed Steel woodturning tools. If you’re interested in a comparison of the different modern steel types, I’m going to leave it to the folks over at Craft Supplies USA, who know more than I do about tool steel:
What are the Best Brands of Wood Turning Tools?
If you’ve read my other woodworking hand tool buyer’s guides you’ll know that I often favor antique tools over new tools. However, when it comes to woodturning tools I have to recommend that you buy new tools. Why? Because, as mentioned earlier, the new tools are made with good High Speed Steel (HSS) and even the top brands are pretty affordable. Especially since you only need four tools. I won’t be discussing the carbide tipped woodturning tools much (see the paragraph at the bottom of this article) because I feel that they are limited in what they can do. Here are some of the best wood turning tool brands that are considered reputable by many woodturners:
Page: 1 | 2

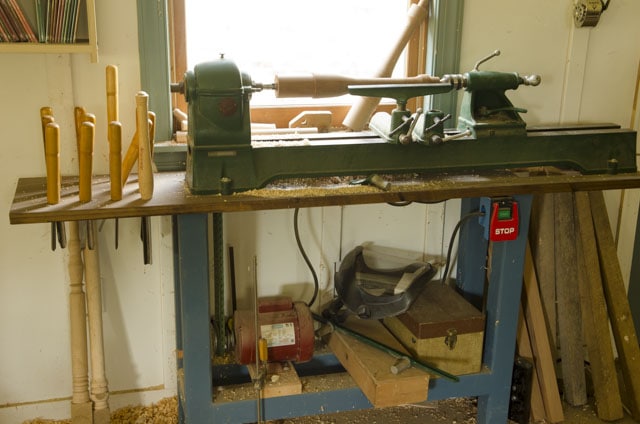




This wood turning tools guide continues on the next page….